Advertising disclosure: This page includes affiliate product links that may earn us a commission, as well as products from our own store.
Slider Hamstring Curls: Control the Slide and Keep Your Hips Working
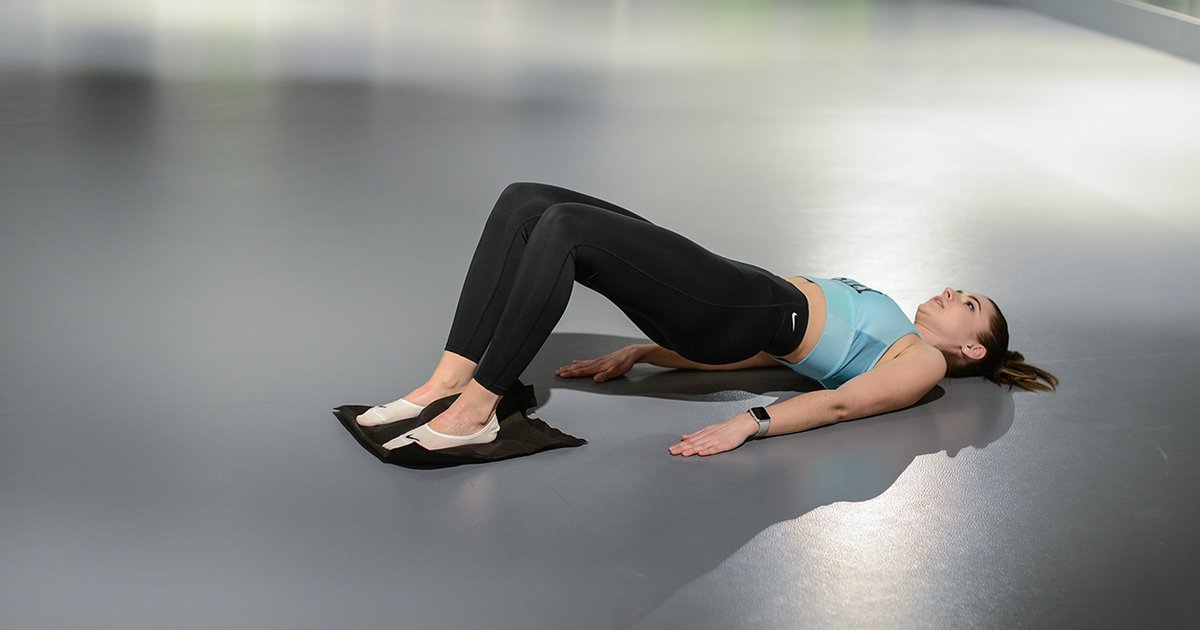
A slider hamstring curl can make a smooth patch of floor feel surprisingly demanding. Lie on your back, put a sliding surface beneath your heels, lift into a bridge and draw the feet toward you. That short description misses the hardest part: keeping your pelvis supported while the heels travel outward, then reversing the movement without turning it into a sloppy push from the shoulders.
Unlike a machine curl, you are managing knee flexion and hip extension together. This makes the drill useful for developing control, but not automatically superior for building hamstrings. The right version is the one that lets you repeat a similar distance, tempo and hip position, not the one that produces the longest slide or most dramatic grimace.
1. Understand the hamstring curl and bridge combination
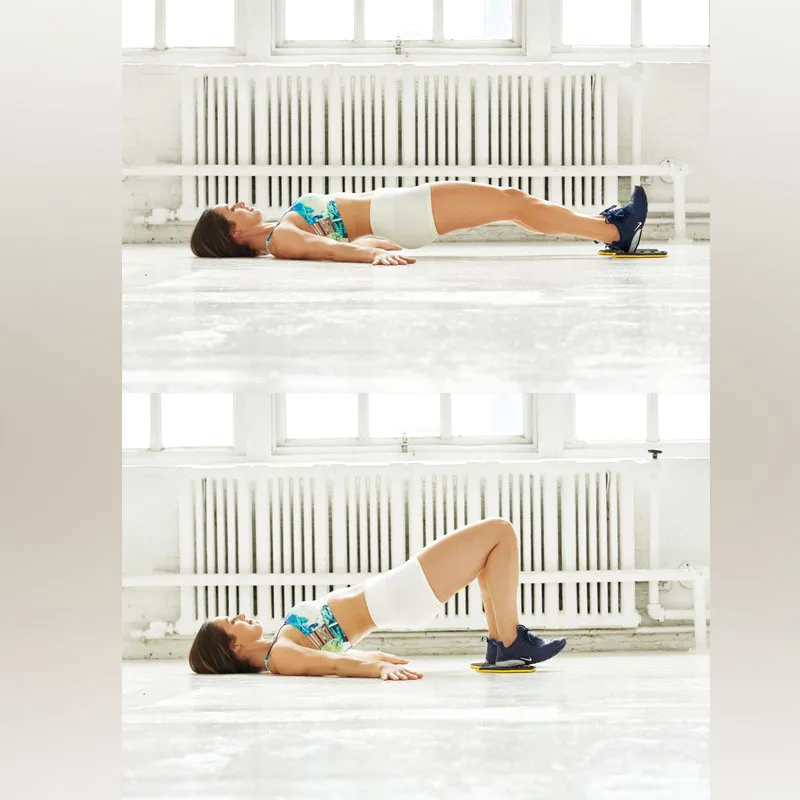
Most of the hamstrings cross both the hip and knee. They help bend the knee and extend the hip, so a slider curl gives them two jobs at once. Your heels move away as the knees straighten, then travel toward your body as the knees bend. Meanwhile, the glutes help keep the hips raised. This is why the exercise feels different from a seated leg curl that supports your torso and fixes your hip position.
The outward slide challenges control while the knee is opening. The return asks you to pull the heels in instead of simply allowing the sliders to drift. A brief pause at either end can expose whether you are actually controlling those phases. Neither a burning sensation nor a slow tempo, by itself, proves a special hypertrophy advantage; both are tools for making the movement measurable.
If the hips collapse as soon as you lengthen the legs, the limit may be the combined bridge-and-curl task rather than a lack of willingness to work. Shorten the range before blaming your hamstrings. The first reliable milestone is a handful of reps in which the hips stay near the same height and the heel movement looks almost identical.
2. Set up the surface before you slide
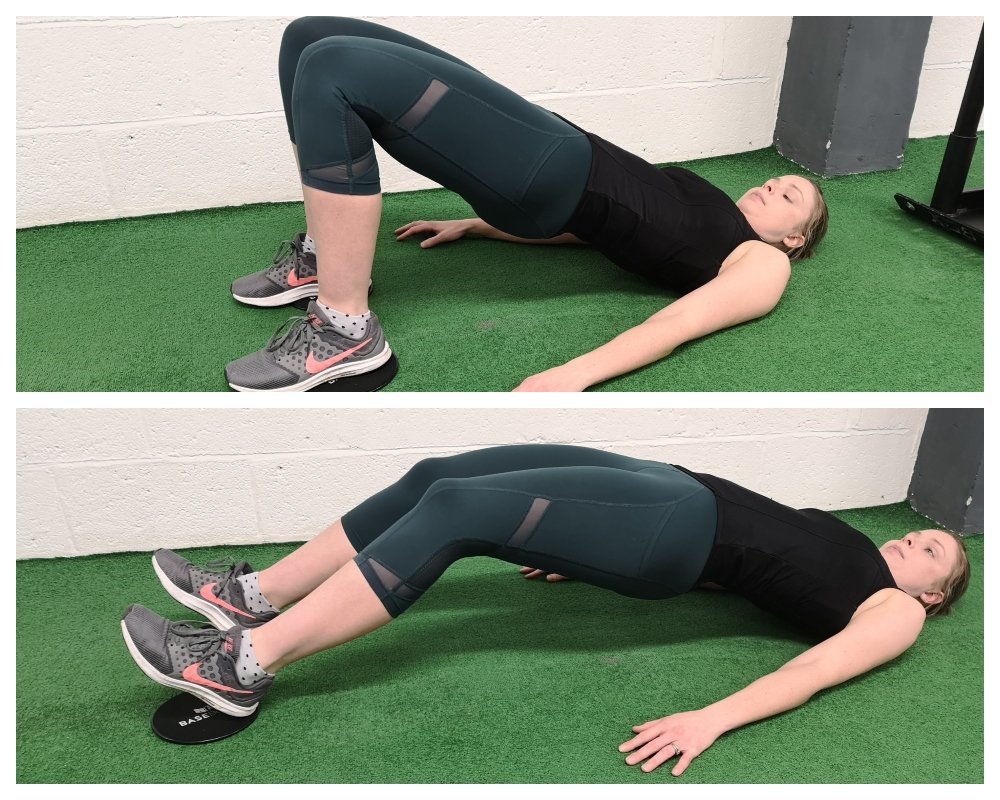
Start on a level floor with enough clear space for the legs to extend. Use purpose-made sliders on an appropriate surface, or test towels on a smooth floor. Hard plastic on carpet and fabric on wood behave differently, so check that the heels glide rather than suddenly catch. Sliders must move without flipping or scraping, and the floor should not be slippery beneath the upper body.
Lie face up with your shoulders, head and upper arms resting on the floor. Place one heel centrally on each slider, with the feet approximately hip-width apart. Bend the knees until your heels are close enough that you can raise your hips comfortably. Press through the heels and make a controlled bridge. Keep your ribcage reasonably quiet rather than exaggerating a lower-back arch to lift higher.
Before the first full repetition, try a tiny outward movement and pull the heels back. If the discs shoot away, your upper body slides or the surface catches, change the setup. Socks may glide on some floors, but slipping is not a substitute for an intentionally controlled exercise. Bare feet may also grip too much. Choose a stable contact arrangement that lets you repeat the same path.
Grip the floor lightly with your palms if that improves stability, but do not force your arms into a hard press. If your neck starts straining, settle the shoulders and reduce the effort. You should feel the movement chiefly through the backs of the legs and glutes, not through a desperate attempt to hold your head up.
3. Own the outward slide and the way back
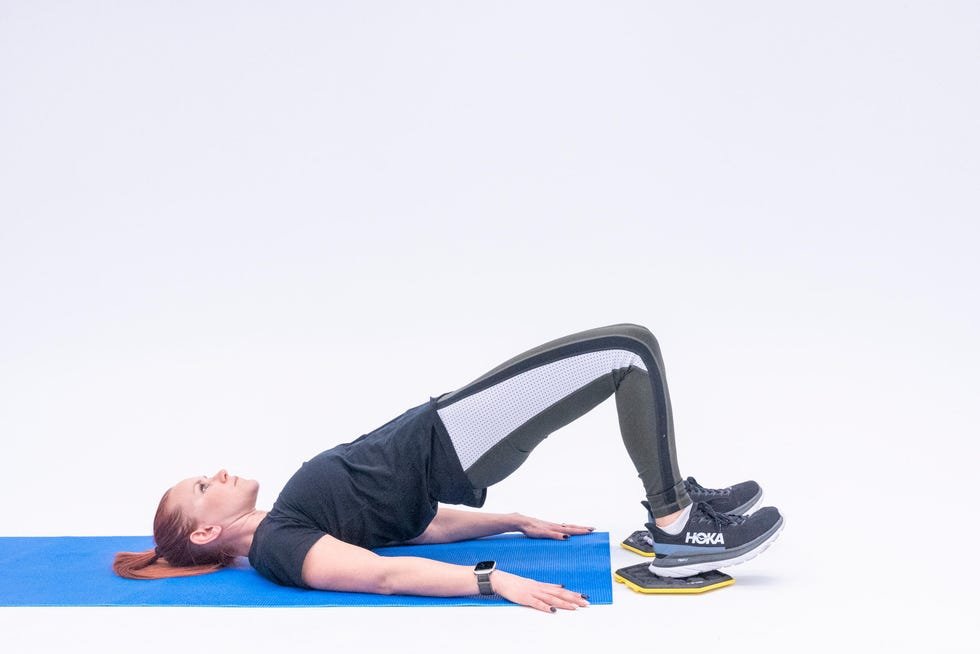
From the bridge, slowly move both heels away from your hips. Imagine lengthening through the knees while keeping a relatively steady line from shoulders through pelvis. Stop before your hips sag or the heels move farther than you can reverse. The usable range may initially be much shorter than the straight-leg demonstration you have seen. That is fine: the first standard is control, not distance.
Now pull the heels back toward the glutes without dropping the pelvis. Keep the motion continuous enough to avoid a jerky restart, but not so fast that the sliders race toward you. Exhale naturally, avoid holding your breath for an entire set and reset the bridge between reps if necessary. A deliberate two- or three-second outward slide is one possible coaching cue; it is not a mandatory biological prescription.
Watch for three common substitutions. First, a rising-and-falling pelvis makes the exercise into alternating bridges rather than a consistent curl. Second, flaring the heels outward may conceal uneven leg effort. Third, pushing the arms hard into the floor can let the upper back take over when the hamstrings are tired. A little assistance is normal, but keep the movement’s purpose visible.
A set should usually end when you cannot keep the range and hip control comparable to the opening reps. Counting an uncontrolled final slide as an extra repetition does not make the session more productive. If one leg seems to do almost all the work, check heel placement and surface friction before increasing difficulty.

Equipment Worth Exploring
Explore equipment, accessories and gear from our carefully selected range.


Leg Extension/Curl BCO-780
Leg extension and lying leg curl combo with plate loading, band pegs and a cable-loading option.

Seated Leg Combo BCO-680
Adjustable seated leg extension and leg curl machine with band pegs for added resistance.

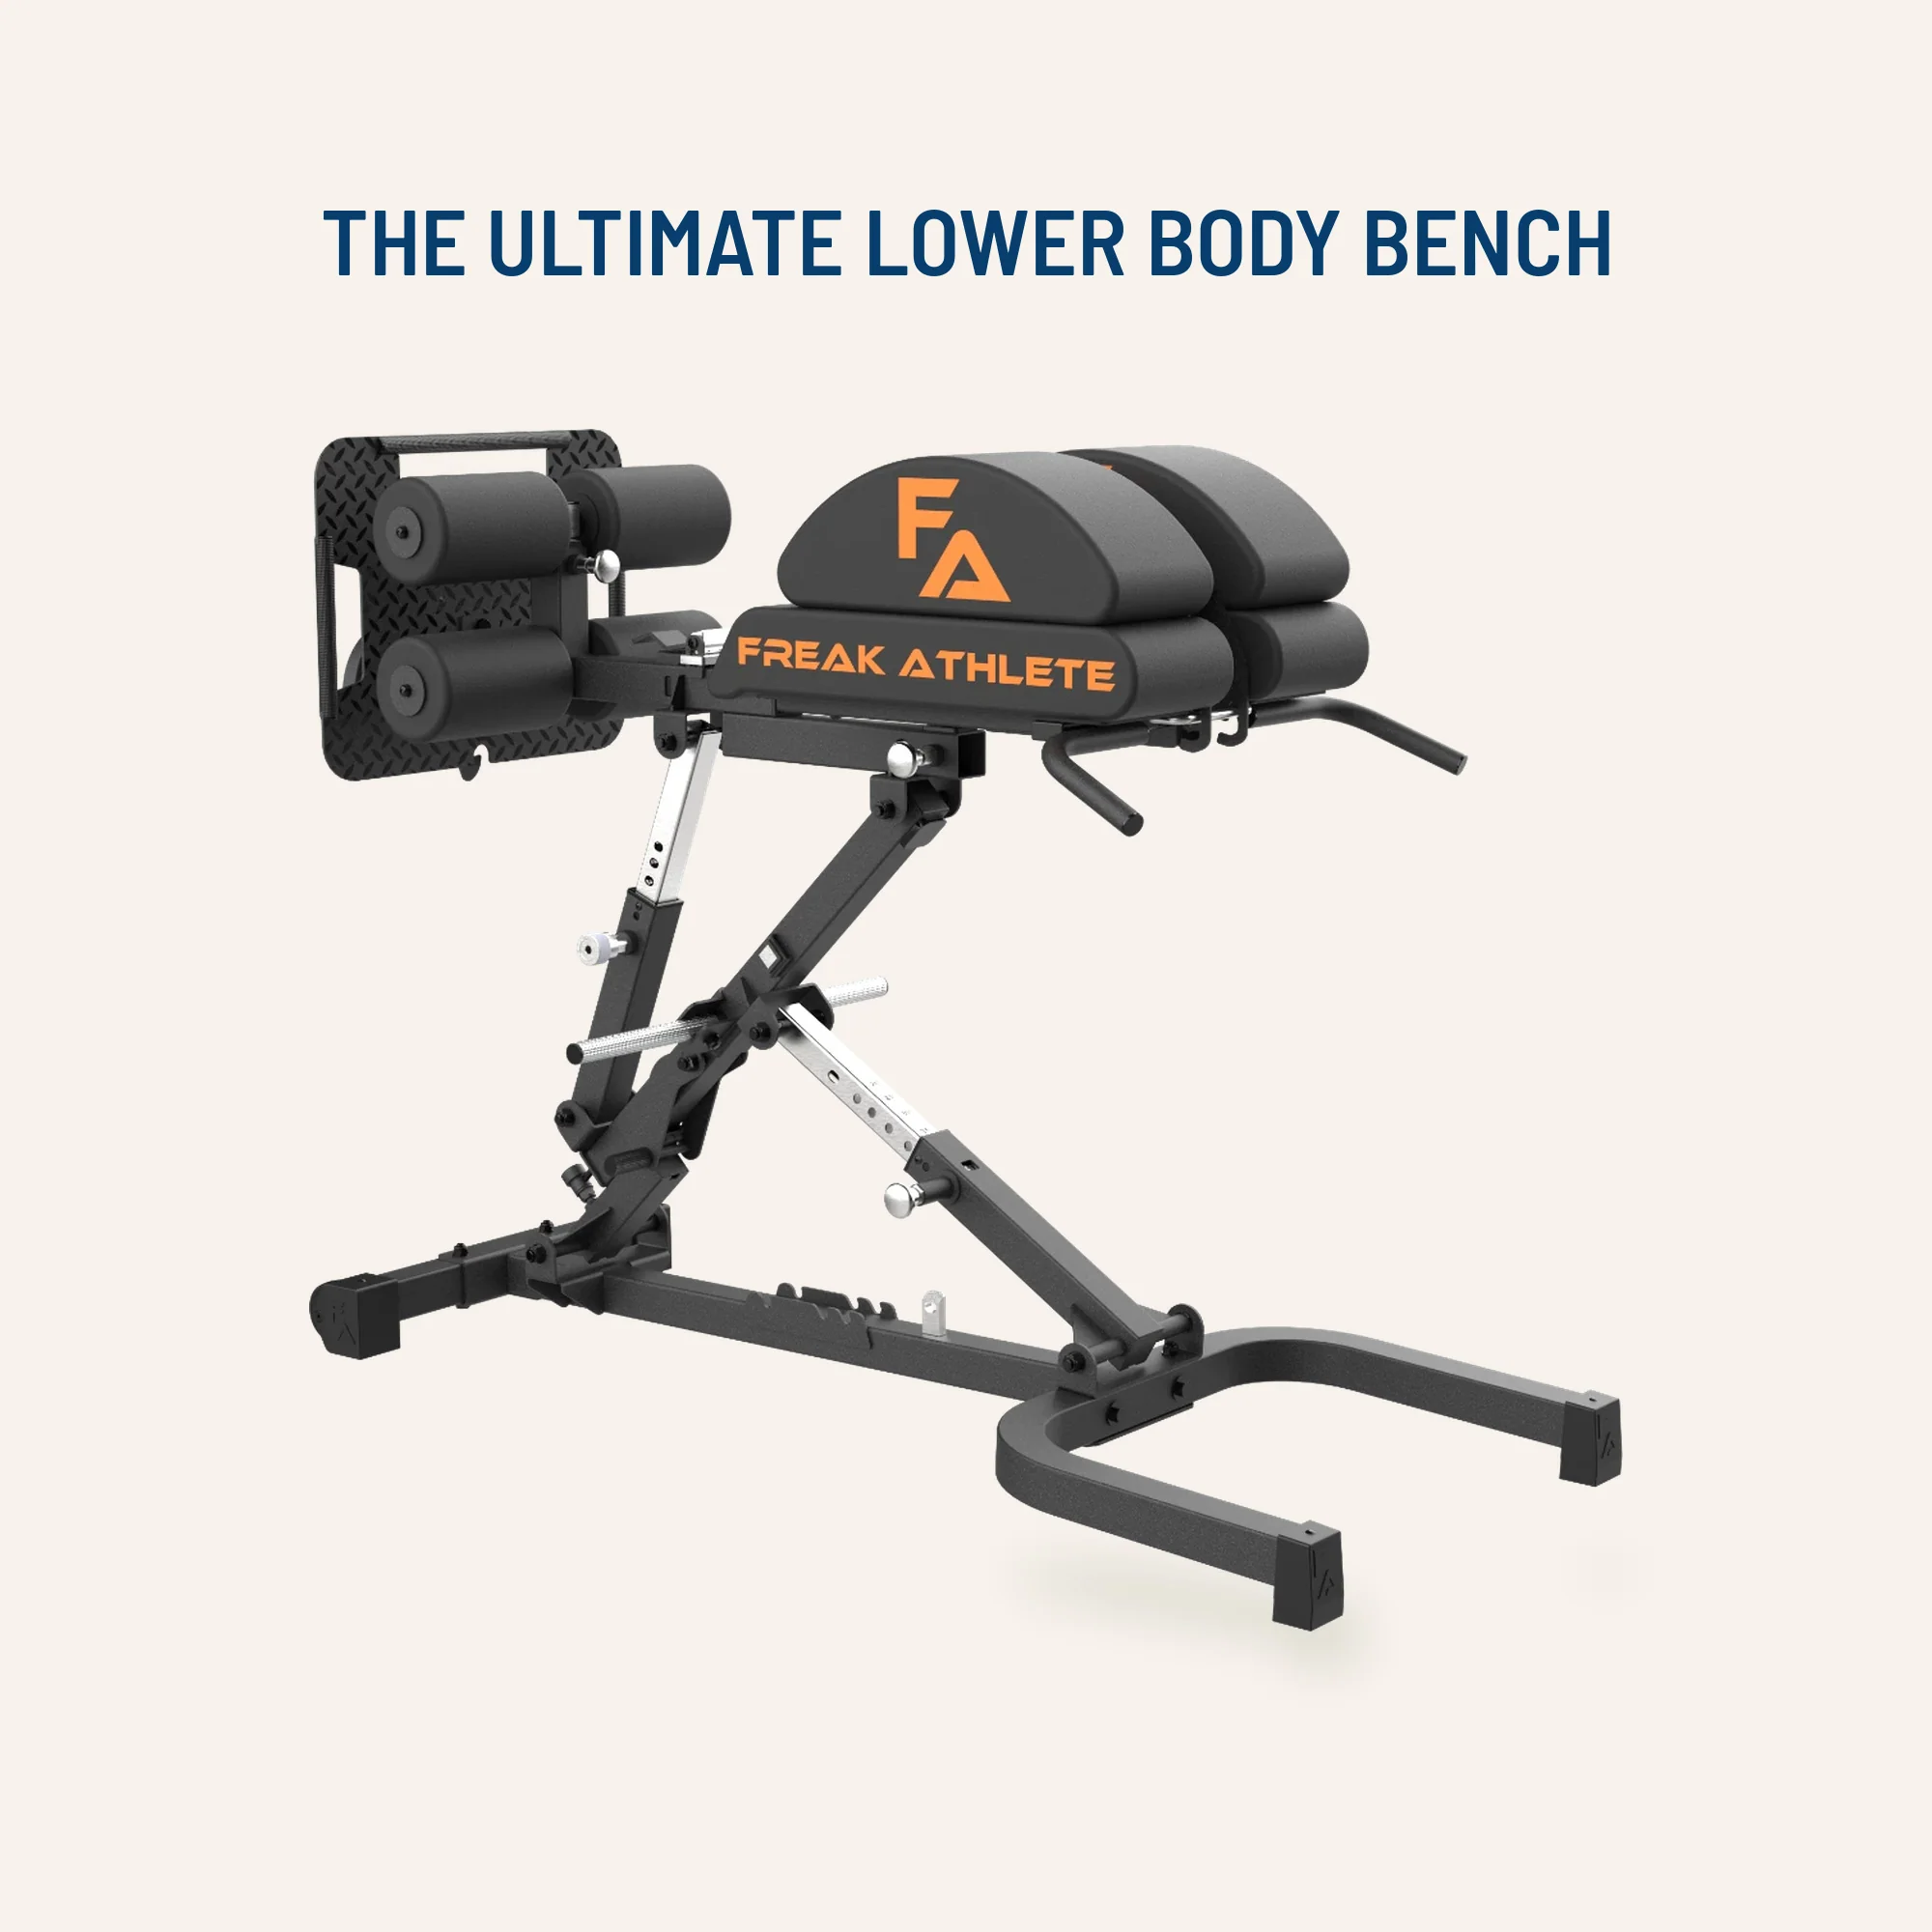

Glute Ham Developer GHD-820
Adjustable glute-ham developer with contoured pads and a fold-out knee support.

45° Hyperextension HPX-650
Angled back-extension trainer with split padding, a ribbed footplate and resistance-band pegs.


HUSLA Leg Extension Pad
Pad attachment designed to increase usable range of motion on compatible leg-extension machines.
4. Progress from short slides to demanding variations
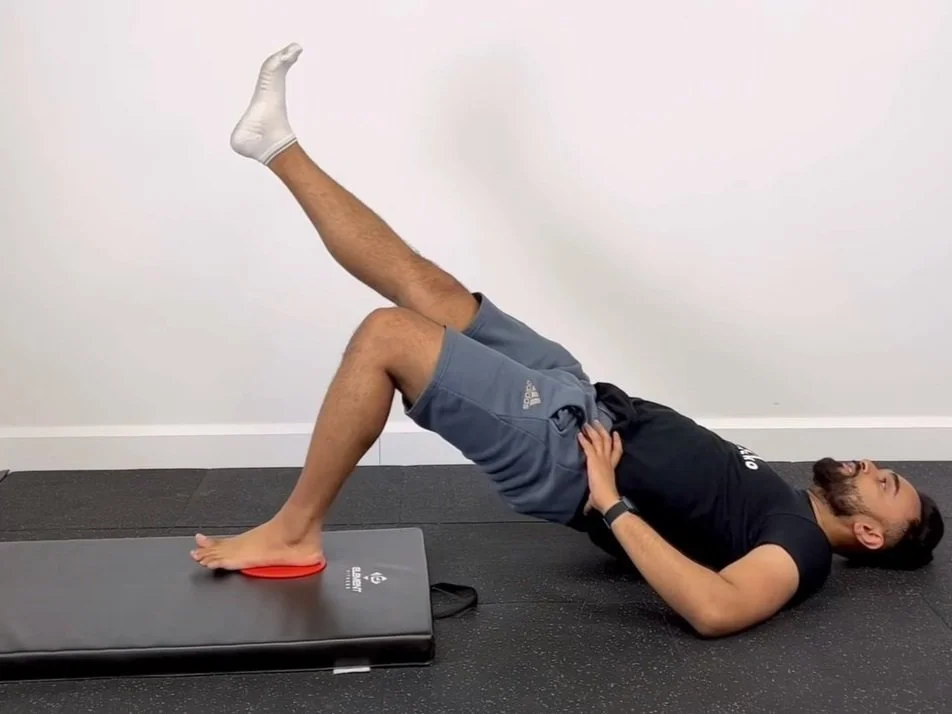
If a full two-leg curl is too difficult, begin with a static bridge, then add shallow slides of a few inches. You can also slide the heels outward under control, lower your hips to the floor and bring the feet back without attempting the hardest return. This eccentric-focused version is a regression in the full movement pattern, not a reason to chase maximal soreness.
Once you can repeat bilateral curls cleanly, extend the travel gradually and consider pausing just before the turnaround. Single-leg work is a much larger step. You can support most of the bridge with both feet and move one slider, or hold the opposite leg in the air for a more advanced version. Do not assume the single-leg option is the next exercise for every beginner.
Slider curls are also not interchangeable with Nordic curls, seated leg curls or a glute-ham raise. Nordics load knee flexion with the lower legs anchored, while a seated machine removes much of the bridge requirement. Machines can be easier for small loading increments and isolation; sliders can provide convenient bodyweight challenge and coordination. Choose based on the task you want to train, rather than declaring one universally best.
The hamstrings may be sore after unfamiliar lengthening work, especially if you suddenly double your range or volume. Build exposure progressively and leave room for other lower-body sessions. Sharp pain, a sudden pull or symptoms after a recent hamstring injury call for stopping and seeking qualified advice, not trying to complete the programmed reps anyway.
Equipment Worth Exploring
Explore equipment, accessories and gear from our carefully selected range.


FID Bench MAX
Adjustable bench offering flat, incline, and decline positions + adjustable headrest.

Multi Bench MBX-650 2.0
Adjustable multi-bench with roller adjustment, 15 backrest positions and accessory mounts.


Rubber Hex Dumbbells
Rubber-coated hex dumbbell pairs with a stable shape for home and commercial strength training.


Studio Glute Drive
Plate-loaded hip-thrust machine with supported back pad and adjustable foot platform.

Pro Sled System
Heavy-duty push-pull training sled for loaded conditioning, speed, and strength work.

Compact Leg Press CLP-700
Compact reverse-style leg press with a moving seat carriage and an adjustable footplate.

Cast Iron Kettlebells
Textured cast-iron kettlebells for swings, squats, carries, and full-body training.
5. A six-week way to track real progress
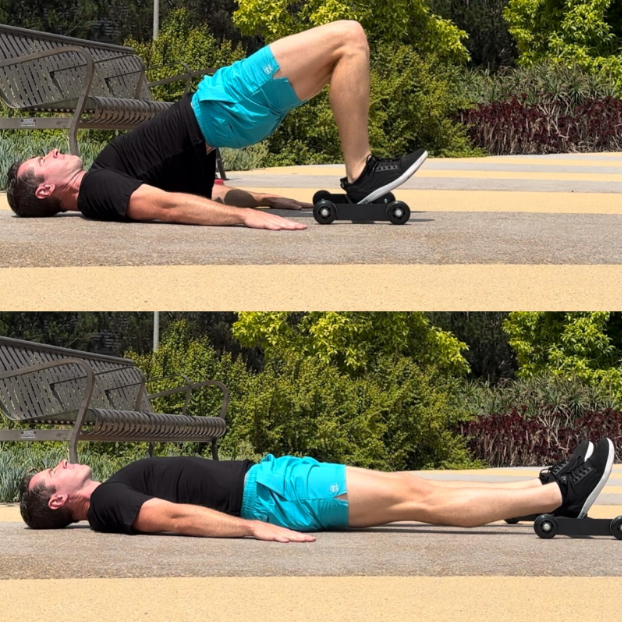
Use the following as an adjustable practice example, not a trial-proven protocol. In weeks one and two, train sliders once or twice weekly after an easy warm-up. Try two sets of four to six controlled bilateral repetitions or shorter outward-and-return partials. Leave a couple of good reps in reserve, particularly during your first unfamiliar sessions. Keep the same surface and foot position so the comparison means something.
For weeks three and four, aim to keep the hips more consistent and lengthen the outward travel slightly before adding extra repetitions. If six clean reps are comfortable, a third set can be appropriate; if the bridge still drops halfway through, remain at two sets and improve the movement. A three-second slide may help you judge control, but it should not force you into unnatural breathing or maximal cramps.
In weeks five and six, choose one progression: modestly more travel, a small increase in clean repetitions or a cautious eccentric-only single-leg set. Avoid increasing all three variables simultaneously. An advanced lifter who already performs leg curls and heavy hip hinges may need only one small dose of slider work, while someone using sliders as the main hamstring accessory may prefer two sessions.
Record the floor surface, sliding device, reps, longest controlled heel travel and whether the pelvis stayed raised. A useful entry is “two sets of six, same tiles, heels reach the marked line, hip position maintained.” Compare that with the same test two weeks later. Do not judge improvement solely from soreness or by whether the legs were perfectly straight.
Finally, place sliders alongside your broader program rather than letting them crowd out every hinge, squat or machine exercise. A Romanian deadlift challenges hip extension under load, a seated curl emphasizes knee flexion with different support and a slider adds a bridge component. You can use more than one, provided the work fits your training week and recovery.

Leg Day Shirts & Workout Gear
Leg-day gym shirts and workout gear for lifters who never skip squats, lunges and lower-body punishment.

Negative Leg Day Review Not Recommended 1 Star T-Shirt
Keep things casual with a little “Negative Leg Day Review” attitude.

Hippo Thrust Meme Leg Day Hooded Booty Day & Glute Hoodie
Keep it laid-back with a little “Hippo Thrust Gym Meme” attitude.


My Leg Hurts Leg Day , Meme Lovers & Bros Casual T-Shirt
Bring “My Leg Hurts” humor to your next gym day.

Funny Viking Deadlift Gym | Leg Day Motivational Workou Sticker
A fun “Viking Deadlift” touch for bottles, laptops, and lockers.
Heavy Metal Deadlift – Skeleton Gym Shirt for Powerlift T-Shirt
A t-shirt featuring the Heavy Metal Deadlift – Skeleton Gym Shirt for Powerlifters and Leg Day Lifters artwork, bringing lifting-inspired humor and distinctive gym graphics to your everyday gear.

I Want You To Stop Skipping Leg Day Patriotic Gym – Unc T-Shirt
Show some gym-day personality with “I Want You To Stop Skipping Leg Day”.

Squat Here | Edgy Workout Decal for Water Bottles & Gym Sticker
A fun “Squat Here” touch for bottles, laptops, and lockers.

Deadlift Cyberpunk Skull Muscle Shirt for Powerlifters, Tank Top
Train hard, laugh a little, and rep “Deadlift”.

I Love Squats Shirt | Valentine's Leg Day Meme with Red T-Shirt
Show some leg-day attitude with a playful “I Love Squats” tee.