Advertising disclosure: This page includes affiliate product links that may earn us a commission, as well as products from our own store.
Kensui EZ-VEST: Check the Plates, Fit and Clearance Before Adding Weight
A plate-loaded vest offers an appealing upgrade for a compact gym: use the weight plates you already own to make familiar bodyweight exercises harder. The Kensui EZ-VEST puts that idea on your torso, leaving your hands free for pressing, pulling and holding a support. Its usefulness depends on more than the largest number on the product page. The plates still have to fit, the vest has to stay put and your exercise needs room for the hardware.
This is a buying and setup guide, rather than a hands-on verdict. The goal is to decide whether the format solves your training problem, understand the differences between versions and identify a sensible first session. A vest that works well for controlled pull-ups may be inconvenient for floor push-ups or quick transitions, even at the same weight.
1. Choose the version for the job you actually need
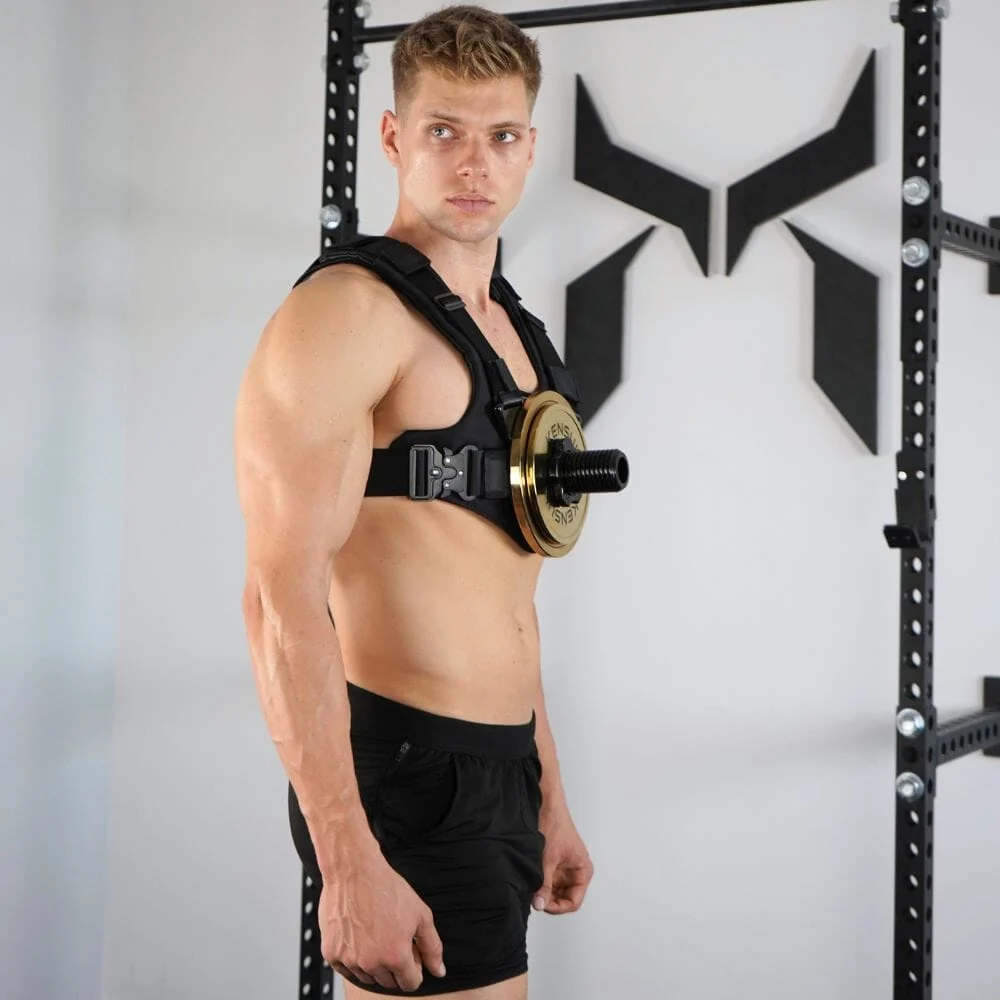
The EZ-VEST V2 range lists three maximum added-load capacities: Lite at 80 lb, Pro at 150 lb and Max at 300 lb. Those are equipment limits, not training recommendations. The Max uses an aluminum frame and a side-release buckle; Lite and Pro use fiberglass with hook-and-loop fastening. These differences matter when comparing the actual versions, rather than assuming that every EZ-VEST has the Max specification.
Begin your decision with the movements you want to load. Someone who wants a small increase for push-ups has a different requirement from an experienced athlete who already does heavy weighted dips. Paying for a larger load ceiling will not automatically make the lighter sessions more productive. Equally, buying the smallest version only to discover that your planned progression exceeds its limit is an avoidable mismatch.
Next, consider what you already have. A plate-loaded vest makes more sense when you own suitable plates, have a place to put the loaded vest down and can take your time between sets. If your only goal is a short walk before work, a lower-profile vest with distributed weights may be easier to live with. If you only need resistance for pull-ups and dips, compare a loading belt before deciding.
Include the practical costs in that comparison: compatible plates, any necessary adapter, a safe loading area and the time needed to change weights. Avoid treating promotional transformation photographs, a large capacity or an impressive exercise demonstration as proof of your likely results. The useful purchase is the one that removes a real constraint from a routine you can maintain.
2. Check plate compatibility, fastening and fit separately
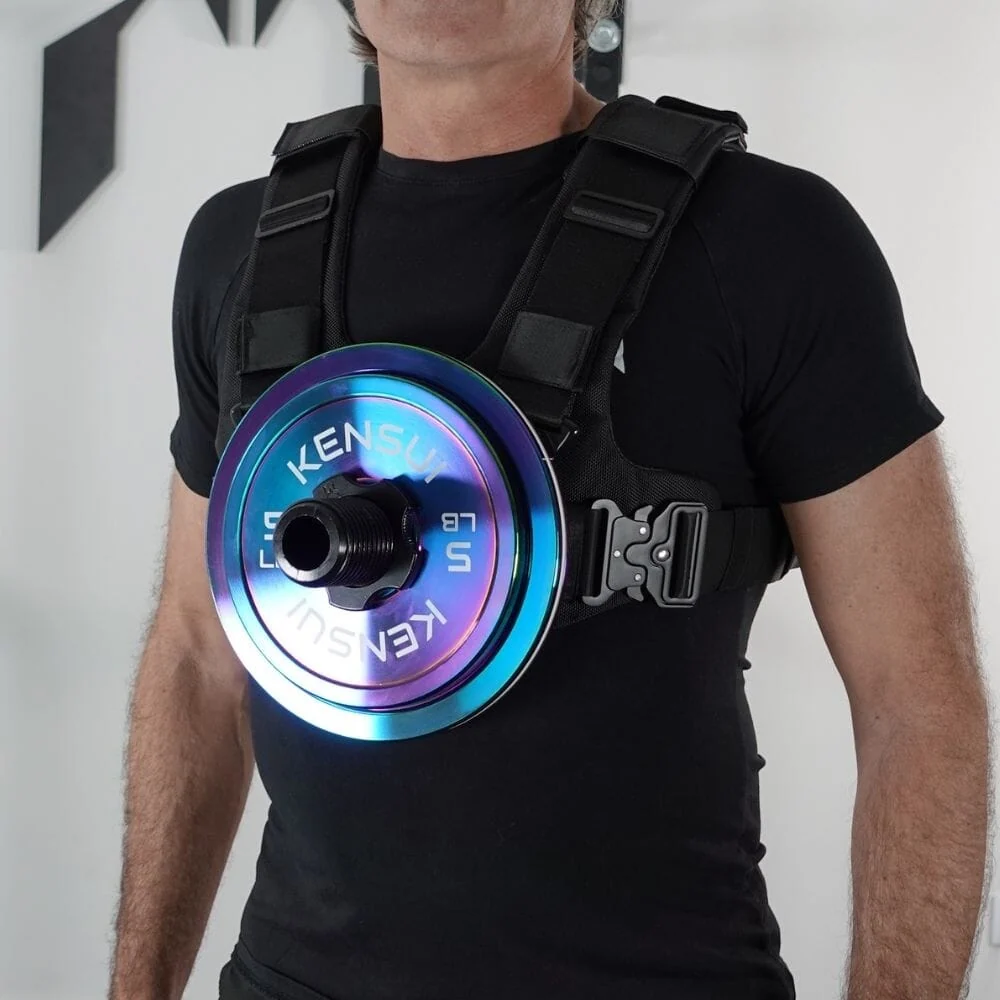
The supplied loading sleeves and collars are intended for 2-inch Olympic plates. A separate, version-specific adapter pair is offered for standard plates described as 1 inch/28 mm. Do not assume that a plate with a smaller hole will fit the supplied sleeve, or that the same accessory fits every version. Plates are not included with the vest.
Hole diameter is only one part of compatibility. Plate thickness determines how much sleeve space remains for the collar, while outer diameter influences how far the plate extends across your chest or back. A thin plate and a thick bumper plate can have the same marked weight but create very different clearance problems. Before purchasing around an existing plate collection, check those dimensions against the instructions for the exact vest and accessories.
Follow the current assembly directions rather than improvising a fastening method. Check that the specified sleeves are correctly seated and that the collars retain the plates securely. An Olympic barbell clip is not automatically a substitute for the vest’s threaded collar. If the hardware does not engage properly, stop and resolve the compatibility issue before wearing the load.
Adjust the vest initially without added plates. Reach overhead, hinge slightly, take a few steps and practise entering the positions you intend to use. The shoulder and torso straps should hold the frame in a repeatable position without forcing an uncomfortable posture or restricting a normal breath. A marketing claim of broad size adjustability cannot tell you how the frame will sit on your particular torso.
Then test a small, securely retained load and repeat those checks. If the frame shifts, the straps slide or you cannot reach the release comfortably, solve that problem before progressing. Plan how you will put the vest on, take it off and lower it safely. A convenient buckle is useful, but it does not make a heavy loaded vest safe to drop or wrestle over your head.

Equipment Worth Exploring
Explore equipment, accessories and gear from our carefully selected range.


Competition Plates
Competition-style bumper plates for Olympic lifts and loaded strength training.

Grip Plates
Rubber-coated weight plates with handholds for loading barbells and machines.


Power Tower
Freestanding pull-up and dip station with adjustable handles for bodyweight training.


3. For push-ups, protect the movement’s clearance
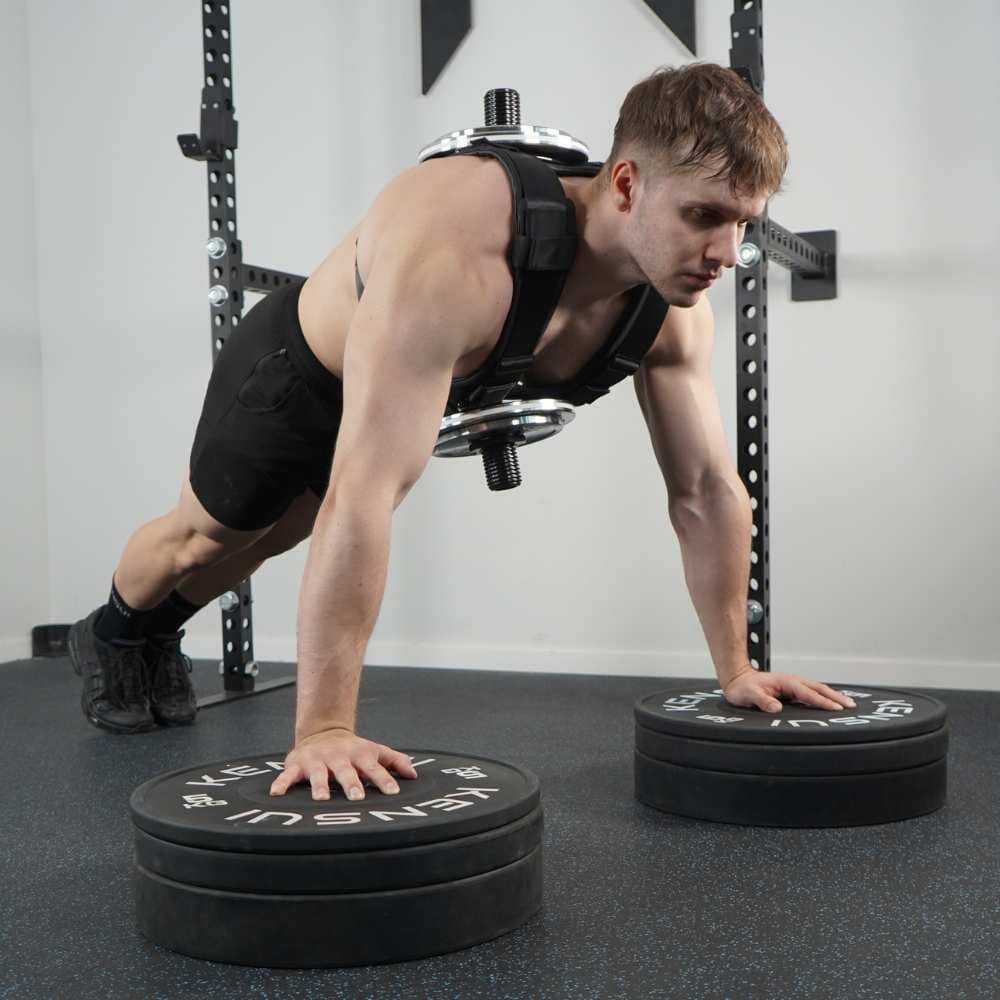
Push-ups expose the biggest difference between carrying weight on the torso and simply wearing a snug garment. A front plate, sleeve or collar can reach the floor before your chest reaches its usual depth. If that contact determines the bottom position, adding weight may also have shortened the exercise. You need to know which change you are actually measuring.
Begin with your familiar unloaded push-up and note the hand position, body line and comfortable depth. Next, test the vest with minimal load, lowering slowly enough to detect contact. Keep the trunk controlled and avoid allowing the hips to sag just to move the hardware out of the way. If the plate reaches the floor first, do not force another few centimetres by arching around it.
Stable push-up handles or suitable parallettes may provide clearance, but raising the hands changes the setup too. Confirm that both supports are secure, matched in height and rated for the task. Test their grip on the floor before loading the vest. Do not copy a photograph of stacked plates as an automatic endorsement of a stable support arrangement in your own room.
A deeper push-up is also a separate progression from a heavier one. If raised handles let you descend below your previous floor position, establish a comfortable range there before increasing the vest load. Shoulders do not become ready for extra depth simply because the collar now clears the ground. Stop a set when you can no longer reproduce the chosen body position and range.
Record the support height and the lowest controlled position alongside the load. For example, six clean repetitions on the same handles are a meaningful comparison with the next session; six repetitions with taller supports, a different hand width and a heavier plate leave several possible explanations for the change. Keep the test simple enough that progress has a clear meaning.
4. Compare the vest with a belt for pulling and dipping
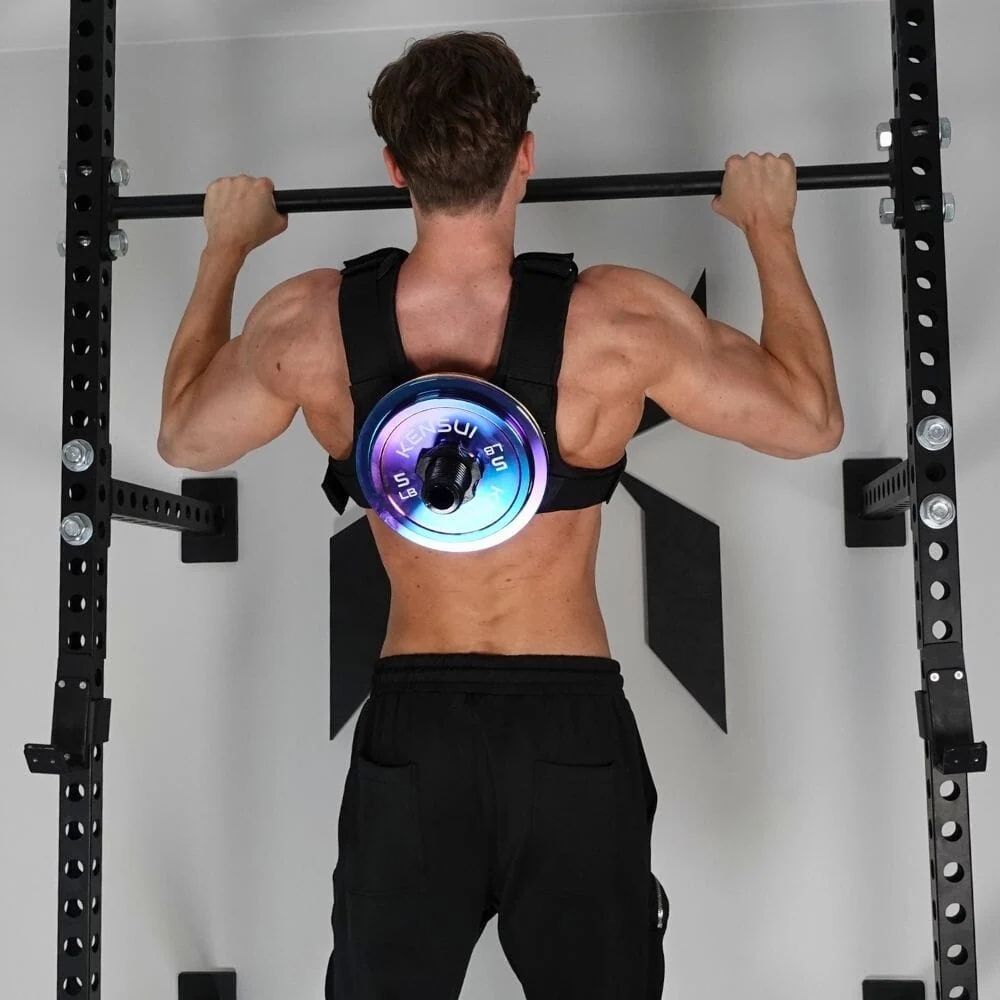
For pull-ups, the vest keeps added resistance around the torso rather than hanging it between the legs. That may suit your available space, but you still need to check the plate’s path relative to the bar, uprights and your arms. Start from a stable step or platform where appropriate, rather than jumping to catch a high bar while carrying unfamiliar hardware.
Added weight is a progression for an exercise you already control. If your current pull-up relies on a kick, a rushed descent or a shortened range, work on that version first. Use a repeatable grip, pull without a large body swing and lower under control. There is no universal bodyweight-repetition threshold that makes every person ready for the same added load.
Dips raise a related clearance question: can you descend and return without a front plate colliding with the supports or changing your comfortable shoulder position? Check the station’s stability and rated total load, including your body mass and all added resistance. A freestanding tower that feels acceptable unloaded may behave differently when you lean, swing or carry additional weight.
A dip belt can be simpler when your main work is weighted pull-ups and dips and there is clear space below you. It moves the load to a hanging position, which brings its own swinging and floor-clearance considerations. A vest can be more versatile across pressing and standing exercises. Neither arrangement makes every exercise easier to set up, and neither removes the need to control the load.
Rings and grip attachments create another change in stability and support geometry. If you use them, establish the unloaded movement and verify the entire support system first. Do not add rings, a new grip and a heavier vest in the same experiment. Separating those changes helps you identify whether the limiting factor is strength, balance, clearance or equipment setup.
5. Start light, log the setup and judge the whole system
Use your first session to learn the equipment. Choose one familiar exercise, warm up without the vest and make a few easy repetitions with the smallest practical added load. Keep several good repetitions in reserve. Check the fastening and fit again between sets. This is an equipment familiarisation session, not a test of the vest’s maximum capacity or your tolerance for discomfort.
For a lifter who already trains consistently, an illustrative starting block might be two comfortable sets of the chosen movement once or twice weekly. Keep the rest of the program broadly stable while learning the new setup. These numbers are an adjustable coaching example, not a product-specific research protocol. The appropriate dose depends on your existing pressing, pulling and lower-body work.
When repetitions become repeatable, change one variable at a time. You might add a repetition within your chosen range before making the smallest useful load increase. Alternatively, you might keep the load and reps while improving control. If the smallest plate jump makes the movement substantially worse, there is no obligation to take it immediately. Smaller compatible increments or another unloaded session can be more useful.
Log the vest version, total added plate weight, front/back arrangement, support height, exercise range and completed repetitions. For pull-ups and dips, note your body mass as well: the same extra plate is not the same total system load after a substantial weight change. A brief note such as “collar cleared the floor; same handles; no shifting” can be more useful than a long list of intensity claims.
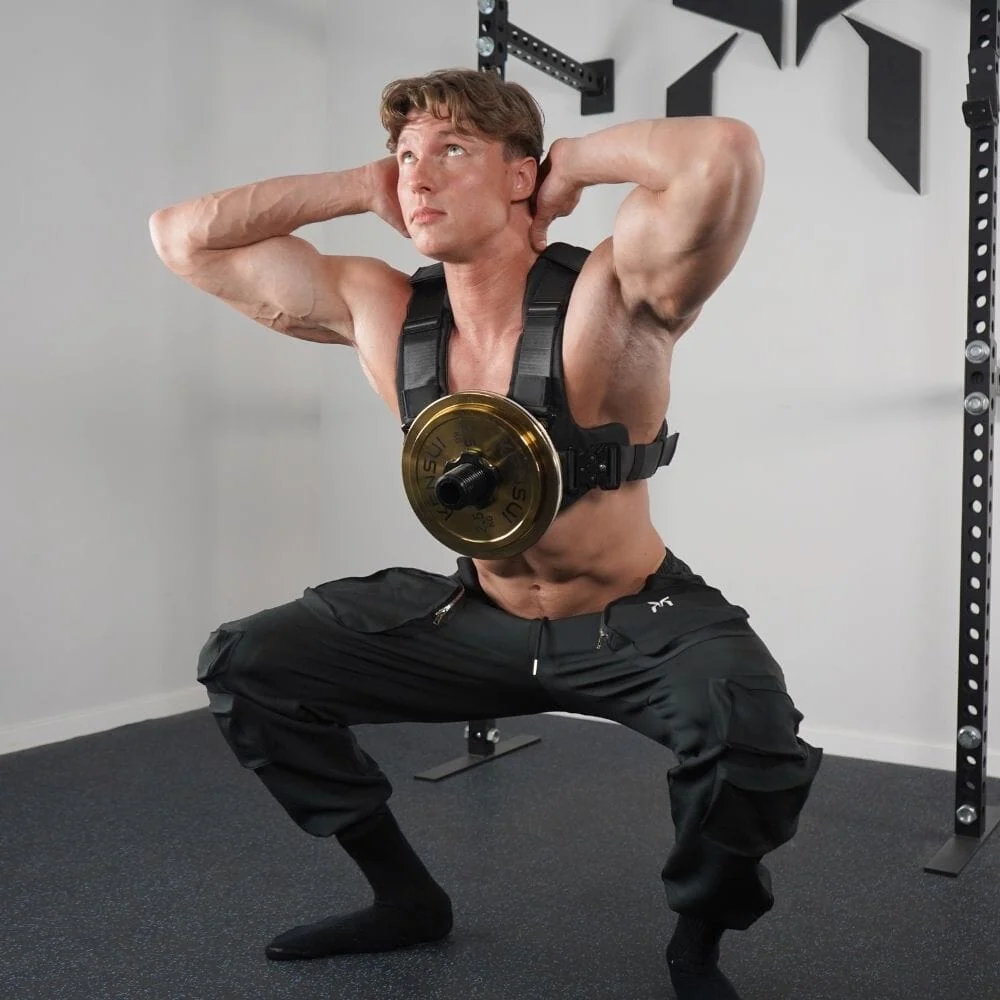
Standing squats may be another option once you can wear and manage the load comfortably. They do not become equivalent to barbell squats simply because both use plates. Check balance, plate contact with the thighs and an easy way to remove the vest before adding difficulty. Running, jumping and fast circuits are separate demands; do not infer readiness for them from successful controlled strength sets.
Finally, account for storage and care. Allow sweaty padding to dry, inspect straps and hardware and follow the cleaning instructions for the specific components. Stop using damaged or poorly engaging parts. Choose a supported place to set the vest down without leaving a projecting sleeve in a walkway. The strongest case for the EZ-VEST is practical: suitable plates, dependable fit and enough clearance to keep familiar exercises repeatable as resistance increases.

Calisthenics Shirts & Street Workout Gear
Calisthenics and bodyweight-training gear for pull-ups, dips, handstands and street-workout athletes.


Pull Up Or Shut Up Hoodie
Bring “Pull Up Or Shut Up” gym humor to lazy days and post-workout plans.

Always Pull Yourself Up Calisthenics Decal for Water Bo Sticker
A fun “Always Pull Yourself Up” touch for bottles, laptops, and lockers.

Pullups Heartbeat Crewneck
Keep things casual with a little “Calisthenics Pullups Heartbeat” attitude.

Calisthenics Evolution Muscle Shirt Athletic Vest for B Tank Top
Add some lifting attitude to training with “Calisthenics Evolution”.

Funny Calisthenics Gym Muscle Shirt Athletic Vest for B Tank Top
Your gym-day look, with a playful “Calisthenics” twist.

Funny Calisthenics Gym Hooded Pullover for Bodyweight W Hoodie
Stay casual and show some lifting attitude with “Calisthenics”.


T-Rex Hates Push Ups Crewneck Pullover Sweater for Cali T-Shirt
For laid-back days and bodybuilding humor: “T-Rex Hates Push Ups”.

Funny Calisthenics Gym Crewneck Pullover Sweater for Bo T-Shirt
Keep things casual with a little “Calisthenics” attitude.