Advertising disclosure: This page includes affiliate product links that may earn us a commission, as well as products from our own store.
Copenhagen Planks: Choose the Lever, Build Adductor Strength and Progress Safely
Most leg programs give quads, hamstrings and glutes plenty of attention. The inner thigh muscles that pull the legs toward each other often receive less deliberate work. Copenhagen planks offer a demanding way to train those hip adductors using a bench and the weight of your own body.
But a Copenhagen is not one fixed exercise. Supporting your knee instead of your ankle changes the challenge substantially, and adding weight makes it tougher again. New measurements help explain why. The useful goal is not to survive the hardest-looking variation; it is to select one you can control, then increase the demand without turning a strength drill into a groin-pain contest.
What changing the lever actually changes
An October 2026 experiment tested 48 male and female field-sport athletes across short-, middle- and long-lever isometric Copenhagen positions. The researchers compared bodyweight holds with extra external loads equivalent to 10% and 20% of body mass. The outcome was hip-adduction torque: the turning force produced around the hip in that specific test position.
Longer support levers produced higher measured torque than shorter ones. The long-versus-short mean difference was about 0.52 newton-metres per kilogram, while moving from short to middle produced about 0.30. Added load also increased measured torque: compared with bodyweight alone, the 20%-body-mass condition averaged roughly 0.53 newton-metres per kilogram higher. Both variables mattered in the testing conditions.
The important distinction is what the experiment did not establish. It measured maximal isometric efforts during one session. It did not assign beginners to six weeks of training, measure subsequent muscle growth or show that a weighted plank prevents groin strains. Higher test torque tells us a variation imposes a greater immediate mechanical demand, not that everyone should begin there.
Other exercise comparisons have also observed greater forces during longer-lever variations, but a more demanding position can change how far a person moves and how comfortable the exercise feels. That trade-off matters in practice: a short lever performed consistently is more useful than a long lever held with the hips collapsing or the upper knee sliding off its support.
Set up a short-lever Copenhagen before chasing range
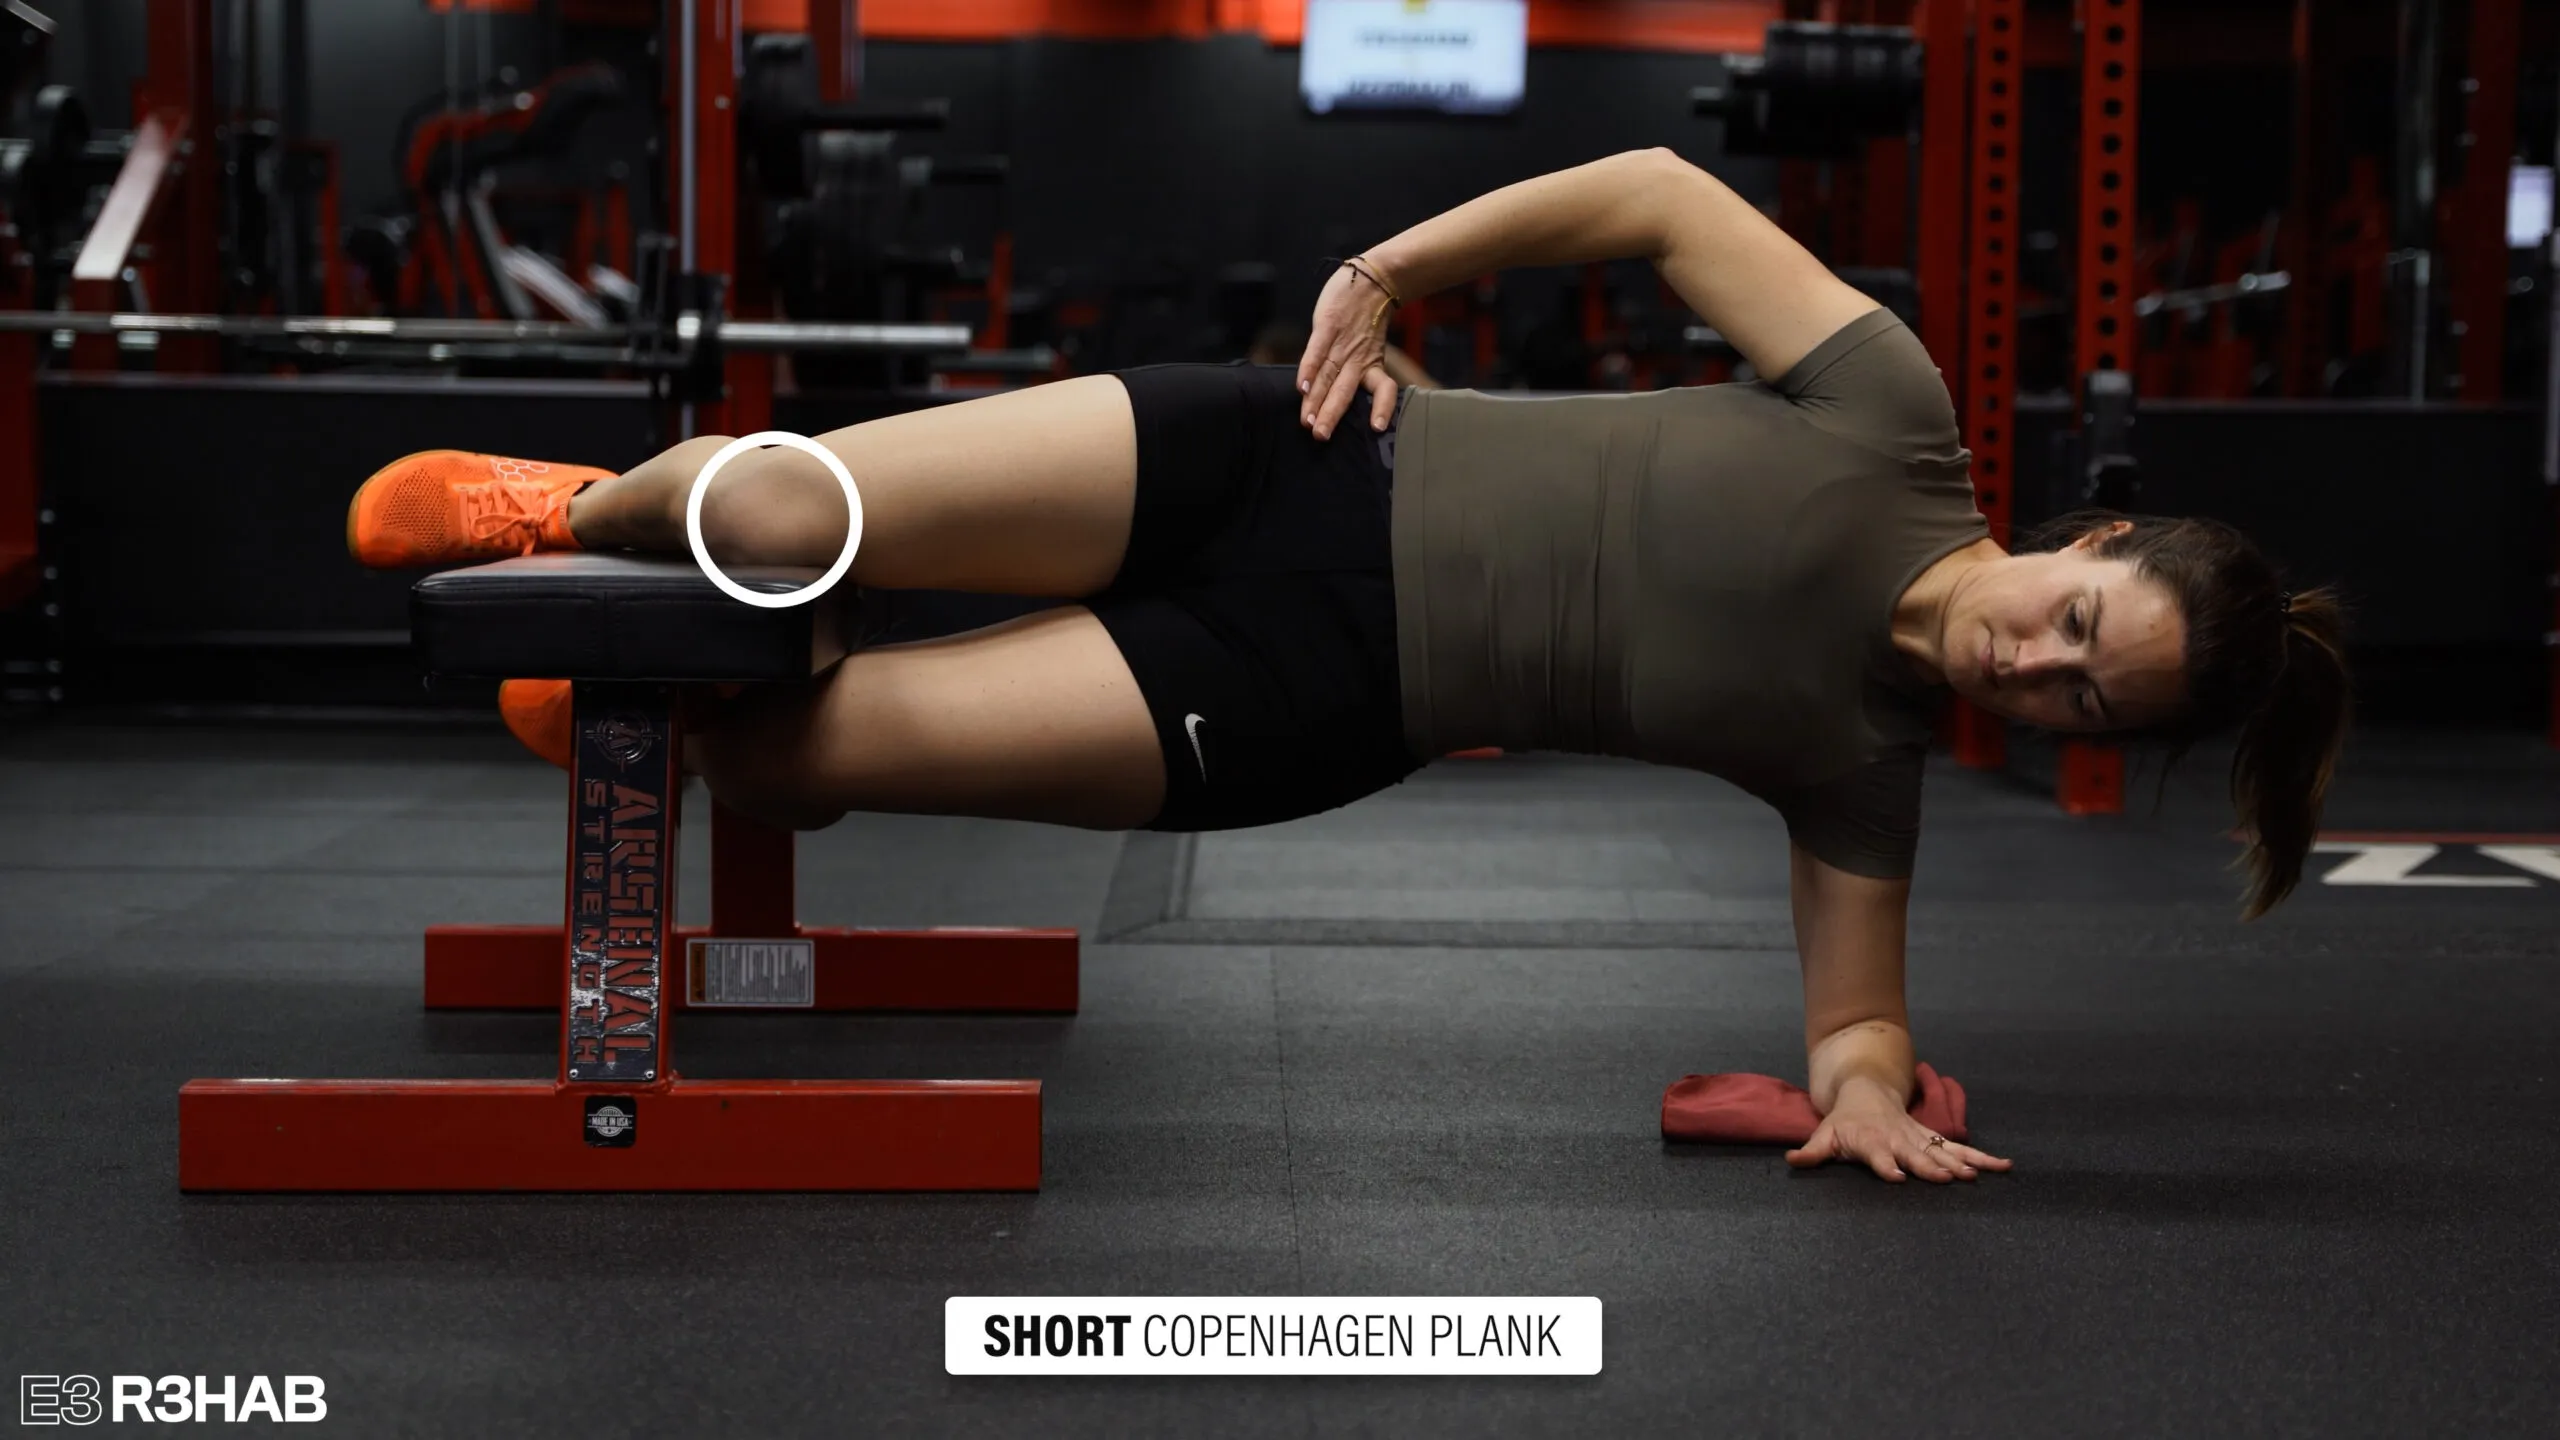
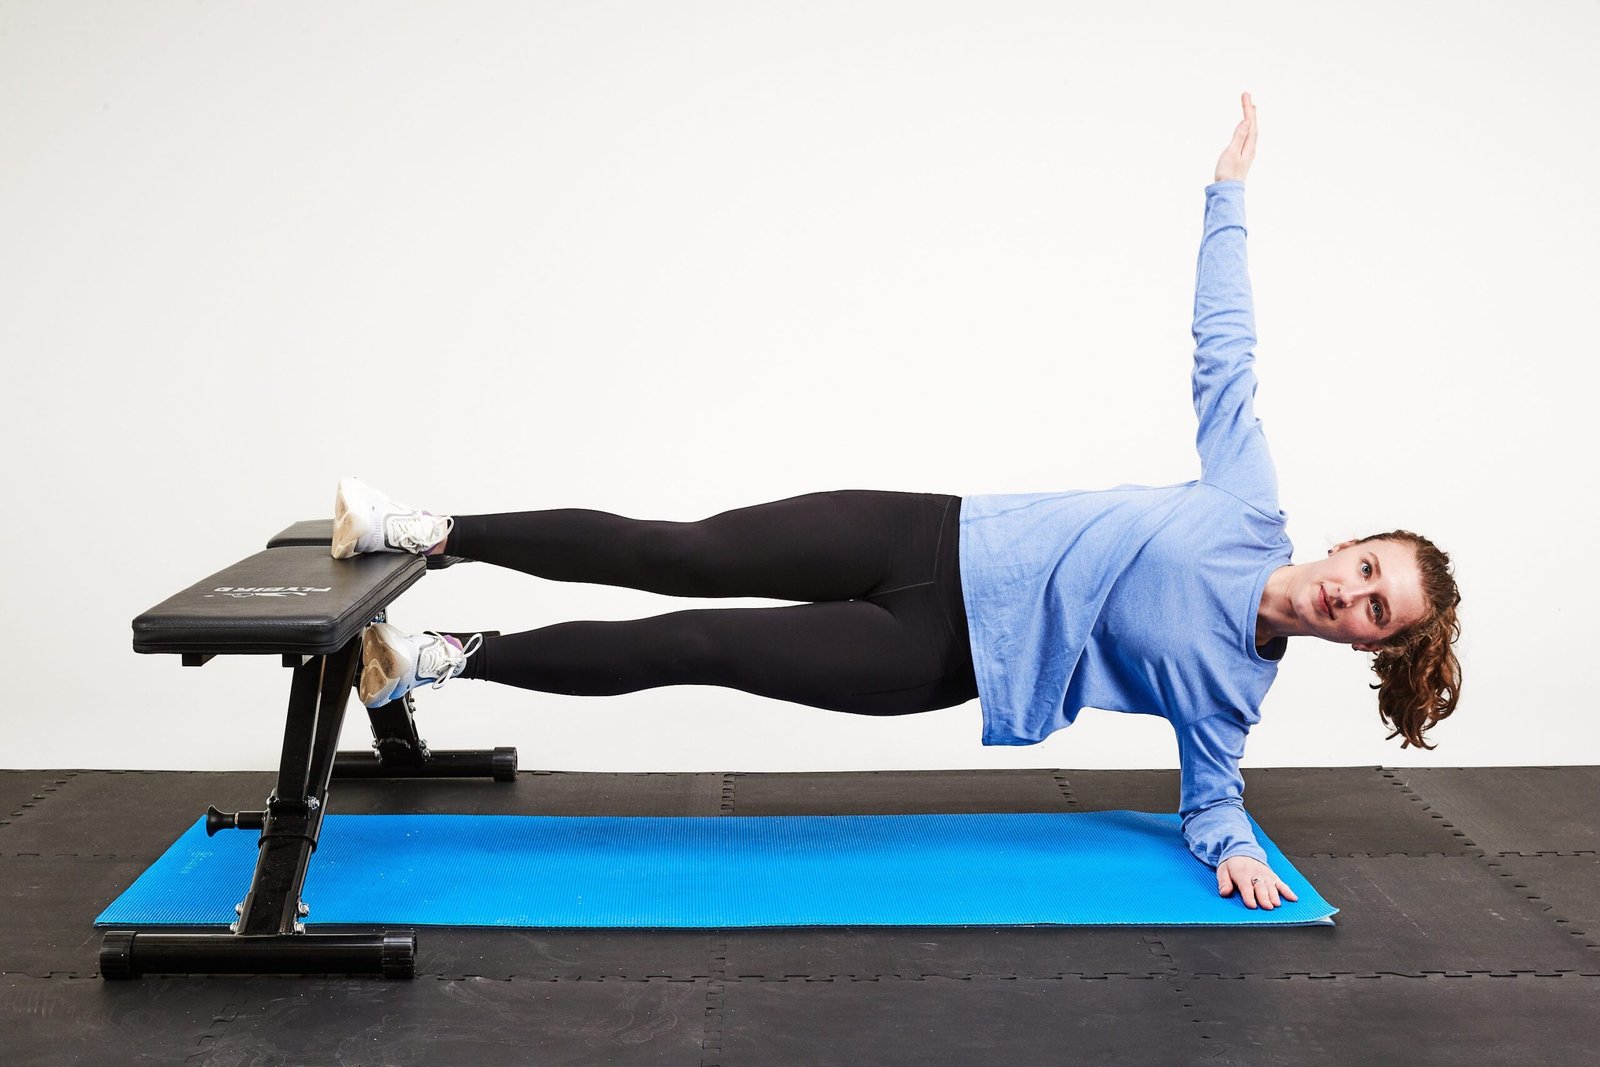
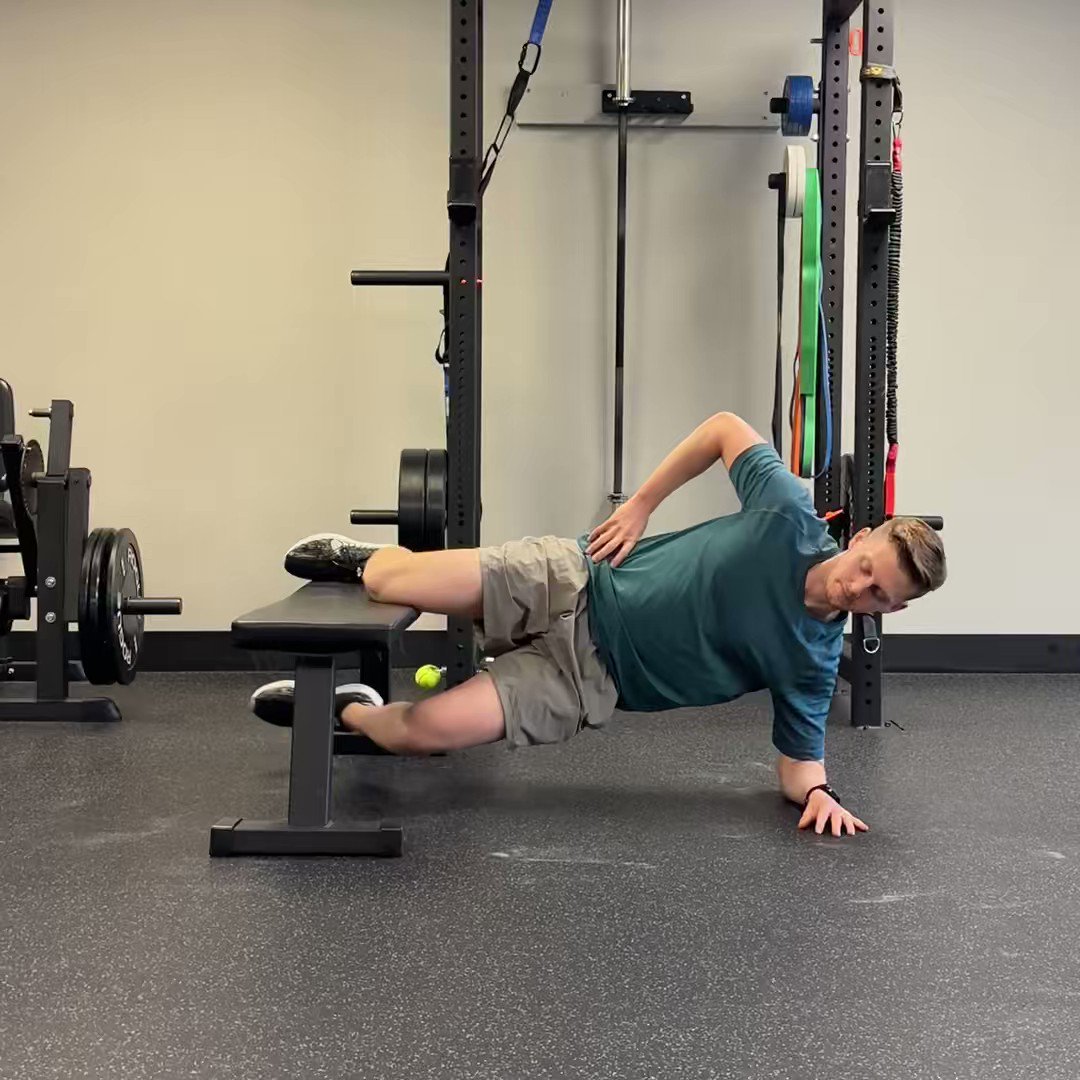
Begin beside a firm flat bench or padded box that will not tip, roll or move. Lie on your side and place the inside of your upper knee and lower thigh across the support. Your bottom leg can stay bent and close to the floor. Set your lower elbow almost directly under your shoulder, with the forearm pressing comfortably into a mat.
Brace gently, exhale and lift your hips by pushing the supported leg down into the bench. Form a straight line from the side of your shoulder through your hip to the upper knee. A small, steady hold is the first goal. Keep the neck relaxed and avoid twisting the chest toward the ceiling to pretend you have lifted higher.
On a short lever, the bench supports the leg closer to the hip, reducing the moment arm compared with placing the ankle on it. That shorter arm is a sensible entry point for a demanding adductor exercise. Use a comfortable pad where the upper knee contacts the bench; hard edges and pressure points can ruin the setup before the muscles have done meaningful work.
Try five to ten seconds with smooth breathing and lower under control. Repeat on the other side. If your top thigh cannot maintain pressure, your shoulder becomes painful or you cannot keep the pelvis stacked, reduce the hold time or place the free foot on the floor for a little assistance. The modification is not cheating; it lets you practice the intended hip position.

Equipment Worth Exploring
Explore equipment, accessories and gear from our carefully selected range.



FID Bench MAX
Adjustable bench offering flat, incline, and decline positions + adjustable headrest.

Multi Bench MBX-650 2.0
Adjustable multi-bench with roller adjustment, 15 backrest positions and accessory mounts.


Foldable Wall Rack
Wall-mounted folding squat rack designed to save floor space between workouts.

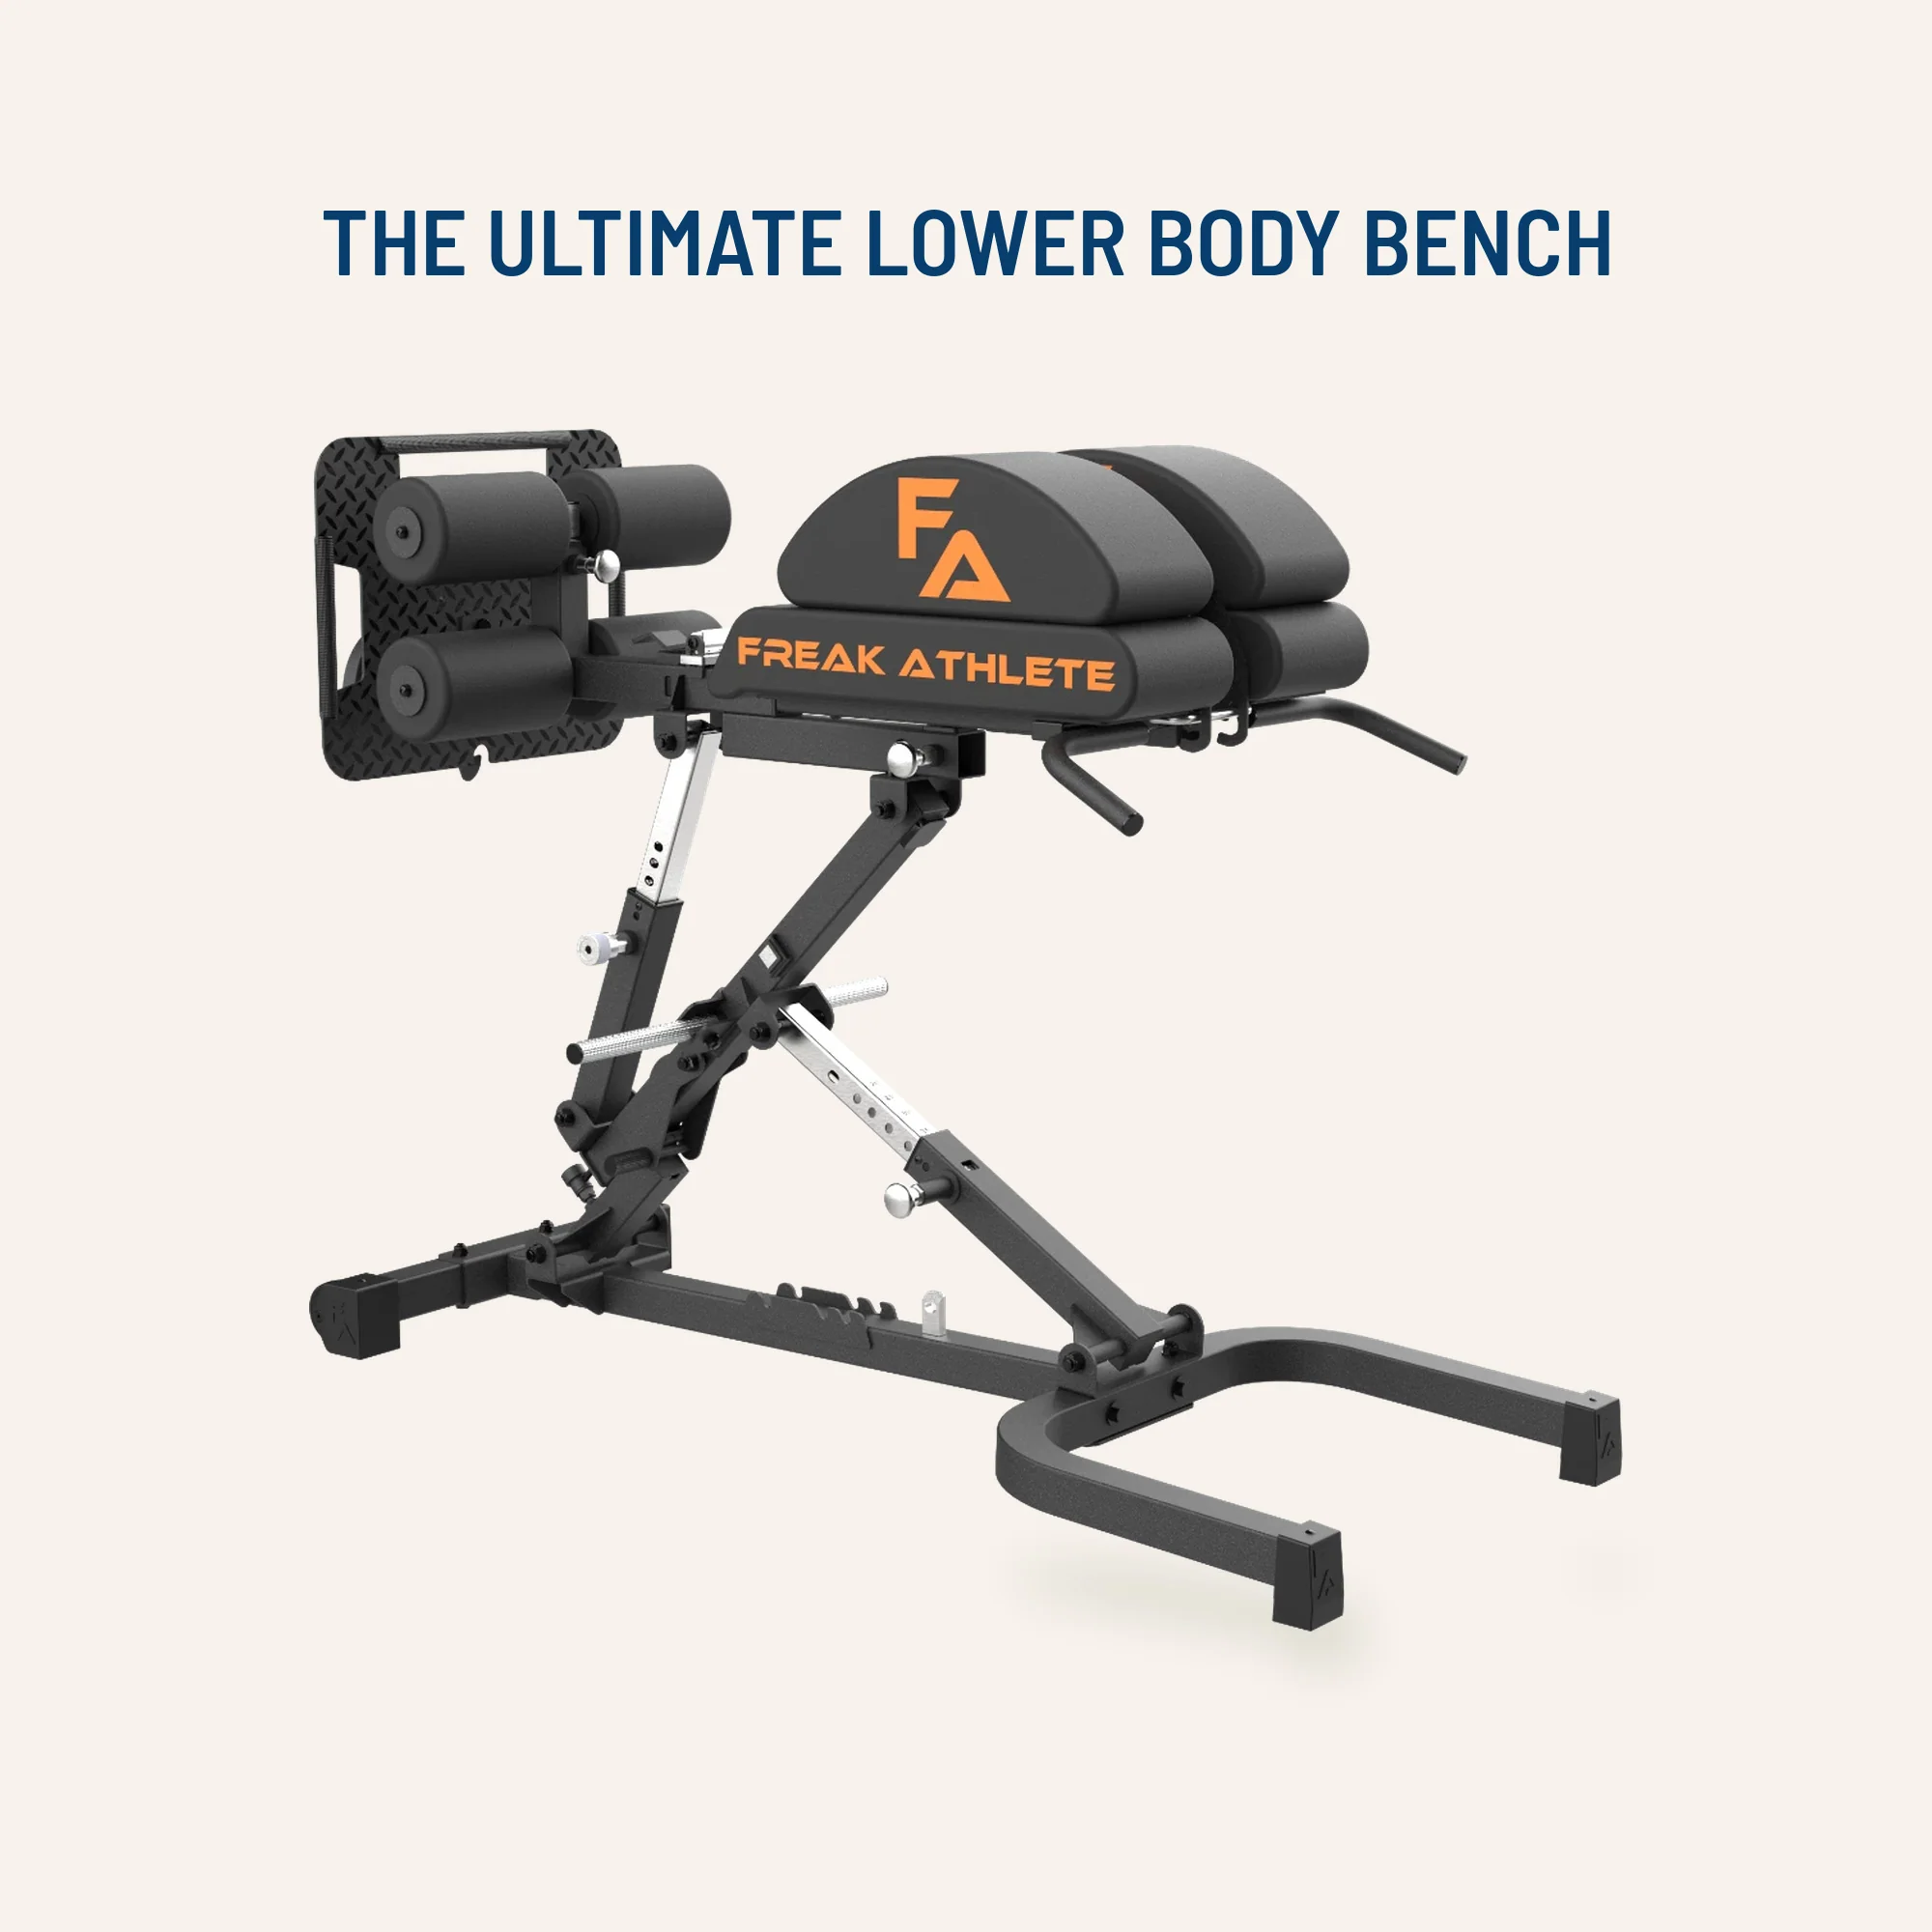

Glute Ham Developer GHD-820
Adjustable glute-ham developer with contoured pads and a fold-out knee support.

45° Hyperextension HPX-650
Angled back-extension trainer with split padding, a ribbed footplate and resistance-band pegs.
Earn the long lever without losing your body line
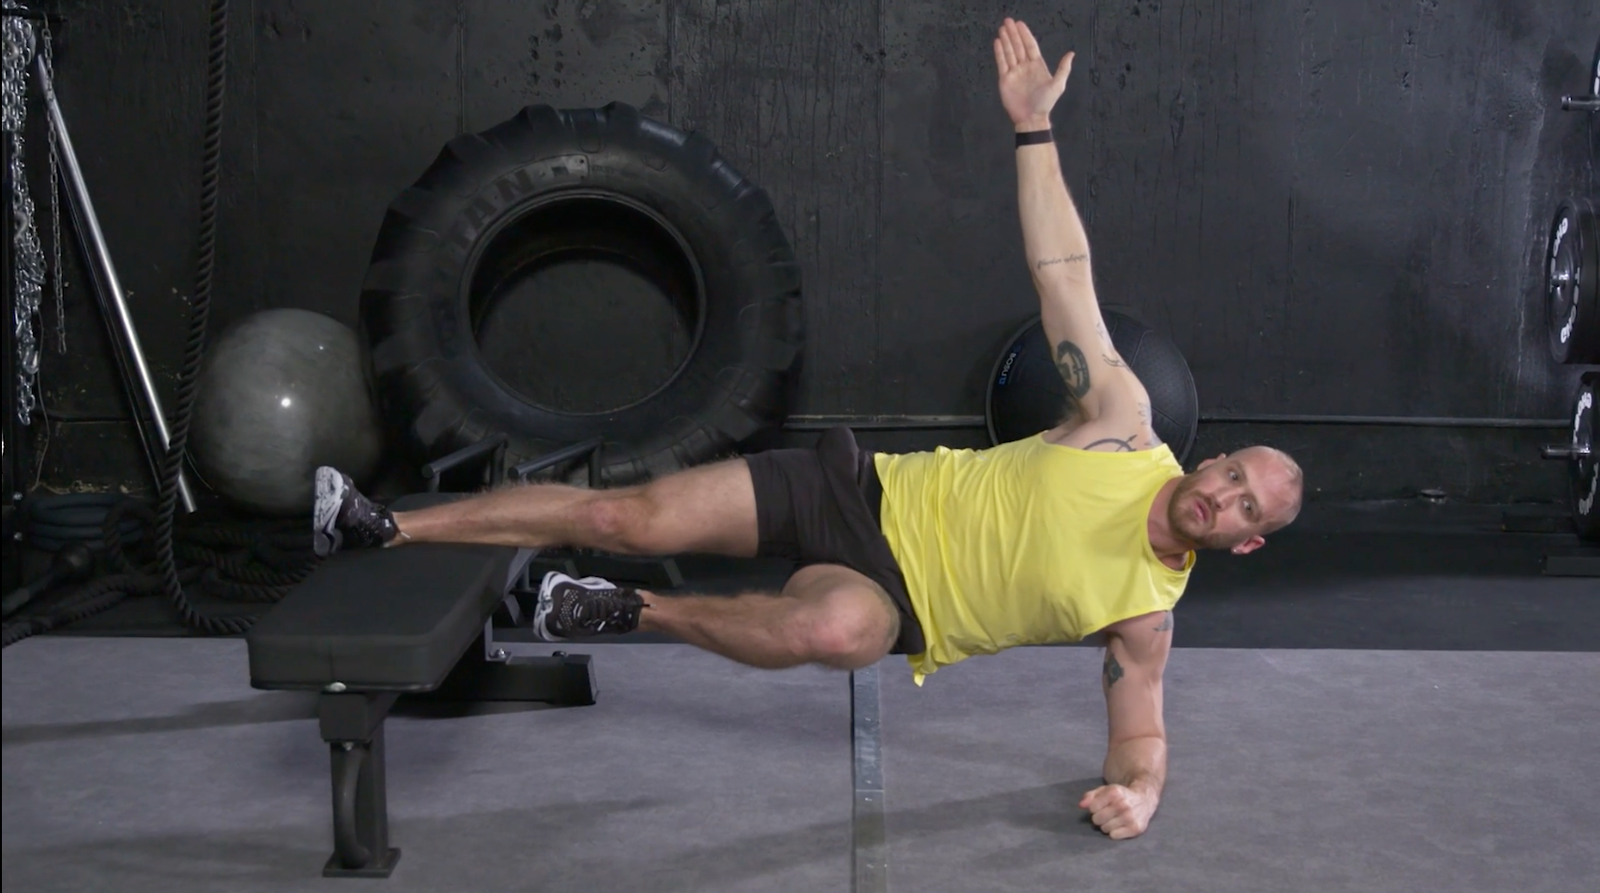
To increase difficulty, slide the bench contact farther away from your hip, first toward the mid-thigh or shin and eventually near the ankle. That increases the lever arm of your body around the working hip. Keep the same basic side-plank alignment rather than letting the pelvis rotate backward or the ribs flare upward.
Place the top leg securely on the bench and press through it. Lift the bottom leg only when you can maintain the plank without wobbling; some versions leave it hanging freely. If both legs are raised, the exercise can feel markedly harder. Changing the position of the free leg is an additional progression, not a requirement for a useful rep.
The most common faults are a hip that sinks toward the floor, a supporting elbow drifting far from the shoulder, a bent trunk that shortens the effective lever and a top leg that slides across the bench. These faults change the task and can increase strain on tissues that are not ready. Stop a set when you can no longer hold the intended line.
Start with short long-lever attempts of three to eight seconds rather than doubling hold time and lever length together. Switch sides and compare your quality, not your ego. A video from the front or a partner watching your pelvis can help identify unwanted rotation. Aim for steady adductor effort with manageable shoulder and trunk support.
Where added weight, dynamic reps and other leg work fit
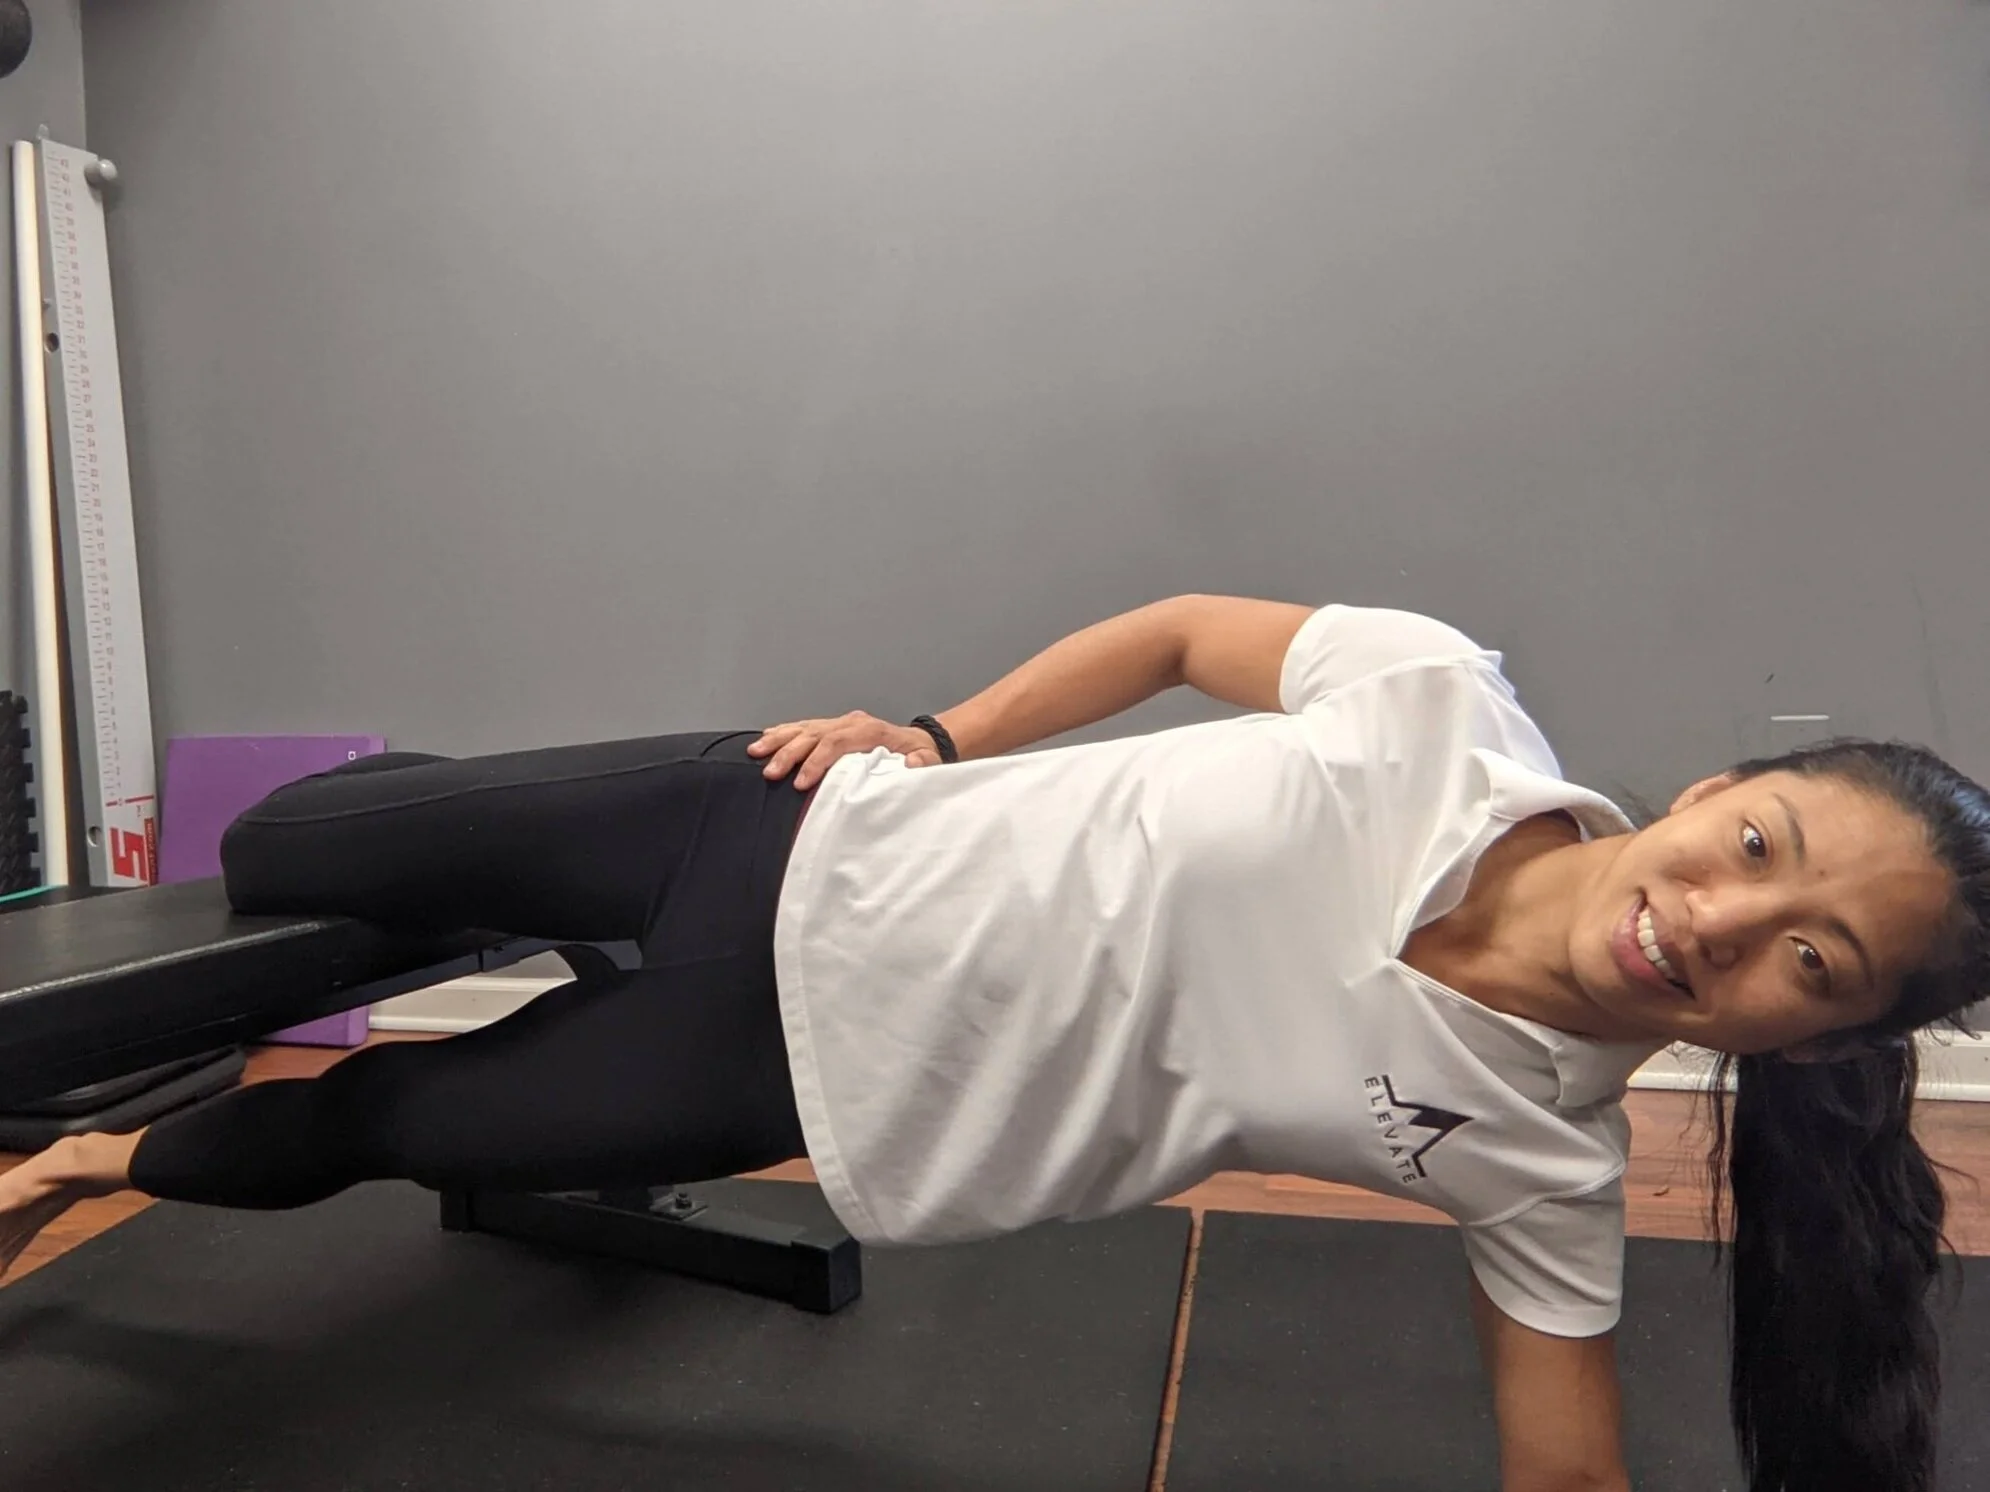
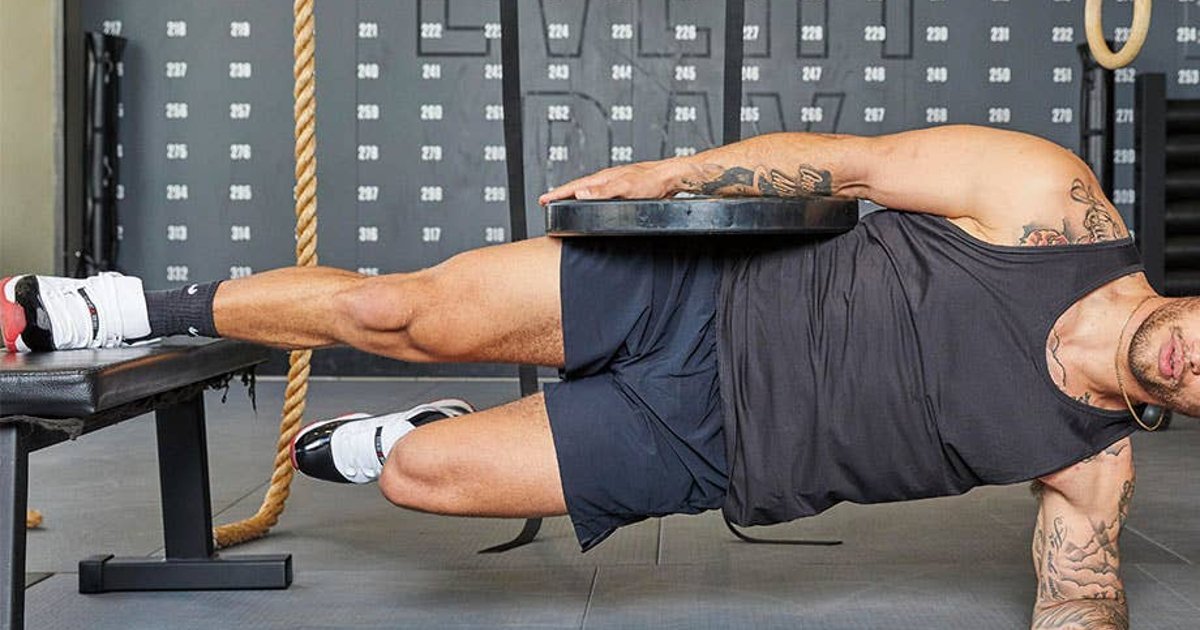
External weight is another way to increase torque, as the recent isometric measurements showed. But hold position and lever length steady before adding a plate or weighted vest. Make sure the load cannot slide off or press uncomfortably into your ribs, pelvis or hip. Weighted Copenhagens are best left to lifters who can already perform clean, repeatable holds.
A dynamic Copenhagen involves raising and lowering the hips or, in some versions, moving the lower leg toward the supported leg. Moving repetitions add coordination, motion and eccentric demands that a stationary hold does not. A five-second isometric test result should not be presented as proof that a particular dynamic repetition scheme is optimal.
Groin-health evidence also deserves restraint. A 2025 review of 15 studies found that Copenhagen programs can improve hip-adductor strength, yet the pooled estimate for groin-injury prevalence was uncertain and did not demonstrate a statistically reliable reduction. Stronger adductors are a plausible performance asset, but injury risk depends on far more than one exercise.
For most lifters, Copenhagen training belongs alongside rather than instead of bilateral squats, lunges, Romanian deadlifts and other strength work. A cable or seated adduction exercise may be easier to load in small increments if the plank creates wrist, shoulder or coordination limitations. Hip-abduction work trains a different direction and should not be confused with adduction.
Persistent groin pain, recent strains or a sudden sharp pulling sensation deserve a stop and an individual assessment, not an immediate switch to a harder variation. Even a light bodyweight hold may be inappropriate early in rehabilitation. There is no prize for pushing through painful tissue just because an exercise has a strong reputation among athletes.
Equipment Worth Exploring
Explore equipment, accessories and gear from our carefully selected range.

Leg Extension/Curl BCO-780
Leg extension and lying leg curl combo with plate loading, band pegs and a cable-loading option.

Seated Leg Combo BCO-680
Adjustable seated leg extension and leg curl machine with band pegs for added resistance.


Standing Abductor
Plate-loaded standing hip abductor for targeted outer-glute and hip-stability training.
VOLTRA
Compact digital cable trainer with smooth, adjustable resistance.

VForce Wall Trainer
Space-saving wall-mounted functional trainer with pivoting cable arms and variable resistance ratios.

VForce 3IN1
All-in-one rack combining an adjustable Smith machine, functional trainer, and free-weight station.


Rubber Hex Dumbbells
Rubber-coated hex dumbbell pairs with a stable shape for home and commercial strength training.


Leg Day Shirts & Workout Gear
Leg-day gym shirts and workout gear for lifters who never skip squats, lunges and lower-body punishment.

Deadlift Cyberpunk Skull Gym Pullover for Powerlifters, Hoodie
Bring “Deadlift” gym humor to lazy days and post-workout plans.

Anti Leg Day Leg Day Club Meme Sweater T-Shirt
Show some gym-day personality with “Anti Leg Day Leg Day Club”.

Never Skip Leg Day Flamingo – Fitness Meme Vest Muscle Tank Top
Train hard, laugh a little, and rep “Never Skip Leg Day Flamingo”.

I Love Deadlifts Muscle | Funny Valentine's Gym Vest Fo Tank Top
Add some deadlift attitude to training with “I Love Deadlifts”.

My Leg Hurts Leg Day , Meme Lovers & Bros Casual T-Shirt
Bring “My Leg Hurts” humor to your next gym day.

Leg Day Thou Shalt Not Skip Leg Day Medieval Knight Gym T-Shirt
Make gym days more fun with “Leg Day” style.


Leg Day Decal Water Bottles & Equipment Meme Sticker
A fun “Leg Day” touch for bottles, laptops, and lockers.

Leg Day Is Calling You Decal Water Bottles & Sticker
Bring “Leg Day Is Calling You” attitude to your water bottle or laptop.
A practical six-week progression for stronger inner thighs
Use this as a conservative example for pain-free lifters, not a clinical protocol proven in a head-to-head trial. Start with one or two sessions per week and allow at least 48 hours between demanding exposures. Place the work after your technically important heavy lifting, or on another day when you can give the hold careful attention.
During weeks one and two, perform two short-lever sets per side of roughly five to ten seconds. Choose a knee contact point you can keep stable and a hold duration that ends before shaking breaks your alignment. Rest as needed and do both sides. If even five seconds is difficult, use a little foot assistance or several shorter holds.
In weeks three and four, work toward two or three sets of ten to twenty seconds per side on the short lever. Once twenty clean seconds feel repeatable, experiment with moving the support slightly down the leg. Do not force a full ankle-supported hold simply because the calendar says week four; progression follows your actual control.
In weeks five and six, perform two or three sets per side with a longer lever only if your trunk stays aligned and the upper leg remains secure. Five to fifteen seconds of strict long-lever work can be a meaningful challenge. Keep the free leg assisted if necessary, and avoid adding an external plate while you are still learning the new position.
Track the lever contact point, hold duration, whether the bottom foot helped and any next-day soreness. Progress one variable at a time. If the plank makes your next squat, sprint or change-of-direction session feel noticeably worse, reduce volume or move it to a less demanding day. Training should improve your week, not compromise it.