Advertising disclosure: This page includes affiliate product links that may earn us a commission, as well as products from our own store.
Sissy Squats: Lean Back, Load Your Quads and Progress Without Guesswork
The sissy squat looks like somebody forgot the rules of a normal squat: the knees travel forward, the heels lift and the torso tilts backward instead of folding over the hips. Yet those unusual mechanics are exactly why some lifters use it to finish a quadriceps session. The exercise shifts the challenge toward knee extension while asking the legs to control a long, leaning body.
It is not a beginner-friendly replacement for every squat, nor is the deepest possible repetition automatically the best one. Start with support, learn how the hips and knees move together, and decide whether this pattern suits your knees before adding load. A sissy squat station, a rack-assisted version and a reverse Nordic can all look related while feeling meaningfully different.
1. Why the straight-hip lean changes quad training
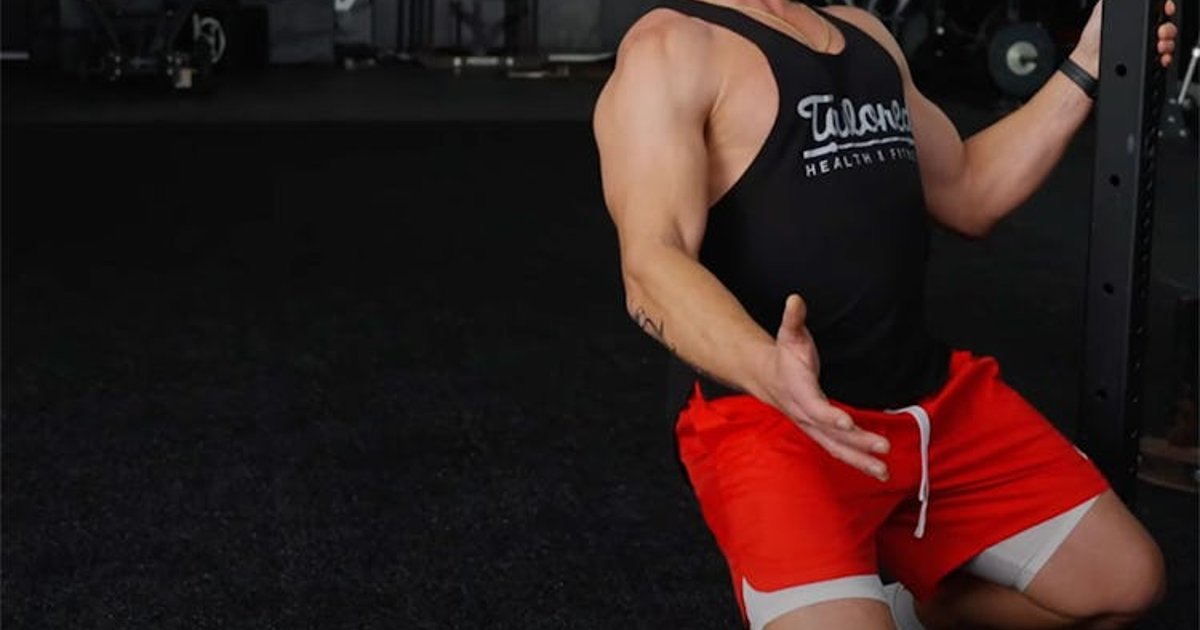
All four quadriceps heads contribute to knee extension, but one of them – the rectus femoris – also crosses the hip. In a traditional squat, the hips and knees bend together. In a classic standing sissy squat, the lifter keeps the hip comparatively extended as the knees bend, creating a different length and resistance challenge for that two-joint muscle. The remaining vasti still work hard to straighten the knees.
Think about the direction of the moving body rather than chasing a magic exercise name. If you lean backward as one unit and keep your feet planted on their forefeet, your knees must control the descent while your torso and thighs form a relatively continuous line. The leverage usually gets more difficult as you move deeper. The exact challenge depends on your proportions, available support and ankle comfort; the exercise does not isolate a single quad head.
The sissy squat therefore complements rather than automatically replaces front squats, hack squats or leg presses. Those movements can support greater external loads and a broader mix of hip and knee work. Use this movement when you want another knee-dominant pattern with relatively little equipment, not because it is proven superior for everyone’s quadriceps. A strong quad session can contain both a big compound lift and a smaller controlled finisher.
2. Learn the supported standing rep before chasing depth
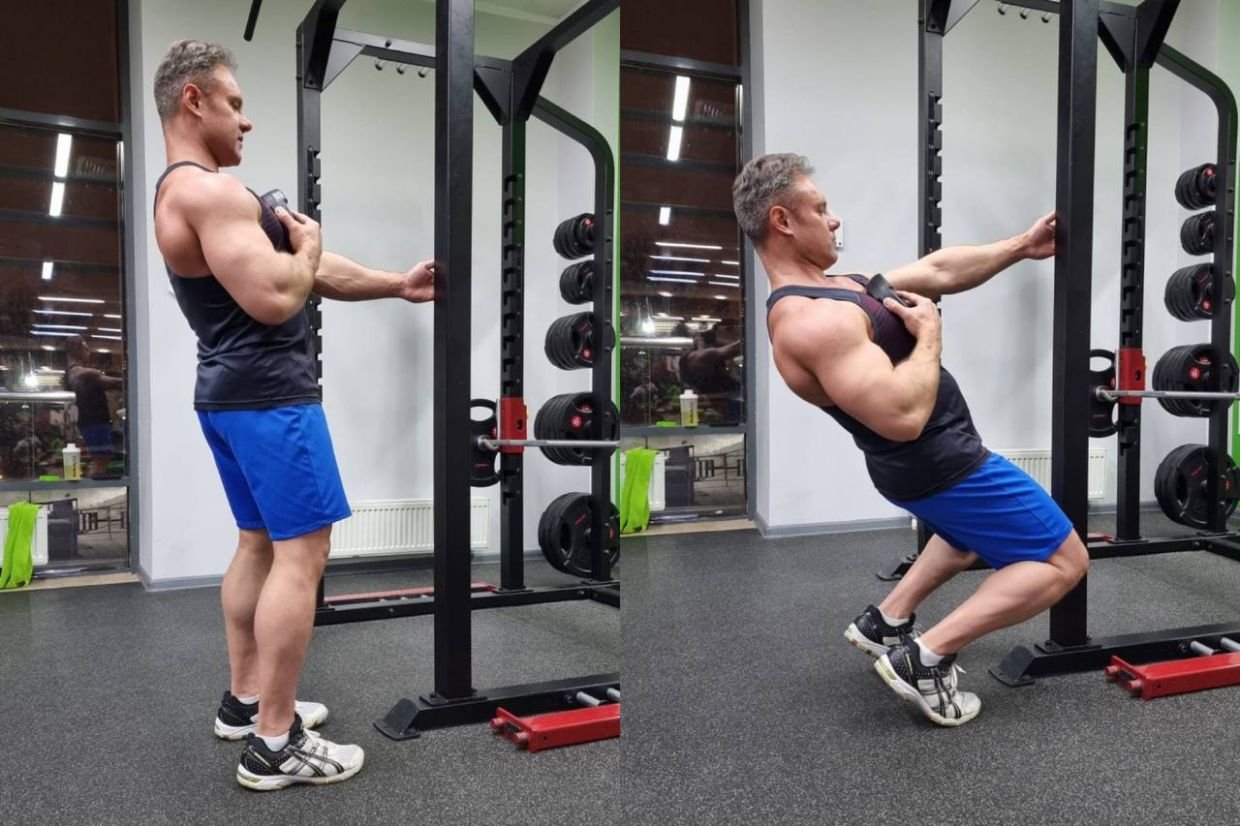
Stand beside a stable power-rack upright or another fixed support that cannot roll or tip. Set your feet around hip width, let the toes point slightly outward if comfortable, and hold the support with one hand. Raise the heels gradually so your pressure stays on the balls of the feet. Brace your abdomen and lightly tighten your glutes; try to keep the shoulders, hips and knees in a long line while that line tilts backward.
Descend slowly over two to three seconds by allowing the knees to bend and track approximately in the direction of the toes. Your knees will move forward: that is a characteristic of this exercise, not automatically a form mistake. Keep the movement smooth rather than bouncing off a maximal bottom position. Stop at the deepest point where you can maintain foot pressure, control the lean and avoid sharp joint pain. Then extend the knees to come back up, using the support only as much as needed.
For a first session, try two sets of five to eight short-range repetitions with an easy amount of hand assistance. Film one side view. If your hips shoot backward into a regular squat, or the torso folds at the waist while the knees barely move, shorten the depth and repeat. If the supporting hand has to yank you upright, you moved beyond your current controlled range. Full unsupported repetitions are a progression, not an entry requirement.
A rack is useful for balance only when firmly anchored or sufficiently stable; never pull on an unloaded, unstable rack or a loose barbell. Give yourself clear floor space and a way to step out of the movement without falling backward.
3. Knee comfort, range of motion and the common shortcuts
The distinctive forward knee travel increases the demand around the knee relative to many hip-dominant exercises. That demand is not inherently harmful, but the full movement can be difficult for someone who has not built tolerance to it. A deep stretch in the quadriceps is not the same as sharp pain around the kneecap. Treat discomfort as useful information: stop the set, reduce range, decrease assistance demands or use an alternative rather than forcing another repetition.
The most common shortcut is a sudden collapse at the bottom followed by a bounce. Another is trying to lower with locked ankles and heels glued down; the classic standing variation generally rises onto the forefeet. Some lifters drift sideways as their weaker side loses control, while others push so hard through the support that the knees do very little work. Record the lowest repeatable depth, not the most dramatic photograph you can recreate.
Warm up with easy walking or cycling and several comfortable knee-bending repetitions before the first set. Then use the first sissy squat set as a movement rehearsal rather than a test of willpower. Someone with current anterior knee pain, swelling, instability or recent knee surgery should obtain individual clinical guidance rather than following a generic depth prescription. The objective is progressive, tolerable loading – not a claim that this movement fixes knee pain.
A practical scale is simple: supported partial reps first, supported deeper reps second, less hand support third, and external loading last. You can remain at any step for as long as needed. An easier variation performed consistently is more valuable than a full-range version that you cannot control.
4. Standing sissy squats versus a dedicated sissy squat bench
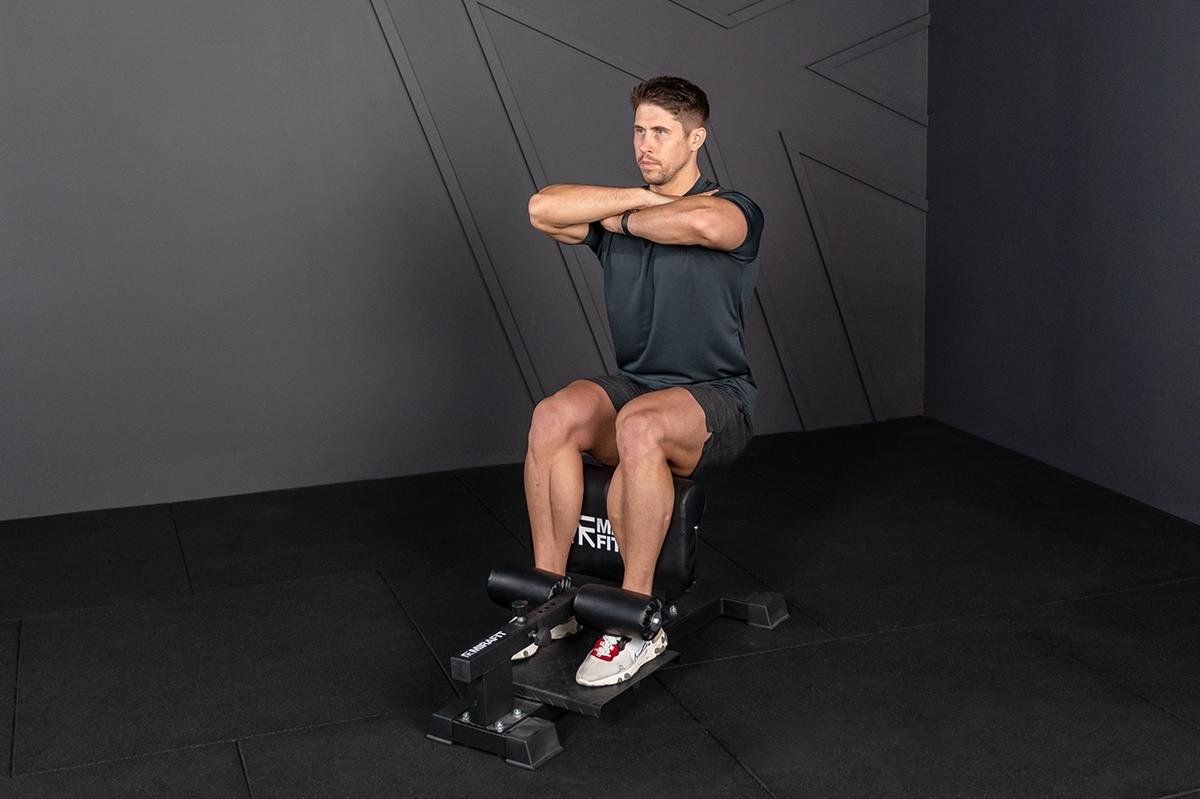
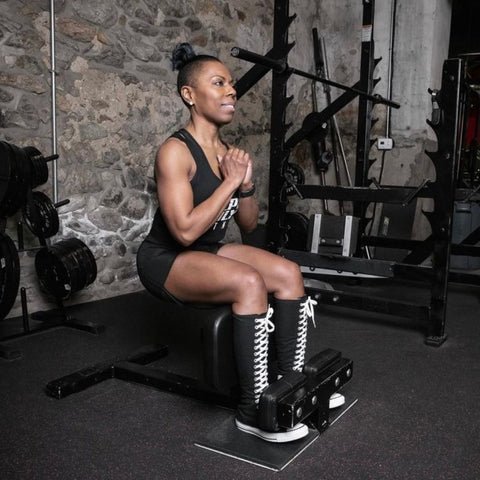
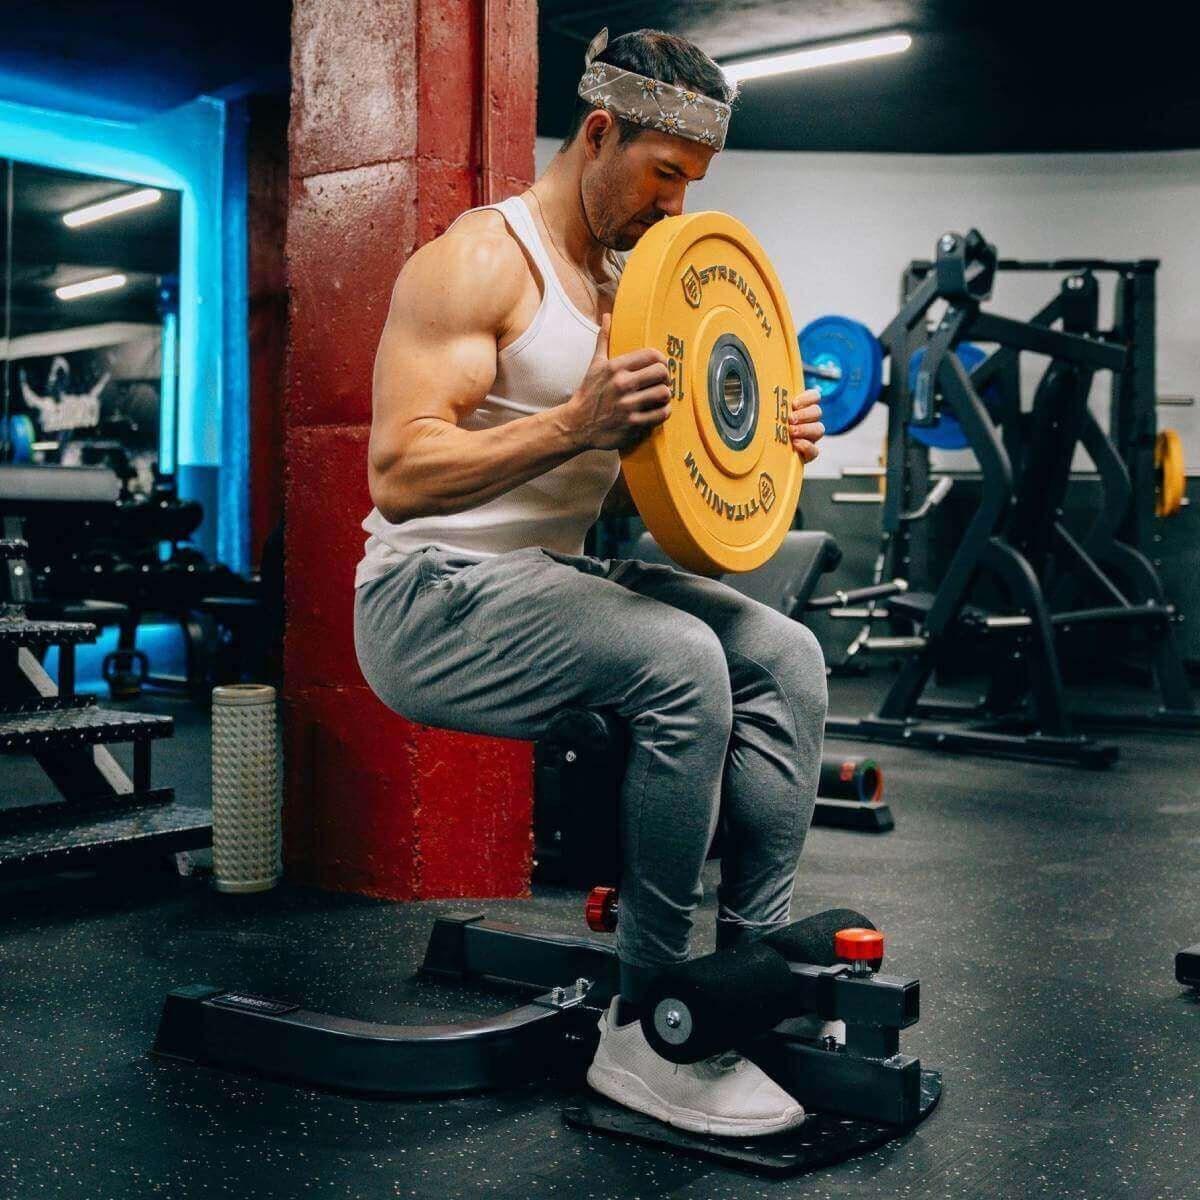
Equipment sellers often use the same name for two setups. The traditional standing version requires you to balance on the forefeet while the torso leans backward and the hips stay relatively extended. A dedicated sissy squat bench instead pins the feet and supports the lower legs with padded rollers. Depending on the machine and how you use it, the position of the shins, foot pressure, hip motion and resistance curve can differ substantially.
For a bench station, begin by setting the foot platform and calf or ankle pads to fit your legs without uncomfortable pressure. Check that the machine stays stationary and the pads are secured. Practise a short controlled bodyweight descent and rise before holding a plate or dumbbell. Some machines encourage a conventional-looking squat backward with the shins braced, while others allow a straighter-body lean; do not assume every bench replicates the exact standing sissy squat.
That distinction matters for comparisons. A video of someone keeping their feet flat in a sissy squat bench should not be presented as identical to an unsupported standing rep on the balls of the feet. Both can be demanding quad exercises, but they are separate implementations with different balance requirements. Pick the version you can set up reliably and repeat, and name it accurately in your training log.
If a machine cannot adjust to your lower-leg length, do not improvise an unstable pad position. A well-secured rack for hand assistance or a straightforward leg extension may offer a more predictable alternative than forcing a poor equipment fit.

Equipment Worth Exploring
Explore equipment, accessories and gear from our carefully selected range.


Leg Extension/Curl BCO-780
Leg extension and lying leg curl combo with plate loading, band pegs and a cable-loading option.

Seated Leg Combo BCO-680
Adjustable seated leg extension and leg curl machine with band pegs for added resistance.

Leg Press/Hack Squat BPR-790
Convertible 45-degree leg press and hack squat machine with a broad footplate and band pegs.

Compact Leg Press CLP-700
Compact reverse-style leg press with a moving seat carriage and an adjustable footplate.

Studio V-Squat
Plate-loaded V-squat machine for supported lower-body strength training.

GymPin Squat Wedges
Non-slip 15-degree squat wedges help elevate the heels for deeper quad-focused squats.

HUSLA Leg Extension Pad
Pad attachment designed to increase usable range of motion on compatible leg-extension machines.
5. Load it intelligently and keep other leg work in the plan
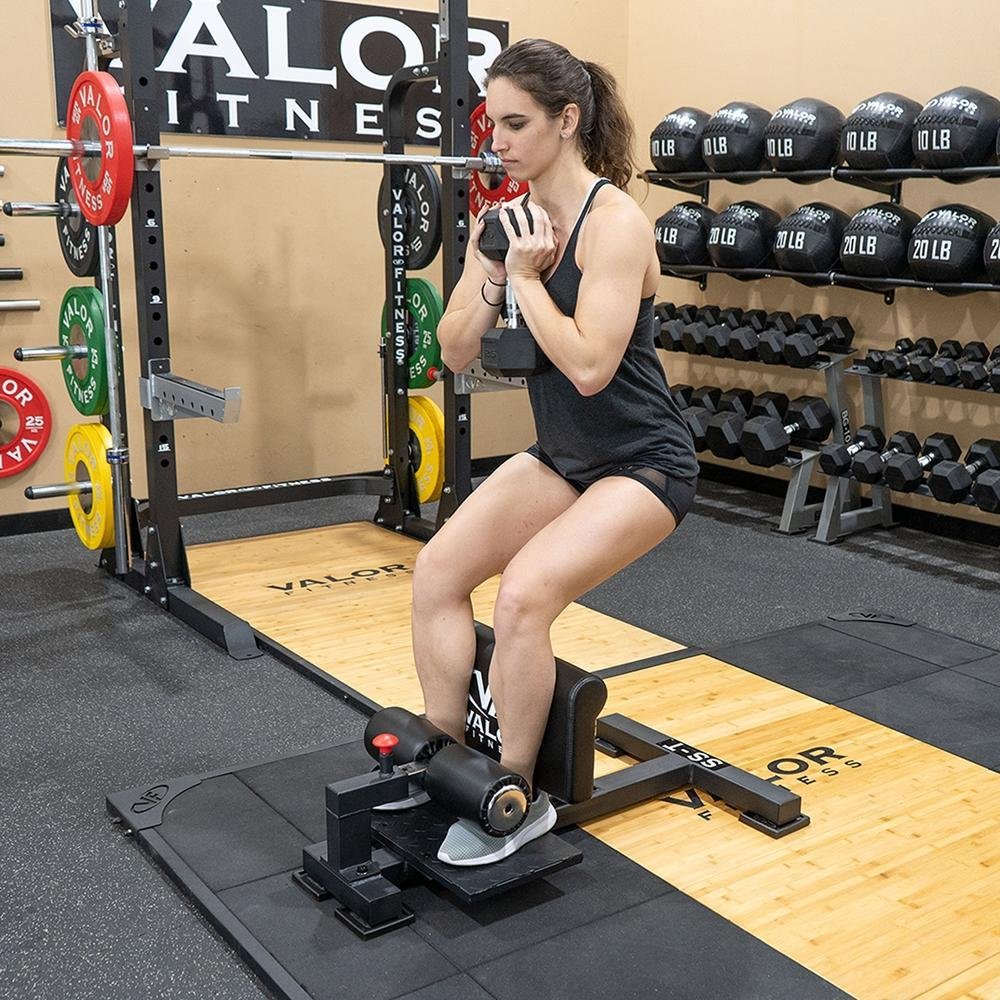
For many lifters, sissy squats fit best after the main squat, leg press or split-squat work, when the legs are warm but technique is still under control. Begin with two working sets of six to ten supported repetitions, stopping with perhaps two or three good repetitions left. Rest enough to restore coordination, usually roughly one to two minutes. Add a little depth or an extra clean rep before deliberately reducing the support of the hand.
Once you can perform consistent repetitions across your chosen range, an extra set may provide more work without abruptly changing the movement. External loading should come much later. Holding a small plate close to the chest or using a lightly loaded vest can alter balance; keep the load modest and retest the same quality standards. Adding weight to a shaky sissy squat is not an efficient way to build confidence in the knee.
To keep the whole lower body balanced, retain a more loadable compound movement, a hip-hinge or hamstring exercise, and calf training somewhere in the week. Sissy squats emphasize knee extension; they do not replace posterior-chain development. If your heavy squat day already leaves the quads exhausted, just one controlled finishing set may be enough.
Keep three training-log details alongside the load: assistance used, approximate depth and whether each rep finished smoothly. Those variables make progression meaningful. Ten shallow reps with a strong pull on the rack are not an automatic improvement over eight deeper, lightly supported reps.
6. A four-week practice plan and when to choose an alternative
Week 1: After the main leg exercises, perform two sets of six partial-range rack-assisted repetitions. Use a three-second descent and stand up under control. Leave a few repetitions in reserve. The goal is to identify a range you can repeat with the heels elevated and hips quiet, not to reach the floor.
Week 2: Keep the same support and tempo. Work toward two or three sets of eight as long as the previous week’s range feels comfortable. If your depth fluctuates, hold the repetition number steady and focus on consistency. Let recovery and knee comfort determine whether to add the third set.
Week 3: Practise slightly greater depth on the first set while keeping the support available. Follow with another set at your established depth. You may lighten the grip on the upright, but do not remove it merely to make the set look harder. A side-view video should show a smooth torso-thigh line rather than an uncontrolled collapse.
Week 4: Aim for two or three sets of eight to ten high-quality repetitions. Change only one challenge – depth, total repetitions, assistance or a small external load – rather than all four. If technique or comfort worsens, repeat the previous week instead of forcing progression.
A reverse Nordic performed from the knees with the hips extended is a useful substitute when forefoot balance is the main obstacle; the ground removes much of that balancing task. A leg-extension machine is another easy-to-dose knee-extension option. If the sissy squat does not suit you, these movements and ordinary squats can still support robust quad training. There is no required exercise that every lifter must master.

Leg Day Shirts & Workout Gear
Leg-day gym shirts and workout gear for lifters who never skip squats, lunges and lower-body punishment.

Quadzilla Massive Quads Leg Day Squatting Meme Tank Top
Train hard, laugh a little, and rep “Quadzilla”.

Santa Quads Is Coming To Town | Fitmas Leg Day Workout T-Shirt
Keep things casual with a little “Santa Quads Is Coming To Town” attitude.

Heavy Squatter Meme Squats & Gains Leg Day Wizard Top T-Shirt
Heavy lifts, good laughs, and a little “Heavy Squatter” energy.

Negative Leg Day Review Leg Day Sucks Meme Squats, T-Shirt
Show some leg-day attitude with a playful “Negative Leg Day Review” tee.

Squatzilla Meme Leg Day & Squat Fans Hooded Hoodie
Show off your leg-day humor in a laid-back “Squatzilla” hoodie.

I Love Squats | Valentine's Leg Day Decal & Bodybuildin Sticker
Put “I Love Squats” gym humor on your laptop, bottle, or gym gear.

Shirt – Squat Inspector Leg Day & Booty Gains – Meme T-Shirt
Make gym days more fun with “Squat Inspector” style.

Leg Day Is Calling You Squats, Deadlifts & Gains T-Shirt
Rep “Leg Day Is Calling You” humor in and out of the gym.

Never Skip Leg Day Squats & Deadlifts Meme , Top T-Shirt
Show some leg-day attitude with a playful “Never Skip Leg Day” tee.

Squats Leg Day Heavy Weights Meme – Essential Top T-Shirt
Bring “Squats Leg Day Heavy Weights” humor to your next gym day.
The bottom line: build a controlled knee-extension pattern, use support without embarrassment, and earn depth before load. The memorable name is optional; repeatable mechanics and a tolerable progression are the useful parts.