Advertising disclosure: This page includes affiliate product links that may earn us a commission, as well as products from our own store.
Rack chin-ups look like a hybrid of a pull-up and a gym-floor puzzle: an anchored bar, a bench in front of it and your heels providing just enough support to pull with control. Done well, they give you a repeatable way to train the back and arms without demanding a full unsupported chin-up. Done badly, they become an awkward hip swing against an unsteady bar. The distinction begins with the setup.
Foot-supported rack chins are not the same as a strict bodyweight chin-up, and they are not automatically identical to a feet-elevated inverted row. Bar height, foot position and torso angle change the direction and amount of resistance. This guide makes those choices deliberate, explains where the movement can fit in a back session and builds a simple six-week progression. You do not need a new machine; you do need a rack or properly locked Smith bar that will stay fixed under pulling force.
Rack chin-ups: recognize the movement before adding reps
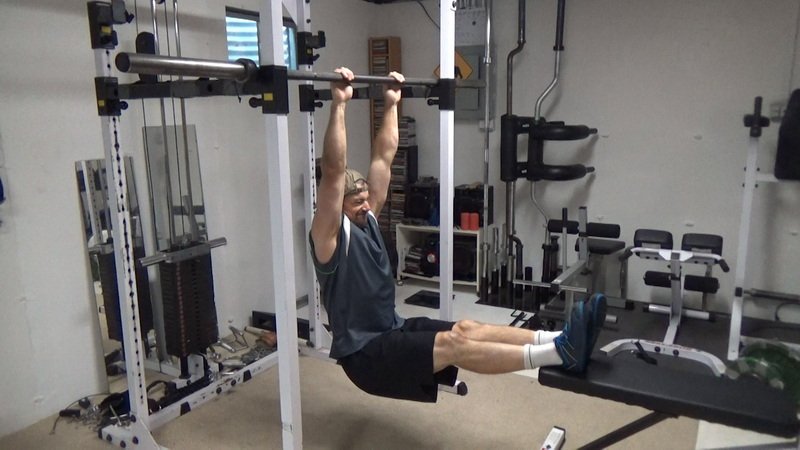
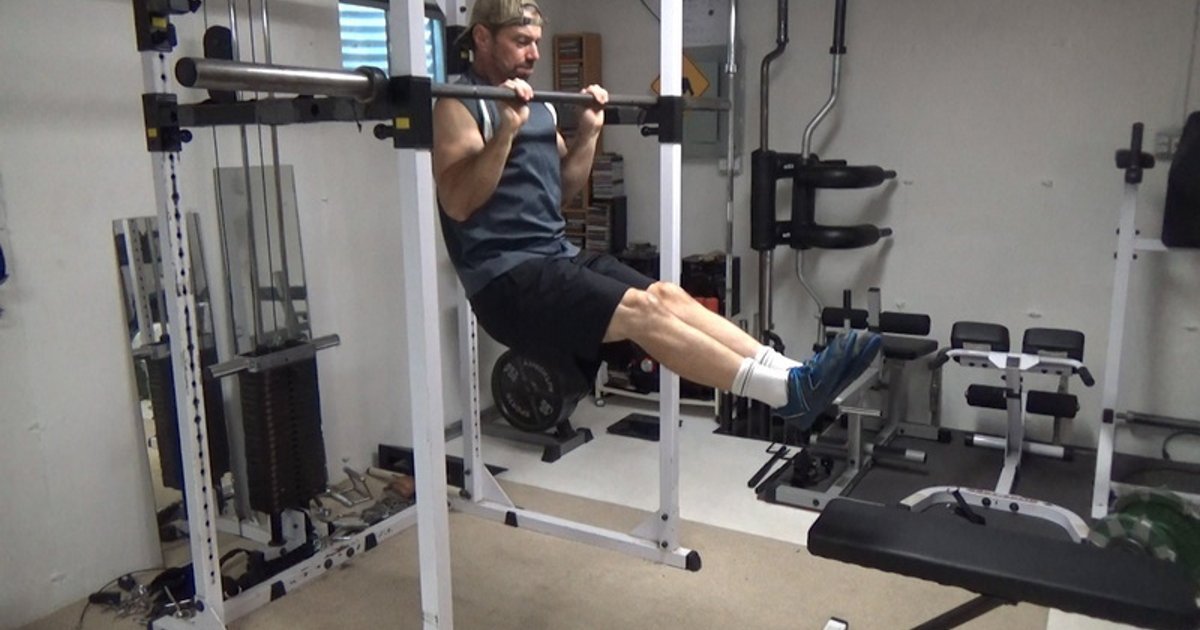
A rack chin-up usually starts with a fixed horizontal bar around the height you can reach while seated beneath it. Your heels rest on a sturdy bench positioned in front of the rack. Instead of hanging freely from a high pull-up bar, you pull the upper body toward the low bar while the legs take part of the load. As you lower, your torso can become more upright or reclined depending on the spacing. That is why two people doing something called a rack chin may actually have quite different resistance curves.
The common foot-supported chin version keeps the torso relatively upright through much of the pull, with the hips allowed to stay low. An elevated inverted row, by comparison, usually keeps the body closer to a straight plank and pulls the chest toward a lower bar. Those details matter more than the exercise label. Decide whether you want a supported chin-like pull or a horizontal row, then set your equipment and cues accordingly rather than switching mechanics mid-set.
Your lats help draw the upper arm toward the torso, while the elbow flexors and other upper-back muscles contribute. There is no reliable universal percentage of bodyweight being lifted here: foot contact, limb length, bench distance and even how hard you push through your heels change it. Track a repeatable station and clean range of motion instead of treating every rack chin rep as equivalent to a regular chin-up.
A useful first test is a motionless start with arms extended to a comfortable position, feet supported and no slipping. If you have to jerk the hips to reach the first rep, adjust the bar or bench before counting that set.
Set the rack, bar and heel support so nothing moves
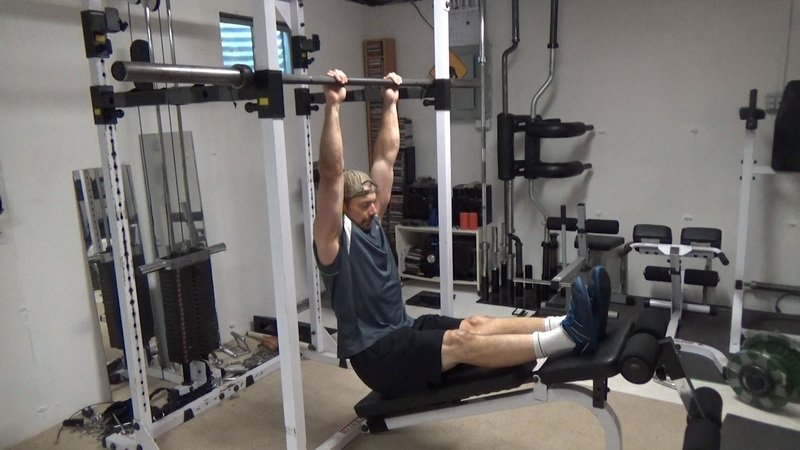
Start with a rack that can resist upward and forward forces without tipping. A stable Smith-machine bar may work when it is positively locked in place; a free barbell set casually on unsecured hooks may roll, lift out or shift if you pull at the wrong angle. Check the manufacturer’s configuration and pull gently on the bar from several directions before putting your body under it. If it moves or rotates unexpectedly, choose a different station. Do not substitute a doorway bar or lightweight freestanding furniture that is not rated for this use.
Put a stable bench where your heels can rest without sliding off the edge. A shallow incline can be comfortable for some lifters, but it is an option, not a rule. Keep the bench from sliding on the floor. Find the distance while unloaded: close enough to reach a controlled top position, far enough to straighten your arms comfortably near the bottom. The heel contact is a support point, not a springboard for kicking yourself to the bar.
Set the bar at a height that lets you start below it without hitting your hips, head or knees on rack hardware. Taller trainees may need more bench distance and clearance, while a short rack may limit the useful range. A shoulder-width underhand grip is a practical baseline; bars, wrist mobility and shoulder comfort vary. Wrap the thumbs and check that the bar cannot roll in the hands. Wear shoes that grip the bench rather than relying on socks against slippery upholstery.
Before the first working set, practice one unloaded descent and one small pull. Feel whether the shoulders can extend without painful pinching and whether your feet remain steady. If bench movement, loose J-hooks or a rocking rack interrupt that check, stop and fix the hardware. A correct station matters more than any cue you might use during the repetition.
An adjustable weight bench, stable rack and suitable bar or handles are the useful ingredients. Adding plates or a weight vest comes later, if ever; choosing a safe bar-and-bench geometry is the real first progression.

Equipment Worth Exploring
Explore equipment, accessories and gear from our carefully selected range.

Power Tower
Freestanding pull-up and dip station with adjustable handles for bodyweight training.


Foldable Wall Rack
Wall-mounted folding squat rack designed to save floor space between workouts.

Multi Pull Smith Rack MPHR-780
All-in-one rack with a Smith machine, functional trainer, lat pulldown and low row.

FID Bench MAX
Adjustable bench offering flat, incline, and decline positions + adjustable headrest.
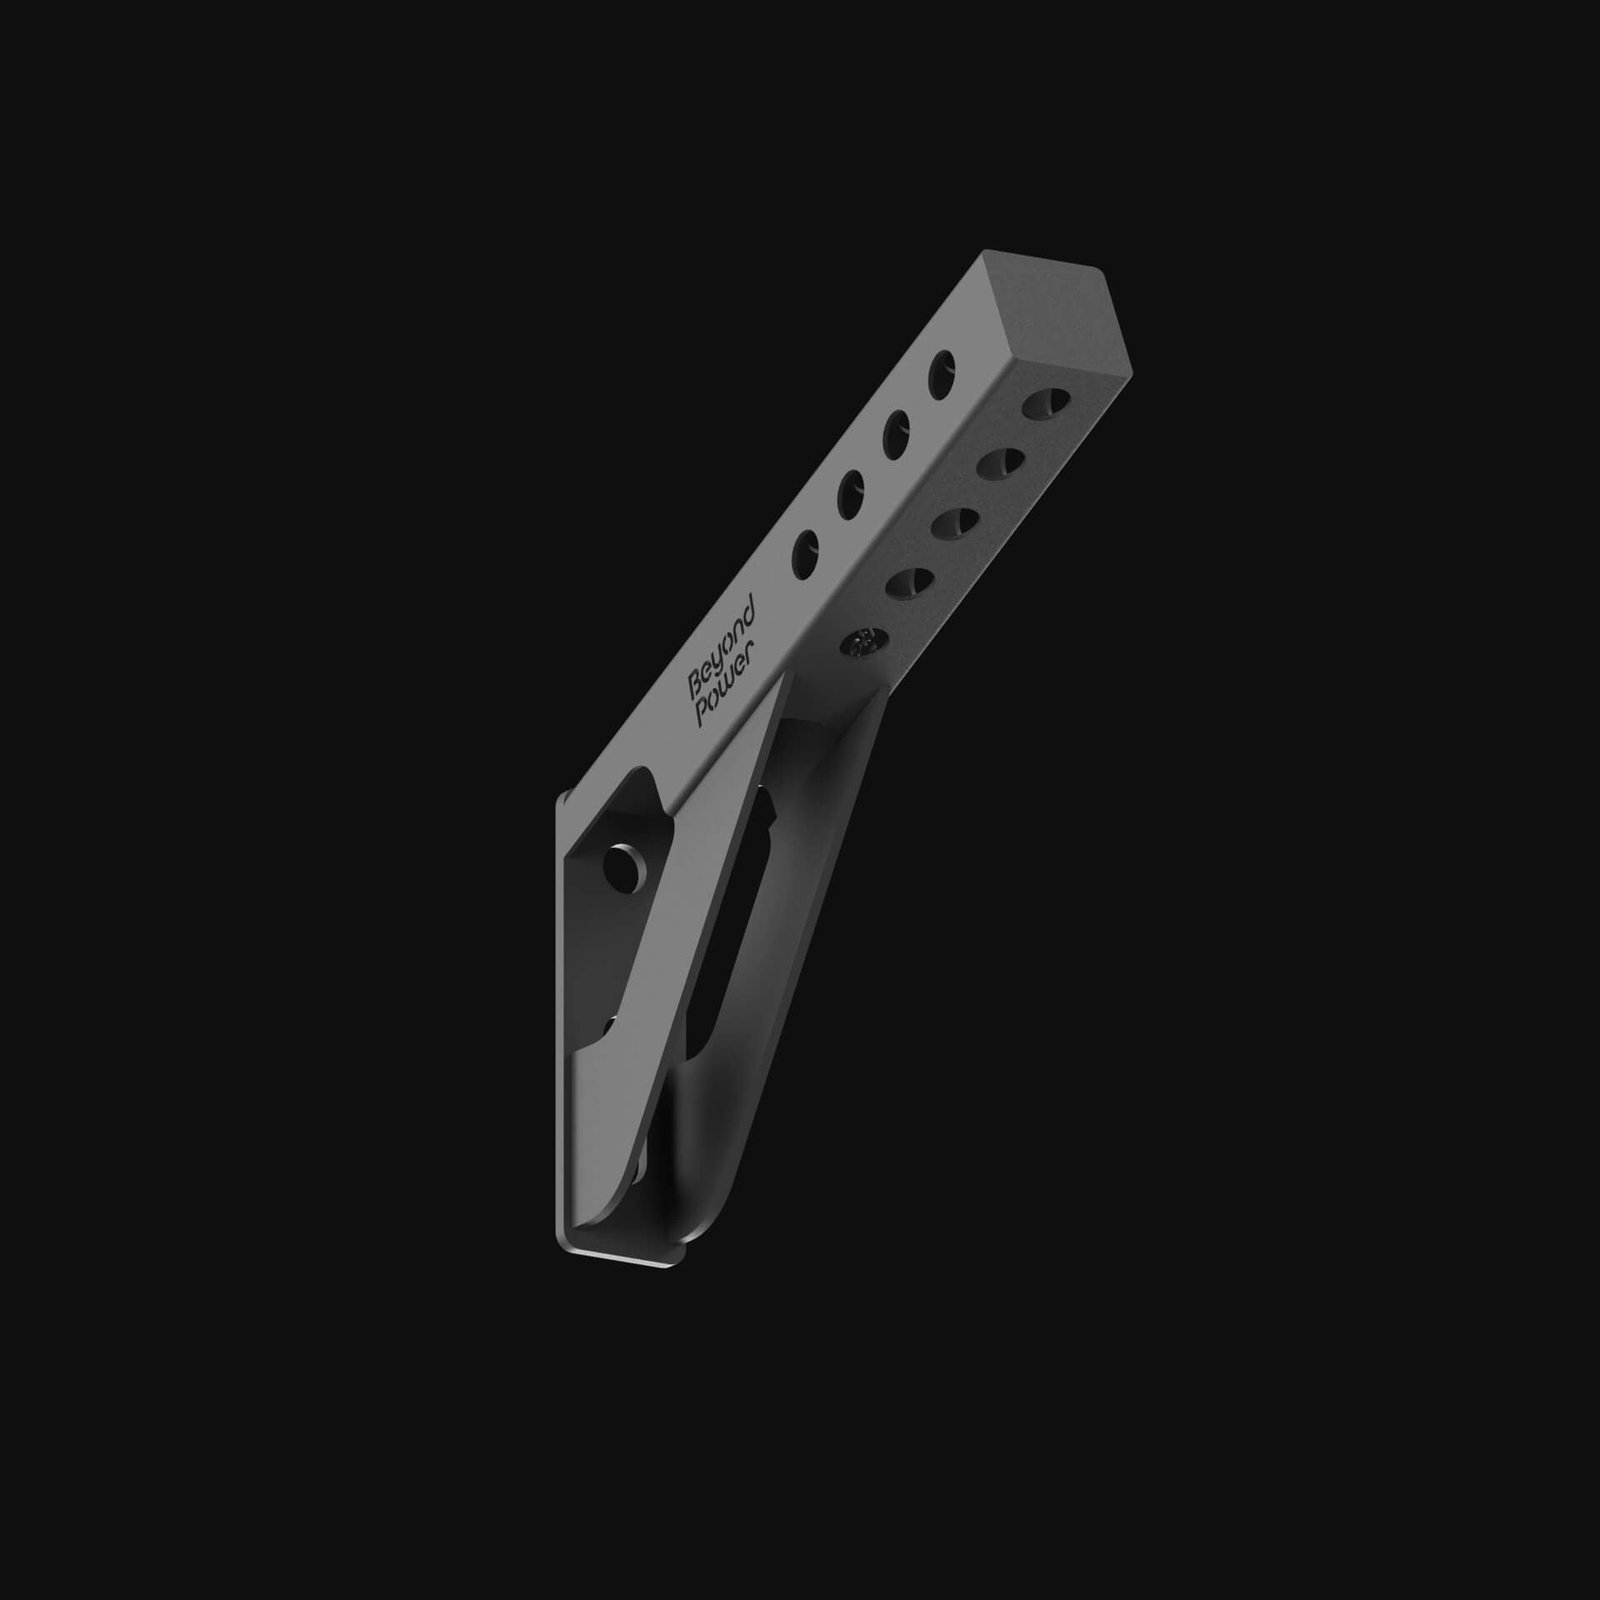

Ultimate Power Seat
Rack-mounted power seat for lat pulldowns, leg extensions, and leg curls.
Underhand grip and elbow path: pull the torso, not the chin
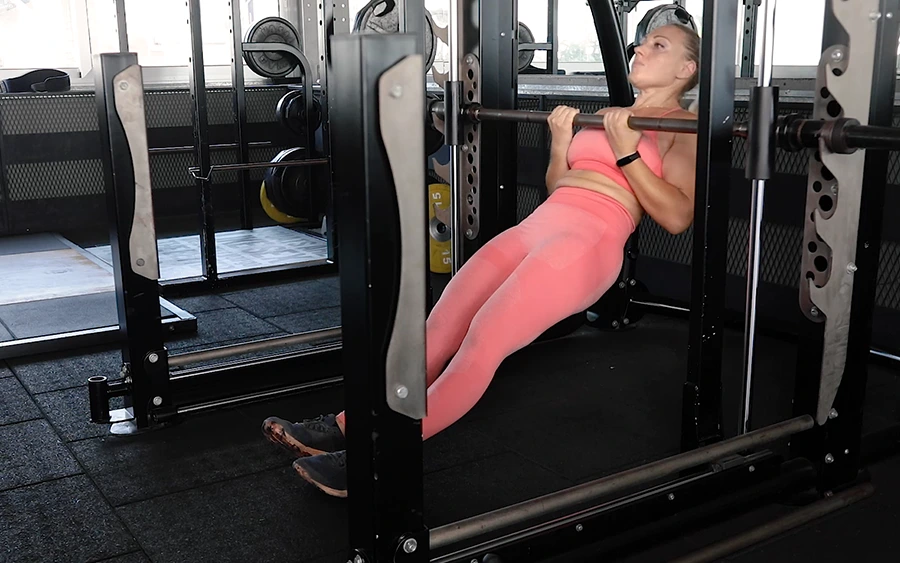
Use a shoulder-width or slightly narrower underhand grip as a starting point, then adjust for comfortable wrists. Keep the bar secure in the base of the fingers with a wrapped thumb, and try to keep the wrists reasonably aligned with the forearms. A deliberately very wide grip is not necessary for this exercise. If the underhand position aggravates an elbow or wrist, a compatible neutral-grip station can be an alternative, but check its secure attachment rather than improvising loose handles.
From the supported bottom position, brace gently through the trunk and initiate the pull by driving your elbows toward the ribs. Think about bringing your upper chest and torso toward the bar as one unit. Let the shoulder blades move naturally; do not force them to remain jammed down and together throughout the entire range. Avoid craning the neck until the chin meets the bar, because that turns a back exercise into a contest of head position.
At the top, stop where you can still control the trunk, elbow position and heel contact. You do not need to bang your chest against the bar. Lower through a controlled two- or three-second return without dropping into the shoulders. A brief reset at the bottom separates the reps and makes it easier to see whether your feet are giving additional push-off. Choose a rep range you can complete without changing the bench distance partway through.
One easy form audit is to film a set from the side. Watch the torso move toward the bar while the heels stay planted. If the knees suddenly extend, the hips leap upward first or the shoulders shrug toward the ears, the lower body is probably helping more than you intend. Make the angle easier or reduce the target reps rather than calling that extra motion a strength breakthrough.
Grip fatigue can become a limiter before the back is exhausted. That does not justify unsafe thumb placement or deliberately unstable attachments. Use a normal full grip, shorter sets or controlled assistance; a secure bar and repeatable movement are more valuable than an impressive-looking partial rep.

Calisthenics Shirts & Street Workout Gear
Calisthenics and bodyweight-training gear for pull-ups, dips, handstands and street-workout athletes.

Pull Up or Shut Up Crewneck Pullover Sweater for Calist T-Shirt
For laid-back days and bodybuilding humor: “Pull Up or Shut Up”.

Always Pull Yourself Up Hoodie
Make your off-duty look more fun with “Always Pull Yourself Up”.

Calisthenics Heartbeat Muscle Shirt Athletic Vest Human Tank Top
Bring “Calisthenics Heartbeat” humor to your next lifting session.


Calisthenics Evolution
Show some lifting attitude with a playful “Calisthenics Evolution” tee.


Big Dip Energy Decal for Water Bottles Laptops Dip Love Sticker
Give your everyday gear a playful “Big Dip Energy” twist.

Be Stronger Than Your Excuses – Motivational T-Shirt
Rep “Be Stronger Than Your Excuses” humor in and out of the gym.

Calisthenics Lovers & – Gains & Meme Vibes T-Shirt
Heavy lifts, good laughs, and a little “for Calisthenics Lovers & Lifters” energy.
Feet, hips and bar angle: measure difficulty without guessing
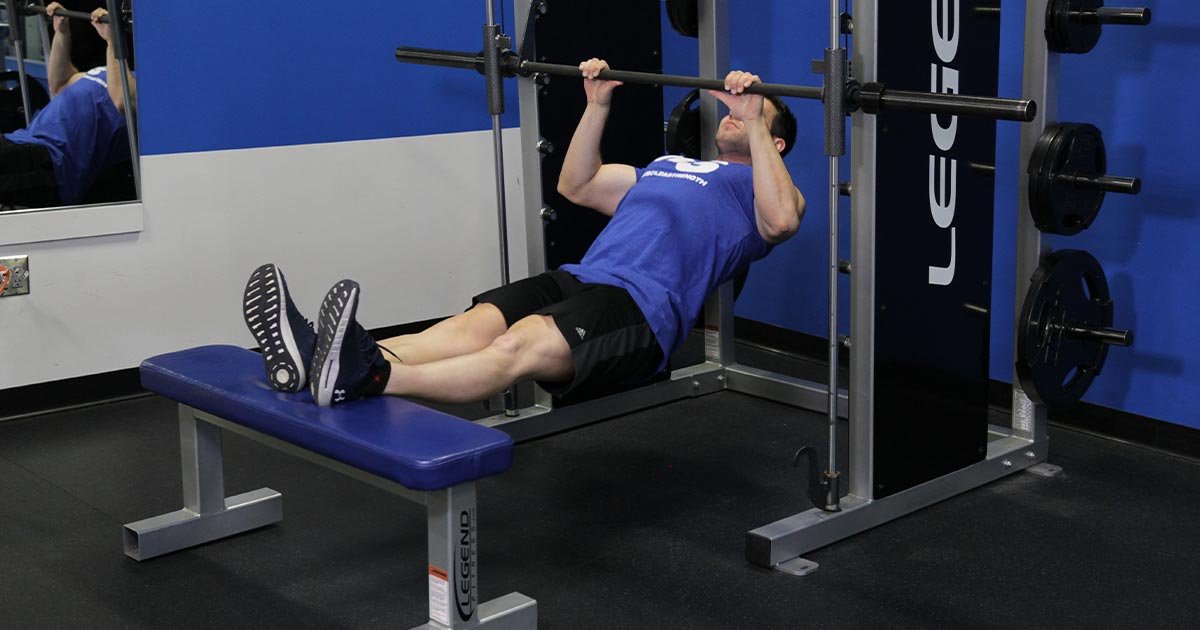
The rack chin-up does not have a numbered weight stack, so its resistance is easy to change without noticing. Moving the bench, changing knee bend or pushing harder through the feet can all alter the amount of bodyweight handled by your arms. A rep may feel dramatically easier simply because your shoes moved closer to the bar. Log the bar setting, bench distance, foot support and grip alongside sets and reps. Even a quick side-view photo can help you reproduce the station next week.
For a manageable starting position, let the heels give sufficient assistance that you can pause near the top and lower under control. Keep the torso angle that matches the variation you chose. To make the supported chin harder, reduce the useful leg assistance carefully rather than throwing the bench farther away or straightening the knees without checking your new clearance. If the setup changes the motion into a stiff-plank row, recognize it as a new variation and treat the workload separately.
Some lifters prefer the hips low for a chin-like line of pull; others naturally shift toward a row with shoulders, hips and knees more aligned. Neither automatically means more lat growth. Joint position changes which muscles and ranges work hardest, but an isolated feeling of stretch or pump is not proof one angle beats another for hypertrophy. Use the angle that produces comfortable, repeatable effort through a useful range.
Try a simple consistency rule: keep the same bench mark and bar position for a full training block, progress reps before leverage, and adjust only one variable at a time. If you cannot tell what became harder from your log, the progression is too complicated to interpret. More control over the exercise is a worthwhile result even before you can add load.
Rack chins, inverted rows and strict pull-ups solve different problems
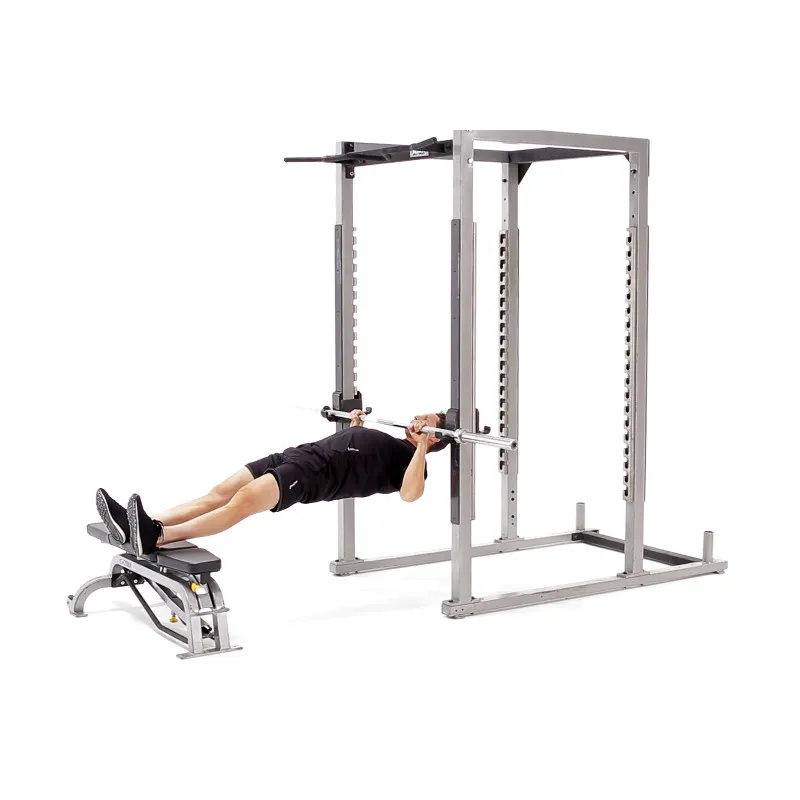
A conventional chin-up suspends your entire body from a high fixed bar, generally with an underhand grip. It develops unsupported vertical pulling and challenges your grip and trunk as part of the movement. Rack chins use the feet to share the work. That can let you focus on a comfortable elbow path and accumulate clean repetitions when unsupported chin-ups are currently limited. But success with the supported variation does not guarantee that you can immediately perform a full bodyweight chin-up.
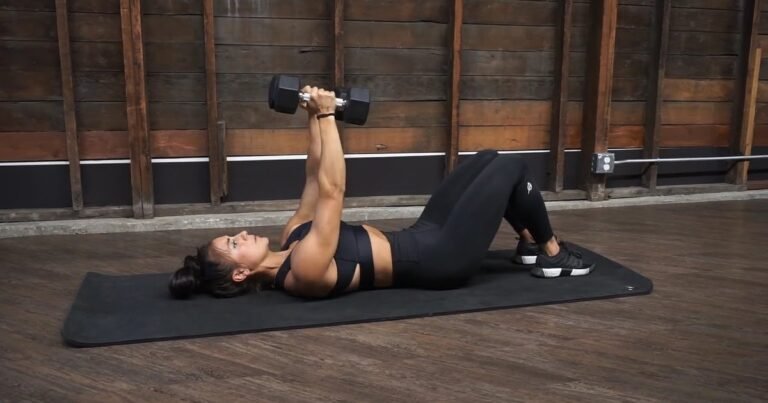
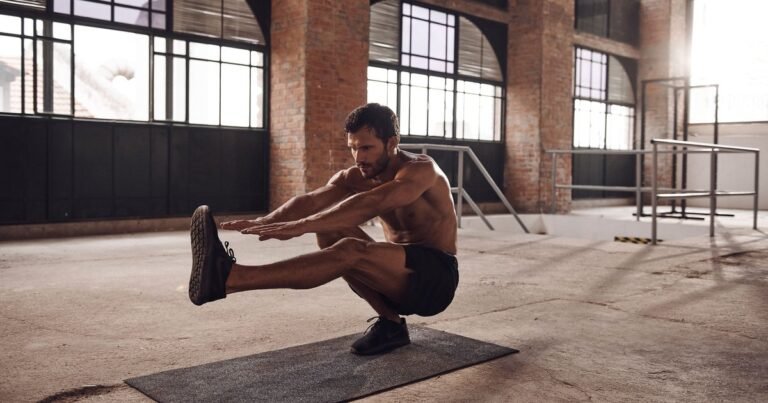
An inverted row uses a bar set low enough for the body to lean beneath it, usually with the torso and legs relatively straight. The pull is more horizontal, with the chest approaching the bar and the body staying rigid. Elevating the feet makes that row more demanding for many lifters. It is an excellent back accessory, but the direction of force, shoulder angle and body line differ from the more upright heel-assisted rack chin. The photos in this guide include these neighboring variations so their setups can be compared rather than mistaken for the same repetition.
A lat pulldown offers another option when a low bar station is awkward, particularly if your foot support will not stay secure. A pulldown can measure external load directly and permits a stable seated setup. A cable row makes the horizontal-pull role clearer. Neither is objectively superior for every back-training goal; the best choice depends on pain-free movement, the available station, how consistently you can progress and what your main lift already covers.
For an athlete targeting strict chin-up performance, preserve actual vertical pulling practice with a suitable band, machine or assisted repetition pattern alongside rack chins. For someone prioritizing back muscle training, a well-loaded rack chin, pulldown or row can all be useful tools. Keep the movement you can track and recover from, not just the one with the most dramatic name.
Equipment Worth Exploring
Explore equipment, accessories and gear from our carefully selected range.
VOLTRA
Compact digital cable trainer with smooth, adjustable resistance.

VForce Lat Tower
Wall-mounted cable tower with pivot arms and adjustable 1:1 or 2:1 pulley ratios.

Trinity Lat Machine LSW-850
Weight-stack pulldown tower offering three cable directions and adjustable seated support.

Leather Lifting Straps
Padded leather straps support grip during heavy rows, deadlifts and pulling exercises.

Lat Pulldown Set
Multi-grip cable attachment set for pulldowns, rows, and varied upper-body training.

48in Aluminum Lat Bar
48-inch aluminum lat pulldown bar with knurled grip and rotating center swivel.

VForce Lat Seat
Rack-mounted seat attachment for supported lat pulldowns and seated cable exercises.

GymPin Barbell Row Handle
Heavy-duty handle attachment for barbell, landmine and T-bar rows.

Linear Row LRX-750
Dual-sided rowing machine for supported rows, bent-over rows and varied pulling movements.

VForce 2IN1
Half rack and pivot-arm functional trainer with switchable 1:1 and 2:1 pulley ratios.
Six-week rack chin-up progression and the fixes that matter
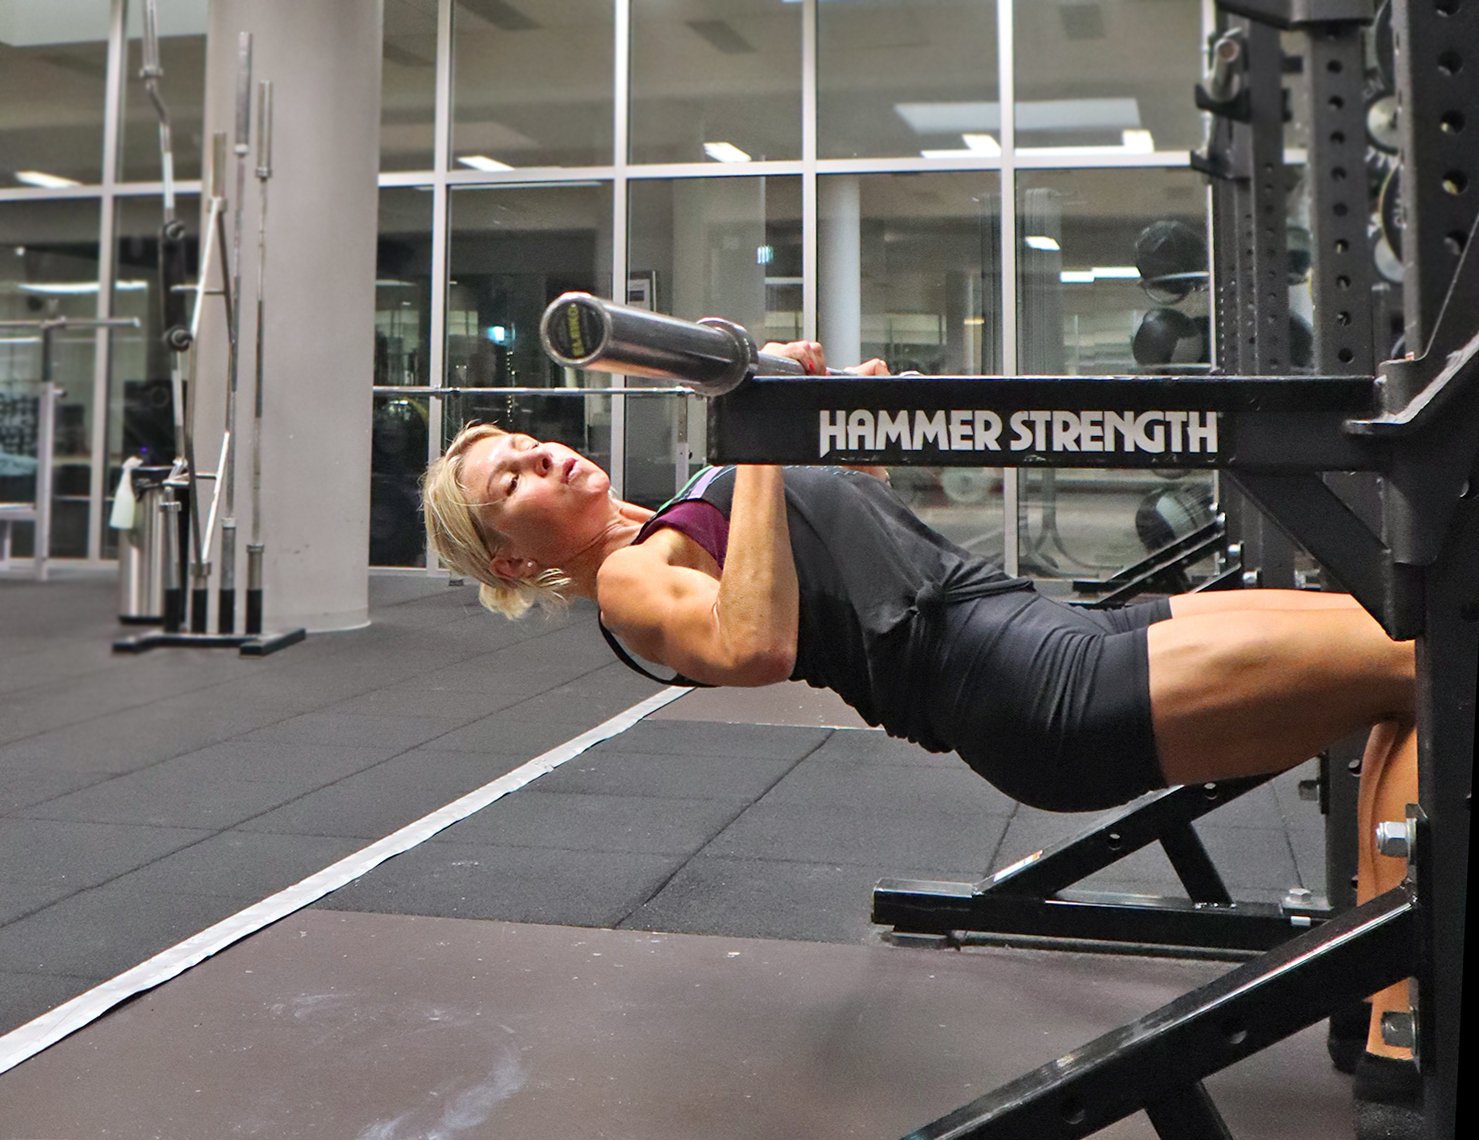
Use rack chins once or twice per week as one back exercise, not as a replacement for every other pull. Begin after a general warm-up and a lighter technique set. Choose a stable station and a rep target that leaves roughly two clean repetitions in reserve. Rest about 90 to 150 seconds between challenging working sets. These are practical starting choices, not measured requirements for every body or training level; increase rest when your grip or bracing has not recovered.
In weeks one and two, aim for two or three sets of six to eight deliberate reps using generous foot support and a consistent bar height. Write down the exact bench position. Concentrate on a smooth top and a controlled return, even if the total rep count is modest. If you cannot own the lowering portion, raise the bar or reduce the pulling angle until you can.
In weeks three and four, build toward three sets of eight to ten at the same setup. Add repetitions only when the chest movement and heel contact remain consistent. A trainee who turns every final rep into a hip thrust has not gained five useful reps; they have quietly changed the exercise. Keep one or two easier reps available for the next session instead of taking all sets to failure.
In weeks five and six, either maintain three sets of eight to twelve with better control or adjust one assistance variable to make three sets of six to eight harder. For example, reduce how much force you press through the heels without moving the bench. Do not introduce a vest until you have mastered the unweighted arrangement, verified equipment ratings and identified how you will exit the position safely.
When a set goes wrong, diagnose its first failure. Feet slipping means check bench surface and shoe contact. A rocking bar means stop and secure the station. Hips jumping first suggests too much effort or a poor torso angle. Elbows hurting with an underhand grip calls for a comfortable adjustment or different exercise, not a forced grip. Sharp pain, numbness or unusual dizziness are reasons to stop. A rack chin is successful when you can explain what changed and reproduce it, even if the progress came from steadier form rather than a bigger number.
Bodybuilding Shirts & Workout Gear
Bodybuilding shirts, tanks and gym gear for lifters chasing muscle, size, symmetry and the pump.


Big Biceps Theory Meme Sweater Bro Science T-Shirt
Add a playful “Big Biceps Theory” touch to your casual rotation.


Strong Back Bodybuilder Tee
Show some lifting attitude with a playful “Strong Back Bodybuilder” tee.

Wide Privilege – Wide Back Meme Jumper Crewneck Pullove T-Shirt
Bring “Wide Privilege” humor to your everyday gym style.

Shirt Pull Day – Back & Biceps Meme Top T-Shirt
Heavy lifts, good laughs, and a little “Pull Day Graphic” energy.

Unbreakable Gains Back Tee
Make gym days more fun with “Unbreakable Gains: Strong Back Greek God” style.

Gym Dost Thou Even Pull Medieval Knight Back Day Muscle Tank Top
Bring “Dost Thou Even Pull Medieval Knight Back” humor to your next lifting session.

Demon Back Big Back Bodybuilders & Meme Hoodie
Stay casual and show some lifting attitude with “Demon Back”.

Nice Traps Big Back – Halloween Horror Jigsaw Meme Vest Tank Top
Add some Halloween attitude to training with “Nice Traps Big Back”.