Advertising disclosure: This page includes affiliate product links that may earn us a commission, as well as products from our own store.
A Petersen step-up looks almost too small to matter: one foot on a low platform, a controlled knee bend, and a quiet rise back to standing. Yet that short range reveals whether you can manage one-sided quad loading without borrowing momentum from the other leg. The trick is understanding which version you are doing, what the heel is supposed to do, and when raising the step becomes counterproductive.
What a Petersen step-up is—and why two versions circulate
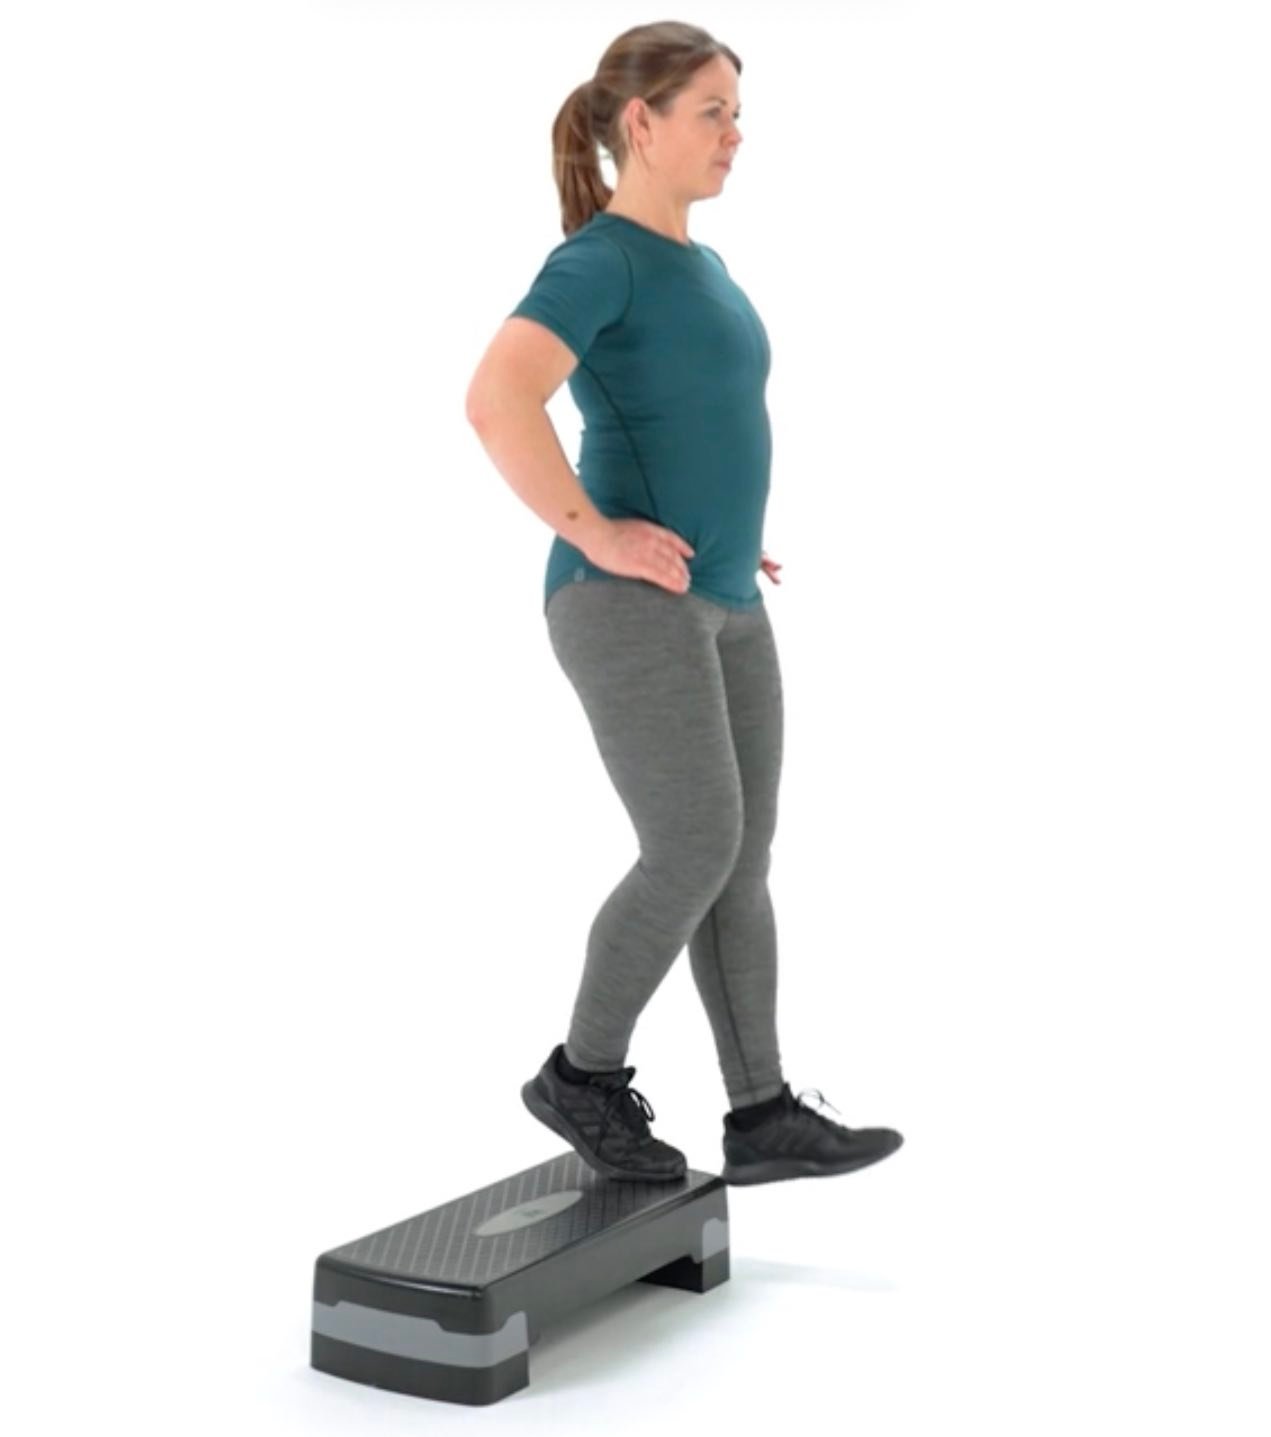
The original Petersen step-up has a specific history in skiing rehabilitation. Its early coaching version used a low step, a slightly backward and sideways orientation, and a deliberate transfer of weight onto the working leg. It was designed as a way to challenge lower-limb control after knee injuries, not as a magical replacement for heavy squats. In modern gyms, you will also see a more forward-facing variation called the Peterson step, Petersen step-down or heel-tap step-up. These variations overlap, but they do not always place the feet in identical positions.
In the original lateral approach, the athlete starts next to a low platform and moves backward at a modest diagonal while keeping the hip and knee controlled. In the common modern step-down, the athlete stands near the edge of a low step, holds the free leg forward, bends the working knee and lets the free heel approach the floor. The working heel frequently rises as the knee travels forward. Some coaches start with the free heel already touching the floor and call the drive upward a step-up; others start at the top and emphasize the descent. Both teach controlled one-leg loading, but the precise cues differ.
That distinction matters if you are following a tutorial. A flat-footed sideways step with the pelvis moving back is not mechanically identical to a forefoot-dominant forward heel tap. Neither version should be sold as the one universally correct definition. Choose one style, establish its starting position and film a few reps from the front and side before increasing difficulty. Consistency makes your progression measurable; constantly switching styles makes it hard to interpret an improving rep count.
Set the step height, foot position and balance support
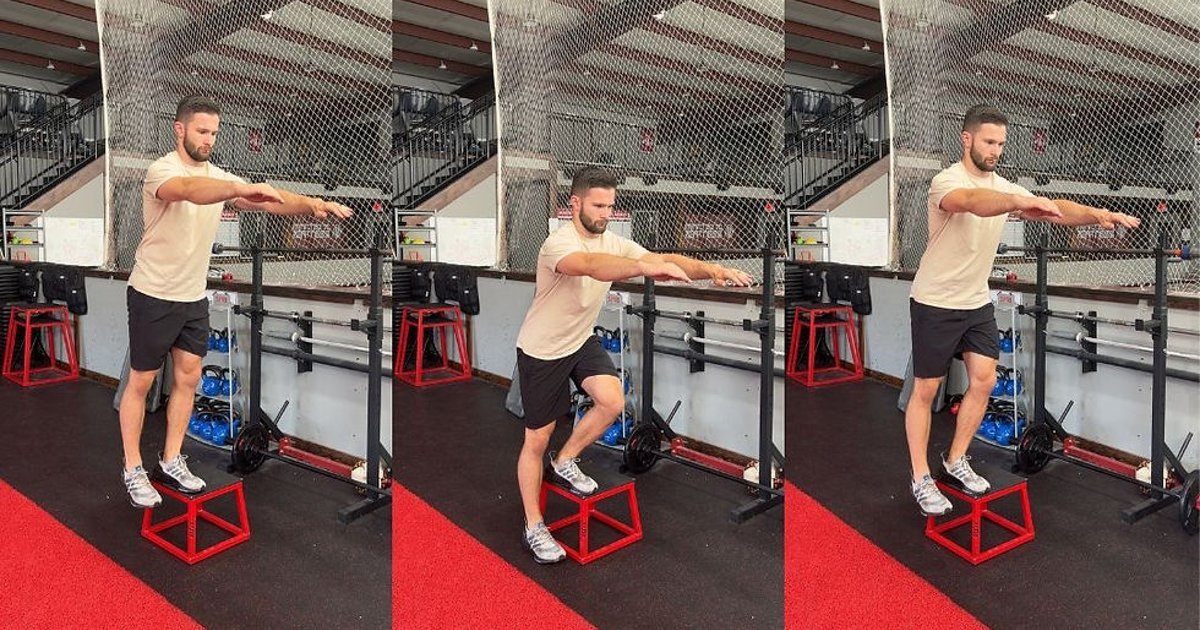
For the forward heel-tap version, start with a sturdy low step, often around 10–15 centimeters, rather than a full-height plyometric box. The surface must not slide or rock. Stand near one edge on the working leg, with enough forefoot on the platform to feel secure and enough clearance that the free foot can move without clipping the side. Keep the free leg reasonably straight and pull its toes upward. A light fingertip hold on a rack upright or rail is useful; balance should not be the limiting factor when your goal is clean knee extension control.
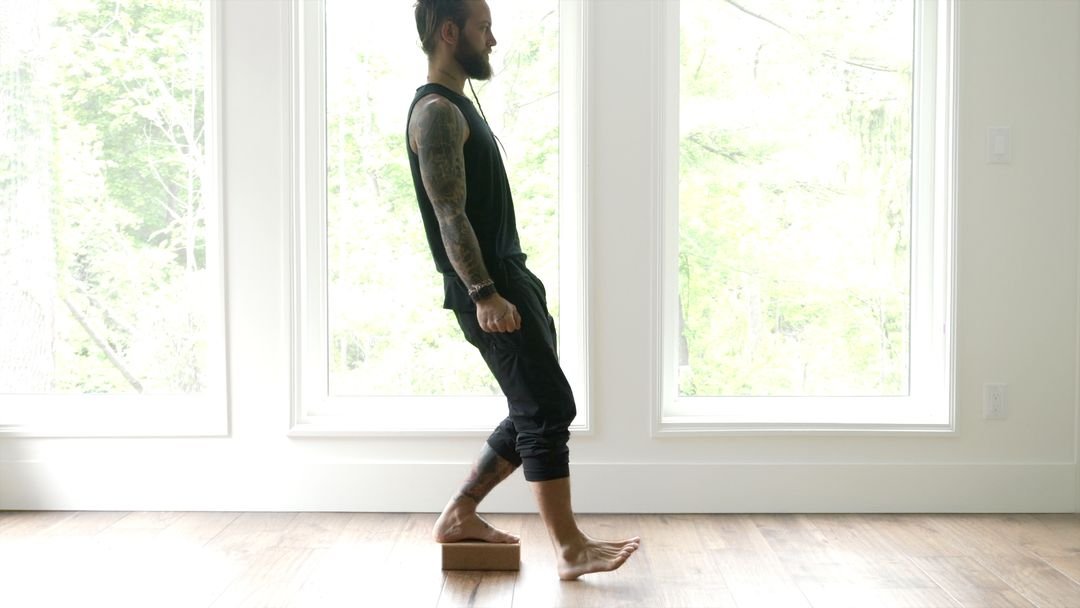
Slowly bend the working knee while letting it travel forward in roughly the same direction as the foot. Depending on the variation, the working heel may rise as weight moves toward the forefoot. A lifted heel is intentional in many forward Petersen step-down demonstrations, but it is not permission to roll onto the outside edge of your foot or twist the knee. Keep pressure balanced across the ball of the foot and maintain a stable pelvis. The free heel should barely kiss the floor; it should not take meaningful bodyweight.
In the sideways version, place the feet at the required offset for that variation and move the hips backward under control. Let your working leg do the rising, not the trailing foot. The goal of either setup is repeatable force through one leg. If your knee collapses inward, pelvis drops sharply, or you must bounce to return, lower the platform or add more hand support. A lower step with clean mechanics provides more useful information than a taller one with messy repetitions.
Do not confuse a squat wedge with the step itself. A slant board can change ankle and knee mechanics during other quad exercises, but the basic Petersen drill uses a stable step or low plate stack. If your ankles cannot tolerate the forefoot version, that is a reason to shorten the range or choose a flatter-footed variant—not to improvise an unstable stack of objects.

Leg Day Shirts & Workout Gear
Leg-day gym shirts and workout gear for lifters who never skip squats, lunges and lower-body punishment.

Swolebob Squatpants Gym | Funny SpongeBob Meme Workout Hoodie
Stay casual and show some leg-day attitude with “Swolebob Squatpants”.

Squat Here | Edgy Muscle Shirt | Gym Humor Meme Workout Tank Top
Show some personality between sets with “Squat Here”.

Leg Day Gains | LEGO Inspired Workout Decal for Water B Sticker
Bring “Leg Day Gains” attitude to your water bottle or laptop.

Squatbucks Gym | Funny Starbucks Parody Muscle Shirt | Tank Top
Train hard, laugh a little, and rep “Squatbucks”.

Funny Legday of Legends Gym | League of Legends Meme Mu Tank Top
Bring “Legday of Legends” humor to your next lifting session.

Legendary Leg Day – Squat Meme Vest Muscle Shirt For At Tank Top
Add some leg-day attitude to training with “Legendary Leg Day”.

I Love Squats Gym | Funny Valentine's Workout Pullover T-Shirt
For laid-back days and leg-day humor: “I Love Squats”.

Leg Day Thou Shalt Not Skip Leg Day Medieval Gym Crewne T-Shirt
Show some gym-day personality with “Leg Day”.

Leg Press Dost Thou Even Press Medieval Knight Gym Pull Hoodie
Show off your medieval humor in a laid-back “Leg Press” hoodie.

I Love Booty Meme – Valentine'S Day Peach Top & T-Shirt
Heavy lifts, good laughs, and a little “I Love Booty Gym Meme” energy.
Make every heel tap a controlled rep instead of a bounce
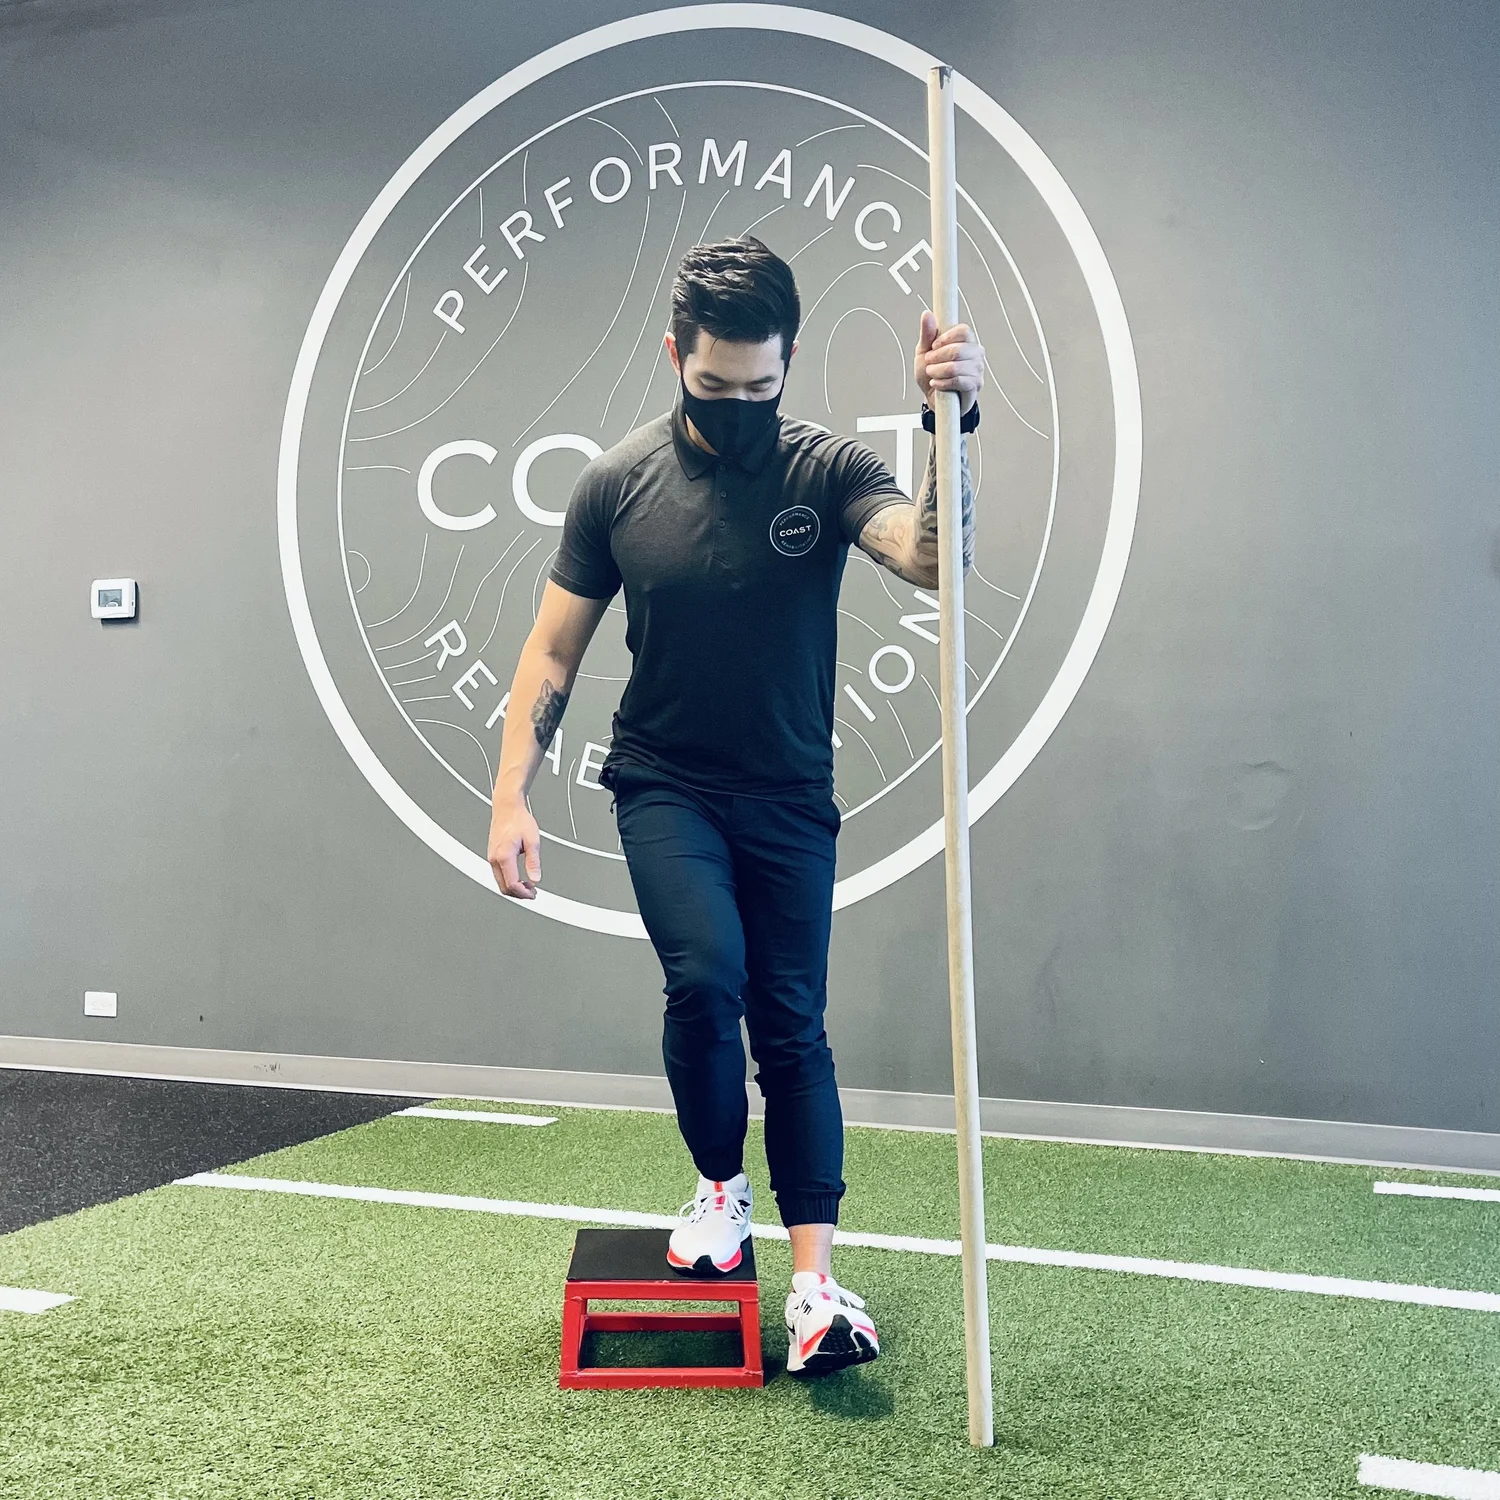
Start the repetition by bracing lightly and shifting your weight onto the working leg. Descend for about two or three seconds. The non-working knee stays relatively straight and the free toes stay drawn up so its heel can approach the floor. Touch lightly, pause just long enough to show you have reached the planned range, then straighten the supporting knee without driving off the ground foot. Bring the working heel down under control at the top if that belongs to your chosen version. Reset balance before repeating.
A wall or upright can help you feel which leg is doing the work. Use the support only to stay aligned; do not haul yourself upward with the arm. Try alternating a set with very light assistance and a set without it at the same height. If removing the assistance makes you twist, launch upward or miss the heel tap, the assisted set remains the better training stimulus for now. If you find you can complete twenty easy reps but cannot explain where pressure is under your foot, lower the speed before increasing the load.
The muscular work is shared. The quadriceps straighten the knee. The hip muscles contribute to keeping the pelvis steady, and the calf handles foot and ankle position, especially if the heel is raised. Calling the drill a ‘teardrop isolation’ move oversells what happens. The quadriceps have multiple portions, and a single step variation does not switch the others off. You can feel local effort near the inside of the knee without proving that one particular part is uniquely activated or growing faster.
Common errors are easy to spot on video: the free foot pushes off the floor, the supporting knee shoots inward, the torso twists, the pelvis tilts toward the unsupported side, or the descent turns into a drop. Address one error at a time. A heel tap that looks identical on rep one and rep ten is a better sign than a dramatic burn in a muscle you are trying to target.

Equipment Worth Exploring
Explore equipment, accessories and gear from our carefully selected range.

GymPin Squat Wedges
Non-slip 15-degree squat wedges help elevate the heels for deeper quad-focused squats.


HUSLA Leg Extension Pad
Pad attachment designed to increase usable range of motion on compatible leg-extension machines.


Leg Extension/Curl BCO-780
Leg extension and lying leg curl combo with plate loading, band pegs and a cable-loading option.

Seated Leg Combo BCO-680
Adjustable seated leg extension and leg curl machine with band pegs for added resistance.

Compact Leg Press CLP-700
Compact reverse-style leg press with a moving seat carriage and an adjustable footplate.

Leg Press/Hack Squat BPR-790
Convertible 45-degree leg press and hack squat machine with a broad footplate and band pegs.

Studio V-Squat
Plate-loaded V-squat machine for supported lower-body strength training.

Safety Squat Handles
Barbell squat handles that reduce shoulder positioning demands during high-bar squats.
What the exercise can—and cannot—prove about knee health
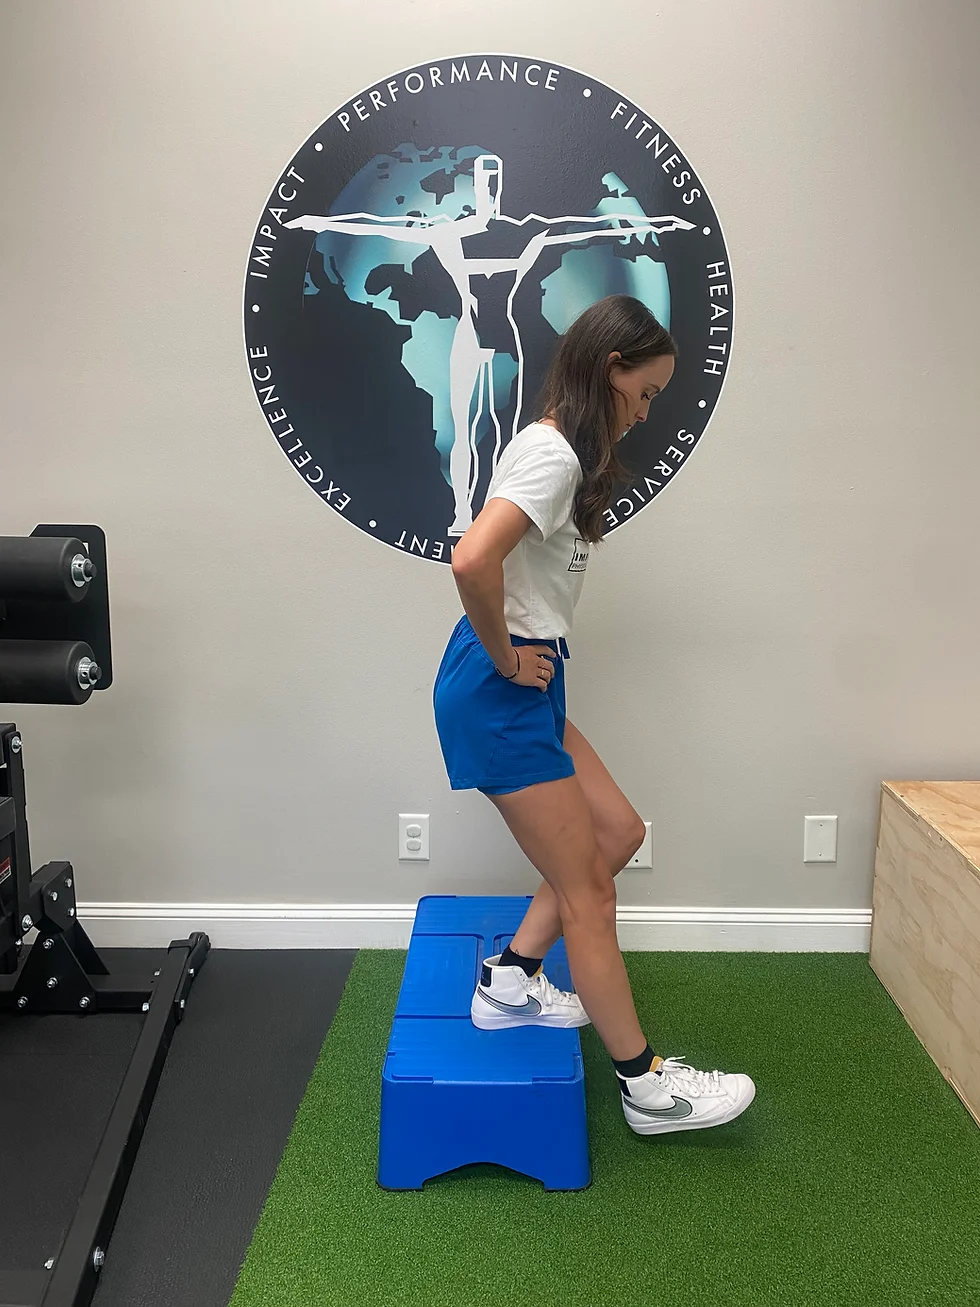
The Petersen step-up is useful as a knee-forward, single-leg strength and coordination exercise, but the evidence does not establish it as a stand-alone cure for patellofemoral pain or a special treatment for damaged cartilage. Knee pain involves many possible causes. Improving tolerance to an appropriately chosen movement is different from proving that the movement fixes a diagnosis. If an injury is acute, the knee is swollen, buckles, locks or repeatedly gives way, assessment comes before experimenting with progressive step height.
You may hear that the exercise selectively trains the vastus medialis oblique, often shortened to VMO, more than the outer quadriceps. That is a popular explanation, not a dependable promise. A review of electromyography studies found little support for reliably changing the relative activation of the inner and outer vastus muscles simply by adjusting limb position. EMG measurements also cannot substitute for long-term measurements of muscle growth, joint function or pain. Treat Petersen step-ups as a way to practice controlled knee extension under load, rather than as a precision switch for one sliver of muscle.
For people with anterior knee discomfort, the larger training picture often matters more than one exercise. Hip and knee strengthening, sensible load progression and symptom monitoring are commonly part of effective management plans. The step-up can be one component when its range is tolerated, but it does not need to displace squats, leg presses, split squats or other movements that suit your body. A professional may adjust the exercise based on symptoms, capacity and the exact condition.
Pay attention to the response both during training and on the following morning. Mild muscular effort is expected; sharp pain, significant swelling or worsening function is not a badge of productive training. If symptoms consistently rise after these sessions, reduce the step height, volume or range and reassess. Do not assume a bigger forward knee position automatically means a better training effect.
Choose equipment and progress without turning it into a balance test
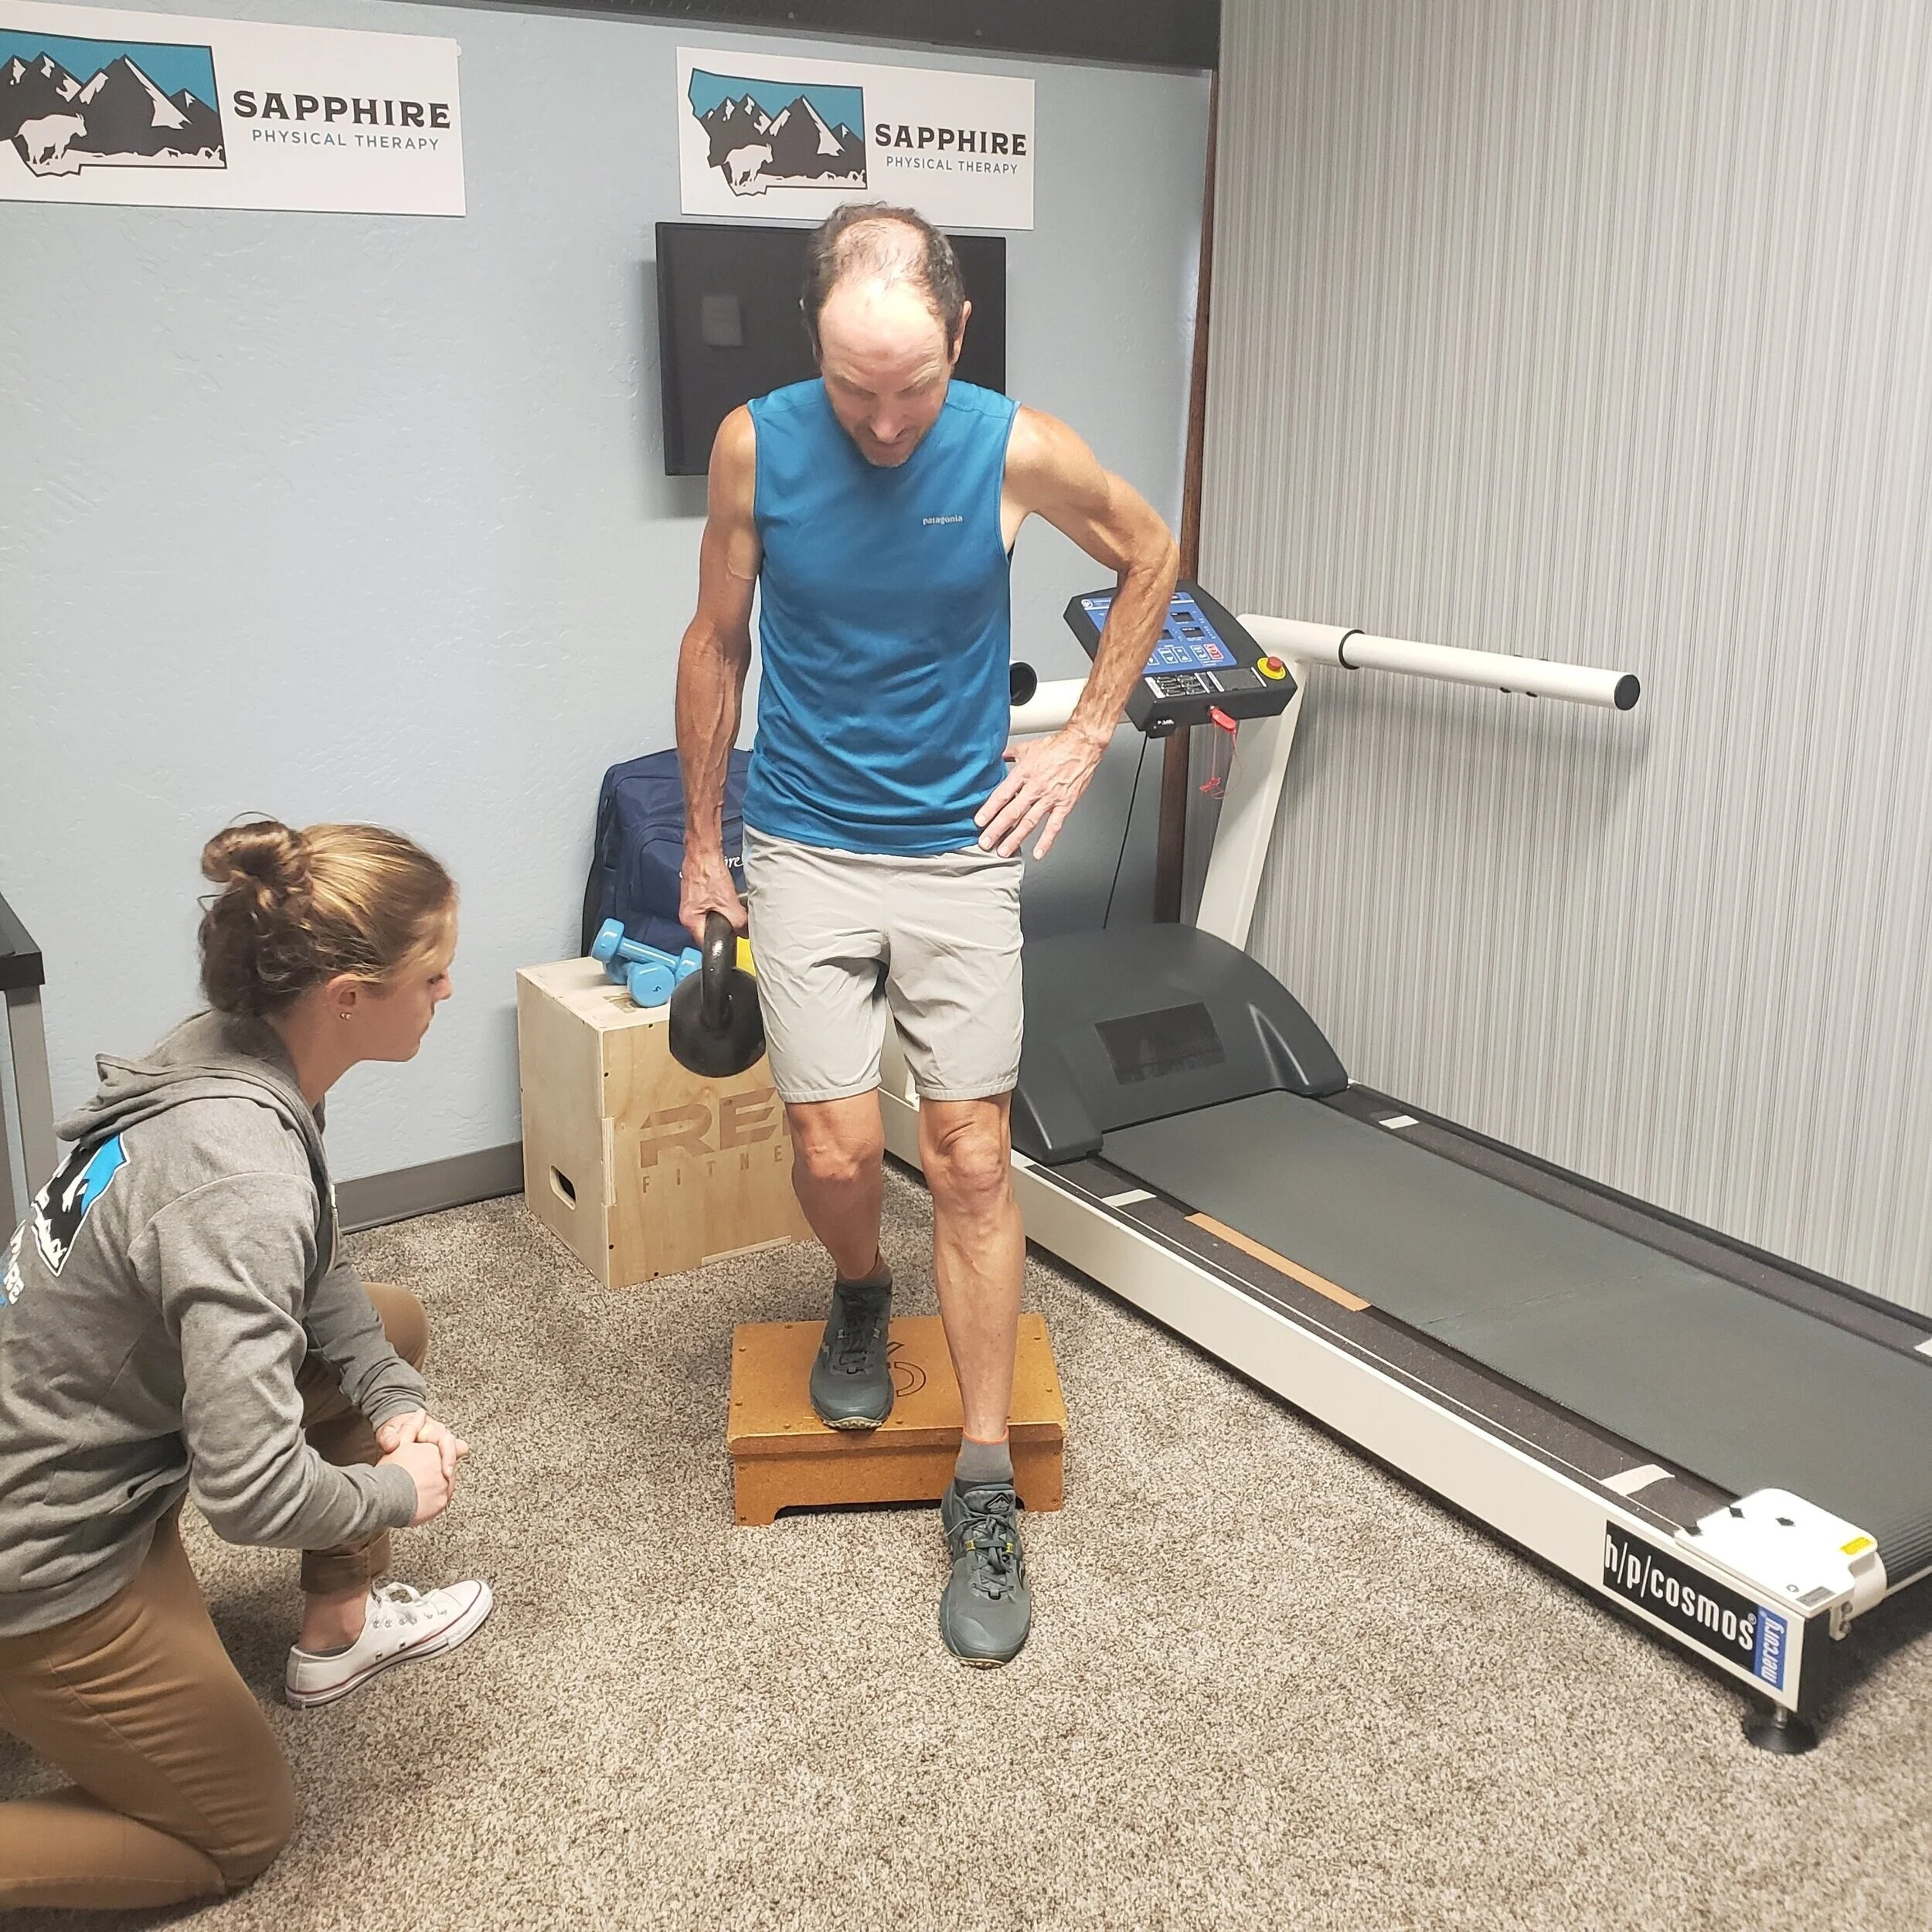
The minimal setup is surprisingly modest: a solid low step, grippy shoes, a safe place to hold for balance and enough space to move the free foot. A rack upright is valuable as a handhold, but there is no need to buy a dedicated heavy machine just for this drill. Loose weight plates can provide a platform only when securely arranged; unstable plate towers defeat the exercise. A low aerobic step or appropriately stable platform is usually simpler.
There are four sensible ways to progress, and they need not happen in a fixed order. First, reduce your dependence on hand support while keeping the same range. Second, improve descent tempo and make the floor touch quieter. Third, slightly raise the step if the working leg stays aligned. Finally, add a very light dumbbell or kettlebell only after the bodyweight rep is repeatable. A loaded step-down with twisted hips does not become better because the load is technically heavier.
Match the tool to the actual training phase. If you cannot control the heel tap, focus on support, step stability and low volume; an adjustable dumbbell is premature. If the basic pattern feels easy and consistent, a pair of light free weights gives a simple progression. For broader leg strength, equipment such as a leg-extension setup or squat machine can complement the drill, but those products train different movements and should not be mistaken for Petersen-step equipment.
Consider alternating a short set of Petersen repetitions with more conventional lower-body strength work rather than doubling up on several knee-dominant movements in the same warm-up. A compact bodyweight exercise can be useful without claiming it delivers the same overall stimulus as progressively overloaded squats. The purpose here is precise control and capacity in a particular range.
Equipment Worth Exploring
Explore equipment, accessories and gear from our carefully selected range.


Rubber Hex Dumbbells
Rubber-coated hex dumbbell pairs with a stable shape for home and commercial strength training.


Cast Iron Kettlebells
Textured cast-iron kettlebells for swings, squats, carries, and full-body training.


Foldable Wall Rack
Wall-mounted folding squat rack designed to save floor space between workouts.

A four-week knee-control plan for lifters
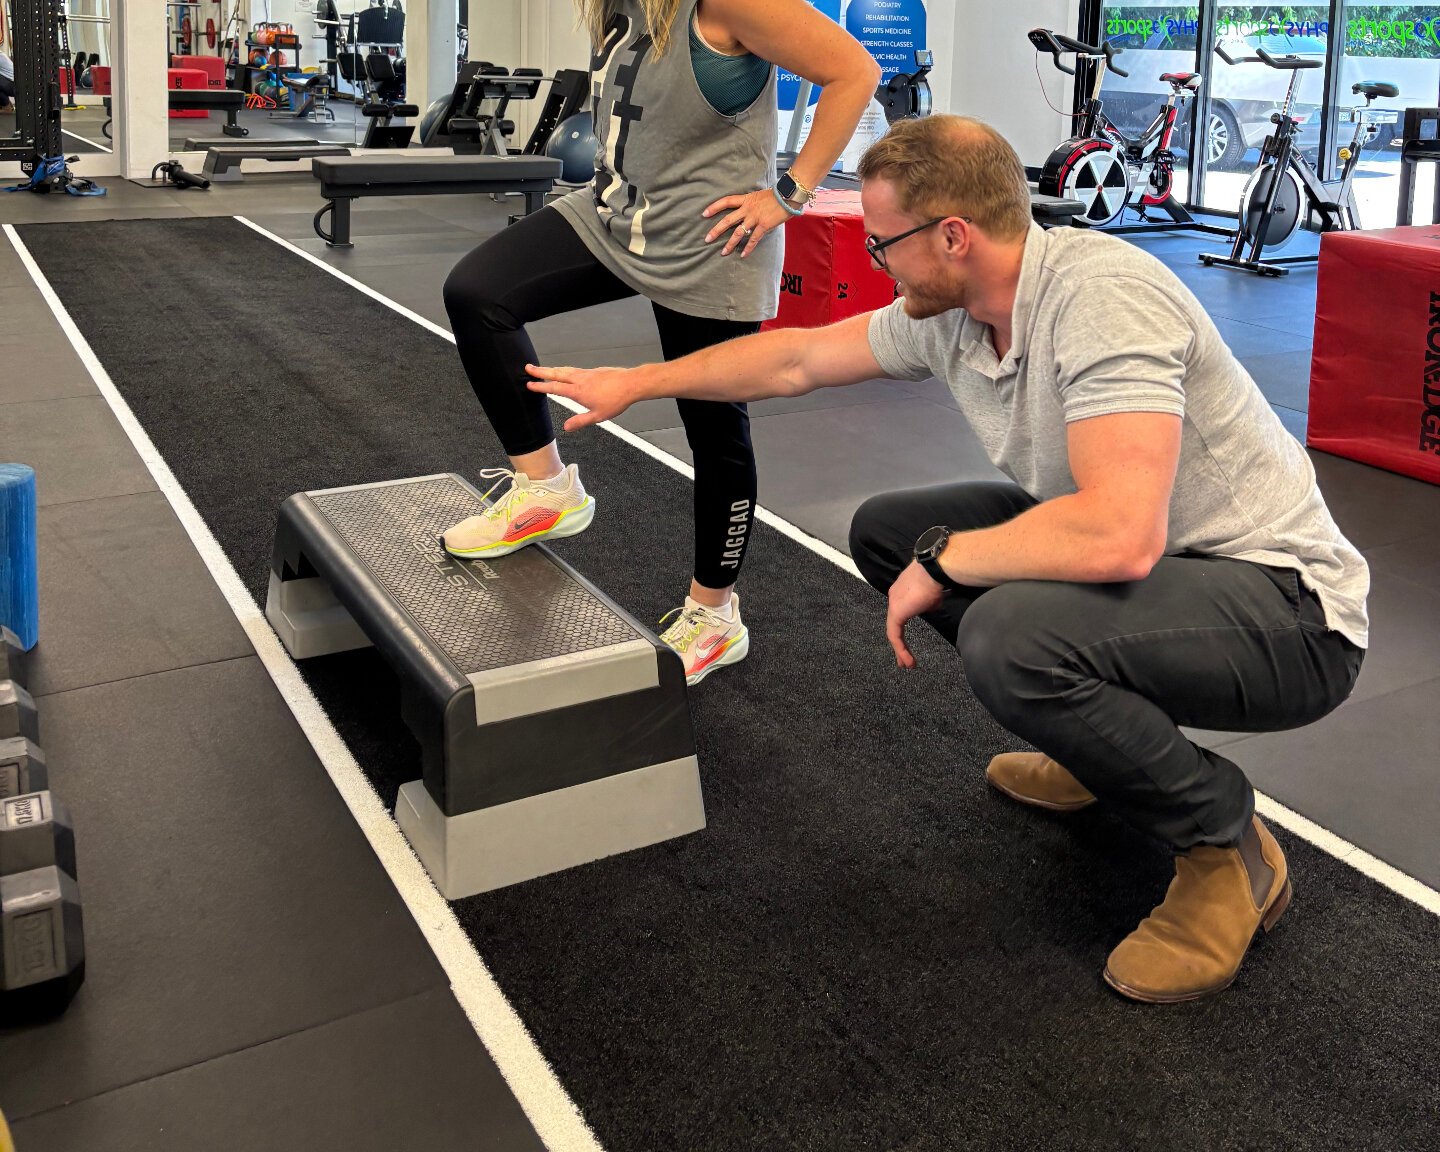
Week one: establish the pattern. Perform two sessions on nonconsecutive days after an easy warm-up. Use a very low step and optional light hand support for two sets of six to eight smooth repetitions per leg. Stop each set as soon as the free leg begins to push, your working knee wanders or the step becomes noisy. Keep the movement comfortable and note the height, degree of support and symptoms. Do not chase soreness.
Week two: make the descent repeatable. Keep the same setup and move toward two sets of eight to ten controlled repetitions per side. Experiment with a two- or three-second descent, maintaining a light floor touch. Check video at the start and end of a set. If the final repetitions look noticeably less stable, maintain your current count until quality improves. Having both sides complete the same target is useful, but it does not mean you should force an identical joint angle when mobility differs.
Week three: earn a small progression. Choose just one variable to change: use a little less hand support, add a couple of reps, or raise the step slightly. Do not raise the height and add dumbbells in the same session. For a lifter who already has pain-free control, three sets of eight per side can be reasonable. For someone returning from irritation, a smaller range and fewer total reps may still be more appropriate. The session after the session is part of the feedback: compare next-day comfort with your normal baseline.
Week four: choose your next role for the movement. If the heel taps are quiet, the working foot stays secure and you remain comfortable the next day, keep it as a warm-up or accessory for one to three sets of eight to twelve per leg. If a higher step is still shaky, stay low and own it. You can later add a small load in one or both hands without making the movement a maximal-strength test. Track quality, height, support and load; don’t measure success only by soreness or how far the knee travels.
The stopping rules are simple: do not use the trailing leg to push, do not sacrifice balance to display a bigger range, and do not train through sharp joint pain or unexpected swelling. Keep squats, hinges and your usual leg-training priorities in the broader plan. Petersen step-ups are most valuable when they fill a real gap in controlled one-leg work, not when a clever exercise name makes them sound like an entire knee program.
Powerlifting Shirts & Lifting Gear
Powerlifting shirts and gym gear for squat, bench and deadlift lifters who live for heavy numbers.

Squatzilla Meme Leg Day & Squat Fans Hooded Hoodie
Show off your leg-day humor in a laid-back “Squatzilla” hoodie.

Quadzilla Massive Quads Decal Leg Day Squat Meme Sticker
Stick a little “Quadzilla” humor on your favorite gear.

Never Skip Leg Day Chicken Legs Meme Sweater & Bros T-Shirt
Show some gym-day personality with “Never Skip Leg Day”.

Leg Day Is Calling You Decal Water Bottles & Sticker
Bring “Leg Day Is Calling You” attitude to your water bottle or laptop.


I'M Still Gonna Squat You Monster Gingerbread Meme – Sticker
Give your everyday gear a playful “I'm Still Gonna Squat You Monster” twist.

Squat Game Gym | Funny Squid Game Parody Workout For Le Hoodie
Stay casual and show some gaming attitude with “Squat Game”.

Anti Leg Day Leg Day Club & Meme Fans Hoodie
Show off your leg-day humor in a laid-back “Anti Leg Day Leg Day Club” hoodie.


Don'T Fart Squats & Leg Day Memes Athletic Shirt Tank Top
Bring “Don't Fart Squats” humor to your next lifting session.