Advertising disclosure: This page includes affiliate product links that may earn us a commission, as well as products from our own store.
A pec deck is one of the easiest ways to isolate chest work—until the seat is too low, the starting angle pulls your shoulders too far back, or every rep becomes an awkward press. This guide explains how the machine trains your chest, how to set it up for your body, what to do about uncomfortable shoulders, and how to make steady progress for six weeks without needing a bigger stack number every workout.
What the pec deck chest fly trains—and what it cannot isolate
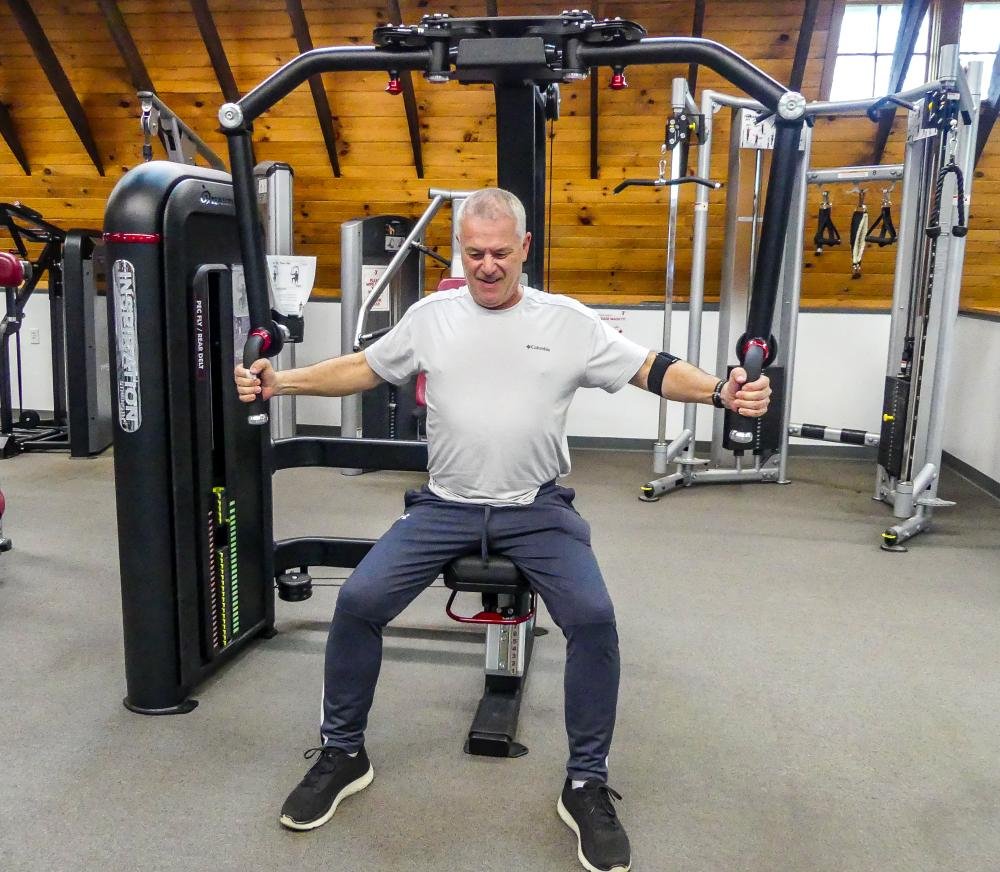
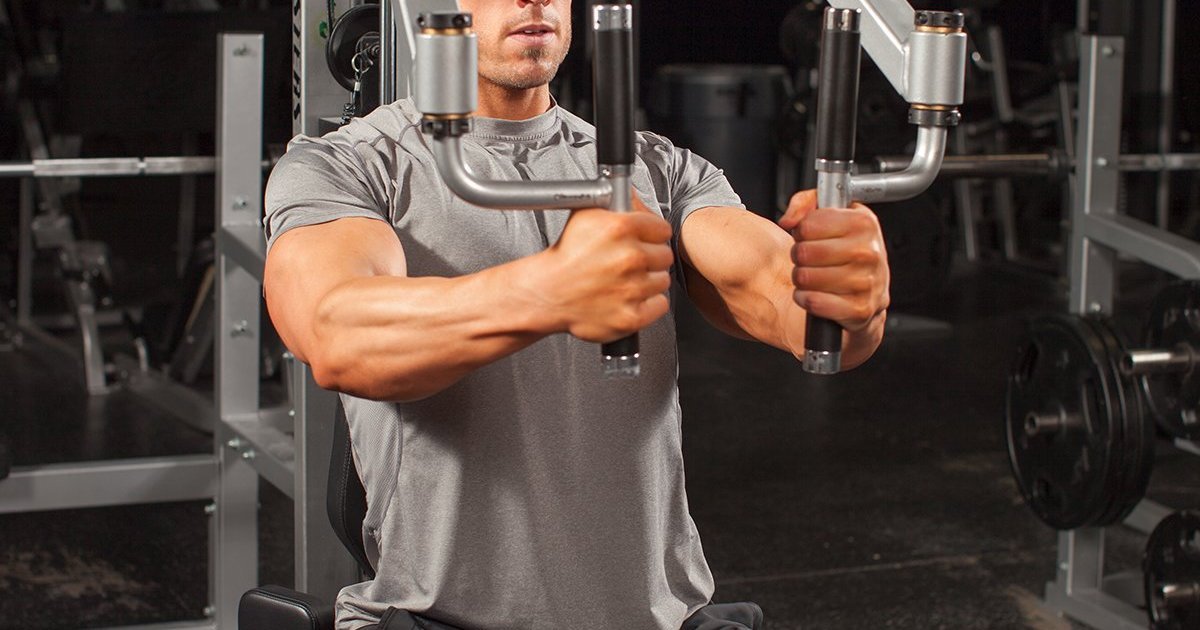
For most lifters, a pec deck chest fly is a repeatable way to work the pectoralis major without having to control a pair of free weights. Your chest moves the upper arms across the front of the torso while the backrest stabilizes your position. That sounds simple, but the setup changes whether your chest does the work comfortably or the front of your shoulder takes an unpleasant share of the load. The machine is a useful option, not an automatic requirement for chest growth.
The pectoralis major has several regions of fibers running from the breastbone and collarbone to the upper arm. A fly brings the arms together across the body, but it does not isolate an imaginary separate inner chest muscle. Squeezing the handles together harder cannot magically select only the inner edge. You can alter the movement’s feel by changing the starting angle and machine style, yet the larger question is whether you can move through a comfortable arc with enough challenging repetitions.
A classic forearm-pad pec deck uses bent elbows that press into pads. Another common version has handles, a small elbow bend and a longer arm lever. Both work the chest, though each feels a little different. Front deltoids contribute and the shoulder-blade muscles provide a stable base. Machine geometry and fit matter more than any claim that one style always delivers better long-term hypertrophy.
When you use the machine well, the chest should feel challenged and the shoulders should remain comfortable. A manageable muscular stretch is not the same as sharp joint pain. Treat chest flies as one component of a balanced program that may also include horizontal pressing, incline pressing and other upper-body work.
Adjust seat height, start lever and grip before loading up
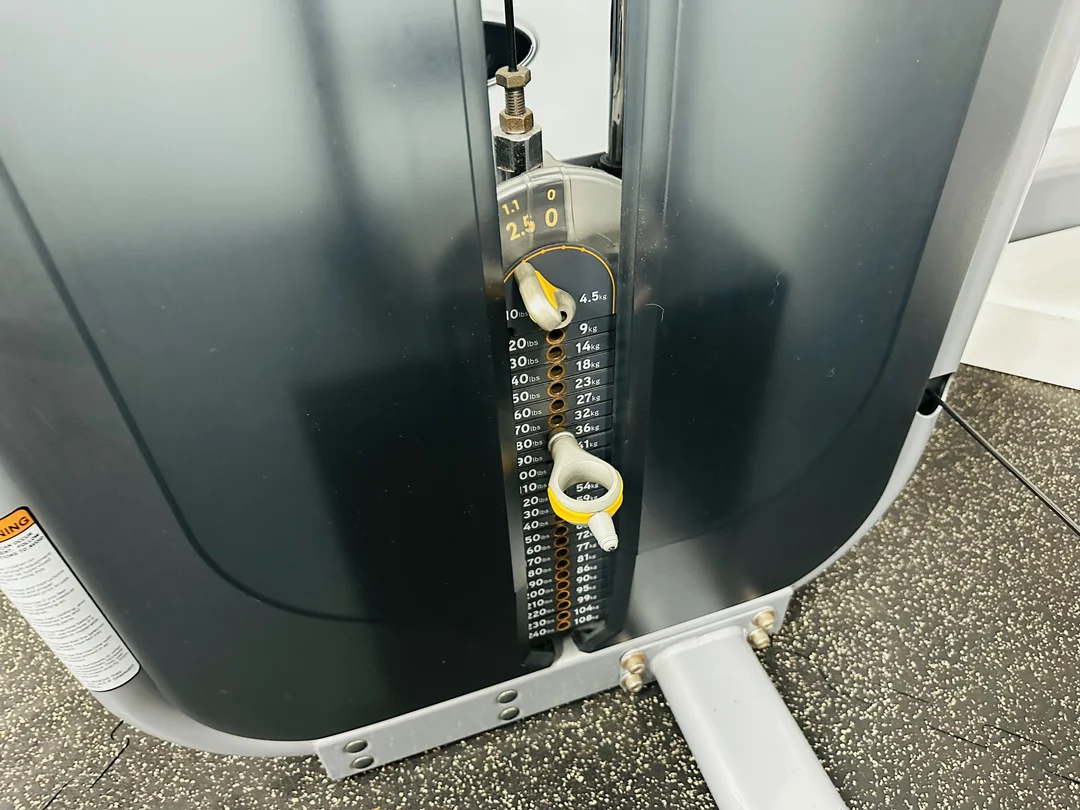
Set the seat before you chase a weight-stack number. When it is too low, the handles or pads may force your elbows above shoulder height, which can create an awkward path for some shoulders. Sit with your upper back fully against the support and your feet on the floor. On most handle-style machines, start with elbows near or slightly below shoulder level and a small elbow bend. Pad-style designs often require a much larger bend so the upper arms and forearms contact the correct surfaces.
Next find the start-range adjustment, sometimes a lever with numbered notches beside the arms. Begin with a conservative position. The handles should open to a mild, controllable chest stretch, not as far behind your body as the machine will physically go. Keeping the shoulders and upper back against the backrest is a useful way to judge whether the opening angle is appropriate. If you have to arch dramatically or roll forward to reach the handles, move the start setting forward.
Choose the lightest useful stack pin for the first trial. Many machines include a small selector pin, extra fractional weight or adjustable arm positions. Check that each side is set symmetrically when the design requires it. Do not confuse a large printed weight-stack number with a measure of real strength across different brands. Cable leverage and cam geometry change the resistance you experience.
After five comfortable test repetitions, note your seat position, start-notch setting, weight pin and grip type. That short setup record lets you compare the next session fairly rather than guessing why the same stack feels heavier on a different day. Machine adjustments are not a nuisance; they are part of making progression measurable.

Equipment Worth Exploring
Explore equipment, accessories and gear from our carefully selected range.

Pec Fly/Rear Delt PEC-650
Combination machine with adjustable movement limits for chest fly and rear-delt exercises.

Standing Chest Press SCP-760
Standing chest-press machine with adjustable handle positions for chest and close-grip pressing.

Lever Arm Multi Press LMP-650
Multi-press with independent lever arms and an integrated adjustable bench for upper-body training.
VOLTRA
Compact digital cable trainer with smooth, adjustable resistance.

VForce 2IN1
Half rack and pivot-arm functional trainer with switchable 1:1 and 2:1 pulley ratios.

VForce 3IN1 Max
Six-post all-in-one rack with Smith machine, functional trainer, and variable-force cables.

Go-Tone Pro
Portable digital cable trainer with up to 66 lb (30 kg) of adjustable resistance.

VForce Lat Tower
Wall-mounted cable tower with pivot arms and adjustable 1:1 or 2:1 pulley ratios.
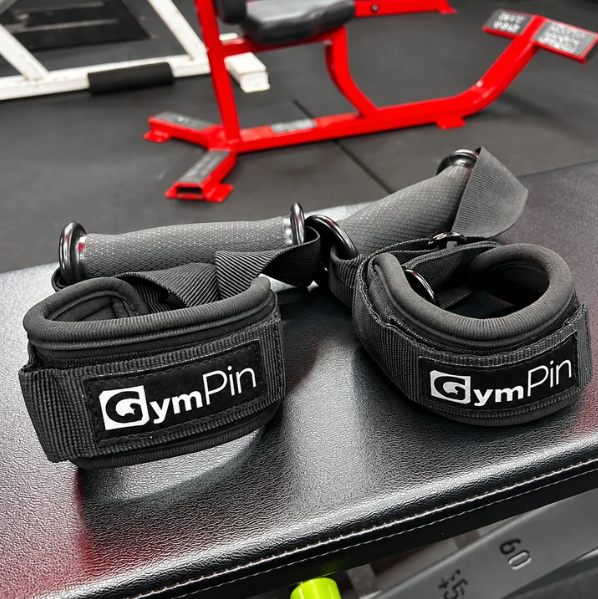
GymPin D Cuffs
Adjustable wrist cuffs with textured grips for supported cable-machine exercises.

GymPin Ergo Handles
Pair of ergonomic cable handles shaped for comfortable triceps and pulling exercises.
Perform a controlled pec fly in five deliberate steps
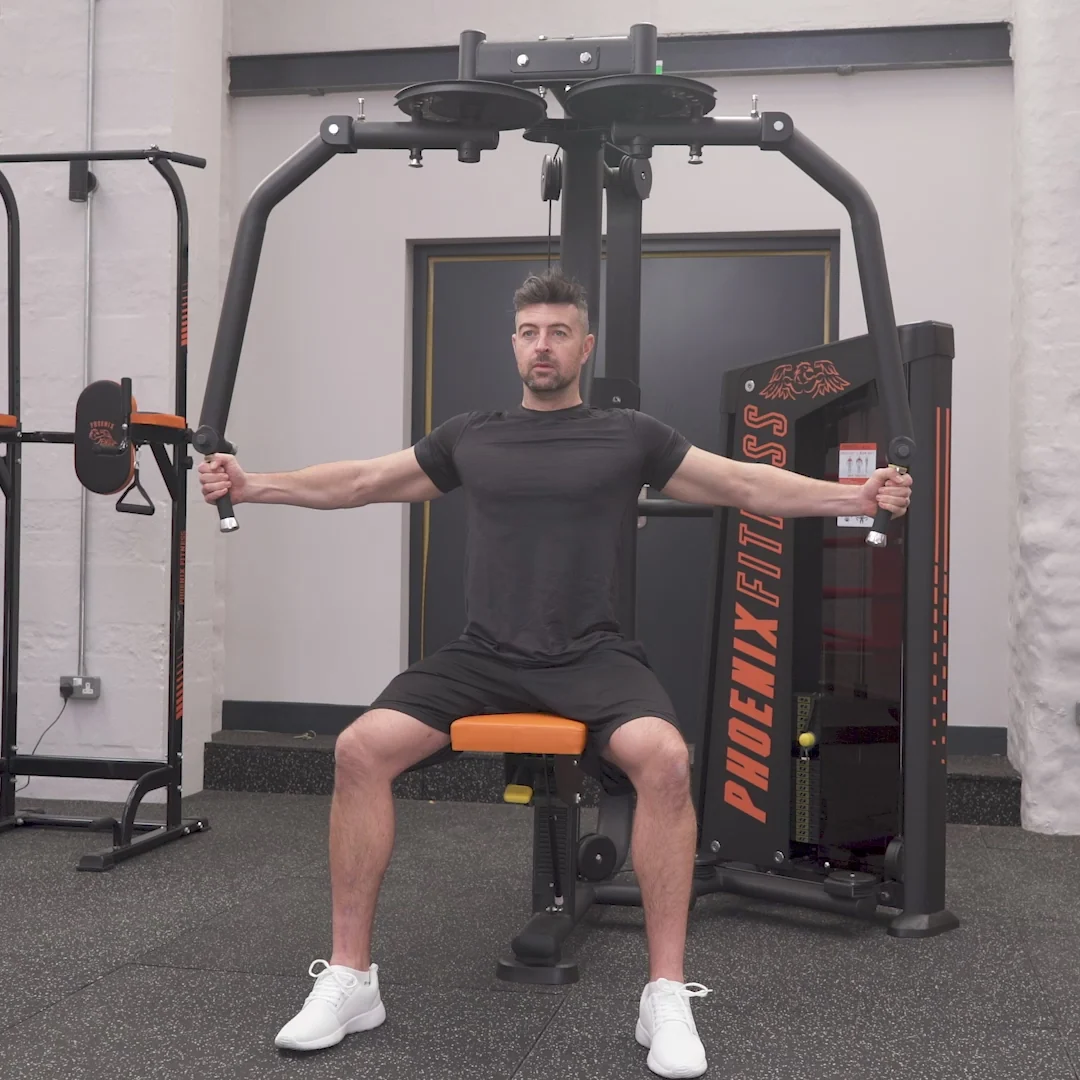
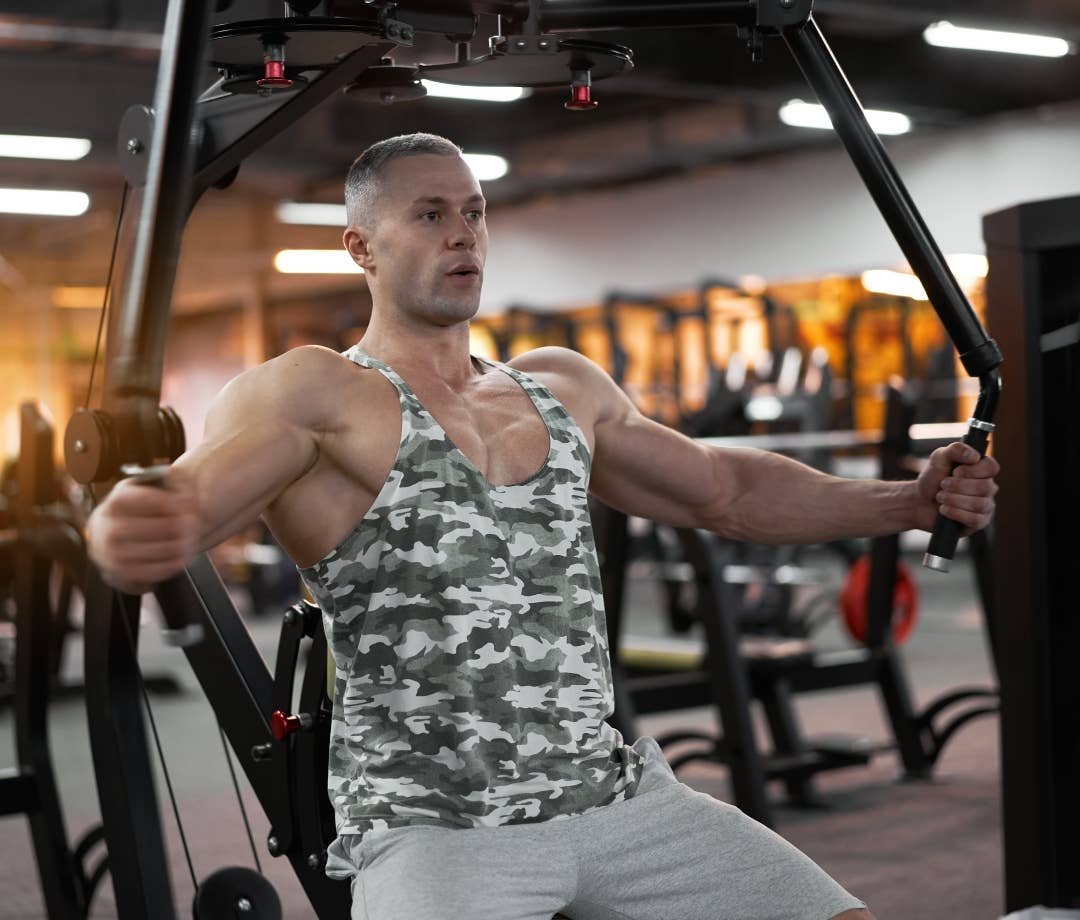
First, settle your hips and upper back against the pad, plant both feet and take the handles without an unnecessarily tight grip. Your starting position should feel stable. Second, choose a gentle elbow bend on handle machines and keep it nearly unchanged through the set. If the machine uses forearm pads, place your elbows and forearms against the pads as intended rather than pushing primarily with your wrists.
Third, move both arms inward in a smooth arc. Think about bringing your upper arms toward one another in front of your chest. Do not thrust your head forward or lift your shoulders as the handles approach the center. Fourth, finish where the machine’s natural arc ends while you can still keep your back on the pad. A short pause can be useful, but there is no need to force one handle past the other or turn a chest fly into an exaggerated whole-body squeeze.
Fifth, reopen slowly, perhaps taking two or three seconds to return to your chosen start position. Keep tension and control; avoid bouncing the plates, jerking the arms backward or snapping into the deepest stretch. Exhale on the closing portion and inhale on the return if that breathing pattern helps you stay calm. It should feel like repeated controlled chest work rather than a race against the stack.
A practical first working set is ten to fifteen repetitions with about two or three clean reps still available. If the elbows bend more on every rep or your shoulders leave the pad to drag the handles together, the resistance exceeds your current ability to keep this technique. Reduce the load and rebuild the same arc. One consistent set teaches you more than a heavier set of completely different repetitions.

Bodybuilding Shirts & Workout Gear
Bodybuilding shirts, tanks and gym gear for lifters chasing muscle, size, symmetry and the pump.


I Love Bench Press Hooded | for Bench & Chest Day Lifti Hoodie
Keep it laid-back with a little “I Love Bench Press Hooded” attitude.

Ultimate Bench Press Tee
Heavy lifts, good laughs, and a little “Ultimate Bench Press” energy.

Shirt: Good Argument But I Bench More Than You – T-Shirt
Make gym days more fun with “: Good Argument But I Bench More Than You” style.

I Want You To Bench Press Uncle Sam – 4th of July Patri Tank Top
Train hard, laugh a little, and rep “I Want You To Bench Press Uncle Sam”.

Bench Press and Chill Funny Gym T
Make gym days more fun with “Bench Press and Chill” style.

Gym Sir Swole of Benchalot Medieval Knight Bench Press Sticker
Give your everyday gear a playful “Sir Swole of Benchalot Medieval Knight” twist.


Work on His Pecks Tee
Show some bodybuilding attitude with a playful “Why Did The Chicken Go To The Gym? To Work” tee.
Correct rounded shoulders, uncomfortable stretch and drifting elbows
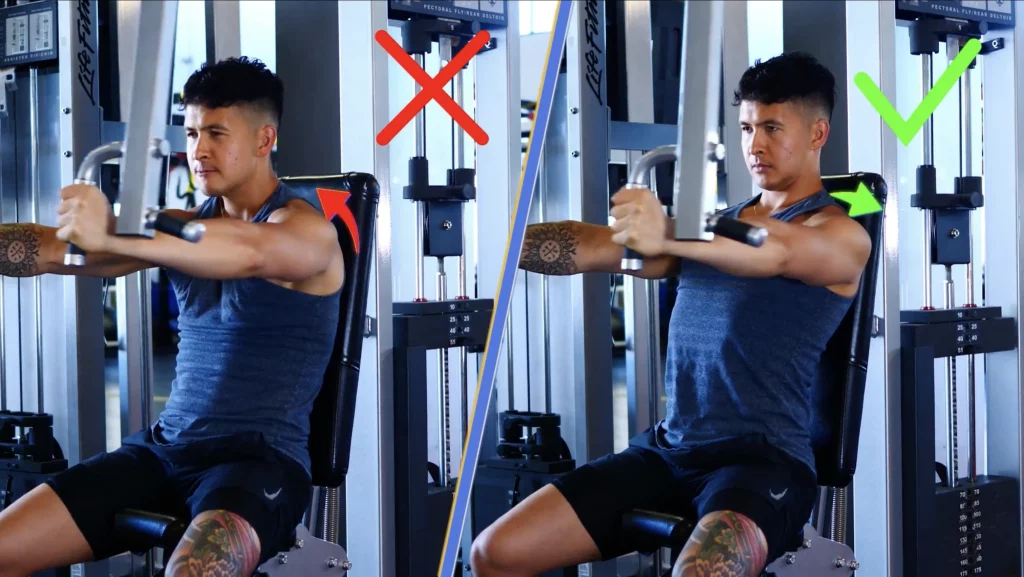
The most common complaint about a pec deck is a front-of-shoulder pinch at the fully opened position. If it happens, do not assume you need to stretch harder. Move the start setting one notch forward, reduce the weight and test a shorter arc. Recheck seat height as well: handles positioned too high for your shoulders may feel unnatural. Every person’s comfortable range is a little different, and two pec deck designs can feel surprisingly unlike each other.
Another frequent error is a rounded-shoulder finish. At first the athlete sits back properly; as the weight gets difficult, the upper back lifts from the support and the shoulders roll toward the handles. That may allow an extra few centimeters of movement, but it makes the exercise less repeatable. A more reliable goal is to keep the upper back on the backrest throughout the rep and let the machine stop where your chest can control the load without torso movement.
On handle machines, elbows that bend farther as fatigue builds effectively turn part of the fly into a short press. Set the elbow angle at the beginning and maintain it through the set. On padded machines, pushing forcefully with the wrists instead of the intended arm pads also shifts the mechanics. Choose a comfortable hand position rather than trying to make every machine accommodate exactly the same grip.
If plates slam between repetitions, slow the return. If the shoulder still feels irritated after adjusting range, alignment and resistance, use another chest exercise that feels better. Sharp pain, tingling, or symptoms that persist beyond training should not be trained through. Stop and get advice from a qualified health professional when appropriate. The value of a chest exercise is the repeatable stimulus, not the obligation to use a particular machine.
Pec deck vs cable fly, dumbbell fly and chest press
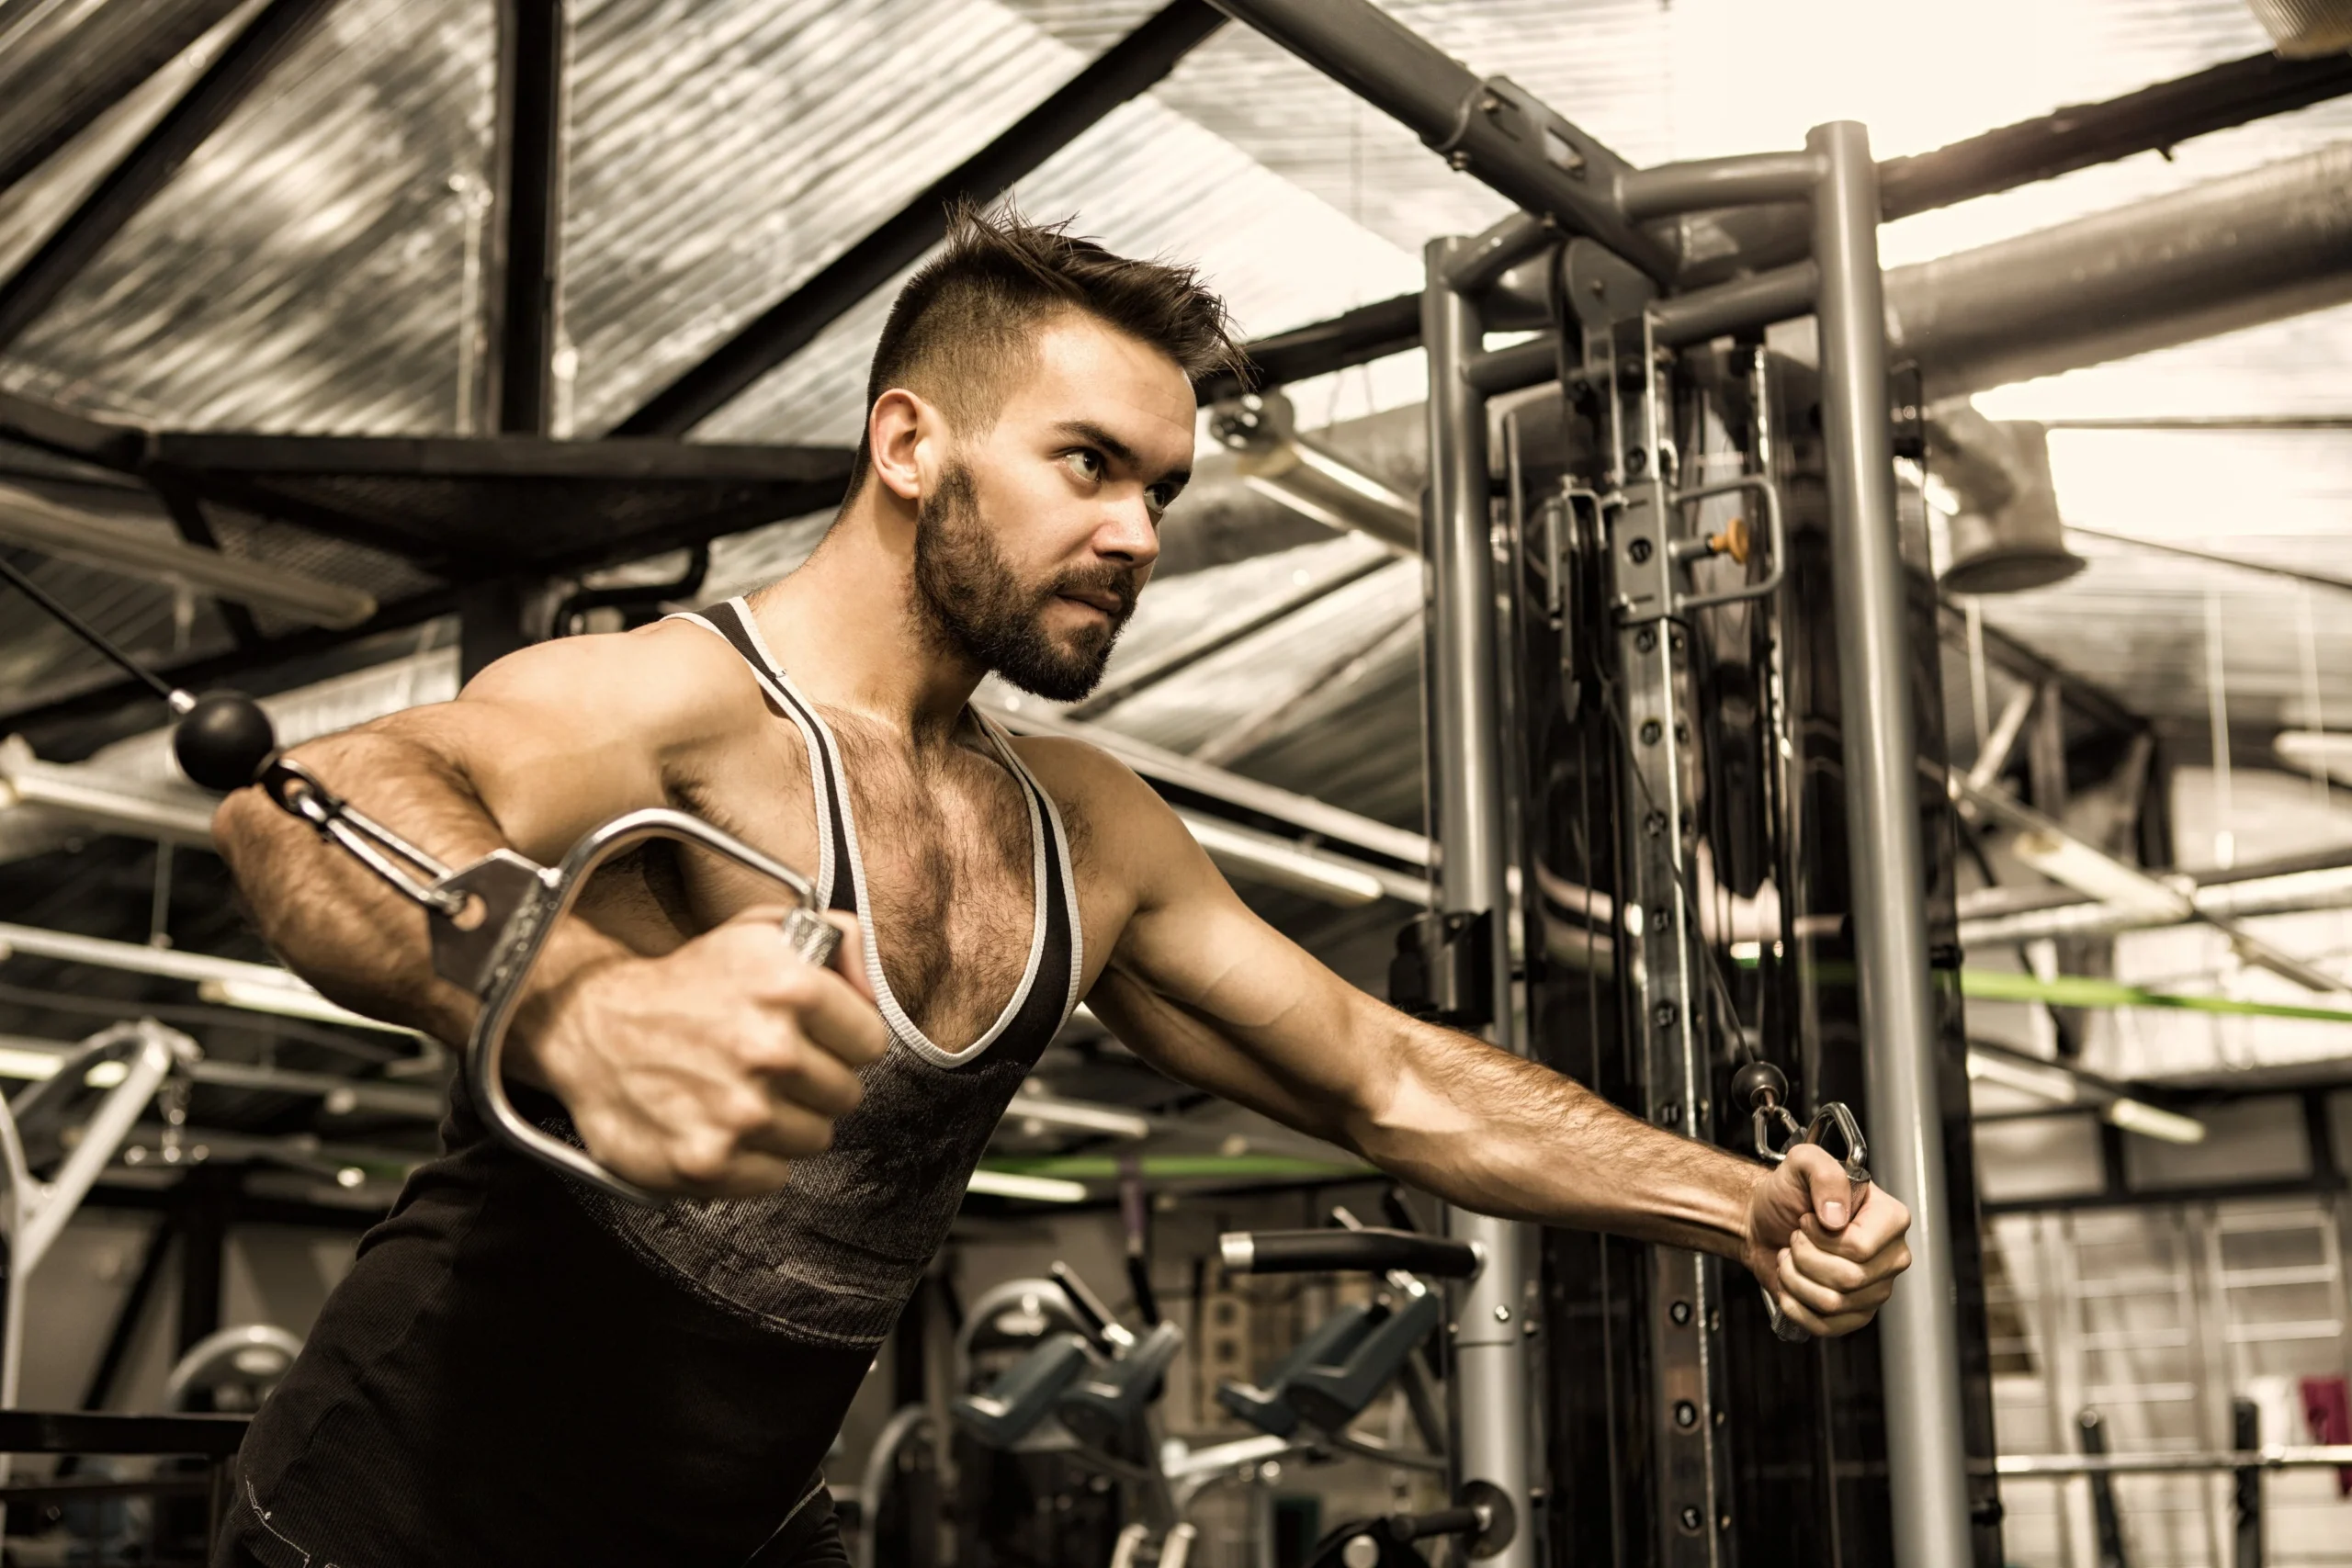
The pec deck and standing cable fly both use the chest to pull the upper arms across the body. The pec deck gives you back support and a fixed path, which makes a consistent setup easy. The cable fly has a freer path. You can adjust pulley height, stance and arm line, so it may suit a shoulder that dislikes a fixed machine arc. In return, you need more control over balance and torso position. That tradeoff is neither automatically good nor bad.
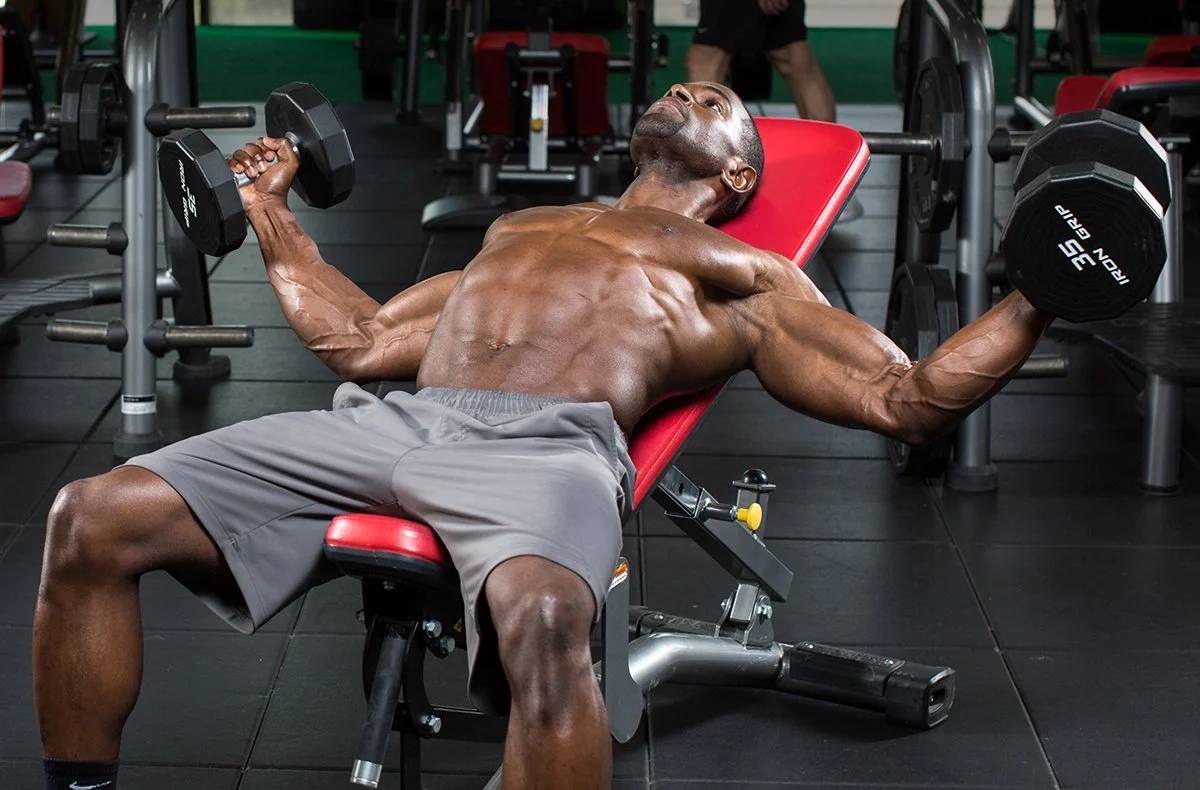
Dumbbell chest flies use even less specialized equipment. An adjustable bench and a pair of dumbbells may be all you need. But gravity always pulls down, so the resistance changes through the movement as the dumbbells travel from the open position toward the shoulders. Near the top, when the weights are almost directly above the shoulders, the dumbbell fly typically has less external torque across the chest. A pec deck can provide another resistance curve, although this depends on each machine’s levers and cams.
Chest pressing is different again. A press uses elbow extension, bringing the triceps into the effort alongside the chest and front delts. Presses are often easier to use for tracking heavier multi-joint strength. Flies allow additional chest-focused work without another heavy press. For many programs, main presses first and chest flies afterward is a sensible order, but a chest-fly-first sequence may suit someone deliberately prioritizing that exercise.
No short-term muscle-activation finding proves that a particular machine grows more chest muscle over the long term. Weight selection, effort, recovered training volume and training consistency matter. If a pec deck fits your body and schedule, keep it. If you have only a cable station or dumbbells, train with those and track progress honestly.
Equipment Worth Exploring
Explore equipment, accessories and gear from our carefully selected range.


FID Bench MAX
Adjustable bench offering flat, incline, and decline positions + adjustable headrest.


Rubber Hex Dumbbells
Rubber-coated hex dumbbell pairs with a stable shape for home and commercial strength training.


Multi Bench MBX-650 2.0
Adjustable multi-bench with roller adjustment, 15 backrest positions and accessory mounts.

Multi Pull Smith Rack MPHR-780
All-in-one rack with a Smith machine, functional trainer, lat pulldown and low row.
Choose equipment that earns its space in a compact home gym
A dedicated pec deck can be excellent in a commercial gym, but space is a separate question for a small home gym. Look beyond the footprint of the frame. You also need clearance for the arms as they open, space to adjust the seat, access to the weight stack and a safe route around the machine. A unit that looks narrow on a product page may require considerable working space on either side.
An adjustable functional trainer offers more movements from the same investment in floor area. With appropriate cable spacing and secure handles, you can use it for chest flies, rows, curls, triceps work and shoulder exercises. Independent cable resistance sources can also work in extremely compact setups, provided they are mounted and operated safely. A cable fly will not copy the exact pec deck path, but it can provide demanding chest work with fewer single-purpose parts.
For a simpler gym, an adjustable bench plus dumbbells can cover pressing and cautious chest-fly variations. Begin flies with modest weight, especially if the bottom stretch is unfamiliar. Pressing may be more comfortable than deep flies for some shoulders, and there is no requirement to force the fly variation. A multi-purpose bench also helps with numerous exercises beyond chest day.
If you are comparing actual pec deck models, test the seat adjustment range, start-lever positions and weight-stack smoothness. Try a few light reps on each model instead of choosing by advertised stack capacity alone. Verify that the arms can open without hitting nearby equipment and that the machine supports your back without making you twist for the handles. Good equipment is equipment you can fit, adjust and use consistently without compromising other training.
Funny Gym Shirts & Workout Gear
Funny gym shirts, tanks, hoodies and workout gear for lifters who like training hard.

Pumping Love Strong Heart Stronger Soul Funny Valentine T-Shirt
Make gym days more fun with “Pumping Love Strong Heart Stronger Soul” style.

Netflex Pump Chill Meme Jumper Motivation T-Shirt
Keep things casual with a little “Netflex Pump Chill” attitude.


Lift Eat Repeat Weightlifting & Hooded Hoodie
Keep it laid-back with a little “Lift Eat Repeat” attitude.

Hardcore Gains Meme – – Fire Top & T-Shirt
Bring “Hardcore Gains Gym Meme” humor to your next gym day.


Squat Bench Deadlift Pet Dogs – Meme Shirt T-Shirt
Rep “Squat Bench Deadlift Pet Dogs” humor in and out of the gym.

T-Rex Hates Push Ups Hooded for Calisthenics Workout Fa Hoodie
Keep it laid-back with a little “T-Rex Hates Push Ups” attitude.
Follow a six-week chest fly plan built around repeatable reps
During weeks one and two, add the pec deck after your main chest press in one or two workouts per week. Begin with two sets of ten to twelve controlled reps, leaving roughly three technically clean reps available at the end of each set. Rest one to two minutes if needed to repeat good form. Log the seat height, start notch and stack pin alongside the reps. If your chest training is already high-volume, start with only one session and see how well you recover.
For weeks three and four, build toward two or three sets of ten to fifteen reps if soreness, performance and shoulder comfort allow. Add reps before weight. For example, an initial sequence of 12, 11 and 10 reps might become 13, 12 and 10, then 13, 12 and 11. None of those improvements requires changing the start position or pulling the handles farther backward. Preserve the movement you have already learned.
During weeks five and six, work toward the top of the chosen rep range and finish most sets with roughly one or two clean reps in reserve. Once every set reaches fifteen with stable timing and range, move the pin up by the smallest practical increment. Rebuild from ten or eleven clean reps instead of using momentum to force a heavier number. If the stack jump is too large, stay at the previous setting and improve rep quality or tolerance for a little extra volume.
Review the six-week log, not one standout session. A better set might mean more clean reps, a modest resistance increase, smoother tempo or less discomfort at the same load. You can also use this basic progression with a cable chest fly if it is more comfortable or convenient. Stop, reduce range or swap exercises when joint symptoms demand it. The best machine chest fly is one that adds useful effort to your chest program without derailing the pressing and recovery around it.