Advertising disclosure: This page includes affiliate product links that may earn us a commission, as well as products from our own store.
The one-arm dumbbell row is one of the easiest back exercises to overload—and one of the easiest to turn into a whole-body heave. A small change in elbow path can make the movement feel more lat-focused or more upper-back-focused, but the goal is not to find a mythical perfect angle. This guide explains a stable setup, the practical difference between rowing to the hip and the ribs, common technique problems, equipment choices and a six-week plan you can actually measure.
What a One-Arm Dumbbell Row Actually Trains
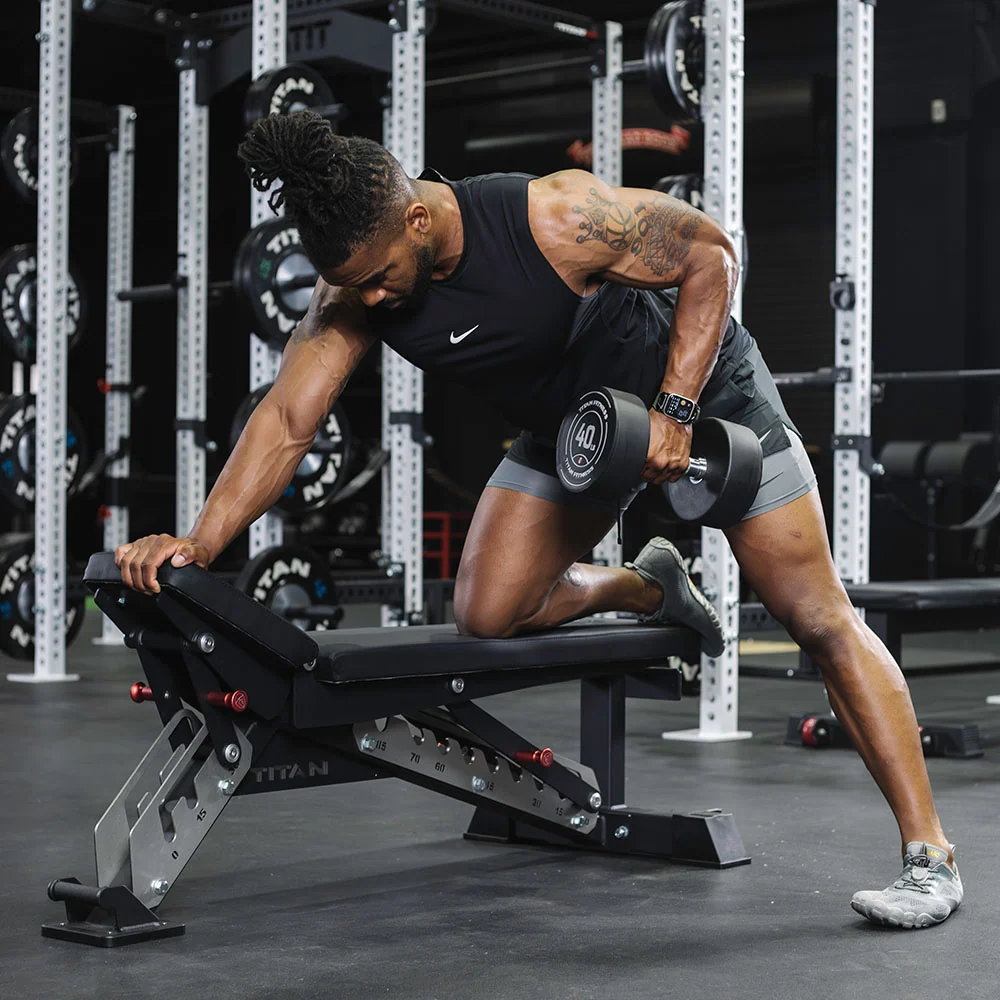
A one-arm dumbbell row is a horizontal pulling exercise, not a way to isolate one magical corner of the back. The latissimus dorsi helps move the upper arm toward and behind the torso. The middle trapezius and rhomboids help control shoulder-blade movement, while the rear deltoid, biceps and brachialis assist the pull. The grip muscles keep hold of the weight. How much each contributes changes with the elbow path, the bench angle, your proportions and how strictly you perform the rep.
A useful advantage is unilateral loading: the right and left sides complete their own work. If your stronger side normally dominates bilateral rows, matching repetitions and range on both arms makes that harder to hide. It does not guarantee a strength imbalance disappears, and it does not mean every athlete needs single-arm training. A combination of supported dumbbell rows, bilateral pulls and vertical pulling often provides a practical back-training menu.
The torso must resist the dumbbell’s tendency to rotate it toward the working side. That makes the obliques and other trunk muscles stabilizers, especially when your only support is one hand. Extra bracing demand is not automatically superior to more back-muscle tension. Use enough external support to perform the actual pulling movement repeatedly and safely.
There is limited direct evidence comparing one-arm row elbow angles for long-term back hypertrophy. Anatomical reasoning and muscle-activation findings are useful clues, not proof that a particular hand path will produce superior growth. Pick a version you can repeat for months before judging it by the heaviest dumbbell you can move.
Build a Stable Bench-Supported Setup
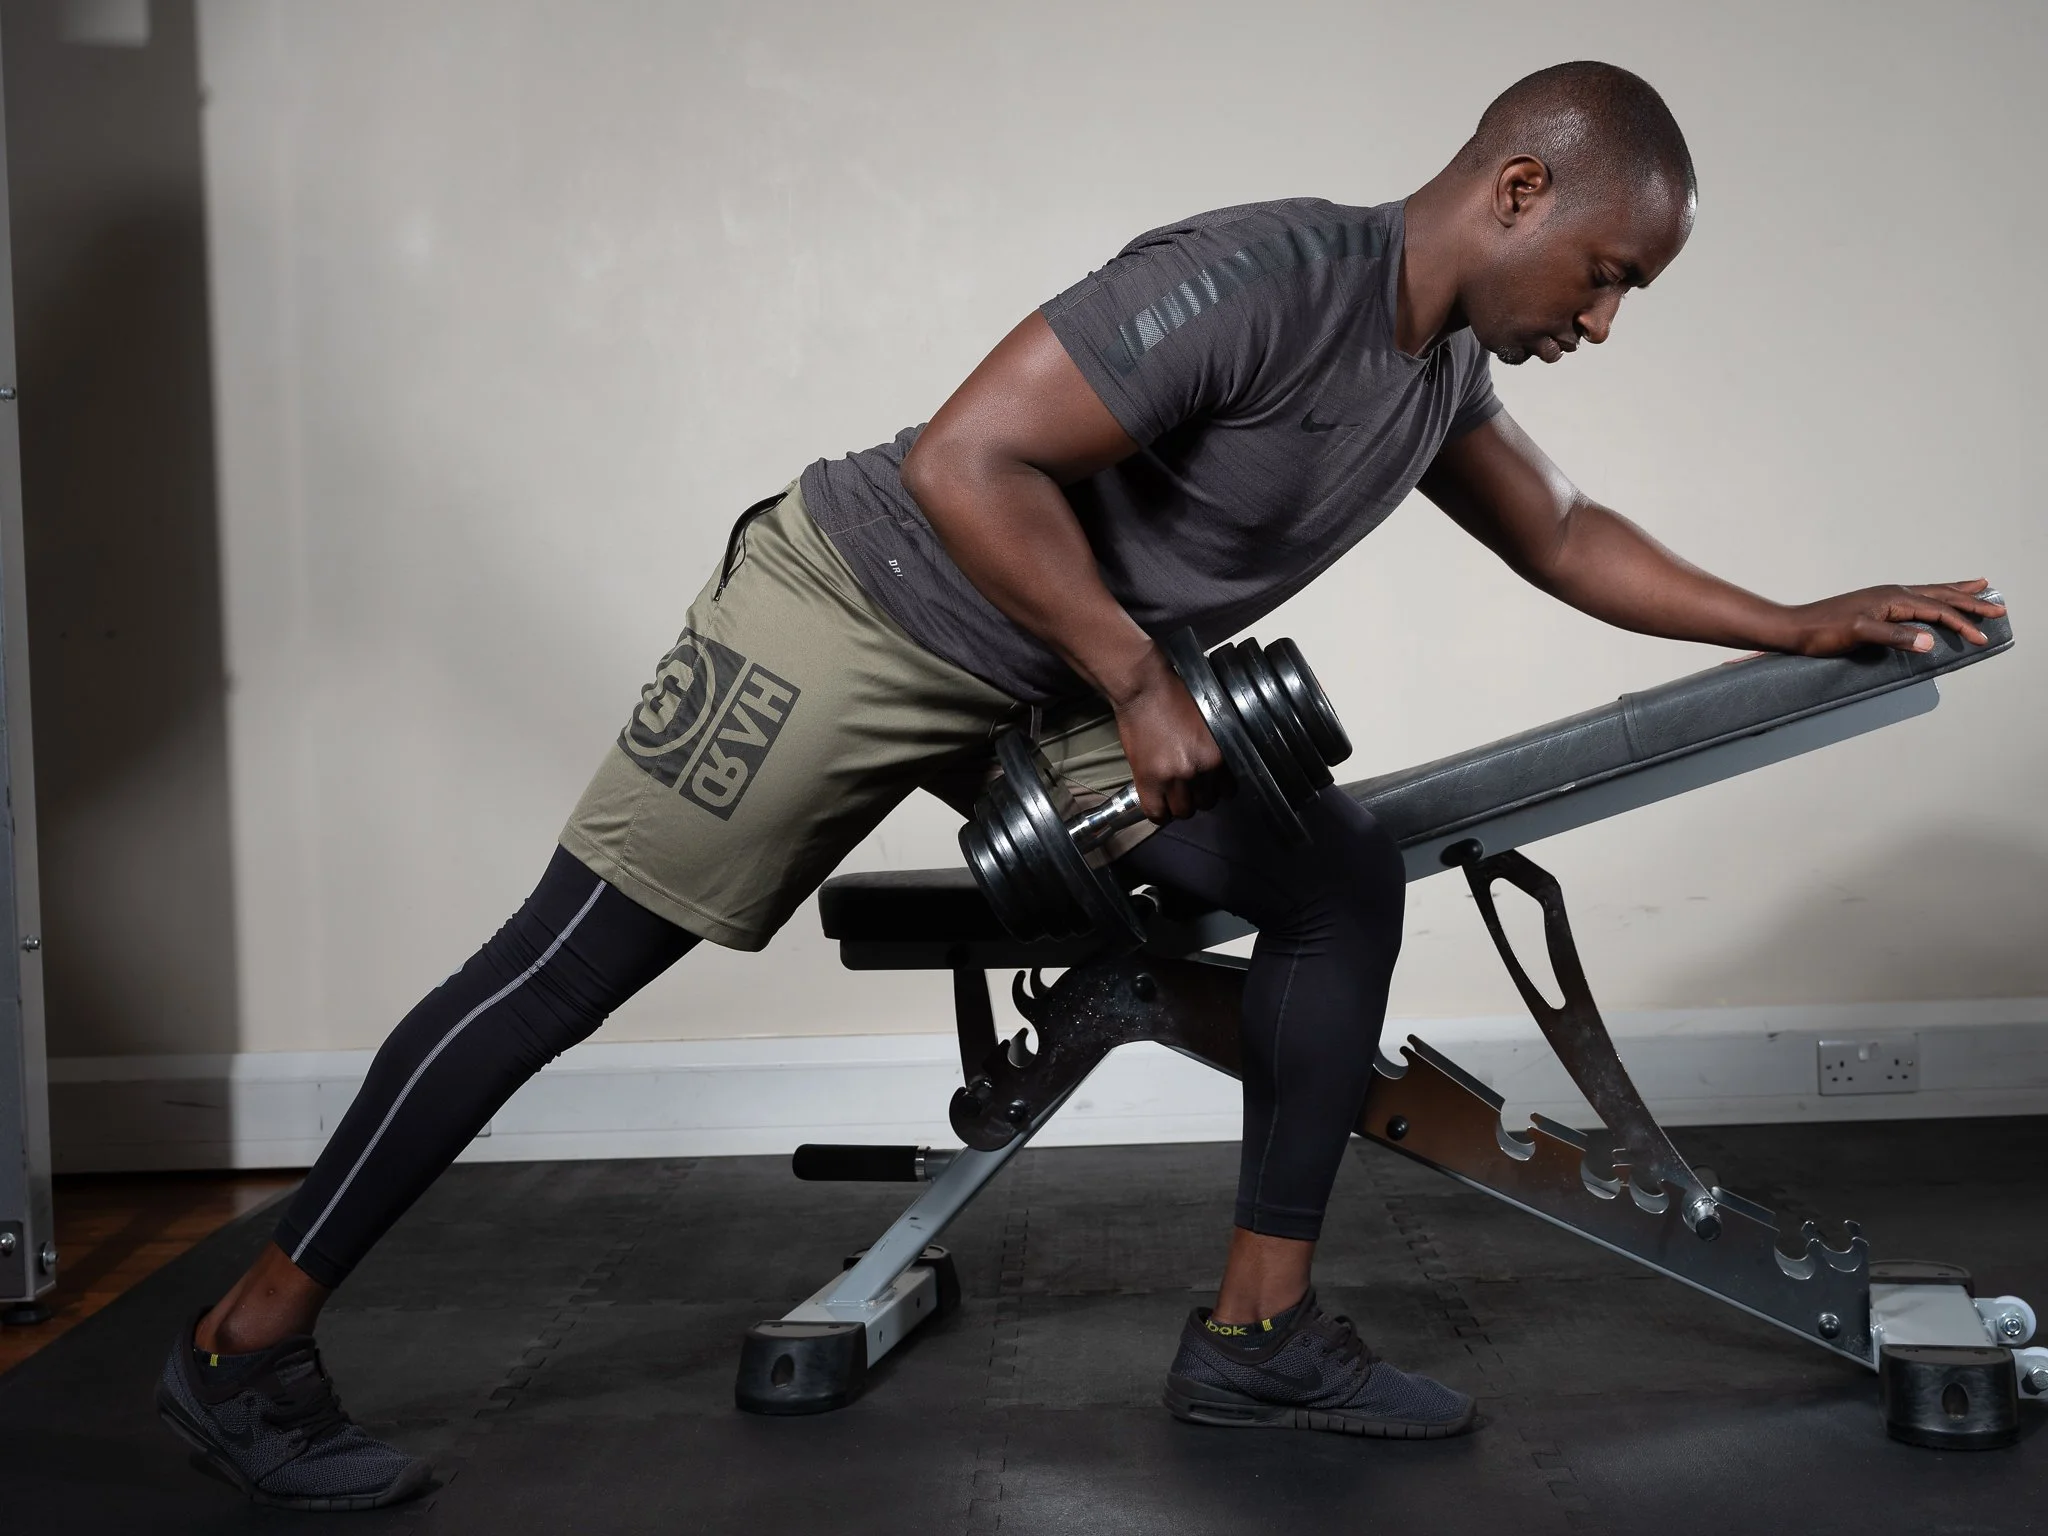
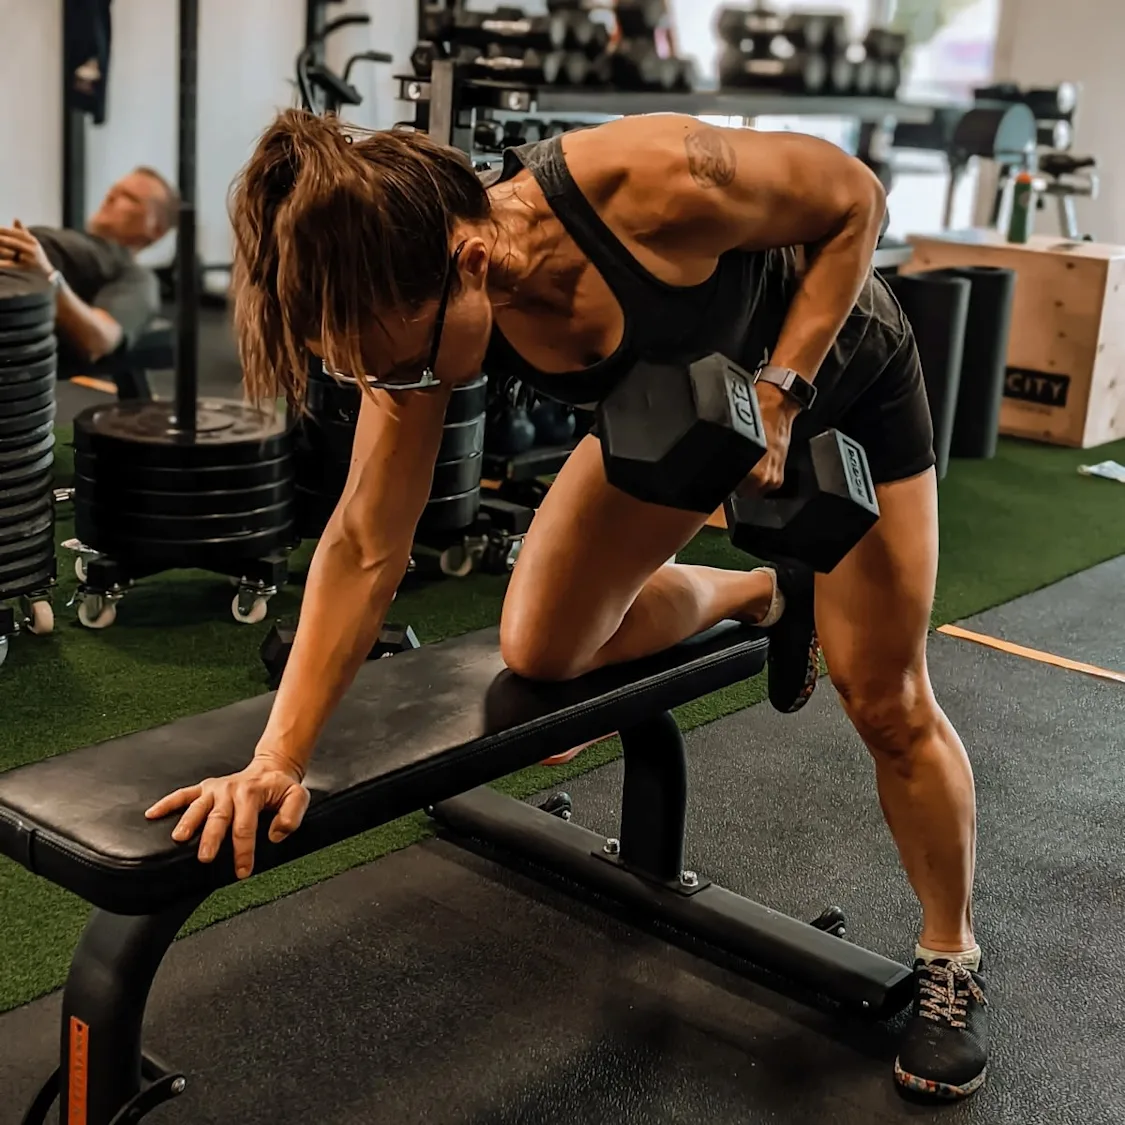
For the classic three-point row, place one knee and the same-side hand on a sturdy flat bench, with the opposite foot planted wide enough to stabilize you. Keep your hand roughly under your shoulder and the supported knee beneath your hip. The working arm should hang with room to move without the dumbbell striking the bench. Set your ribs over your pelvis and hinge until the torso is close to horizontal without forcing an uncomfortable lumbar position.
A split stance with both feet on the floor is equally legitimate. Put your non-working hand on a bench, rack upright or another stable support, then step back and hinge. Many taller lifters prefer this arrangement because a conventional hand-and-knee bench setup can leave the hips cramped. The stable support is the essential feature, not a universally perfect knee position.
Before the first repetition, take a breath and lightly brace the midsection as if preparing for a controlled deadlift. Keep your hips facing the floor. Let the loaded shoulder reach naturally at the bottom instead of pinning both shoulder blades tightly together throughout the set. Maintain an ordinary neck position, looking toward the floor several feet ahead rather than craning up at a mirror.
Check three things before adding plates: the bench cannot slide or rock, the dumbbell has a clear route past your leg, and the working shoulder can move through a comfortable range without your ribcage twisting. If reaching the bottom makes your entire upper back collapse, reduce the load, narrow the range slightly or adjust your torso angle. A stable starting position makes progression measurable.

Equipment Worth Exploring
Explore equipment, accessories and gear from our carefully selected range.


Rubber Hex Dumbbells
Rubber-coated hex dumbbell pairs with a stable shape for home and commercial strength training.



FID Bench MAX
Adjustable bench offering flat, incline, and decline positions + adjustable headrest.


Leather Lifting Straps
Padded leather straps support grip during heavy rows, deadlifts and pulling exercises.

Leather Wrist Grips
Padded leather lifting grips help support the hands and wrists on heavy pulling exercises.

Elbow Toward the Hip or Elbow Toward the Ribs?
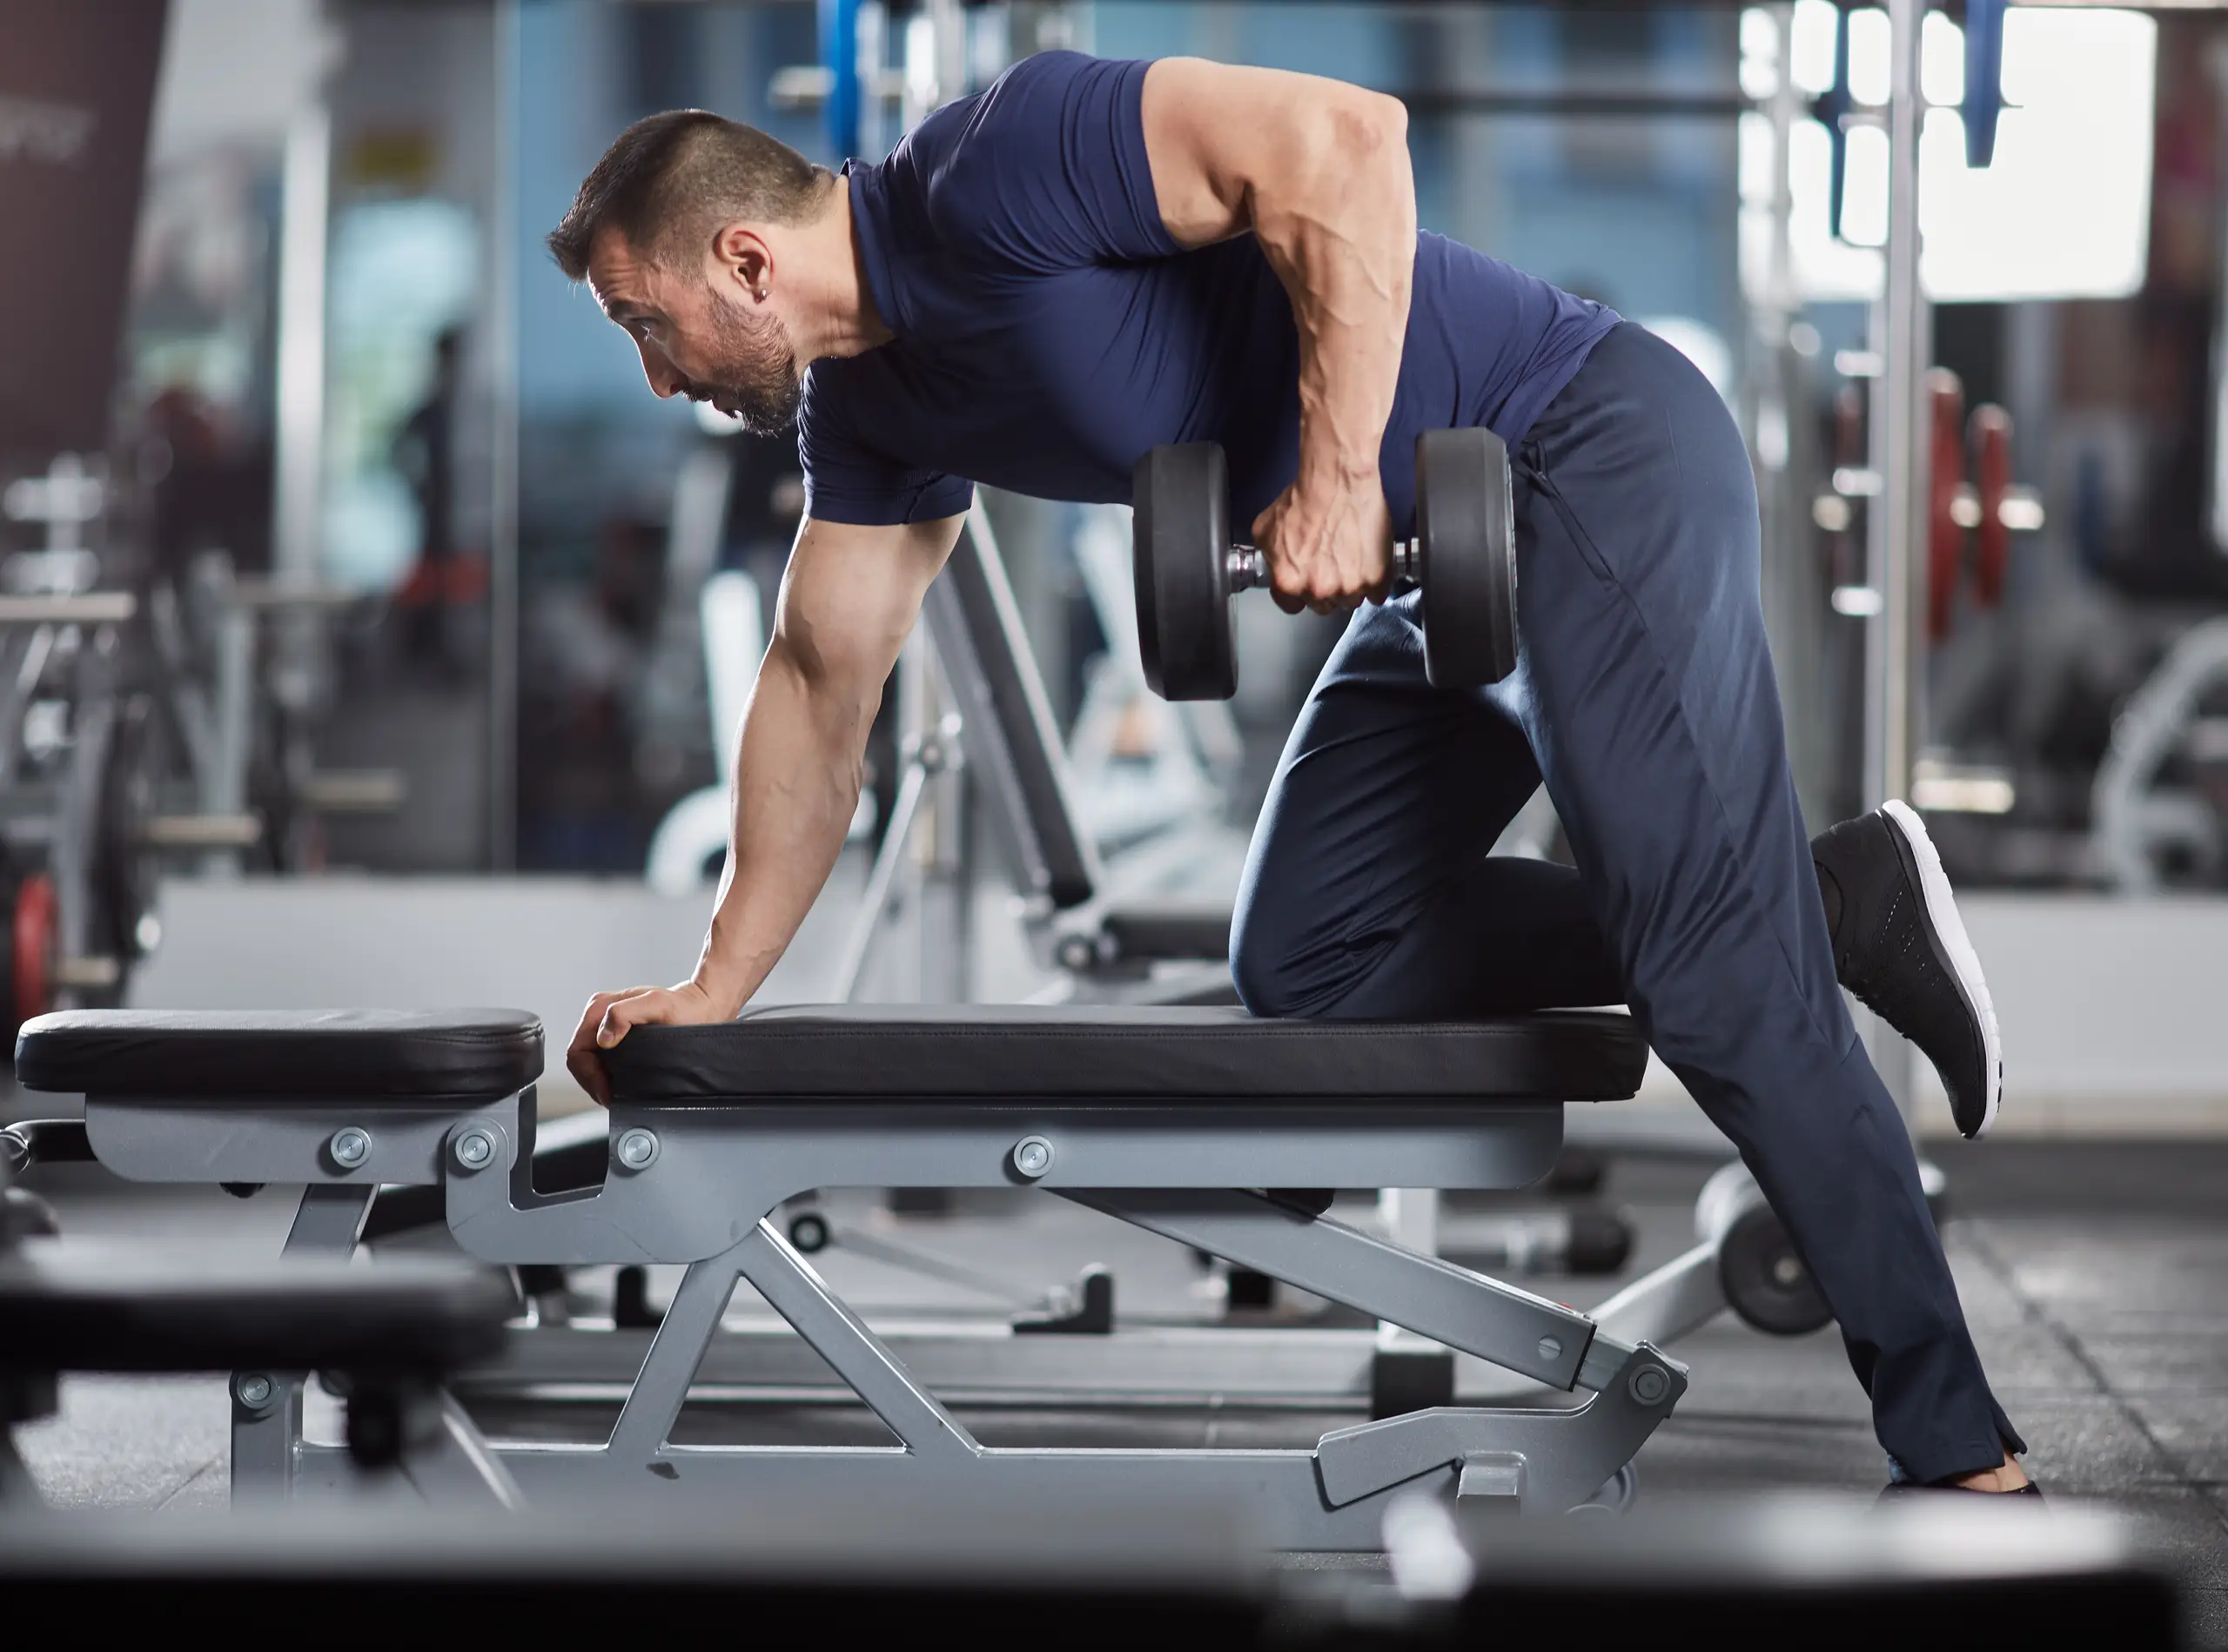
Two elbow paths are useful. If your goal is a lat-focused row, keep the upper arm relatively close to the torso and think about driving the elbow toward your back pocket. The dumbbell usually travels diagonally toward the hip rather than vertically to the armpit. Shoulder extension is prominent, although the rear shoulder and upper-back muscles still contribute.
If you want more upper-back emphasis, let the elbow travel somewhat farther out and pull toward the lower or middle ribs. That creates more shoulder horizontal abduction and allows the muscles around the shoulder blade and rear deltoid to take a larger practical role. There is no need to flare the arm straight sideways or crank the upper arm beyond a comfortable position. A moderate outward angle is enough to change the movement.
The most important instruction is to avoid changing your torso angle to fake an additional inch of elbow travel. Imagine a line painted between your shoulder blades and your hips: it should stay close to the same orientation through the rep. At the top, the upper arm can finish approximately alongside the torso. If it only gets there because you rotate the chest open, that is not extra rowing range.
These paths are training biases, not an evidence-based ranking of regional growth. Claims that pulling to the hip definitely grows the lower lats or that a flared elbow definitively beats a tucked elbow for the rhomboids exceed the direct long-term evidence. Choose one path for a block of training, note how it feels and track strict reps before experimenting with the other.
Seven Form Errors That Steal Tension From the Back
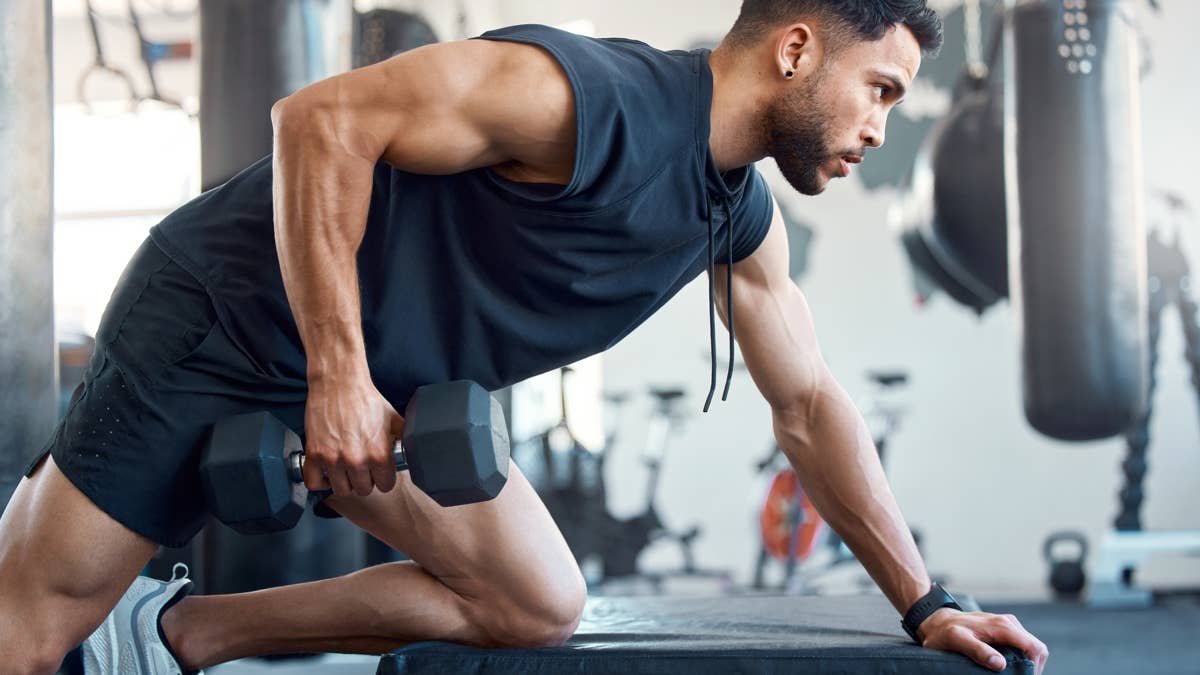
The first error is turning every heavy rep into a torso rotation. A small amount of natural movement is unavoidable, but opening the chest toward the ceiling to finish the lift shifts the work away from the controlled row you intended. Film from behind or have a training partner watch your hips. Reduce the dumbbell until both sides can finish with roughly the same chest orientation.
Second, avoid a fast yank from the bottom. You can let the shoulder blade reach and the elbow extend, but start the next repetition without jerking the spine. Third, do not shrug the loaded shoulder toward the ear as the default finishing strategy. Fourth, keep the wrist approximately neutral instead of curling it awkwardly to hoist the bell.
Fifth, do not shorten the eccentric phase simply because the weight feels heavy. A deliberate two-second descent is a useful coaching cue, not a mandatory scientific tempo. Sixth, stop using the bench as a spring: pressure through your planted hand can steady you, but the bench should not rock or let you bounce. Seventh, do not let the dumbbell swing inward under the torso while the elbow goes a completely different direction.
If grip quits long before the back, first check that the handle is comfortable and dry. Straps can make sense on particularly demanding back sets, although some unassisted pulling is still useful if grip strength matters to you. Pain that is sharp, worsening or different from normal muscular effort is a reason to stop and reassess, not push through simply to hit a rep target.
A practical standard is to finish the set when you can no longer reach a similar end position without clearly twisting, shrugging or accelerating. That gives you an objective stopping point and makes a lighter, cleaner set easier to compare with the next session.

Bodybuilding Shirts & Workout Gear
Bodybuilding shirts, tanks and gym gear for lifters chasing muscle, size, symmetry and the pump.


Back Sabbath Back Day Heavy Metal Back Training Workout T-Shirt
Bring “Back Sabbath Back Day” humor to your next gym day.


Nice Traps Big Back Tee
Heavy lifts, good laughs, and a little “Nice Traps Big Back” energy.

Strong Back Bodybuilder Tee
Show some lifting attitude with a playful “Strong Back Bodybuilder” tee.


Back In Shape Back In Black Album Cover Parody AC/DC He Sticker
Bring “Back In Shape” attitude to your water bottle or laptop.
Row Variations and When to Choose Each
The supported bench row is the starting point for many lifters because it simplifies balance. A split-stance row with one hand braced on a rack allows a different hip position and can be more comfortable for long-limbed athletes. Both are single-arm dumbbell rows; use the arrangement that lets the shoulder move freely while the torso remains consistent.
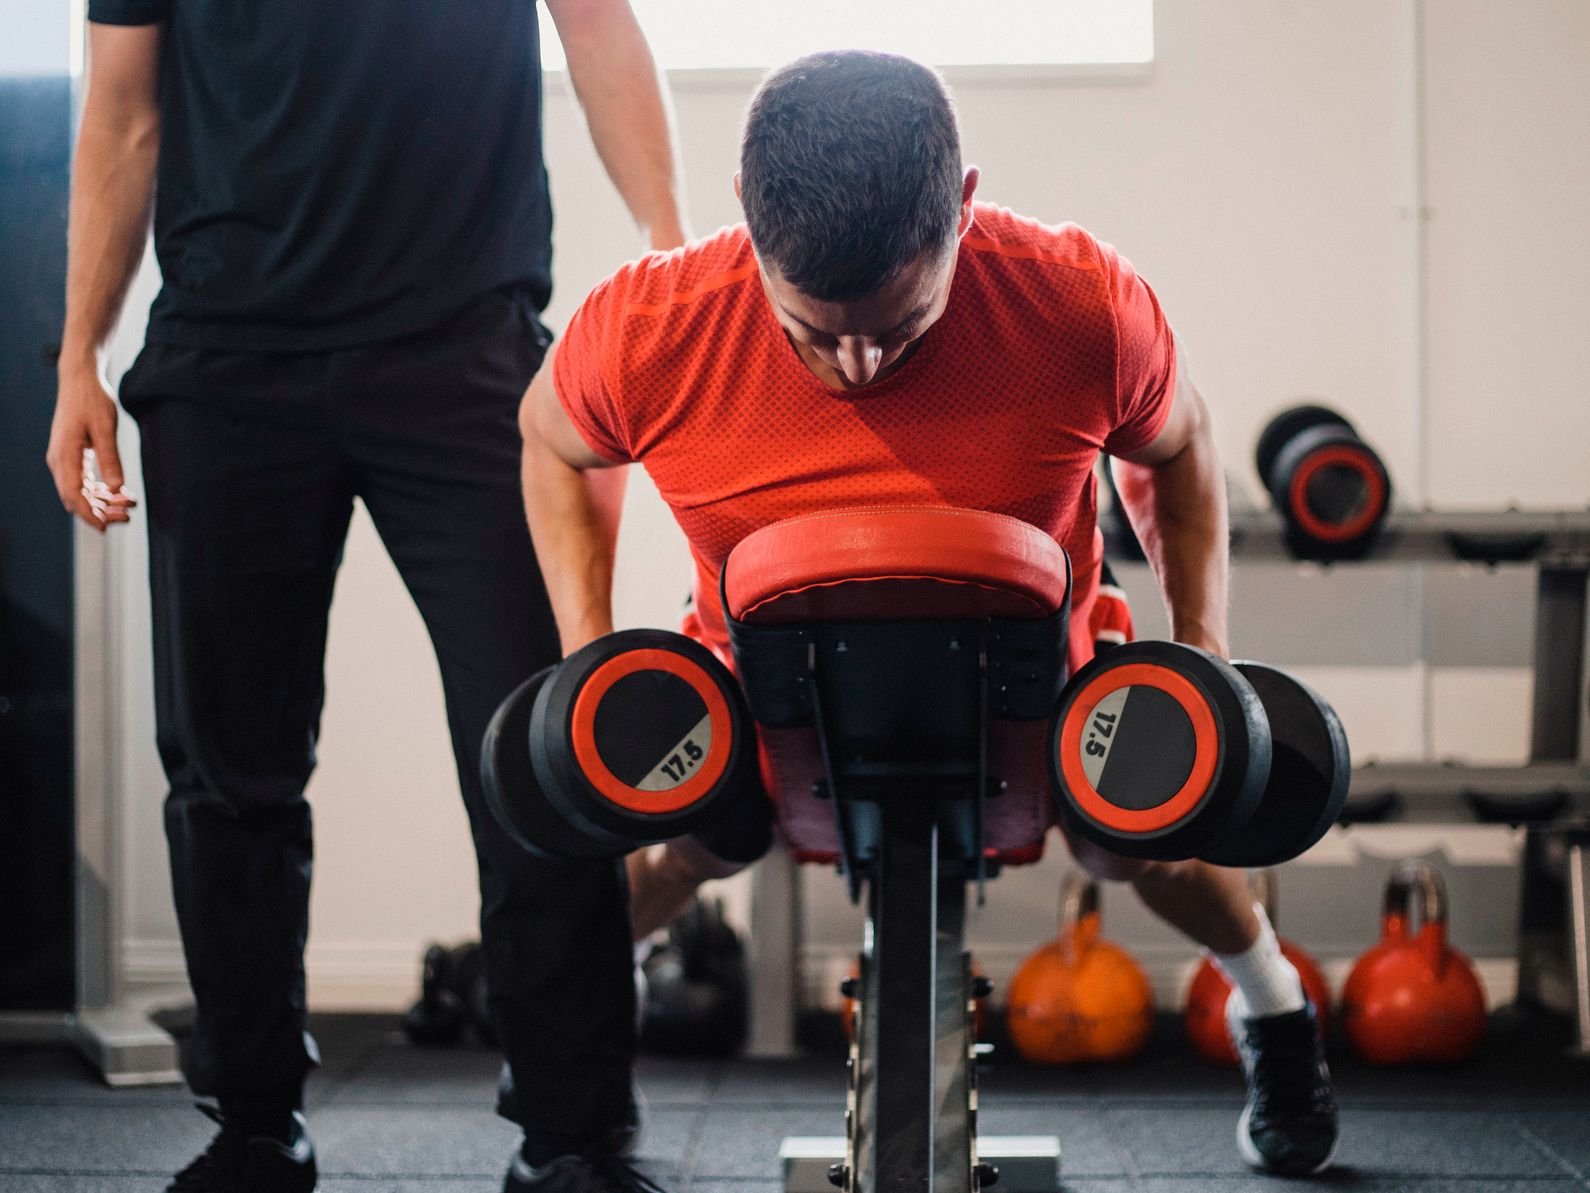
For the chest-supported variation, lie face down on an incline bench with a dumbbell in each hand or work one arm at a time if the bench permits it. The chest pad reduces how much effort you spend holding the hinge, making it particularly attractive if spinal fatigue is limiting your session. The bench angle changes the direction of the pull, so it will not feel identical to a near-horizontal three-point row.
A one-arm cable row allows a smoother resistance path and makes small weight increments convenient. A kettlebell row can also work, although the shape of the bell may interfere with your thigh or bench at the top. A landmine or T-bar row is a different implement and usually changes the arc and available hand positions; treat it as a complementary pull, not a direct replacement for tracking dumbbell progress.
There is no decisive hypertrophy trial proving that one of these supports or implements is best for everyone. Choose by comfort, stability, the load increments you can use and where each variation fits in the session. If you also deadlift, squat or train the lower back hard, a chest-supported option may help keep rowing quality high without making the spinal erectors the bottleneck.
Equipment Worth Exploring
Explore equipment, accessories and gear from our carefully selected range.
VOLTRA
Compact digital cable trainer with smooth, adjustable resistance.

Go-Tone Pro
Portable digital cable trainer with up to 66 lb (30 kg) of adjustable resistance.
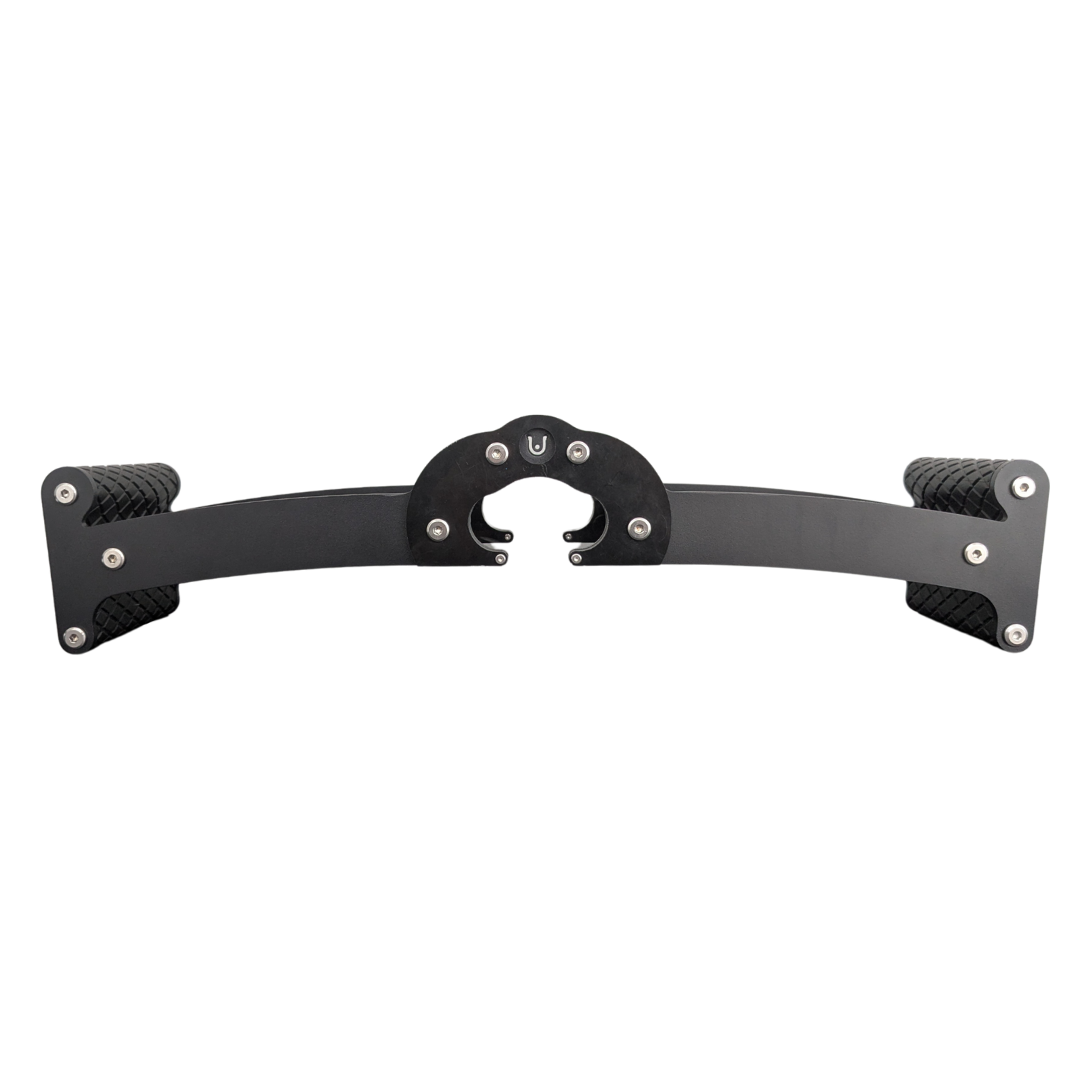
Back Bar
Multi-grip cable and landmine bar with a built-in deadlift jack.

Angles 90 Grips
Flexible grip attachments that allow natural wrist movement during pulling exercises.

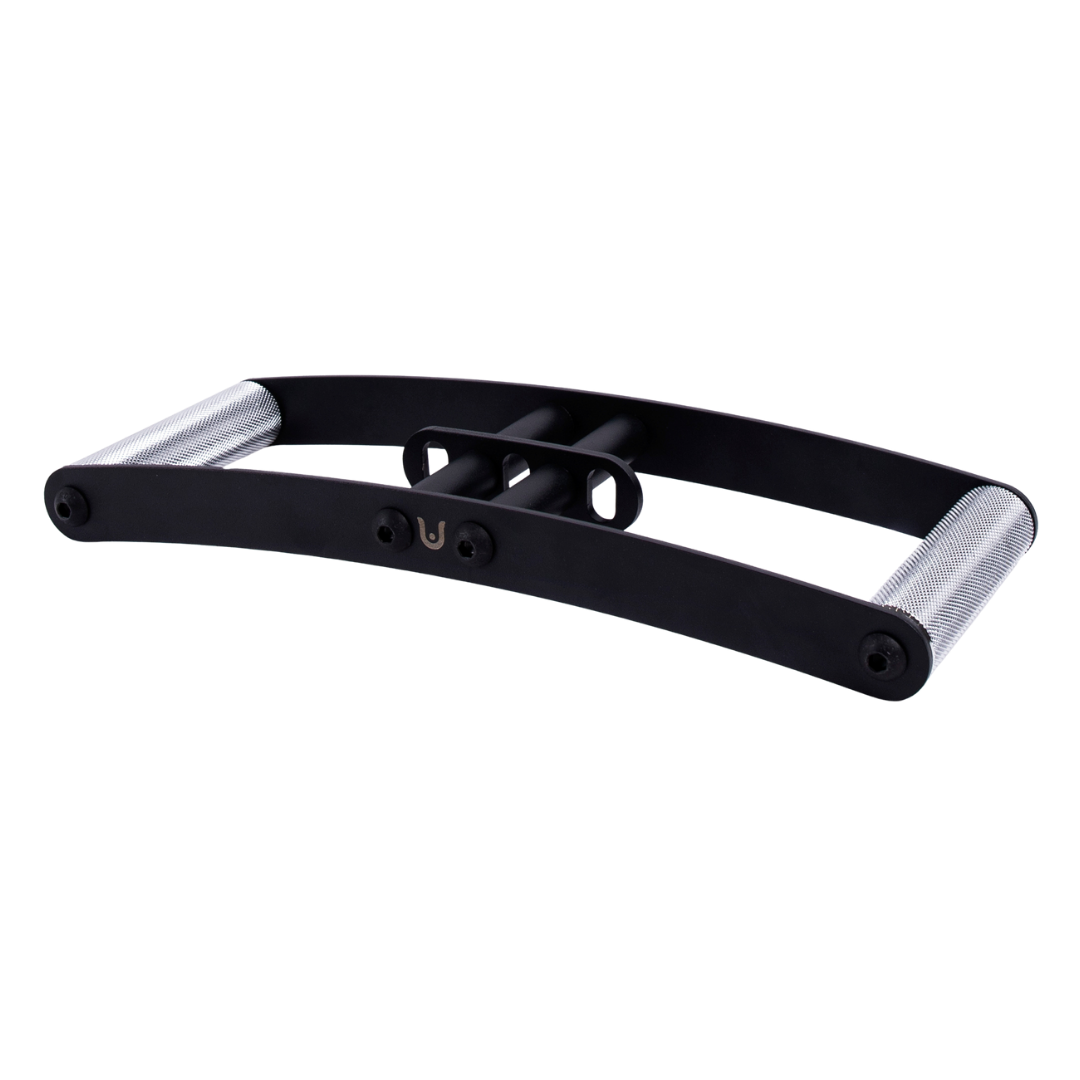
Horizon Grip
Ergonomic V-style cable grip for rows and back training.

GymPin D Handle Bar
Multi-use steel D-handle bar for cable rows, pulldowns and other cable exercises.

GymPin Barbell Row Handle
Heavy-duty handle attachment for barbell, landmine and T-bar rows.

T-Bar Row Attachment
Welded barbell attachment that connects a D-handle bar for landmine and T-bar rows.

Dumbbell, Bench, Straps and Load Selection
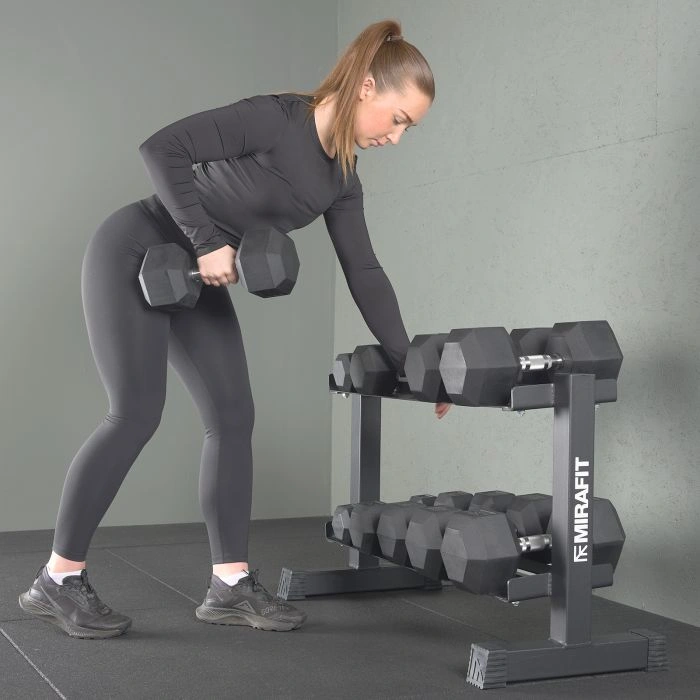
A single heavy dumbbell and a solid support are enough to get started. Fixed dumbbells are convenient when a gym has closely spaced weight jumps. Adjustable dumbbells save space but differ in grip diameter, balance, head size and minimum increments. For a row, check that the handle lets the wrist stay comfortable and that the dumbbell head clears the bench and your thigh throughout the chosen path.
A flat bench is helpful but not mandatory. Adjustable benches can support split-stance rows, and an inclined pad can turn the movement into a chest-supported variation. An unstable chair or lightweight storage rack is not an appropriate support for heavy repetitions. If you brace on gym equipment, make sure it is designed to tolerate that pressure and will not tip, rotate or roll.
Start with a weight you can lift for roughly eight to twelve controlled repetitions while keeping two or three repetitions in reserve. Perform the weaker side first, then match that side’s repetitions with the stronger arm. If the first set feels easy but subsequent sets collapse, your setup or rest period may need adjustment before the dumbbell gets heavier.
Lifting straps are optional rather than a badge of serious training. They may be useful on higher-repetition sets when grip fatigue masks your back effort. If you want to develop grip as well, keep some unstrapped work elsewhere rather than pretending one accessory must solve both goals. Cable grips, handles and barbells can diversify a whole back program but should not crowd out the simplest dumbbell-row progression.
For a longer workout, pair the row with a vertical pull such as a pull-up or pulldown. Those movements place the upper arm through a different path. The combination can be more useful than adding four nearly identical single-arm row variants with slightly different attachments.
A Six-Week One-Arm Row Plan That Is Easy to Track
Train the row twice weekly with at least one day between sessions. Place it after a heavy compound pull if maximal strength is the priority, or near the beginning of the back workout when perfecting the row itself matters most. Use the same support, elbow path and practical torso angle for the entire six-week block so the numbers represent a repeatable movement.
In weeks one and two, perform two working sets per arm in the eight-to-twelve-repetition range, stopping with roughly two to three repetitions in reserve. Rest about 90 to 150 seconds between hard sets and enough time between sides to restore a steady brace. Write down the load and the strict reps achieved on the weaker side; then match them on the stronger side. Learning the setup is more important than chasing a personal record.
In weeks three and four, progress toward the upper end of your rep range. When both sets reach twelve clean reps per arm twice in a row, move to the smallest practical weight increase and return near eight reps. If recovery is good and the rest of the back workout is modest, you can add a third working set. Do not add it if your pulling volume is already high or the shoulders and elbows remain unusually sore.
In weeks five and six, keep two or three quality sets, retain the chosen elbow path and aim for a small performance improvement: one more strict rep, a modest load increase or less visible torso motion at the same load. Resist the temptation to turn the final week into heaving 20 percent more weight. If fatigue accumulates, use the final workout as a lighter technique session instead of trying to force an unsustainable result.
Example week: Monday, bench-supported row 2–3 sets of 8–12 each side plus pulldowns; Thursday, the same row 2–3 sets of 8–12 plus a chest-supported or machine row. Keep other pulling work in mind when choosing the set count. This is an illustrative progression, not a six-week protocol proven superior in a trial. Muscle growth depends on total training, adequate recovery and consistency across more than one short block.
The simplest test of progress is whether the same torso position and elbow path can handle more controlled work. That is more informative than a heavier dumbbell moved through half the range. Good form should make training harder for the right muscles, not merely make a demonstration look tidy.
Funny Gym Shirts & Workout Gear
Funny gym shirts, tanks, hoodies and workout gear for lifters who like training hard.

Pull Up Or Shut Up Hoodie
Bring “Pull Up Or Shut Up” gym humor to lazy days and post-workout plans.

Dumbbell Heartbeat Muscle Shirt Athletic Vest Fitness F Tank Top
Your gym-day look, with a playful “Dumbbell Heartbeat” twist.

Funny Gains Time Gym | Workout Sweater & Gym Bros | Fit T-Shirt
Show some gym-day personality with “Gains Time”.

Meat Mountain – Gymbro Pullover Jumper For Powerlifting T-Shirt
Bring “Meat Mountain” humor to your everyday gym style.

Let It Grow Motivation Hooded Meme Jumper Hoodie
Make your off-duty look more fun with “Let It Grow”.


Big Back SpongeBob Sweater Back Day & T-Shirt
Bring “Big Back” humor to your everyday gym style.

The Empire Lifts Back – Star Wars Back Day Meme Decal f Sticker
Bring “The Empire Lifts Back” attitude to your water bottle or laptop.

Tough Cookie Sweater & Bros Meme T-Shirt
For laid-back days and bulking humor: “Tough Cookie”.
Bottom line: Keep your torso steady, choose an elbow path you can reproduce, and progress clean repetitions before changing the weight. The dumbbell row rewards consistency more than theatrics.