Advertising disclosure: This page includes affiliate product links that may earn us a commission, as well as products from our own store.
Scapular Push-Ups: Keep the Arms Straight and Learn the Shoulder-Blade Movement
A scapular push-up looks small because the elbows are not doing the pressing. Instead, your shoulder blades move around the ribcage while your hands stay planted and your body remains supported. Learning that distinction can make this a useful bodyweight practice drill, particularly if every attempt currently turns into a regular push-up, a shrug or a large bend through the spine.
The aim is a controlled movement you can recognise and repeat. It is not a posture diagnosis, a guaranteed cure for shoulder pain or a requirement to make every muscle feel isolated. Start with a support position that lets you keep the arms straight comfortably, then judge the movement before increasing the challenge.
1. Find the movement before taking a full plank
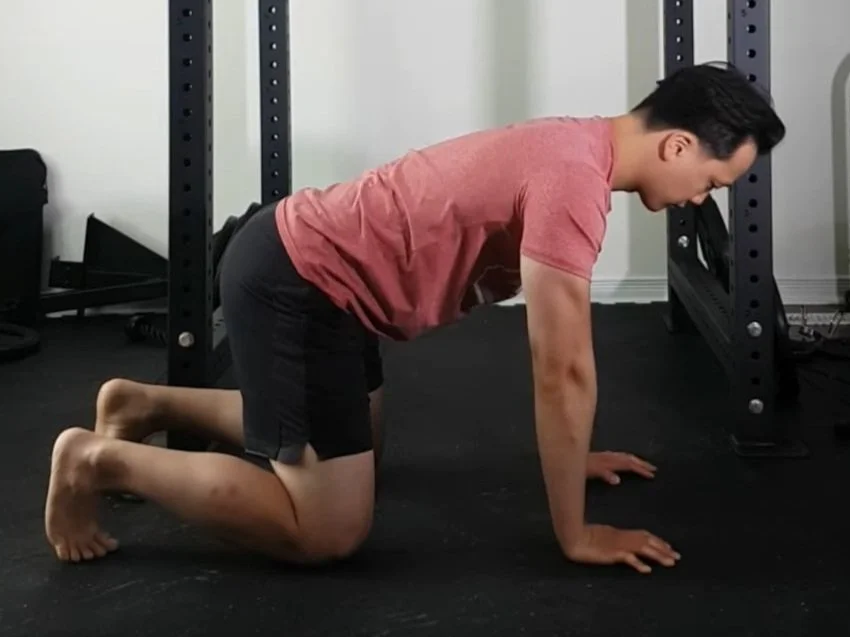
Begin on hands and knees, with the hands roughly beneath the shoulders and the knees beneath the hips. Keep your elbows comfortably straight without forcing them backwards. Let the chest settle a little between the arms, then press the floor away so the upper trunk rises between the shoulders. The hands remain in the same place throughout.
The shoulder blades move closer together as the chest settles and farther apart as you press away. This second action is called protraction. The serratus anterior, which runs along the side of the ribcage, contributes to that action. You do not need to memorise every muscle attachment to practise the movement, but you do need to distinguish it from bending and straightening the elbows.
Use a small range initially. Imagine moving the ribs between two steady supporting arms rather than trying to drive your chest as high as possible. A controlled rise followed by a controlled return is a useful first repetition. If the elbows bend immediately, reduce the effort and make the movement smaller until you can tell what is changing.
Keep your gaze down and your neck reasonably relaxed. You should not have to lift the chin dramatically to complete the motion. A short side-view recording can help you see whether the elbows stayed steady, but avoid diagnosing shoulder-blade abnormalities from one camera angle. Bodies differ, clothing obscures landmarks and a video is not a clinical assessment.
This kneeling position also gives you an easy exit. If your hands or wrists become uncomfortable, settle your weight back and stop. There is no benefit in forcing the wrists through an uncomfortable position simply to complete a small warm-up drill. Change the support or ask for individual guidance if discomfort persists.
2. Choose a stable height that lets you stay organised
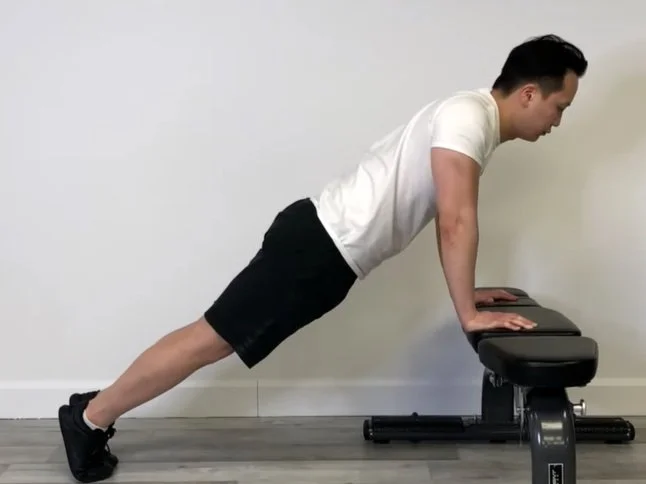
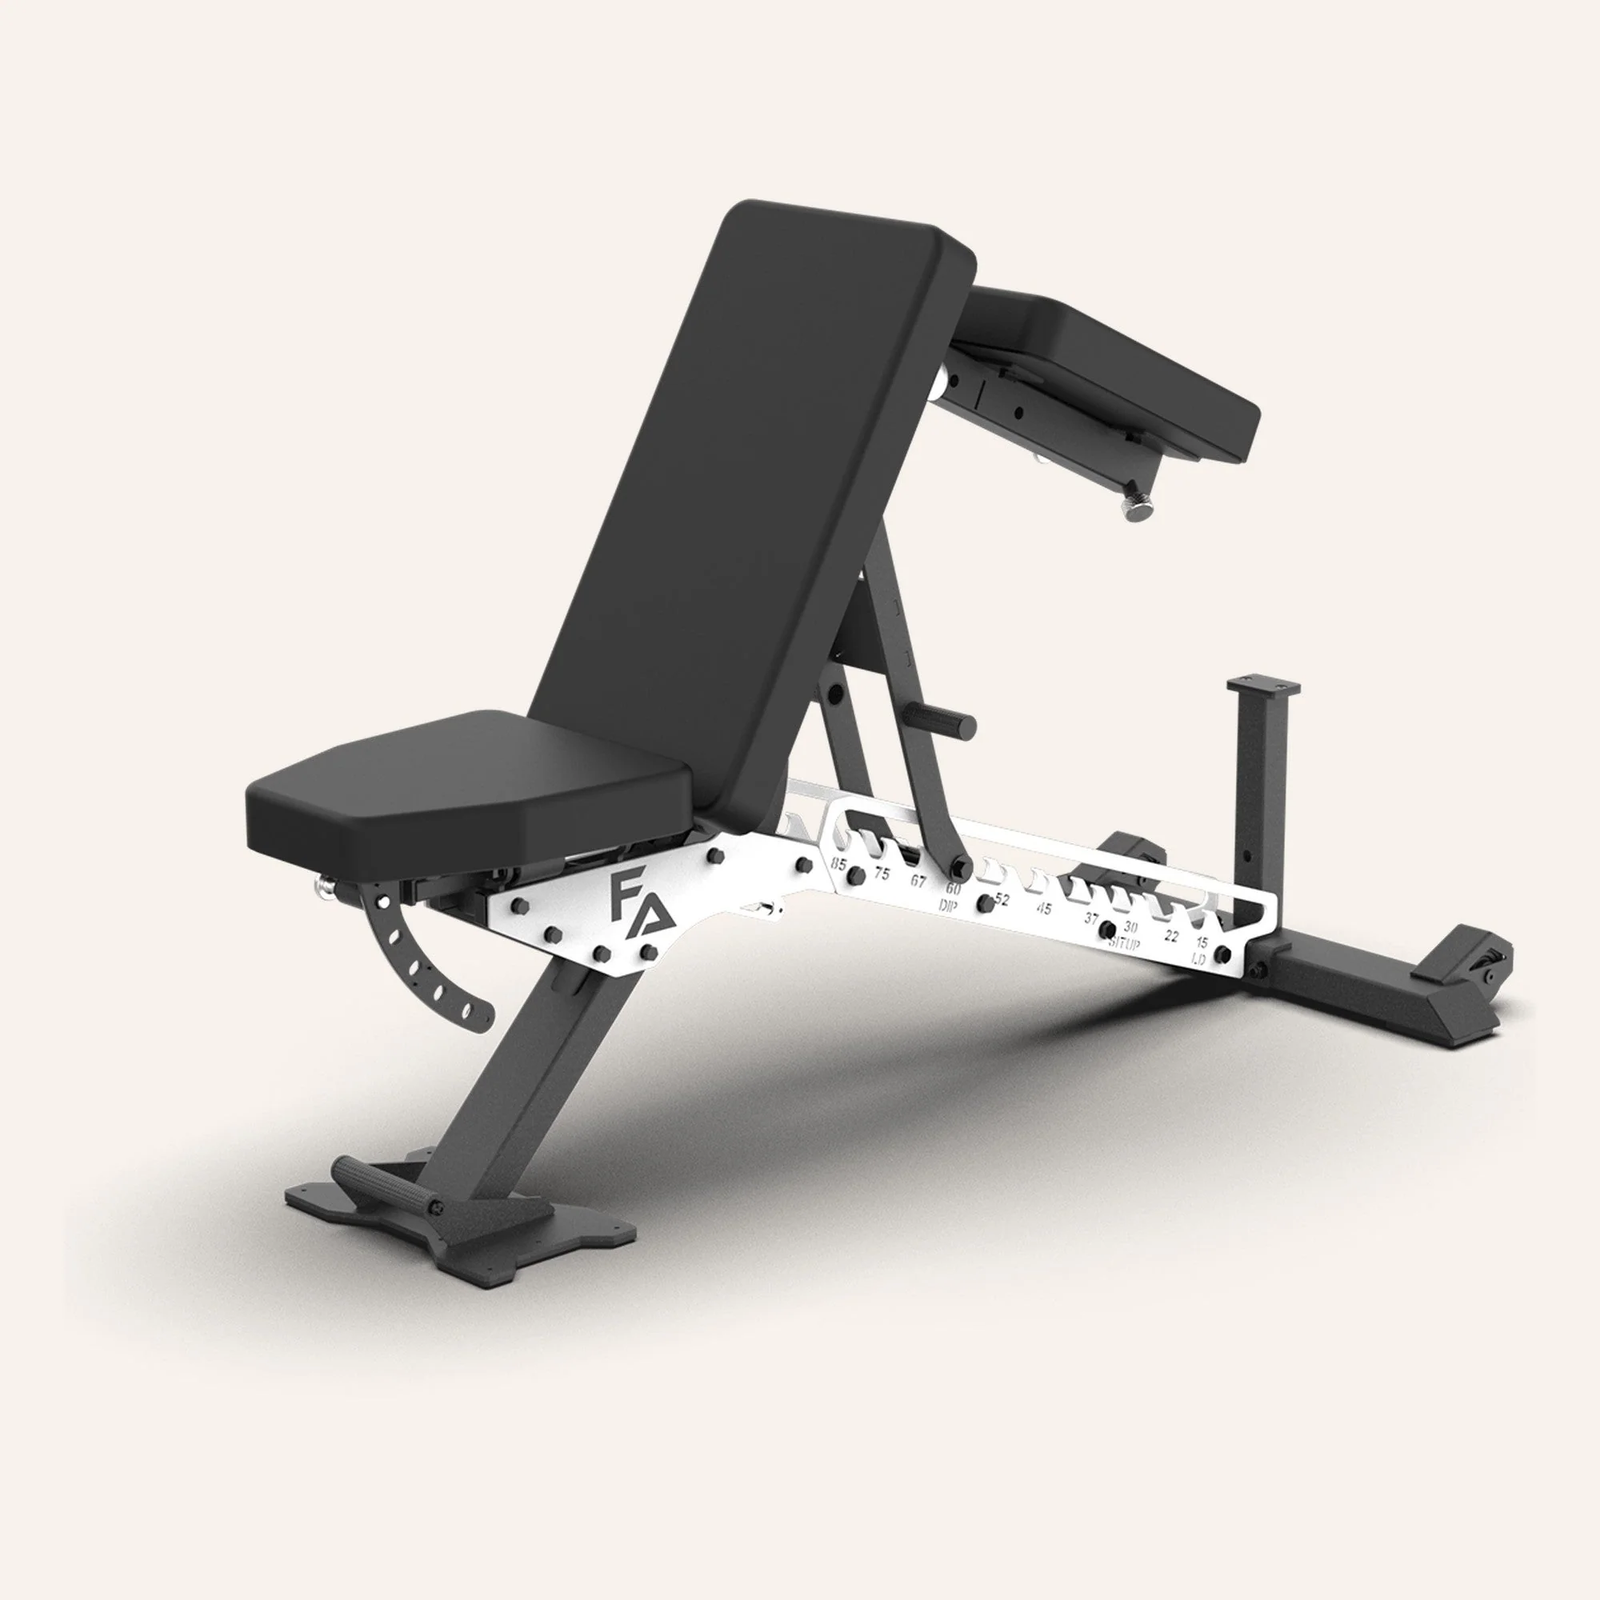
An elevated support offers another way to learn the movement. Place both hands on a firm surface, step back and establish a comfortable line through the trunk and legs. Keep the elbows straight as the chest moves slightly towards the support and then away again. A higher surface generally makes it easier to manage the bodyweight demand than a low bench or the floor.
Check the surface before using it. A desk must not slide, tip or fold under pressure. An adjustable bench should be locked in position and stable against the direction of force. Do not assume that a light chair is suitable merely because its seat happens to be at a convenient height. The support has to be dependable before the exercise can be repeatable.
Start with the hands at a comfortable width near shoulder width. Extreme width changes are not necessary to make the drill worthwhile. Moving the hands closer or farther apart changes the task; it should be a deliberate experiment rather than a way to escape a position you cannot control. Keep the same hand width while you learn the basic pattern.
Where the hands sit also changes wrist demands. Stable parallettes or purpose-made handles may offer a more comfortable grip for some people, provided they cannot roll or slide. Loose adjustable dumbbells are not automatically safe push-up handles. Even a flat-sided dumbbell needs a suitable floor and enough stability; do not improvise with a round weight that can roll away.
A bench, handles and other gym equipment are options, not prerequisites. Ordinary dumbbell presses, cable presses and rows can remain part of your broader strength program, but they are different tasks. Rings and a pull-up station also create different support and stability demands. Buying more equipment is not the progression you need if the basic shoulder-blade movement is still unclear.

Equipment Worth Exploring
Explore equipment, accessories and gear from our carefully selected range.
VOLTRA
Compact digital cable trainer with smooth, adjustable resistance.


Multi Bench MBX-650 2.0
Adjustable multi-bench with roller adjustment, 15 backrest positions and accessory mounts.


Rubber Hex Dumbbells
Rubber-coated hex dumbbell pairs with a stable shape for home and commercial strength training.

Cast Iron Kettlebells
Textured cast-iron kettlebells for swings, squats, carries, and full-body training.


Power Tower
Freestanding pull-up and dip station with adjustable handles for bodyweight training.
3. Move to the floor without turning it into a normal push-up
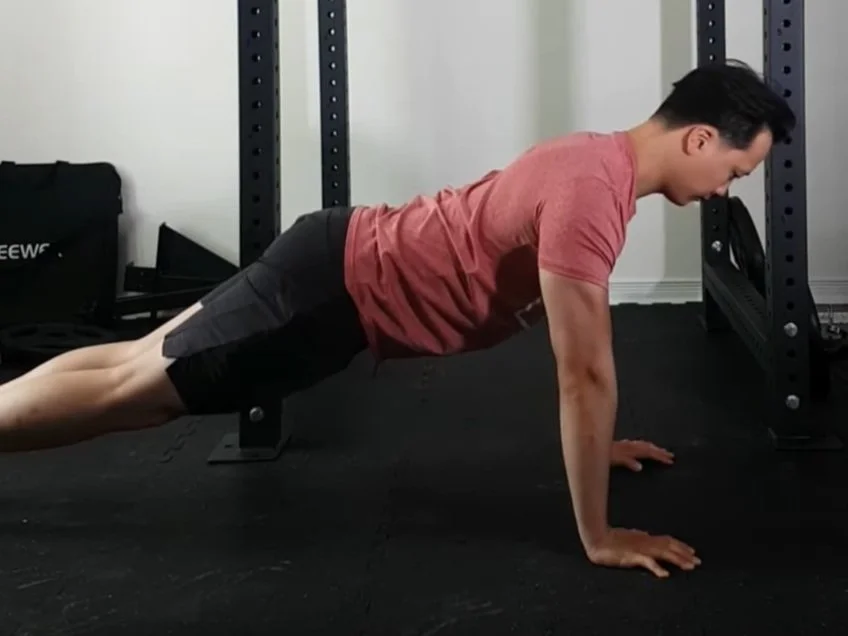
Once you can repeat the movement with a manageable support, try a high plank on the floor. Position the hands and feet so you can hold the trunk steadily. Gently brace the abdomen and glutes, then let the chest move a short distance between the arms before pressing the floor away. Keep breathing rather than holding your breath for the entire set.
Your elbows should remain straight through both phases. If they bend and then extend, you have added a conventional pressing movement. That can be a legitimate exercise, but it makes the drill harder to judge. Return to a higher support or your knees if maintaining straight arms becomes the limiting factor.
Names are not perfectly consistent. Some coaches use “push-up plus” for a full push-up followed by an extra reach at the top. Others use it for the straight-arm shoulder-blade movement alone. Know which version you are practising. In this guide, a scapular push-up means the elbows stay straight; the changing position comes primarily from the shoulder blades and supported trunk.
Do not chase a dramatic rounded-back appearance. The shoulder blades glide around the ribcage, and the upper back may look somewhat different as they move. A large spinal curl, a collapsing lower back or a forward head thrust adds movement that can hide whether the intended action is happening. Aim for a quiet, repeatable trunk rather than an exaggerated finishing pose.
Research measuring muscle activity during push-up-plus positions helps explain why the exercise is used to train the scapular muscles. Those measurements do not prove that one photographed hand position prevents injuries or produces superior long-term results for everyone. Comfortable control is a better starting point than treating an activation ranking as a universal technique prescription.
4. Change the support before adding complicated variations
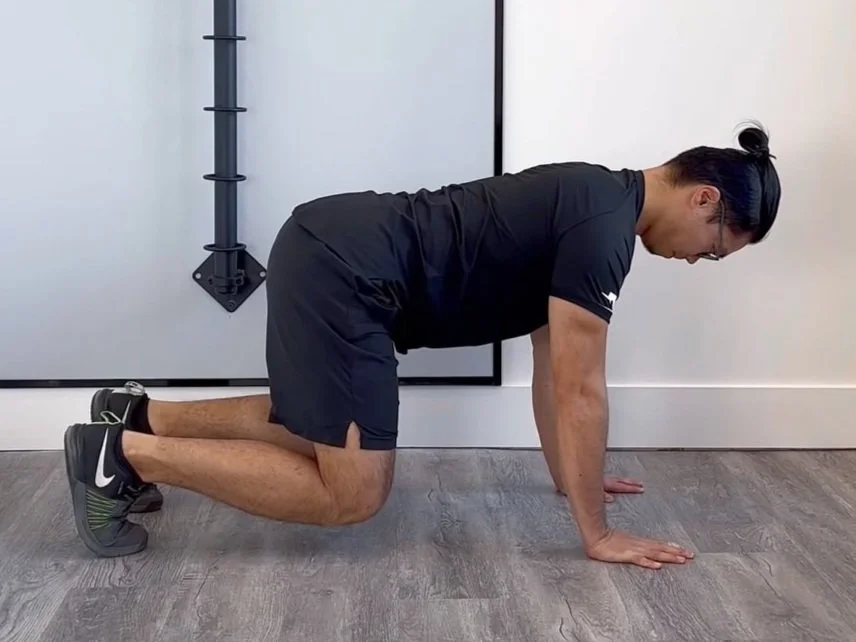
A knees-hovering bear position is one possible variation: start on all fours, lift the knees slightly and practise the same small shoulder-blade movement. The change adds a different trunk and lower-body support demand. It is not automatically easier or better than a long plank, and you do not need to master it before ordinary floor repetitions.
Use it only if you can tell the difference between holding the knees up and moving the shoulder blades. If your main experience is shaking through the thighs while the upper body remains frozen, the variation may be distracting from the purpose of the session. Put the knees down or return to the elevated version.
Several common errors have simple checks. For a shrug, look for the shoulders crowding towards the ears and the neck becoming tense. For an elbow bend, watch the joint angle from the side. For a collapsing trunk, compare the hips and ribs before and after the repetition. Correct one feature at a time instead of adding five simultaneous cues.
The return deserves attention too. Dropping quickly into the space between the shoulders is different from allowing a small, controlled movement back. Avoid forcing the blades together as hard as possible. You are exploring a range you can support, not trying to squeeze the upper back to a maximum on every repetition.
If you experience sharp pain, a sense of instability, new weakness or symptoms that continue after stopping, seek individual assessment. A general exercise guide cannot identify the cause from the appearance of your shoulder blades. Likewise, a clinical rehabilitation plan should determine your progression if you are recovering from an injury or surgery.
5. Build a repeatable practice block before adding a band
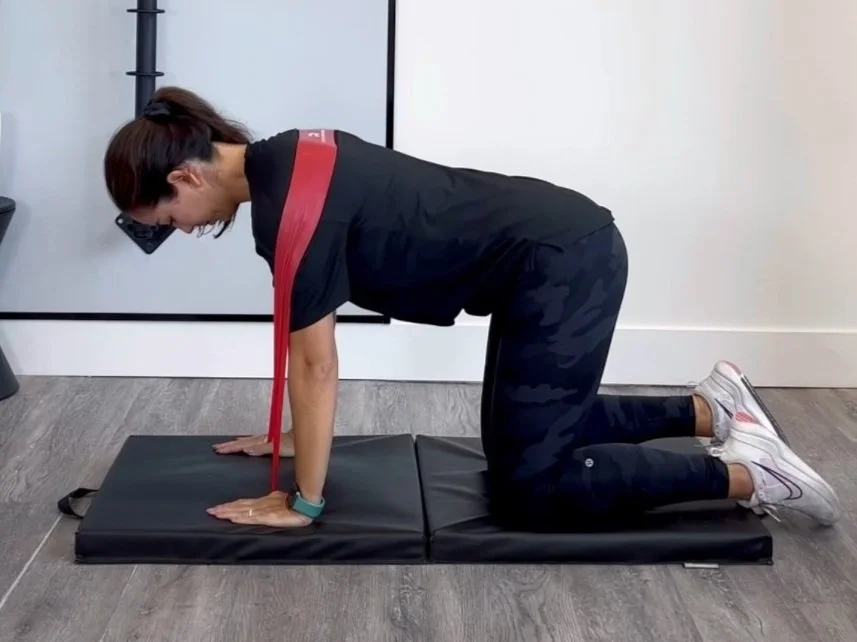
A resistance band can add another challenge to protraction when it is positioned securely across the upper back and held under the hands. The pictured kneeling version is an example of a different resistance setup, not a required upgrade. Inspect the band, keep it away from the neck and avoid any arrangement that can slip suddenly towards your face.
First establish an unbanded baseline. As an illustrative practice block, try one or two sets of five to eight comfortable repetitions on two training days each week. This is a starting experiment, not a research-validated dose for every lifter. Use fewer repetitions if you lose control earlier, and leave enough energy for your main session.
Record the version, support height, hand width and whether the elbows and trunk remained steady. “Two sets of six at desk height, no elbow bend” is more useful than “serratus workout done.” Keep the same arrangement for several sessions so an improvement in control is not confused with a change in leverage or support.
When those repetitions become consistent, choose one next step: a slightly lower support, a few more clean repetitions or a brief pause in the pressed-away position. A band is another option once the original task is easy to recognise. Avoid lowering the support, adding resistance and doubling the repetitions in the same session.
Finally, give the drill a sensible role. It can be a short movement practice before a pressing session or a small accessory alongside broader upper-body training. It does not replace every press, row or pulling exercise, and it does not need to become an exhausting workout. The most useful result is simple: you can move the shoulder blades deliberately while keeping the rest of the setup under control.

Calisthenics Shirts & Street Workout Gear
Calisthenics and bodyweight-training gear for pull-ups, dips, handstands and street-workout athletes.

Big Dip Energy Hooded Pullover for Calisthenics Dips Fa Hoodie
Show off your lifting humor in a laid-back “Big Dip Energy” hoodie.


Always Pull Yourself Up Crewneck Calisthenics Pullover T-Shirt
Bring “Always Pull Yourself Up” humor to your everyday gym style.


Calisthenics Lovers & – Gains & Meme Vibes T-Shirt
Heavy lifts, good laughs, and a little “for Calisthenics Lovers & Lifters” energy.

Calisthenics – Meme & Lovers – Top & Gains T-Shirt
Heavy lifts, good laughs, and a little “Calisthenics” energy.


T-Rex Hates Push Ups Muscle Shirt Athletic Vest for Cal Tank Top
Add some lifting attitude to training with “T-Rex Hates Push Ups”.

Calisthenics Lovers – Gains & Meme Shirt T-Shirt
Make gym days more fun with “for Calisthenics Lovers” style.