Advertising disclosure: This page includes affiliate product links that may earn us a commission, as well as products from our own store.
Frog Pumps: Find a Comfortable Foot Position and Control the Hip Lift
Frog pumps turn a familiar floor bridge into a different setup: the soles of the feet meet, the knees open out and the hips lift while the shoulders remain supported. The movement is simple enough to practise at home, but the unusual foot position can make people chase the wrong thing—forcing the knees wider, pushing the hips excessively high or counting a burning sensation as proof of superior results.
Give the exercise a specific job. It can be a short glute-focused accessory or a low-load movement practice, provided the position feels comfortable and you can repeat the lift without strain. You do not need to feel a dramatic pump, copy another person’s range or abandon ordinary bridges and loaded lower-body training to make it useful.
1. Set the feet without forcing the knees apart
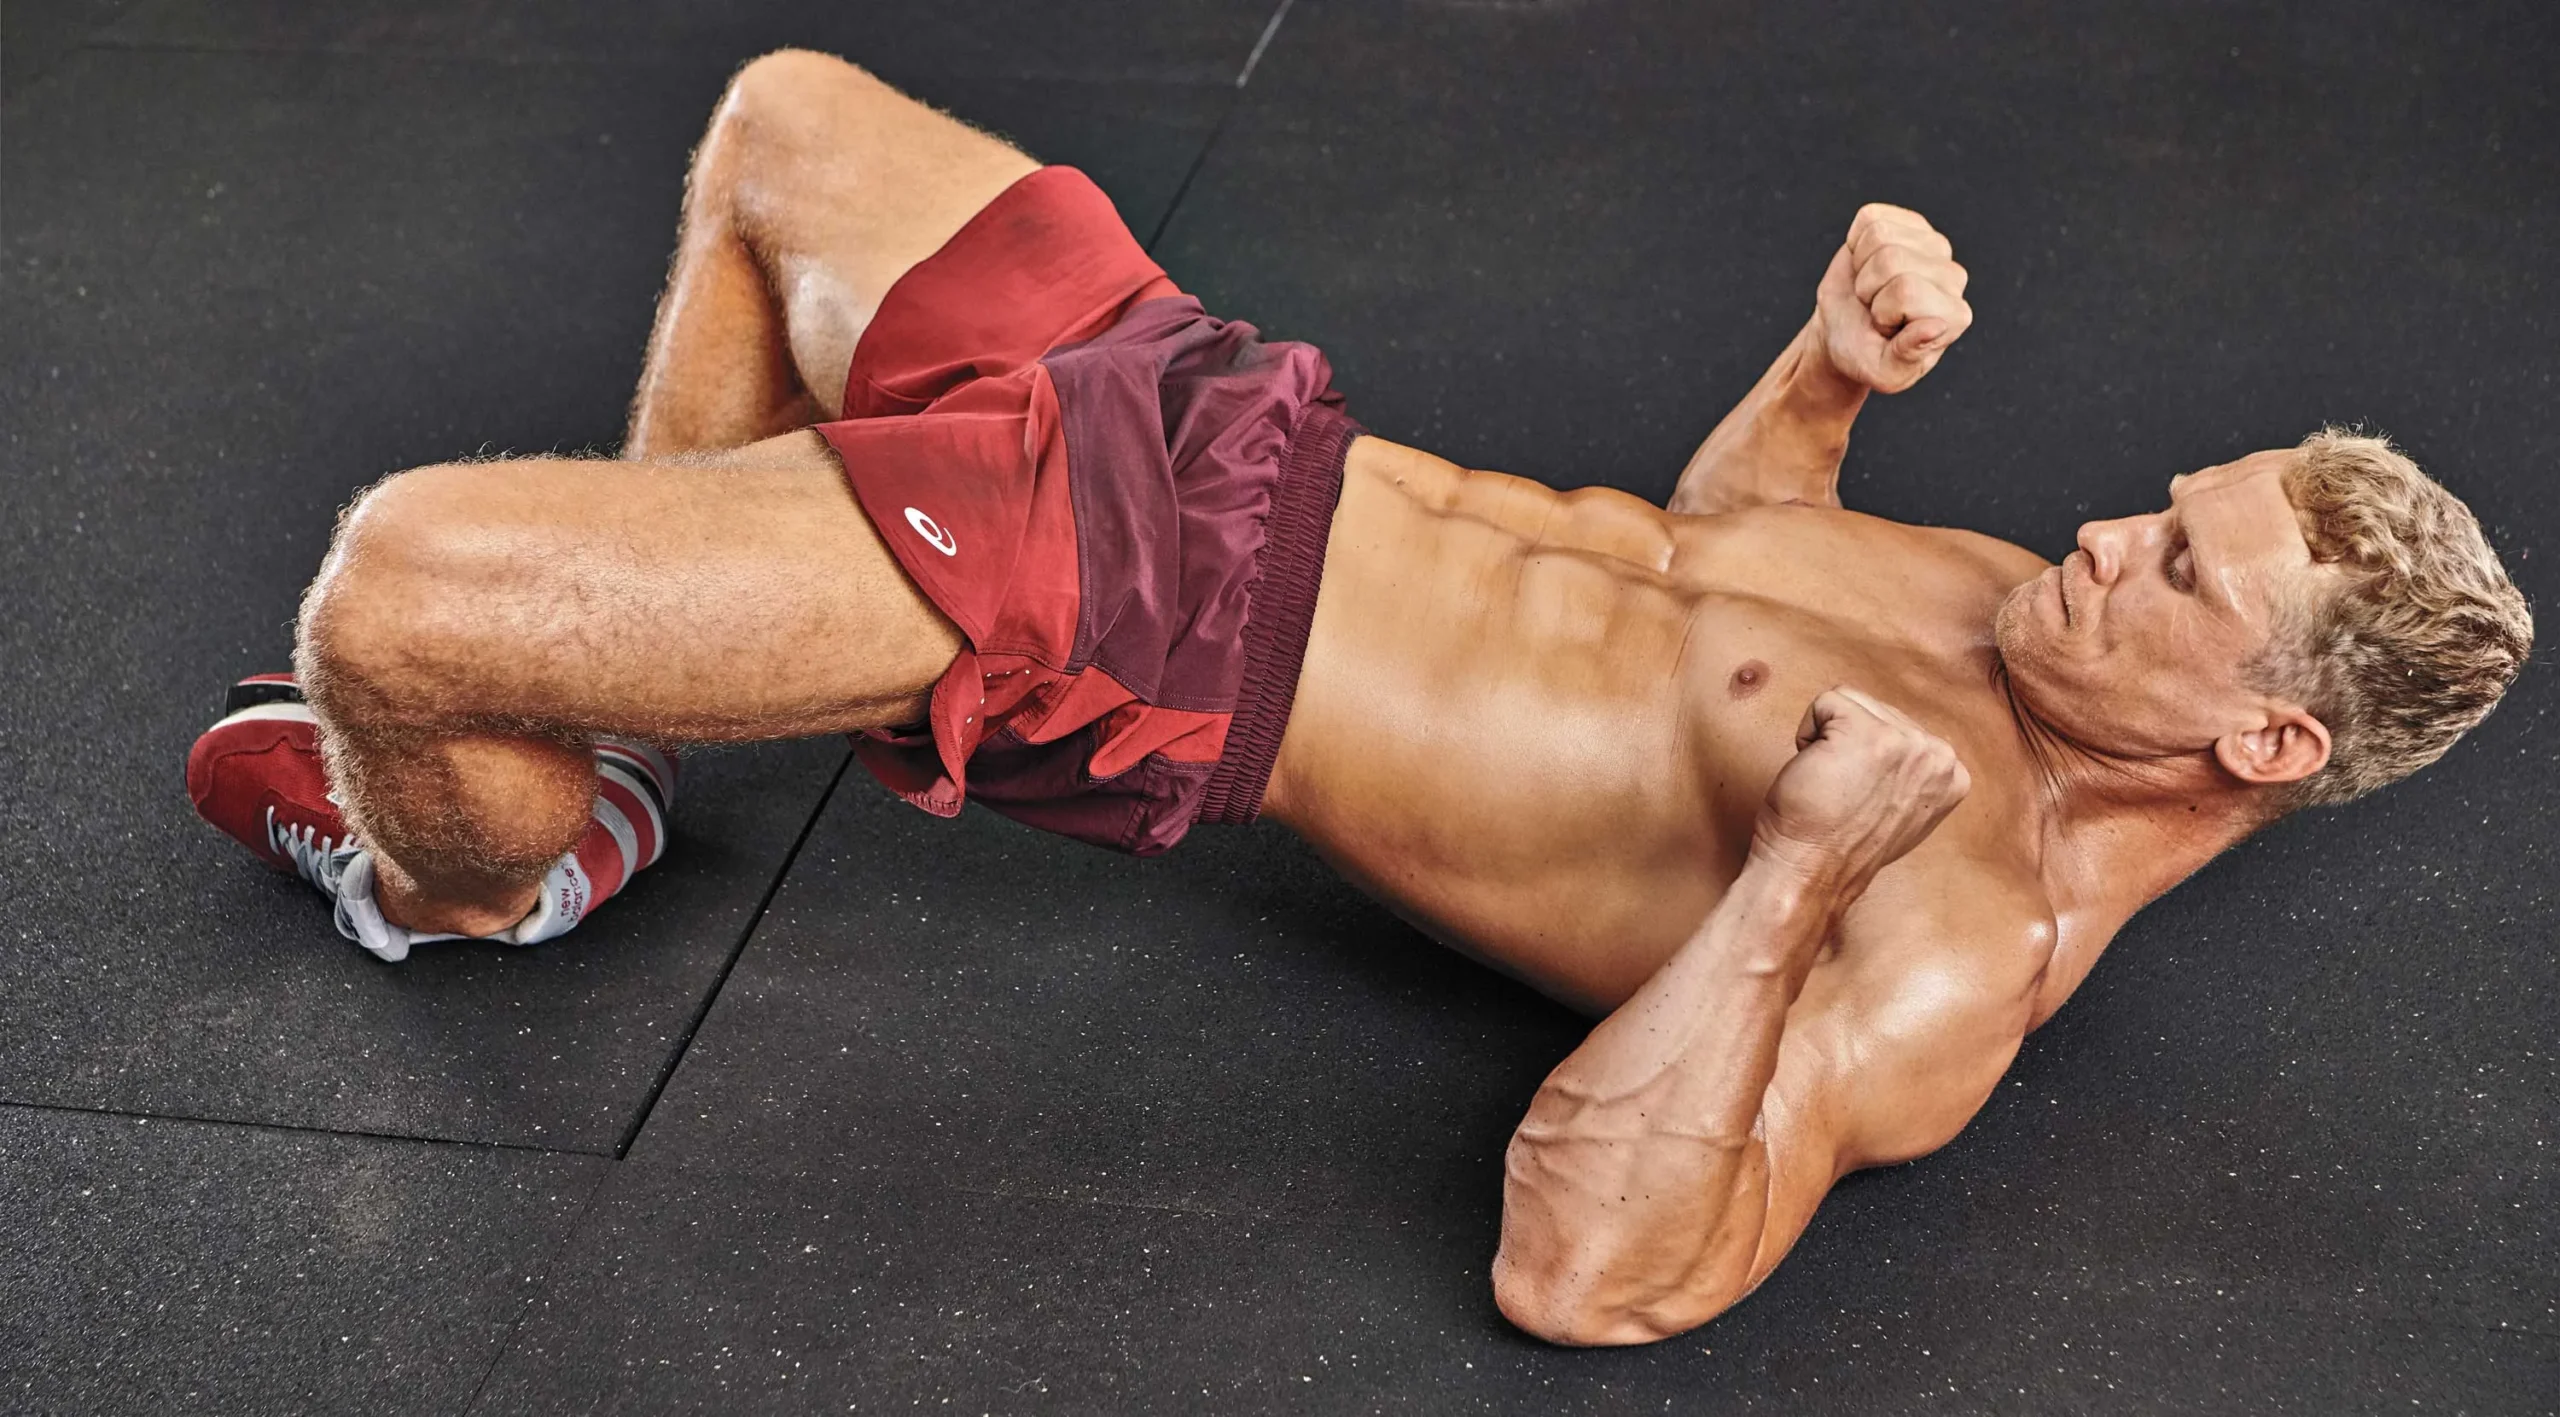
Lie on your back on a supportive mat or comfortable floor. Bend the knees and bring the soles of the feet towards each other, allowing the knees to open into a butterfly-like position. Move the heels towards the pelvis only as far as you can do comfortably. The position should let you press into the floor without twisting through the knees or straining the groin.
There is no single heel-to-hip distance that fits every person. Limb proportions, hip comfort and the contact between your shoes or feet all affect the setup. Begin with a modest opening rather than trying to flatten both knees against the floor. If the feet slide or you cannot find a stable point of pressure, adjust the distance and surface before continuing.
Keep the shoulders supported and let the head rest comfortably. A gentle chin tuck is different from aggressively pulling the chin into the chest or holding the head up throughout a long set. You can leave the head down. Place the arms where they provide light support without turning the exercise into a forceful press through the neck and elbows.
Before lifting, make a small abdominal brace and settle the lower back into a comfortable starting position. This is preparation for controlling the pelvis, not an invitation to push the spine into the floor as hard as possible. If the butterfly position itself produces pain, an ordinary feet-flat bridge may be a more suitable starting option.
2. Make the hip lift and return repeatable
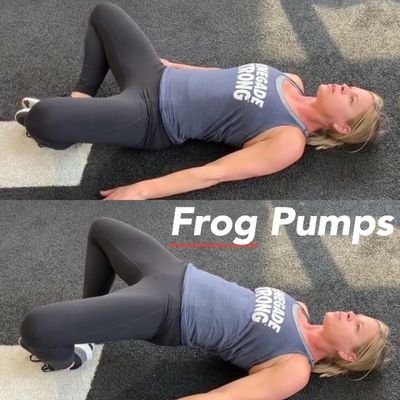
Press the supported edges of the feet into the floor and raise the pelvis by extending at the hips. Keep the shoulders down and lift only as high as you can while maintaining a controlled trunk. Pause briefly, then lower the hips deliberately. The return is part of the repetition; dropping onto the mat and immediately bouncing back up changes the task.
The gluteal muscles help extend the hips, while the rest of the body helps maintain position. Calling frog pumps a glute-focused exercise does not mean the hamstrings, adductors or trunk muscles have stopped working. Feeling some effort outside the buttocks is not automatically a technique failure. Equally, a strong sensation in the glutes does not establish that this exercise will produce more growth than every alternative.
Watch what happens as you approach the top. If the ribcage lifts and the lower back arches to gain another few centimetres, stop a little earlier. A smaller hip lift that you can reproduce is a better practice standard than a high finish achieved by changing spinal position. Exhale naturally during the effort and avoid holding your breath for the entire set.
Keep the knee opening roughly consistent. If the knees gradually close and the feet separate, you are moving towards a different bridge arrangement. That is not inherently bad, but it makes the set harder to compare. Reset the feet between repetitions if necessary rather than forcing the original position after fatigue has made it uncomfortable.
3. Add resistance only when you can manage it safely
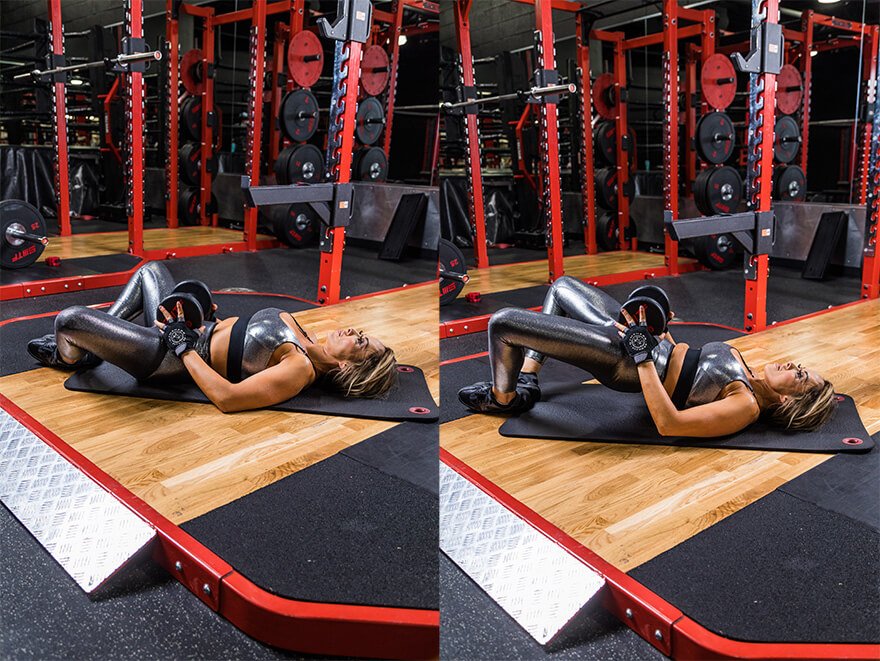
Bodyweight is a useful place to learn the movement. Extra resistance is optional, and it adds a separate practical problem: getting the weight into position, keeping it there and removing it safely. Do not start with an awkward object simply because the unloaded exercise seems easy or a demonstration uses a large dumbbell.
If you experiment with a dumbbell, use a manageable load and a comfortable contact point across the hips. Keep control of the weight with your hands so it cannot roll towards the abdomen or slip sideways. Padding may help with pressure, but it should not conceal an unstable arrangement. End the set while you can still lower the hips and remove the weight deliberately.
A weight held on the pelvis can change the available range and the way the exercise feels. Establish a new repeatable standard rather than insisting on the same height as your unloaded reps. If most of your attention goes into balancing the object, the loading method may be less useful than another exercise with a more secure setup.
Resistance bands introduce their own variables, including band length, placement and tension. A band around the thighs adds resistance to maintaining the knee opening; it is not the same loading task as weight over the hips. Inspect bands for wear, avoid uncomfortable pressure around the knees and do not use resistance to force a wider position.
Stop for sharp pain, pinching or a sudden pull. Familiar muscular effort is different from symptoms that make you alter the movement to escape discomfort. Someone with a recent injury or persistent hip, knee or back symptoms should get individual guidance rather than use a general exercise description as a rehabilitation prescription.
4. Choose between frog pumps, bridges and other glute exercises
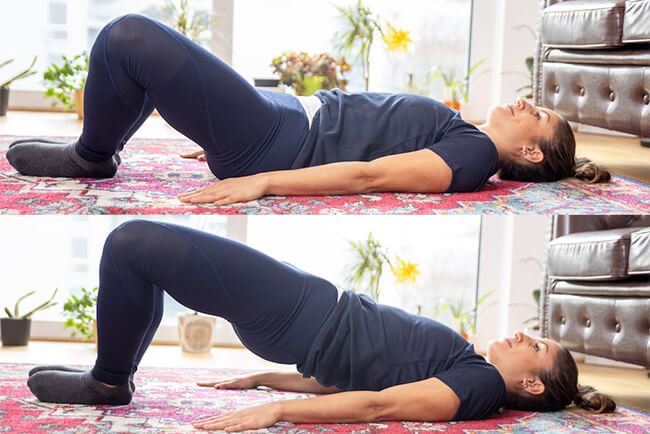
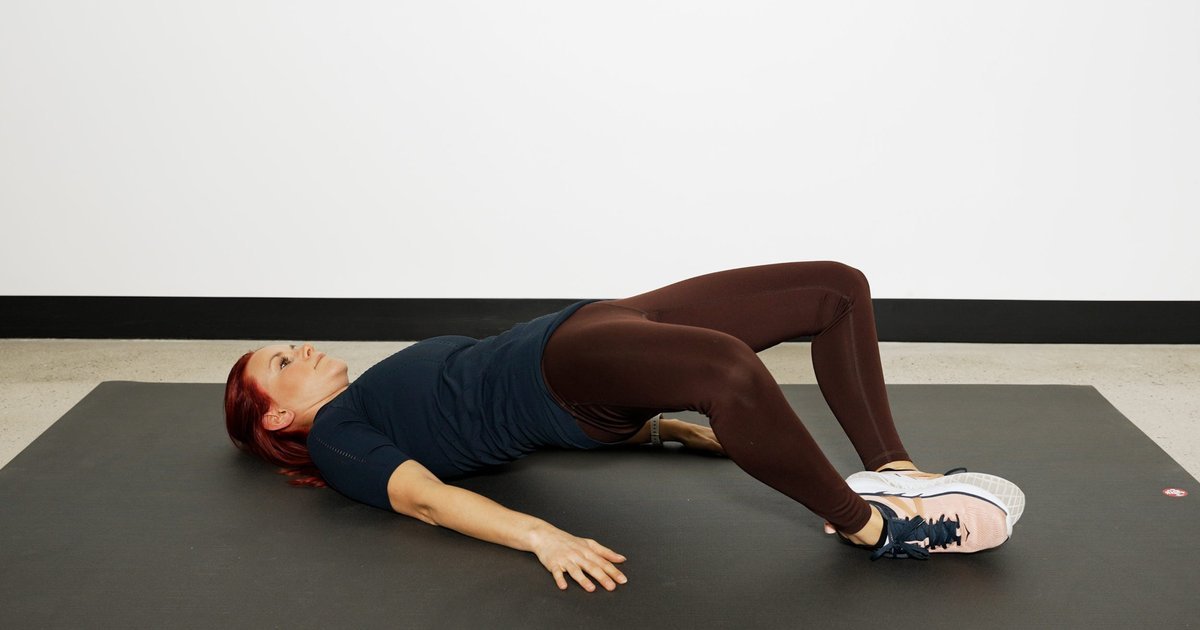
An ordinary glute bridge places the feet flat on the floor, usually with a more parallel leg position. The accompanying comparison photograph shows that conventional version, not a frog pump. It may provide a simpler and more comfortable base for learning hip extension. You can choose it without treating the frog position as a level you must eventually pass.
A bench-supported hip thrust changes the support height and available movement. Before using one, check that the bench is stable, the contact point is comfortable and the load can be controlled. A floor frog pump, a feet-flat bridge and a hip thrust may all involve hip extension, but their setup and loading options differ enough that the same weight is not an equal difficulty test.
A dedicated glute-drive machine can offer a more constrained loading arrangement. It also requires its own adjustment, restraint and range checks. A standing hip-abduction machine trains a different action from extending the hips off the floor; opening the knees during a frog pump does not make the two exercises interchangeable. Choose equipment for the movement you actually want to train.
Dumbbells, kettlebells, barbells and compatible plates can belong in a broader lower-body program without all being suitable objects to balance on the pelvis. Squats, lunges and hinges provide different challenges and may be easier to progress in measurable increments. A barbell pad can reduce pressure during an appropriately configured loaded bridge or hip thrust, but padding does not make a poorly controlled load safe.
Keep frog pumps in proportion. A short accessory can complement more demanding strength work, but a strong burn after a few sets does not demonstrate that all your glute training needs have been met. Your exercise selection should reflect the movements, resistance and recovery you can sustain across the week.

Equipment Worth Exploring
Explore equipment, accessories and gear from our carefully selected range.


Rubber Hex Dumbbells
Rubber-coated hex dumbbell pairs with a stable shape for home and commercial strength training.


Cast Iron Kettlebells
Textured cast-iron kettlebells for swings, squats, carries, and full-body training.



Studio Glute Drive
Plate-loaded hip-thrust machine with supported back pad and adjustable foot platform.

Standing Abductor
Plate-loaded standing hip abductor for targeted outer-glute and hip-stability training.
5. Use a small practice block and keep a useful log
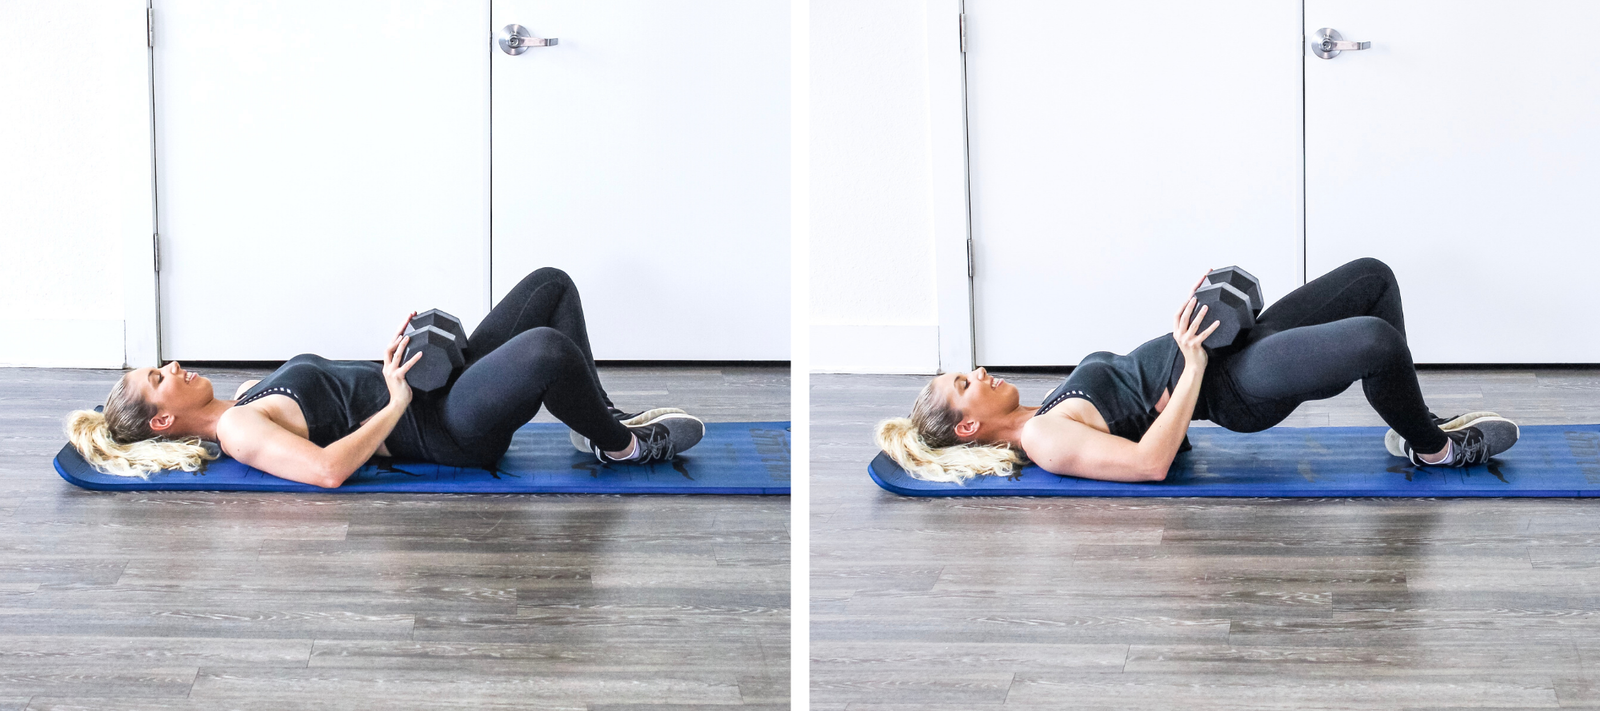
Start with an amount of work that lets you assess the exercise rather than endure it. An illustrative trial might be one or two sets of eight to twelve controlled bodyweight repetitions on one or two training days. These are adjustable coaching numbers, not a research-proven frog-pump prescription. Begin with less if you are unfamiliar with the position or already have substantial glute work in your program.
As a warm-up, keep the sets easy enough that they do not reduce the quality of the main lifts. As an accessory after training, you can use a more challenging effort while still stopping before the feet, knees or trunk lose their established position. There is no requirement to perform a long burnout or reach an arbitrary high repetition count.
Record the foot position, approximate heel distance, repetitions and whether the same controlled lift was maintained. If you add a dumbbell, note its weight and how it was supported. “Two sets of ten, same mat and foot position, no sliding” is a clearer comparison than a description of how intense the pump felt.
Choose one progression when the task becomes consistently manageable. You might add a few clean repetitions, pause briefly at the top or introduce a small, secure load. Avoid increasing range, resistance and total sets simultaneously. If the next available weight is awkward to manage, keep practising the current version or progress another exercise instead.
After a few weeks, review whether frog pumps are doing the job you wanted. They may be a convenient way to practise a controlled hip lift, or you may prefer a conventional bridge. Either result is useful information. A successful accessory should fit the rest of your training and be straightforward to repeat, rather than demand constant adjustments to an uncomfortable position.

Leg Day Shirts & Workout Gear
Leg-day gym shirts and workout gear for lifters who never skip squats, lunges and lower-body punishment.

Thicc Ass Energy Booty Gains & Meme T-Shirt
Heavy lifts, good laughs, and a little “Thicc Ass Energy” energy.

I Only Do Butt Stuff At The Glute Gains Hooded Hoodie
Make your off-duty look more fun with “I Only Do Butt Stuff At”.

Never Skip Legday – Chicken Legs Meme , , & Leg Day T-Shirt
Heavy lifts, good laughs, and a little “Never Skip Legday” energy.

Leg Day Is Calling You Squats, Deadlifts & Gains T-Shirt
Rep “Leg Day Is Calling You” humor in and out of the gym.

Shirt Never Skip Leg Day NSLD Meme – Chicken Legs & T-Shirt
Show some leg-day attitude with a playful “Never Skip Leg Day NSLD Meme” tee.

Shirt Never Skip Leg Day Flamingo Meme – Gymbros, & T-Shirt
Rep “Never Skip Leg Day Flamingo Meme” humor in and out of the gym.

OnlyGains Hooded Leg Day & Booty Gains Meme Top Hoodie
Bring “OnlyGains” gym humor to lazy days and post-workout plans.

GymTok – TikTok Parody Peach Booty Training Crewneck fo T-Shirt
Show some gym-day personality with “GymTok”.

Hippo Thrust Meme – Hip Thrusts & Leg Day , Gymbro, T-Shirt
Bring “Hippo Thrust Gym Meme” humor to your next gym day.

Negative Leg Day Review Leg Day Sucks Meme Squats, T-Shirt
Show some leg-day attitude with a playful “Negative Leg Day Review” tee.