Advertising disclosure: This page includes affiliate product links that may earn us a commission, as well as products from our own store.
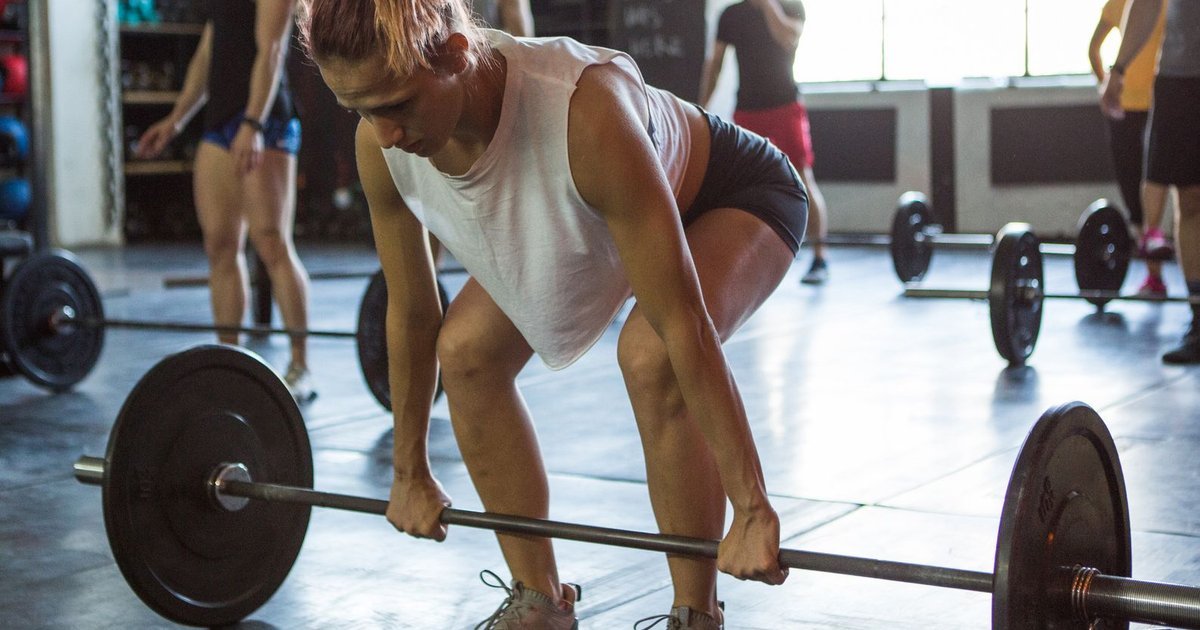
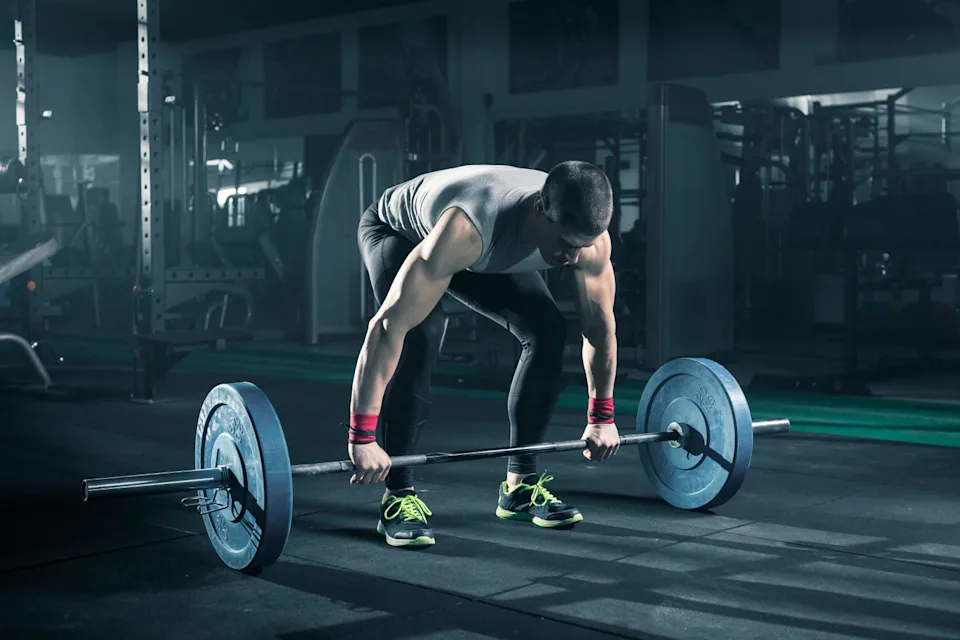
A Pendlay row starts where most barbell rows finish: with the plates resting on the floor. Every repetition is a new pull from a motionless bar, not a bounce disguised as another rep. That simple difference makes the exercise useful for building stronger horizontal pulling mechanics, but only if your torso and load permit repeatable technique. Here is how to set it up, troubleshoot mistakes and run a six-week progression.
What makes a Pendlay row different from a bent-over row?
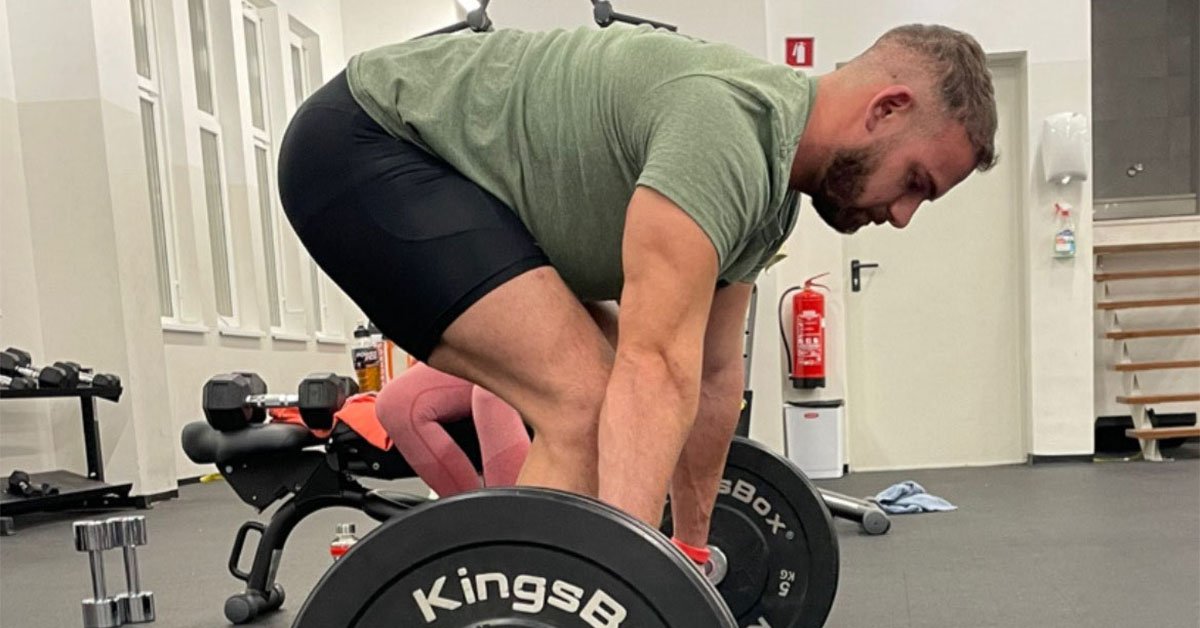
In a classic bent-over row, you hinge forward, hold your torso position and move the bar up and down without necessarily touching the plates to the floor. A Pendlay row normally uses a deeper hip hinge with the torso approximately parallel to the ground. Each repetition begins after the bar has come to a complete stop on the floor. Pull the bar to the lower chest or upper abdomen, then return it to the ground and reset.
That reset removes momentum carried over from the lowering phase. It also reveals technique changes: if you have to stand taller every repetition to lift the same load, the weight is probably too heavy. A regular barbell row can also build a powerful back. The two styles are different tools, not evidence of one being universally superior for muscle growth.
The pull challenges upper and middle back muscles, lats and elbow flexors, while the trunk, hips and legs keep you hinged and steady. Your lower back provides significant isometric support, which is why these rows can feel demanding even when the weight is far below your deadlift. The objective is a forceful but controlled pull from an identical start, not violent jerking or spinal rounding.
Set the bar height, stance and grip before the first rep
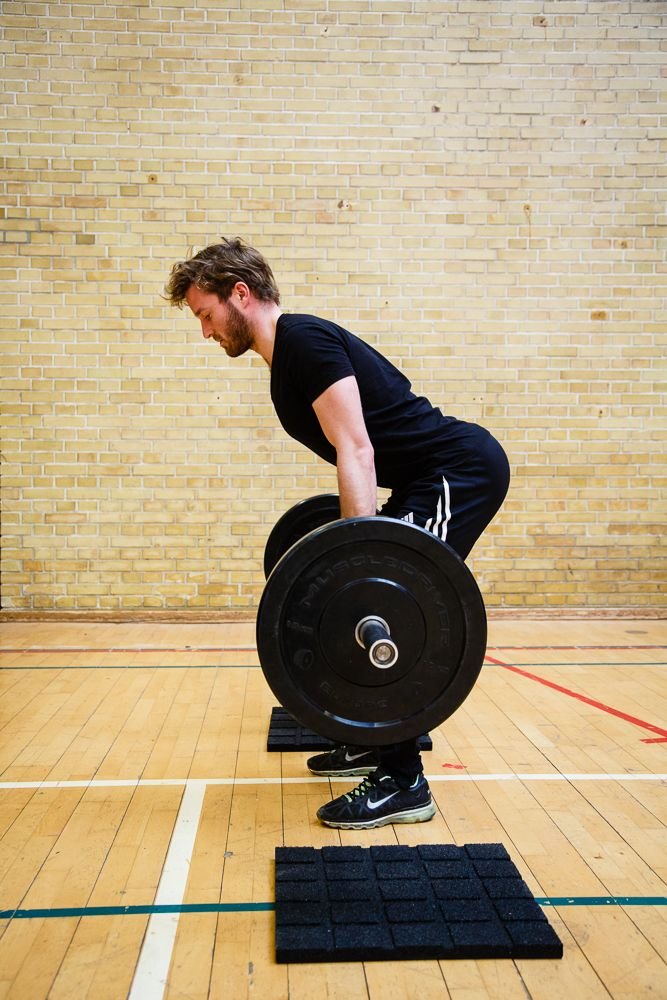
Use a stable barbell, secure collars and plates with enough diameter that the bar starts at a practical height. Standard-size bumper plates work well. A lighter lifter may need technique plates or stable purpose-built blocks to avoid starting too low. Never stack loose objects below a loaded bar. Keep the lifting area level and clear.
Stand hip- to shoulder-width apart, with the bar over your midfoot. Hinge the hips back and bend the knees enough to reach the bar. Keep pressure through the entire foot rather than shifting onto your toes. Your torso will often approach horizontal, but exact angles vary with limb length and mobility. A braced, comfortable neutral spine matters more than matching a photograph to the degree.
Take an overhand grip just outside your knees, commonly around shoulder width. A slightly wider grip changes the touch point and elbow angle. Avoid exaggerating the width to shorten the repetition or irritate your shoulders. Brace your midsection, position the shoulder blades naturally and let the arms hang straight before the first pull.
Rehearse five light singles: pull, touch, settle, re-brace. If you must round to reach the bar, adjust your hips and knees, safely raise the start height or choose another row for now. The setup should remain consistent as the load increases.

Equipment Worth Exploring
Explore equipment, accessories and gear from our carefully selected range.


Competition Plates
Competition-style bumper plates for Olympic lifts and loaded strength training.


Grip Plates
Rubber-coated weight plates with handholds for loading barbells and machines.


Multi Pull Smith Rack MPHR-780
All-in-one rack with a Smith machine, functional trainer, lat pulldown and low row.

Foldable Wall Rack
Wall-mounted folding squat rack designed to save floor space between workouts.
Pull each rep from a complete dead stop
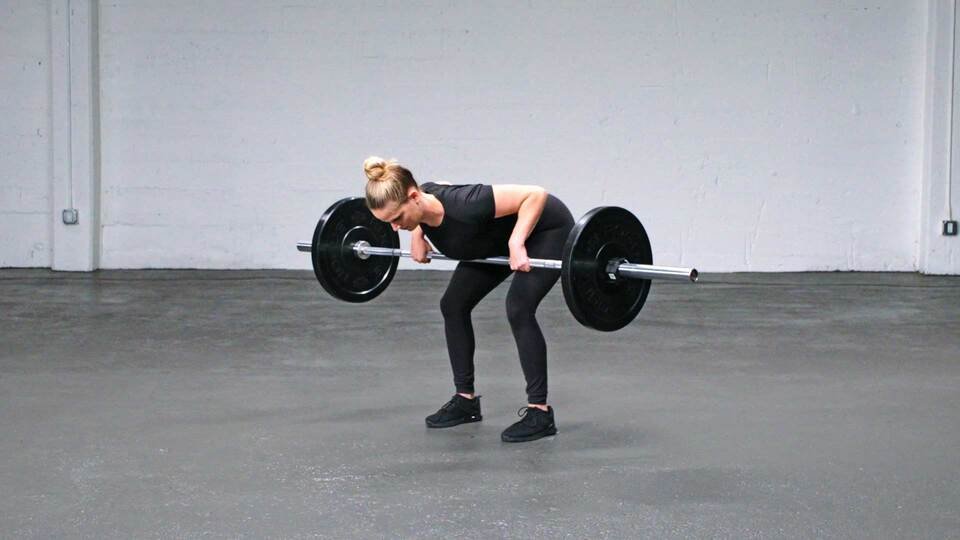
With the plates motionless, take a breath and brace. Press the feet into the floor to anchor your body and draw the elbows backward as the bar travels toward the lower chest or upper abdomen. Keep the torso angle approximately constant. Slight natural motion is normal; standing upright to lift the bar is a different exercise.
Keep the bar close enough that you are not reaching forward. Think elbows back, ribs quiet, bar close. Touch the torso lightly when comfortable. There is no reason to slam the bar into your ribs or crank the elbows unusually high to mimic an arbitrary finish position.
Lower under control until both plates contact the floor, let the bar settle, then re-establish your brace. A complete stop does not require resting for several seconds, but the next repetition should have a distinct beginning. If the back position changes as you lower, finish the set.
Film from the side without placing a camera in the lifting lane. Compare hip height, torso angle, start height and bar path from the first rep to the last. If the final rep looks like an upright shrug, reduce the load. Aim for repeatable pulling strength, not making the plates move by any means available.

Powerlifting Shirts & Lifting Gear
Powerlifting shirts and gym gear for squat, bench and deadlift lifters who live for heavy numbers.

Patriotic Gym With Barbell Flag Design | USA Lifters Ho Hoodie
Keep it laid-back with a little “Patriotic” attitude.

Barbell Breaker Tee
Show some rock-and-lifting attitude with a playful “Barbell Breaker AC/DC Rock Music” tee.

Since I've Been Lifting You Gym | Funny Led Zeppelin Ba Hoodie
Keep it laid-back with a little “Since I've Been Lifting You” attitude.

I’m Strong Barbell Heartbeat Crewneck Pullover for Powe T-Shirt
Bring “I’m Strong Barbell Heartbeat” humor to your everyday gym style.
Barbells and Suffering – Satanic Heavy Metal Gym Shirt T-Shirt
A t-shirt featuring the Barbells and Suffering – Satanic Heavy Metal Gym Shirt for Powerlifters and Bodybuilders artwork, bringing lifting-inspired humor and distinctive gym graphics to your everyday gear.

Therapy Barbell – Bodybuilding Powerlifting Meme Muscle Tank Top
Your gym-day look, with a playful “Therapy Barbell” twist.

Lift Together Grow Stronger Buddies Friendship Workout T-Shirt
Make gym days more fun with “Lift Together Grow Stronger” style.

Liftionaire Money Barbell Meme Workout Bodybuilding Fit T-Shirt
For laid-back days and lifting humor: “Liftionaire”.

Bane Barbell Club Hooded Pullover Gymbros Barbell Fans Hoodie
Stay casual and show some superhero attitude with “Bane Barbell Club”.

Praise The Deadlift Holy Lifting Meme & Fans Hoodie
Keep it laid-back with a little “Praise The Deadlift” attitude.
Which back muscles work, and what does this row leave out?
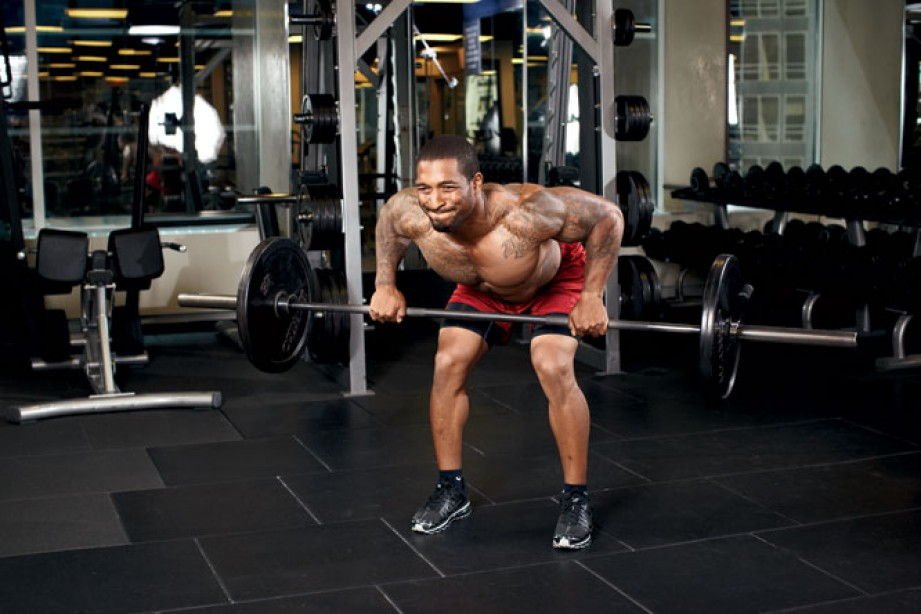
The lats help pull your upper arms back. Rhomboids, the mid-trapezius and other shoulder-blade muscles contribute to upper-back control. Rear deltoids assist arm movement, while biceps and other elbow flexors help bend the elbows. The spinal erectors and abdominal wall resist unwanted trunk movement; glutes and hamstrings help hold the hinge.
Elbow path can change how the row feels. Drawing the elbows closer to the sides commonly creates a tighter lower bar path. Letting them flare moderately may increase upper-back involvement but can be less comfortable for some shoulders. Neither is automatically better for hypertrophy. Choose a path that lets you keep the shoulder position stable and a similar range of motion on each rep.
One row cannot cover every back-training need. It does not replace the vertical-pulling angles of pull-ups or pulldowns, and it requires more active torso stabilization than a chest-supported machine row. A useful week may include one free-weight row, a vertical pull and one supported option, scaled to your recovery.
More weight is not necessarily better if it requires momentum or a shortened range. Challenging sets, meaningful progression, consistent technique and adequate recovery matter more than showing an impressive number on the plates.
Six common mistakes and how to correct them
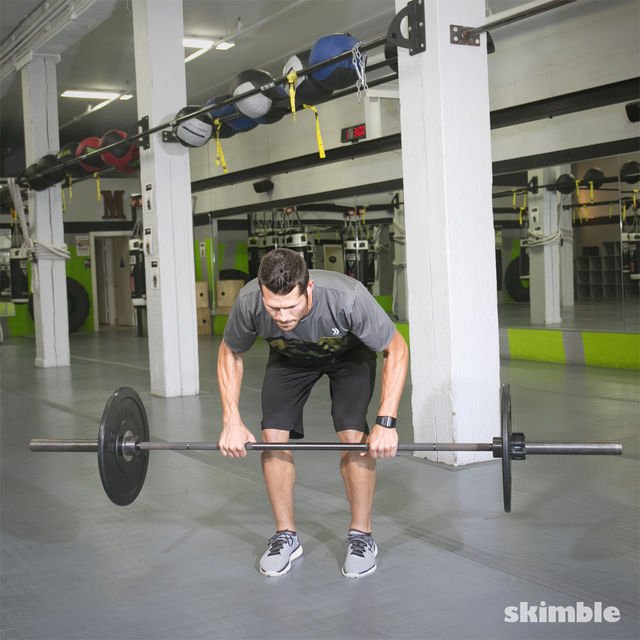
- Bouncing plates: let the bar settle completely and start a fresh pull. Reduce weight if every rep depends on rebound.
- Standing taller each rep: check your torso on video and stop when its angle changes noticeably.
- Rounding to reach the bar: hinge more effectively, allow some knee bend or use stable blocks to raise the bar safely.
- Throwing the head back: keep the neck aligned with the torso and look toward the floor ahead.
- Pulling the bar too far forward: start above midfoot and drive the elbows behind you without swinging.
- Maxing out every session: choose a load with one to three technically clean repetitions in reserve for most working sets.
Straps can help if grip fails before your back, but they are optional and cannot rescue a collapsed hinge. If a bent-over position aggravates your back, substitute a supported row rather than pushing through worsening discomfort. Sharp pain, unexplained numbness or persistent symptoms are reasons to stop and seek suitable assessment.
Consistency is a trainable skill. A slightly lighter load with a genuine floor reset can yield better feedback than a heavy, hurried set. If you change grip width, start height and bar path every workout to chase weight, it becomes difficult to know whether you have actually improved.
Equipment Worth Exploring
Explore equipment, accessories and gear from our carefully selected range.

Leather Lifting Straps
Padded leather straps support grip during heavy rows, deadlifts and pulling exercises.

Leather Wrist Grips
Padded leather lifting grips help support the hands and wrists on heavy pulling exercises.


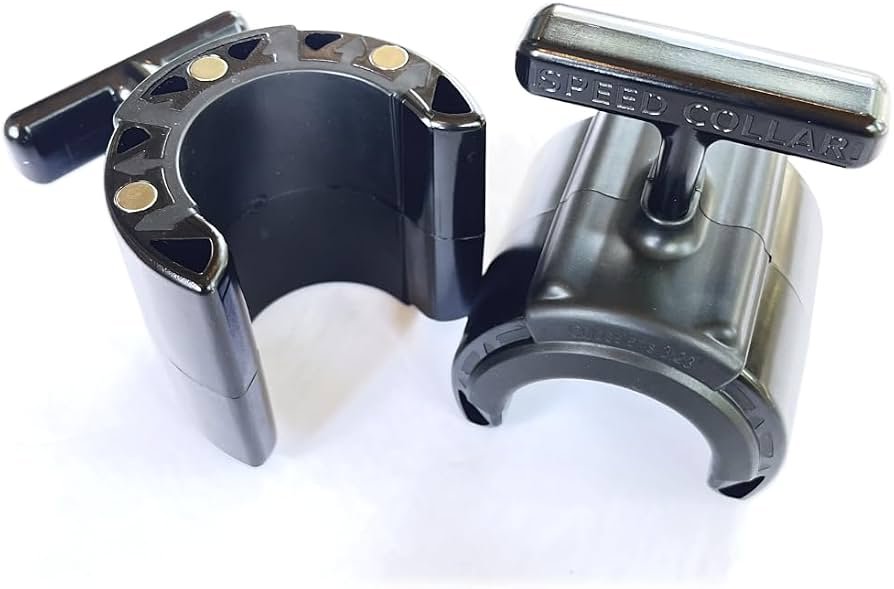
Speed Collar
Quick-release collars designed to secure weight plates on standard two-inch Olympic bars.
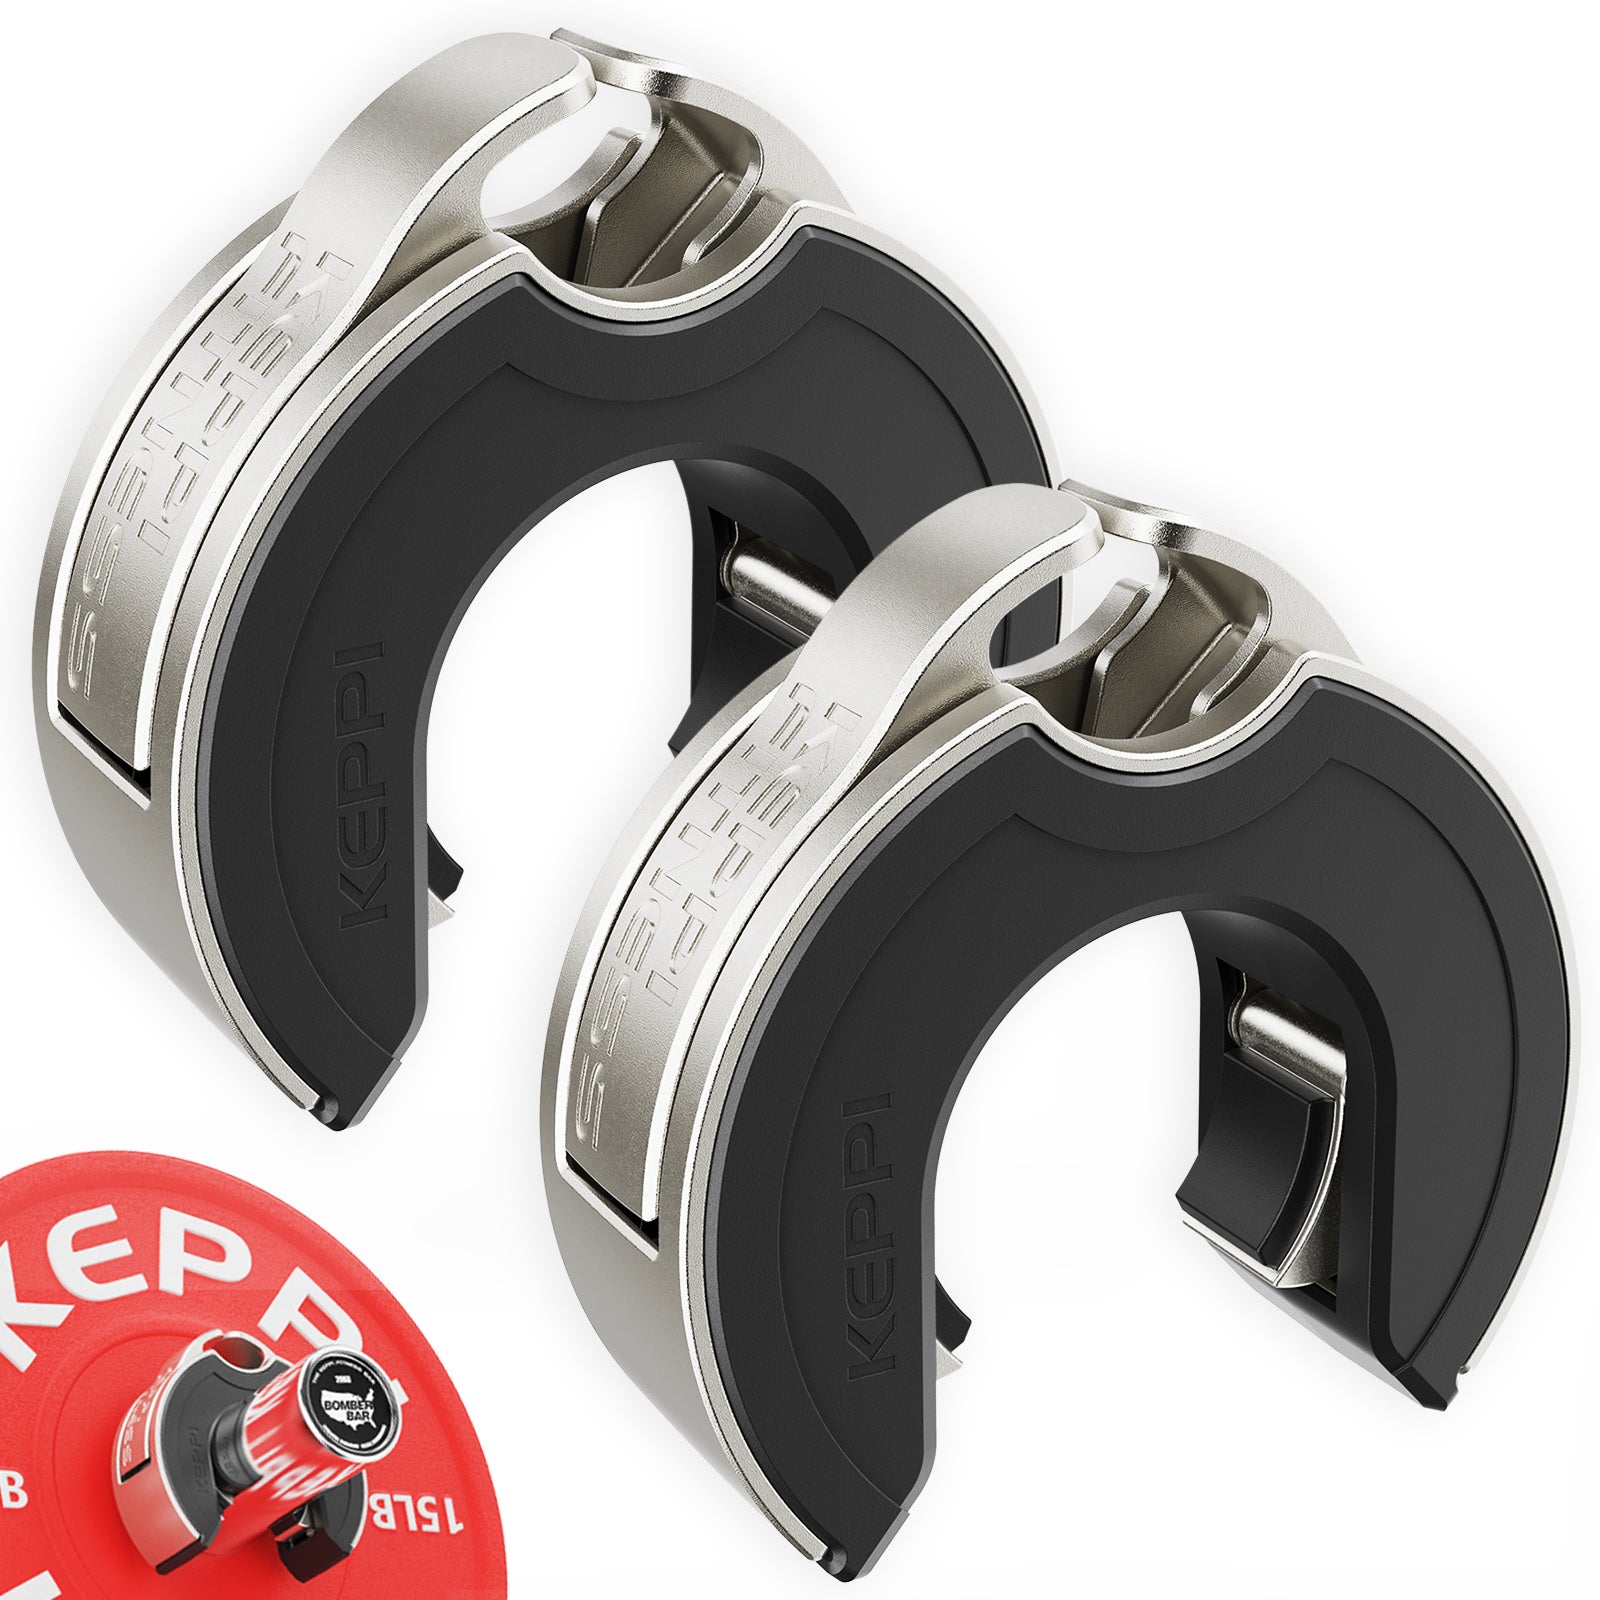
Keppi Open Collars
C-shaped magnetic Olympic barbell collars with a quick-lock mechanism and grippy lining.

GymPin Barbell Row Handle
Heavy-duty handle attachment for barbell, landmine and T-bar rows.

T-Bar Row Attachment
Welded barbell attachment that connects a D-handle bar for landmine and T-bar rows.

Lateral Row Machine LRM-720
Rowing machine with independent lever arms, an adjustable seat and chest support.

Linear Row LRX-750
Dual-sided rowing machine for supported rows, bent-over rows and varied pulling movements.
Pendlay vs conventional, landmine and chest-supported rows
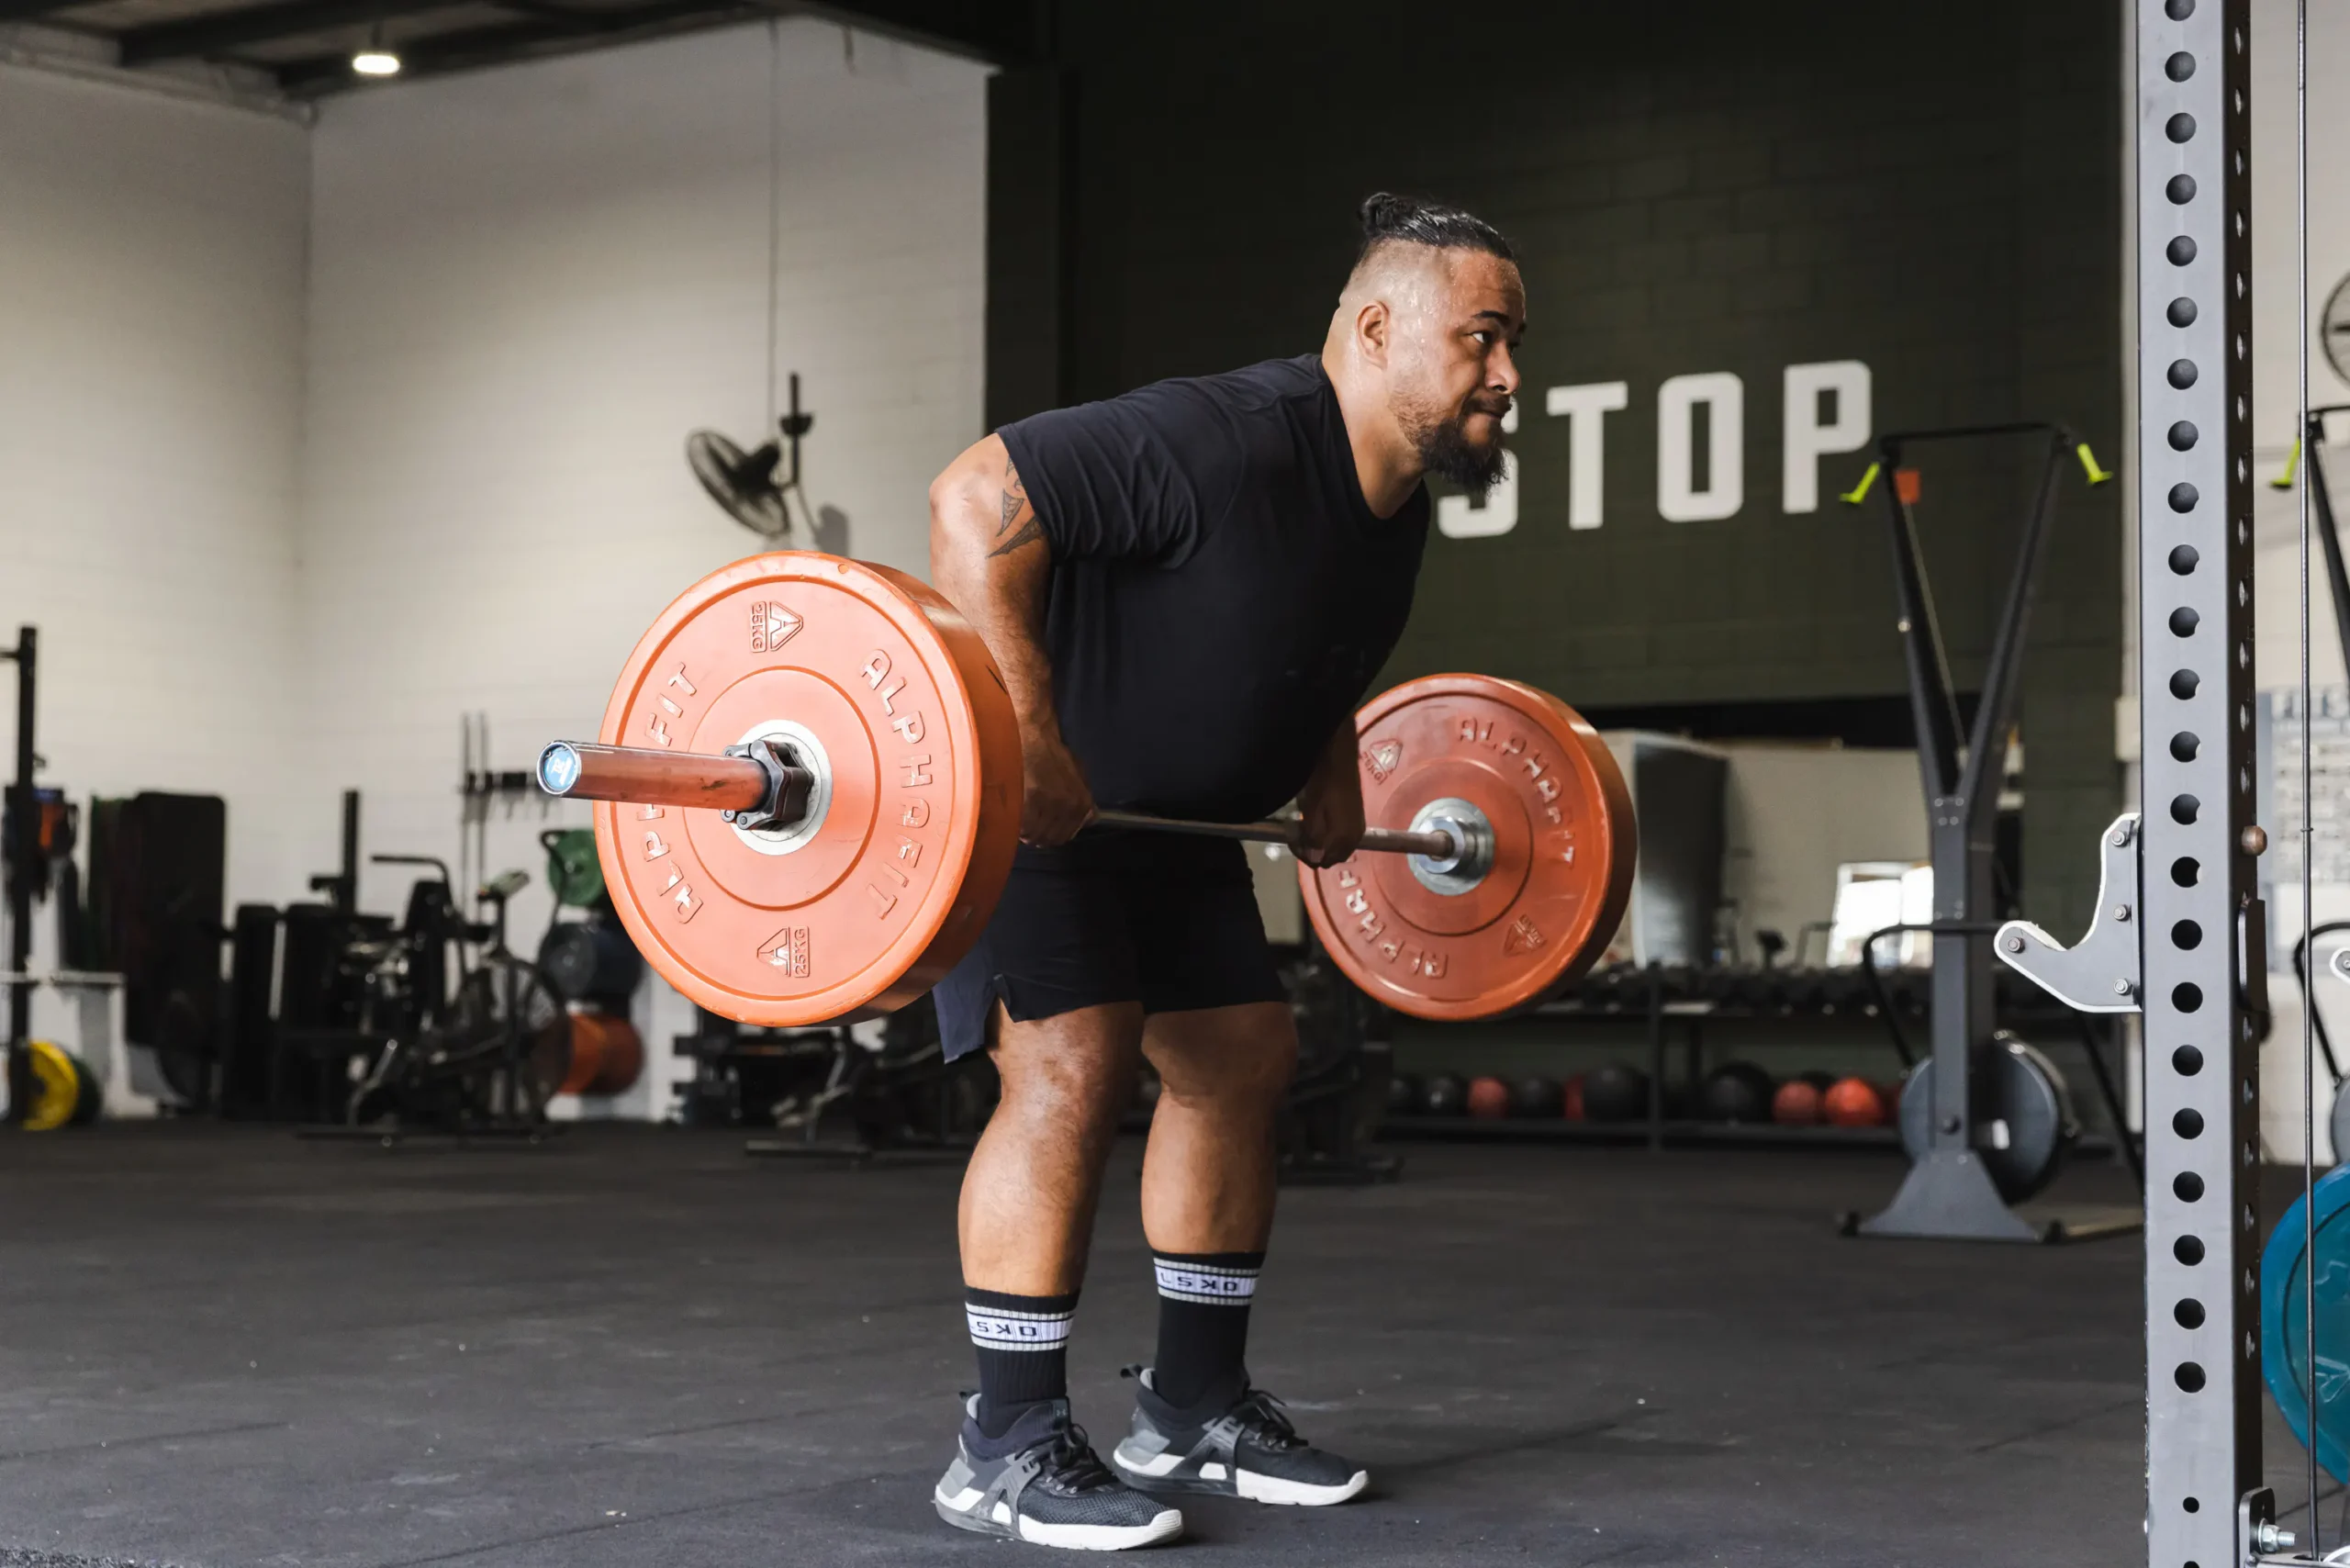
Pendlay row: each pull starts from the floor, creating a defined range and an opportunity to practice force from stillness. It requires a fairly deep hinge and trunk endurance. This does not guarantee greater growth than other variations.
Conventional bent-over row: plates may stay airborne between repetitions. That can maintain loading through the set, but you must avoid gradually using momentum instead of controlled arm and back movement. Both versions are worth practicing when they suit your goals.
Landmine or T-bar row: the anchored bar follows a different arc and handle options may improve comfort. Because leverage and resistance change with the setup, two row variations loaded with the same plates are not directly equivalent.
Chest-supported row: a bench or machine reduces hip-hinge stabilization demands. This can make it easier to target the back after heavy squats or deadlifts when your spinal erectors are already tired. Support is not an inferior choice if it produces a better set.
Choose by a comfortable joint path, reliable form, available equipment and the recovery cost of other training. Anyone unable to reach a bar on the floor with a stable spine can start with a raised-start row or supported version instead.
Bodybuilding Shirts & Workout Gear
Bodybuilding shirts, tanks and gym gear for lifters chasing muscle, size, symmetry and the pump.

Lat Man Big Back – Jumper With Huge Lats – Back Day T-Shirt
Add a playful “Lat Man Big Back” touch to your casual rotation.


Back Sabbath Back Day Funny Gym Hoodie
Bring “Back Sabbath Back Day” gym humor to lazy days and post-workout plans.

Big Back SpongeBob Sweater Back Day & T-Shirt
Bring “Big Back” humor to your everyday gym style.

Demon Back Big Back & Lat Workouts Vest Tank Top
Your gym-day look, with a playful “Demon Back” twist.

Back In AC/DC Rock Music – Gymbro & Gains Meme T-Shirt
Heavy lifts, good laughs, and a little “Back In Gym Funny AC/DC Rock Music” energy.

Back In Shape Back In Black Album Cover Parody AC/DC He Tank Top
Your gym-day look, with a playful “Back In Shape” twist.

Jacked Sparrow | Pirate Workout Sweater & Bodybuilding T-Shirt
Keep things casual with a little “Jacked Sparrow” attitude.

Rat | Ratatouille Meme Muscle Shirt | Cheese Barbell Wo Tank Top
Train hard, laugh a little, and rep “Gym Rat”.

Groot Grow Stronger Decal for Water Bottles Laptops Gym Sticker
Bring “Groot Grow Stronger” attitude to your water bottle or laptop.
A six-week Pendlay row progression for two back days
This sample is for a lifter comfortable with a basic hip hinge and able to row without pain. Place Pendlay rows early on Day A, before other heavy hinges. Day B uses a supported row so you can add back volume without repeating the exact same bracing demand twice.
| Week | Day A: Pendlay row | Day B: supported row | Objective |
|---|---|---|---|
| 1 | 3 x 6 at 3 reps in reserve | 3 x 10-12 | Find a clean starting load. |
| 2 | 3 x 7, same load | 3 x 10-12 | Repeat the same floor reset. |
| 3 | 3 x 8 if technique permits | 3 x 11-13 | Earn reps before adding load. |
| 4 | Add 2.5-5% and do 3 x 6 | 3 x 10-12 | Start the next rep climb. |
| 5 | 3 x 7-8, 1-2 reps in reserve | 3 x 11-13 | Progress without swinging. |
| 6 | 2-3 x 6-8, all clean starts | 2-3 x 10-12 | Review form and recovery. |
Warm up with unloaded hip hinges and progressively heavier practice sets. Rest about two to three minutes between hard row sets or longer if required to recover breathing and bracing. Keep the same start height, grip width and touch point throughout the block. A larger number achieved by shortening the movement is not the progression you want.
On Day B, combine a supported row with a vertical pull such as pull-ups or lat pulldowns. If your week already includes hard deadlifts or squats, lower Pendlay volume or space the sessions farther apart. Do not add these sets wholesale to an already high-volume program.
When you can hit the upper end of the prescribed range cleanly, make a small weight increase and return to the lower rep target. If the trunk position breaks down, repeat or reduce the weight. If you stall despite adequate sleep, food and practice, briefly trim one set before adding more. A successful six-week outcome is more weight or more clean reps from the same starting position, not one heroic pull.