Advertising disclosure: This page includes affiliate product links that may earn us a commission, as well as products from our own store.
Spanish Squats: Band Setup, Quad Holds and a Six-Week Plan
The Spanish squat is one of the more unusual ways to train your quads: a thick band runs behind the knees and anchors in front of you, letting you lean back into a squat without losing balance. That counterbalance is why the exercise looks almost like sitting into an invisible chair. The position can make static holds surprisingly challenging even without a plate or barbell.
But it also creates questions. How tight should the band be? Do the shins have to stay perfectly vertical? Is holding for 45 seconds always better than moving through repetitions? The useful answer is not a magic rule; it is a consistent setup, suitable effort and a progression you can repeat. Here is how to make the variation productive without treating it as a cure-all for knee pain.
1. Why the Spanish squat feels different from an ordinary squat
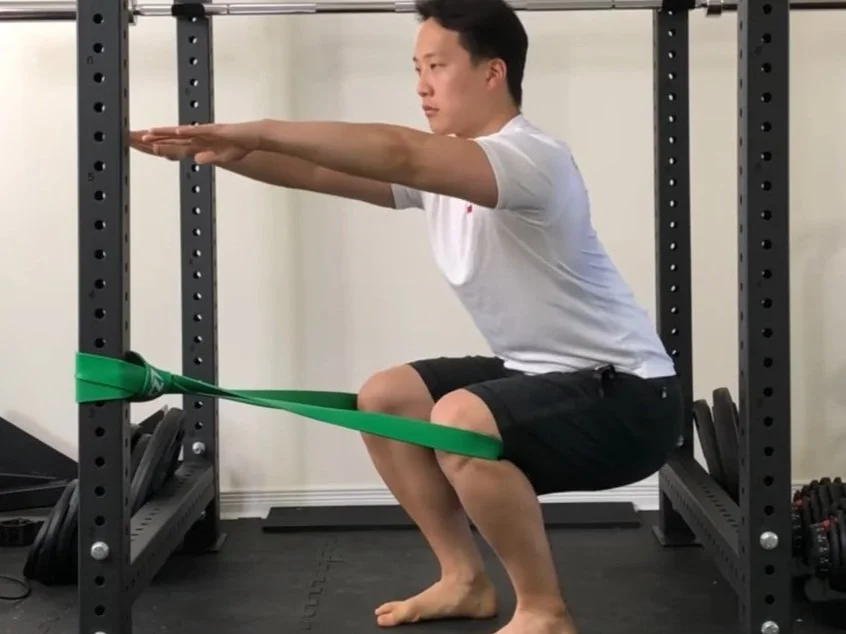
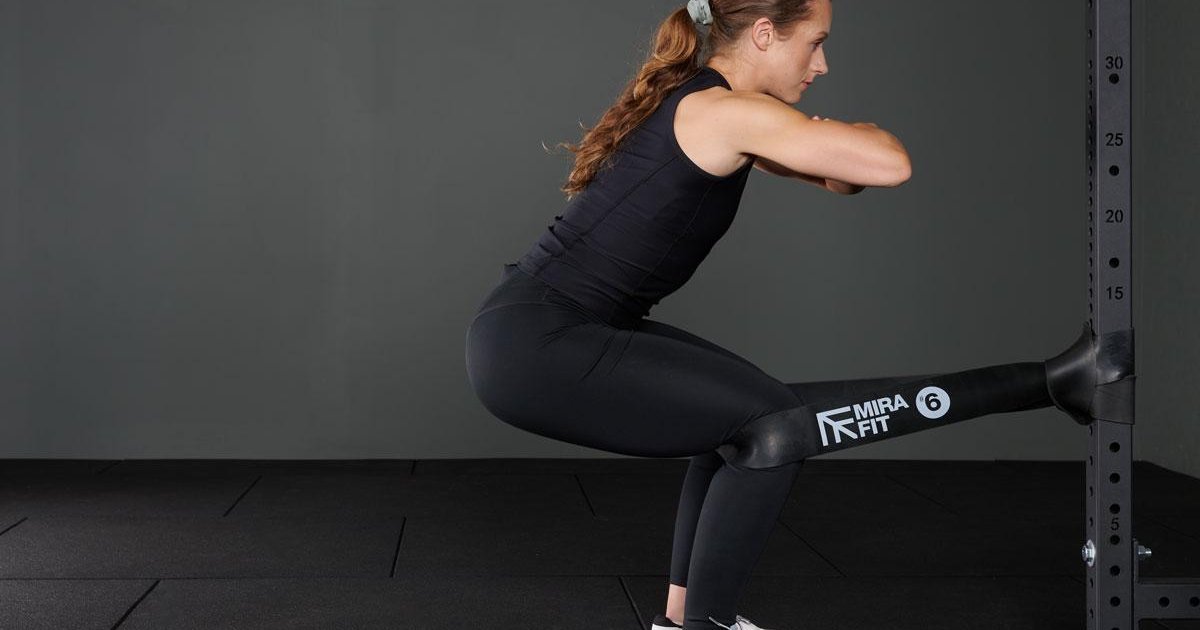
A Spanish squat uses a strong band or rigid strap positioned behind both knees and anchored to something immovable in front of you. As you move away from the anchor, the band pulls your lower legs forward toward it. You can then sit your hips backward into the band’s support instead of balancing entirely over your feet. The torso often stays more upright and the shins closer to vertical than in a conventional squat.
The quadriceps still have to generate force to maintain the bent-knee position or stand up again. A band is not a powered knee-extension machine and it does not make the exercise automatically superior to squats, leg extensions or split squats. It changes the balance demands, joint angles and way you apply load. The glutes and trunk contribute too, but the front of the thighs is usually where a hold becomes demanding first.
This makes the variation useful as a deliberately simple accessory: you can practice a repeatable knee angle, hold quadriceps tension without handling a barbell, and add time under tension after your main lifts. It is not a shortcut to bigger quads if your regular training already supplies enough challenging, progressively loaded work. Treat it as a different tool, not a mandatory replacement.
2. Build a secure anchor and position the band correctly
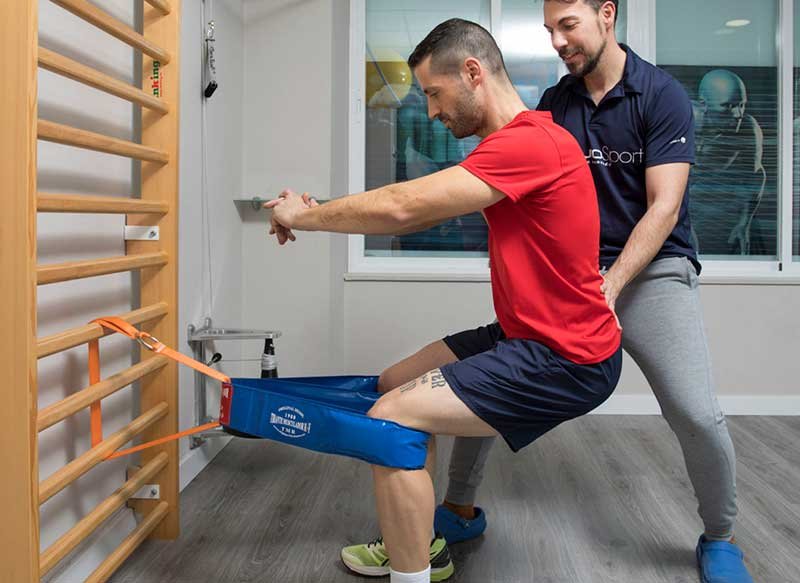
Start with a substantial resistance loop or purpose-made strap. Fix it around a genuinely stable rack upright or structural post approximately at knee height. A movable bench, loose door attachment or lightweight freestanding stand can tip or release under your backward lean. Inspect the band for cracks, abrasion or damaged stitching and keep the area behind you unobstructed.
Step both legs into the loop and settle the band against the back of the knees or just below the knee crease where the contact feels secure. Some setups use a separate band per leg. Walk backward from the anchor until the band is taut and offers a clear counterbalance, but not so much that it pulls your stance apart or digs sharply into the skin. Stand with feet around hip to shoulder width on a non-slip floor.
Before committing to a full hold, test three small knee bends. Check that the anchor remains fixed, the band tracks evenly behind both legs, and you can return upright without stumbling. The farther you stand from an elastic anchor, the more its force can change; that makes anchor distance an actual training variable. Record the same band, post and standing distance when you want comparable sessions.

Equipment Worth Exploring
Explore equipment, accessories and gear from our carefully selected range.


Foldable Wall Rack
Wall-mounted folding squat rack designed to save floor space between workouts.

VForce Wall Trainer
Space-saving wall-mounted functional trainer with pivoting cable arms and variable resistance ratios.

VForce 2IN1
Half rack and pivot-arm functional trainer with switchable 1:1 and 2:1 pulley ratios.

VForce 3IN1
All-in-one rack combining an adjustable Smith machine, functional trainer, and free-weight station.

Multi Pull Smith Rack MPHR-780
All-in-one rack with a Smith machine, functional trainer, lat pulldown and low row.

VForce 3IN1 Max
Six-post all-in-one rack with Smith machine, functional trainer, and variable-force cables.


Rubber Hex Dumbbells
Rubber-coated hex dumbbell pairs with a stable shape for home and commercial strength training.

GymPin Squat Wedges
Non-slip 15-degree squat wedges help elevate the heels for deeper quad-focused squats.
A rack can provide a convenient secure attachment point, but the brand of rack is less important than stability and a properly placed band. Never tie a questionable band to a small accessory that was not designed as a bodyweight counterbalance.
3. Find the right shin angle, depth and foot pressure
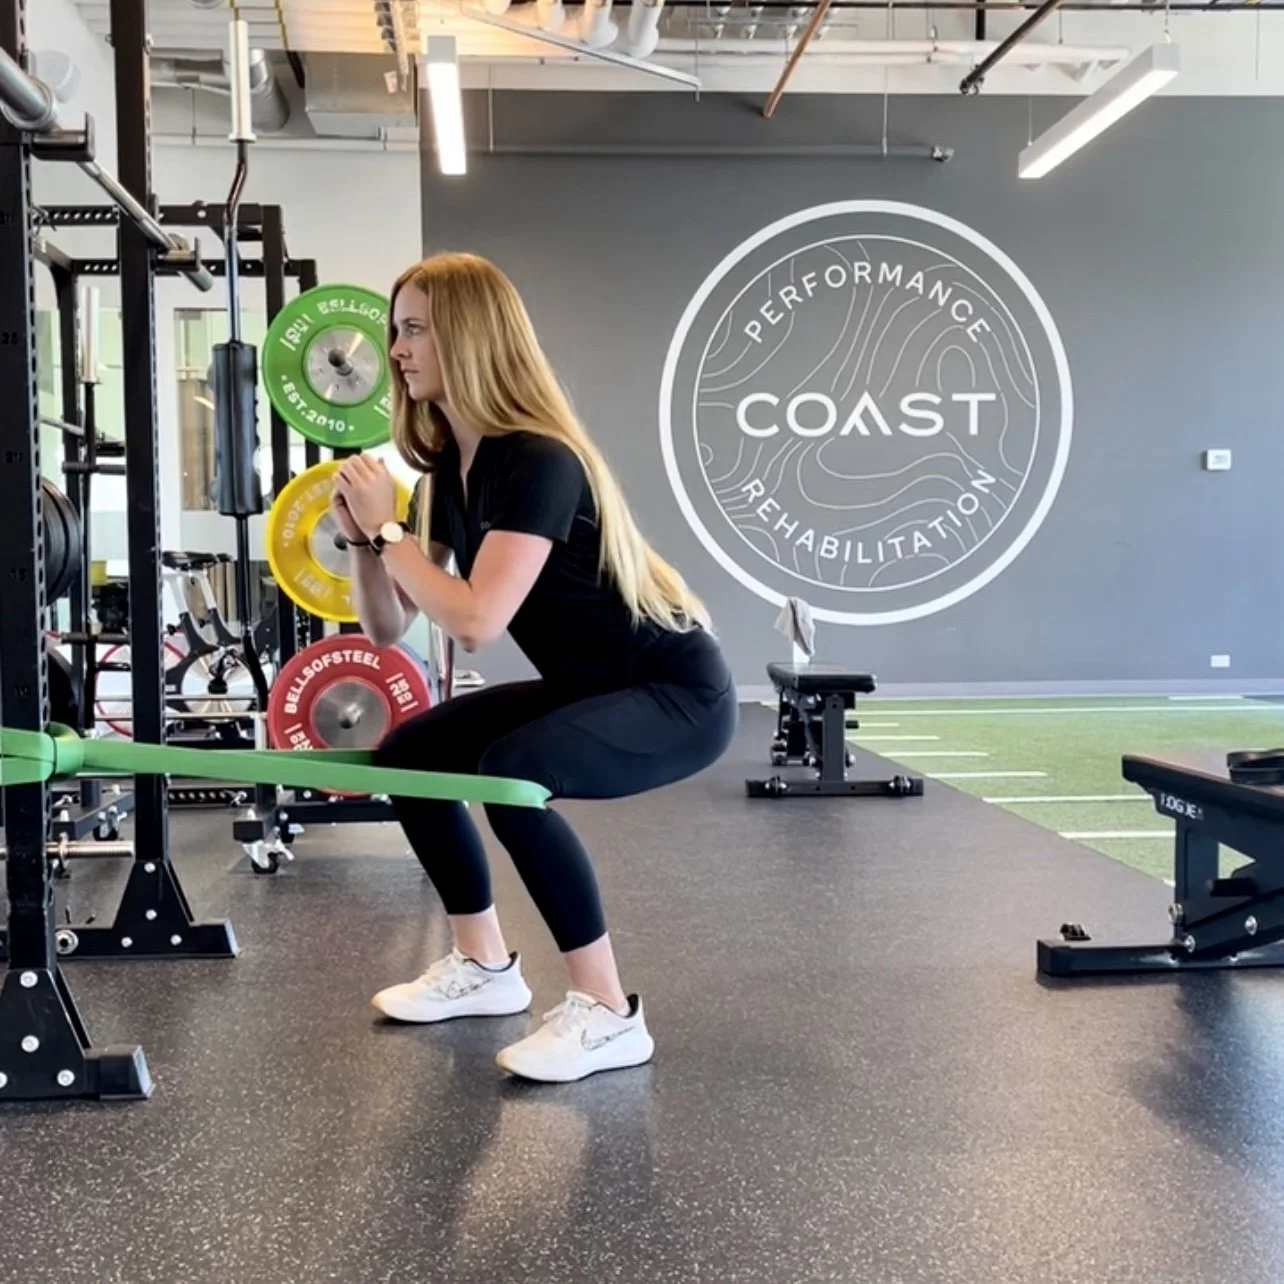
With the band under tension, send the hips back and down in a controlled manner. Aim for a tall, comfortable trunk rather than rounding your lower back or aggressively arching your chest. The band should help counterbalance your weight while you maintain full-foot contact. Your heels should stay down and your knees should roughly track the direction of your toes.
Near-vertical shins are a useful starting cue because they make this variation recognizable, but the shin angle is not a medical rule or a reason to force an uncomfortable joint position. Body proportions, ankle motion, band height and anchor distance can change what feels stable. Start with a shallower knee bend, then descend only as far as you can maintain balance, even pressure across the feet and steady quad effort.
For a hold, pause at a position where the thighs are angled downward or approximately parallel to the floor, depending on tolerance. Breathe in a controlled rhythm rather than straining through a long breath-hold. When your hips rise without permission or the band slides, end the set. For repetitions, take two or three seconds lowering and stand smoothly, avoiding a bounce from the band.
Common mistakes tell you which variable to change: heels lifting can suggest too much forward pressure or insufficient support; a sudden drop back may mean excessive reliance on the band; sharp pressure at the knee crease calls for a different band width or position. Fix the setup before chasing more seconds.

Leg Day Shirts & Workout Gear
Leg-day gym shirts and workout gear for lifters who never skip squats, lunges and lower-body punishment.

I Love Squats Shirt | Valentine's Leg Day Meme with Red T-Shirt
Show some leg-day attitude with a playful “I Love Squats” tee.

Leg Day No Thanks Skip Leg Day Meme Decal Water Sticker
Give your everyday gear a playful “Leg Day No Thanks” twist.

My Leg Hurts Leg Day Sweater & Squat Meme Lovers T-Shirt
Keep things casual with a little “My Leg Hurts” attitude.

Patriotic Eagle Stars Stripes and Squats Pullover for L Hoodie
Show off your leg-day humor in a laid-back “Patriotic Eagle” hoodie.


The Quadfather Leg Day Meme Top & T-Shirt
Bring “The Quadfather” humor to your next gym day.

Never Skip Leg Day Chicken Legs Meme Sweater & Bros T-Shirt
Show some gym-day personality with “Never Skip Leg Day”.


Leg Day Is Calling You Squats, Deadlifts & Gains T-Shirt
Rep “Leg Day Is Calling You” humor in and out of the gym.
4. Holds, moving reps and what knee-pain research can actually prove
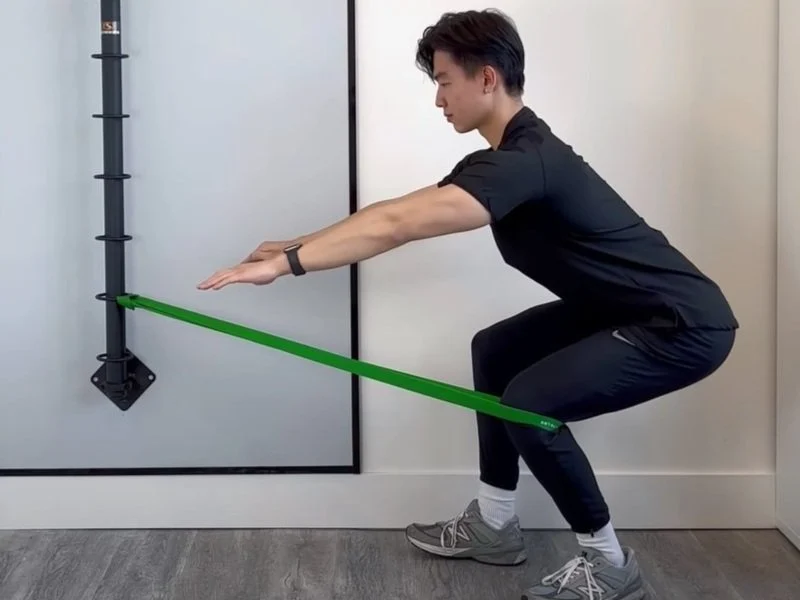
An isometric Spanish squat is simply a static hold at a chosen knee angle. A dynamic Spanish squat moves down and up through that angle. Both can challenge the quads; one is not automatically better for hypertrophy or rehabilitation. An isometric is easy to measure in seconds, while moving repetitions let you practice controlled range and concentric effort.
In a four-week uncontrolled case series involving 25 in-season athletes with patellar tendon symptoms, participants performed five 30-second supported squat holds and reported improved pain and function. That is an encouraging observation, not proof that the Spanish squat cured their symptoms: there was no comparison group, management outside the exercise was not fully controlled, and the athletes were a specific symptomatic population.
Exercise responses differ. Some people find an appropriately chosen supported knee bend tolerable; others feel worse with sustained flexion. A painful tendon is not necessarily helped by pushing through a burning hold, and knee pain does not always arise from the patellar tendon. If there is swelling, instability, recent injury or persistent pain, a qualified clinician should guide loading rather than a generic six-week template.
For general lifters, the practical takeaway is to use the smallest dose that delivers purposeful quadriceps work without making the next workout worse. If your quads are already fatigued from hard squats, a couple of moderate holds may be sufficient. If you’re using the movement as part of a clinical recovery plan, follow the dosage chosen for your specific situation.
5. A six-week Spanish squat progression that fits leg day
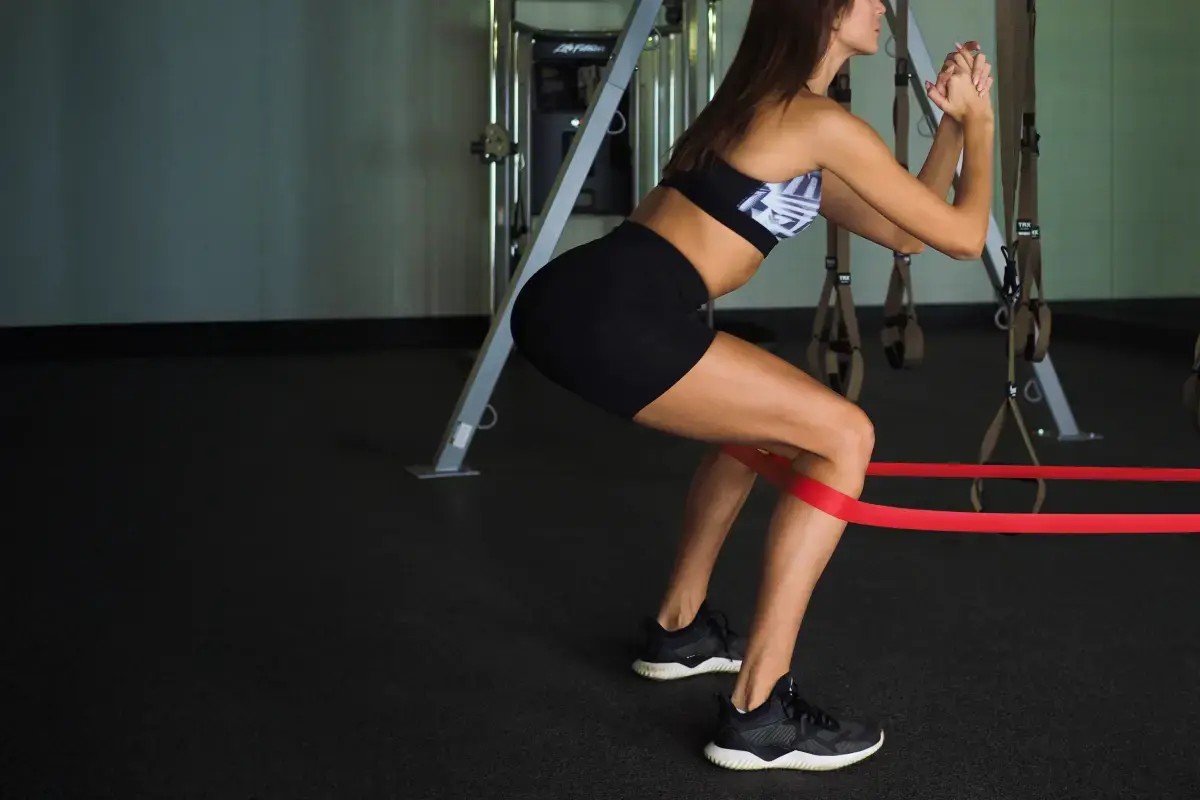
Keep the first session easy enough that you can reproduce the position. The plan below is a training example for otherwise healthy lifters, not a prescribed tendon-rehabilitation protocol. Use two sessions per week, ideally after your primary lower-body lift or on a separate light-accessory day. Leave at least one day between demanding sessions when possible.
- Weeks 1–2: two holds of 15–25 seconds at a comfortable shallow-to-moderate depth. Rest about 60–90 seconds between sets. Note which band and anchor distance you used.
- Weeks 3–4: three holds of 20–30 seconds, maintaining the same depth and foot pressure. Increase time only if every hold finishes without losing position.
- Weeks 5–6: three holds of 30–40 seconds, or replace one hold with one set of 8–12 controlled dynamic Spanish squats. Keep the band placement and depth consistent before adding any handheld load.
Longer is not always better. Once a hold becomes comfortable and repeatable, a small increase in depth, a carefully chosen change of band tension or a modest goblet load can create progression. Change only one variable at a time. Keep two or three reps or several seconds in reserve instead of grinding until the band yanks your knees forward.
If the same position suddenly feels difficult, first look at band tension, sleep, recent squats, the floor and the position of the anchor. Treat those differences as information rather than assuming your quads became weaker. A simple log of hold duration, depth, band type and next-day response is far more informative than claiming a universal resistance number for elastic bands.
Equipment Worth Exploring
Explore equipment, accessories and gear from our carefully selected range.

Leg Press/Hack Squat BPR-790
Convertible 45-degree leg press and hack squat machine with a broad footplate and band pegs.

Compact Leg Press CLP-700
Compact reverse-style leg press with a moving seat carriage and an adjustable footplate.

Studio V-Squat
Plate-loaded V-squat machine for supported lower-body strength training.

Leg Extension/Curl BCO-780
Leg extension and lying leg curl combo with plate loading, band pegs and a cable-loading option.

Seated Leg Combo BCO-680
Adjustable seated leg extension and leg curl machine with band pegs for added resistance.


HUSLA Leg Extension Pad
Pad attachment designed to increase usable range of motion on compatible leg-extension machines.


Spanish squats can complement leg presses, split squats, regular squats and knee-extension exercises, but they do not replace a well-rounded program for the hips, hamstrings and calves. Pick the option you can load safely and progress consistently. If you cannot secure the band properly, choose a stable wall sit or another controllable quad exercise rather than improvising an unsafe anchor.
Some product links may be affiliate links, supporting Mind Muscle Perfection at no additional cost to you.