Advertising disclosure: This page includes affiliate product links that may earn us a commission, as well as products from our own store.
The Z press looks simple: sit on the floor and press a weight overhead. The catch is that there is no standing leg drive and no bench backrest to hide a shifting torso. That can make a light barbell or dumbbell feel much harder than expected.
Used sensibly, this strict variation can help lifters practice shoulder control, overhead balance and bracing. Here is what it trains, how to set up, which version to choose and how to progress without turning every set into a mobility struggle.
Why the Z press feels harder than a regular shoulder press
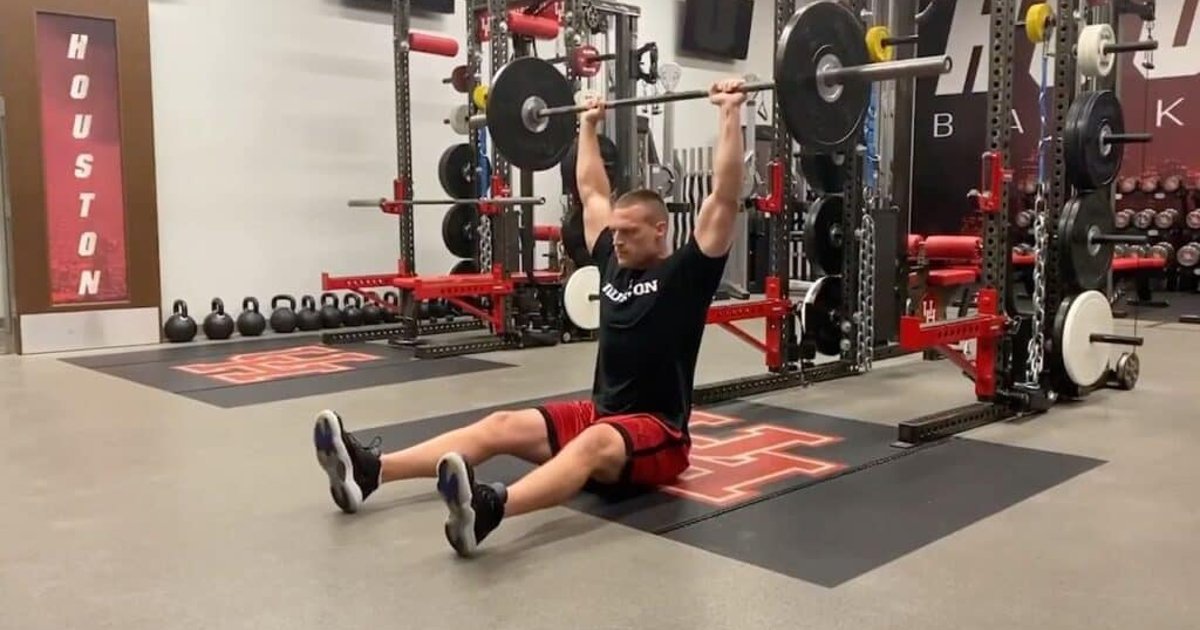
The Z press is a strict overhead press performed while sitting on the floor, with both legs extended and no back support. It is not simply a seated shoulder press moved to a lower seat. The new position removes the push from the legs and greatly reduces opportunities to lean backward. The shoulders and triceps still move the load; the abdominals, spinal stabilizers and muscles controlling the shoulder blades work to preserve an effective pressing platform.
The front and side deltoids contribute to raising the arms while the triceps extend the elbows. The upper back and serratus anterior help the shoulder blades rotate as the arms rise. Your trunk resists being pulled backward by the weight, so maintaining an upright torso becomes part of the repetition. This is why a bar you can press comfortably while standing may feel surprisingly heavy from the floor.
Difficulty is not proof that the Z press automatically produces more muscle growth than standing or supported pressing. It is a challenging variation with particular constraints, not a proven universal winner. If you already perform hard, progressive overhead work, the Z press is one possible accessory to strengthen a weak position or make technique more deliberate. Its value comes from what the strict floor position asks you to control.
Think of a clean rep as a sequence: steady seated posture, controlled upward force, a clear bar path and the same posture on the way down. If one element disappears under load, the set is no longer testing the version of the movement you intended to train.
Set up on the floor without sacrificing your back position
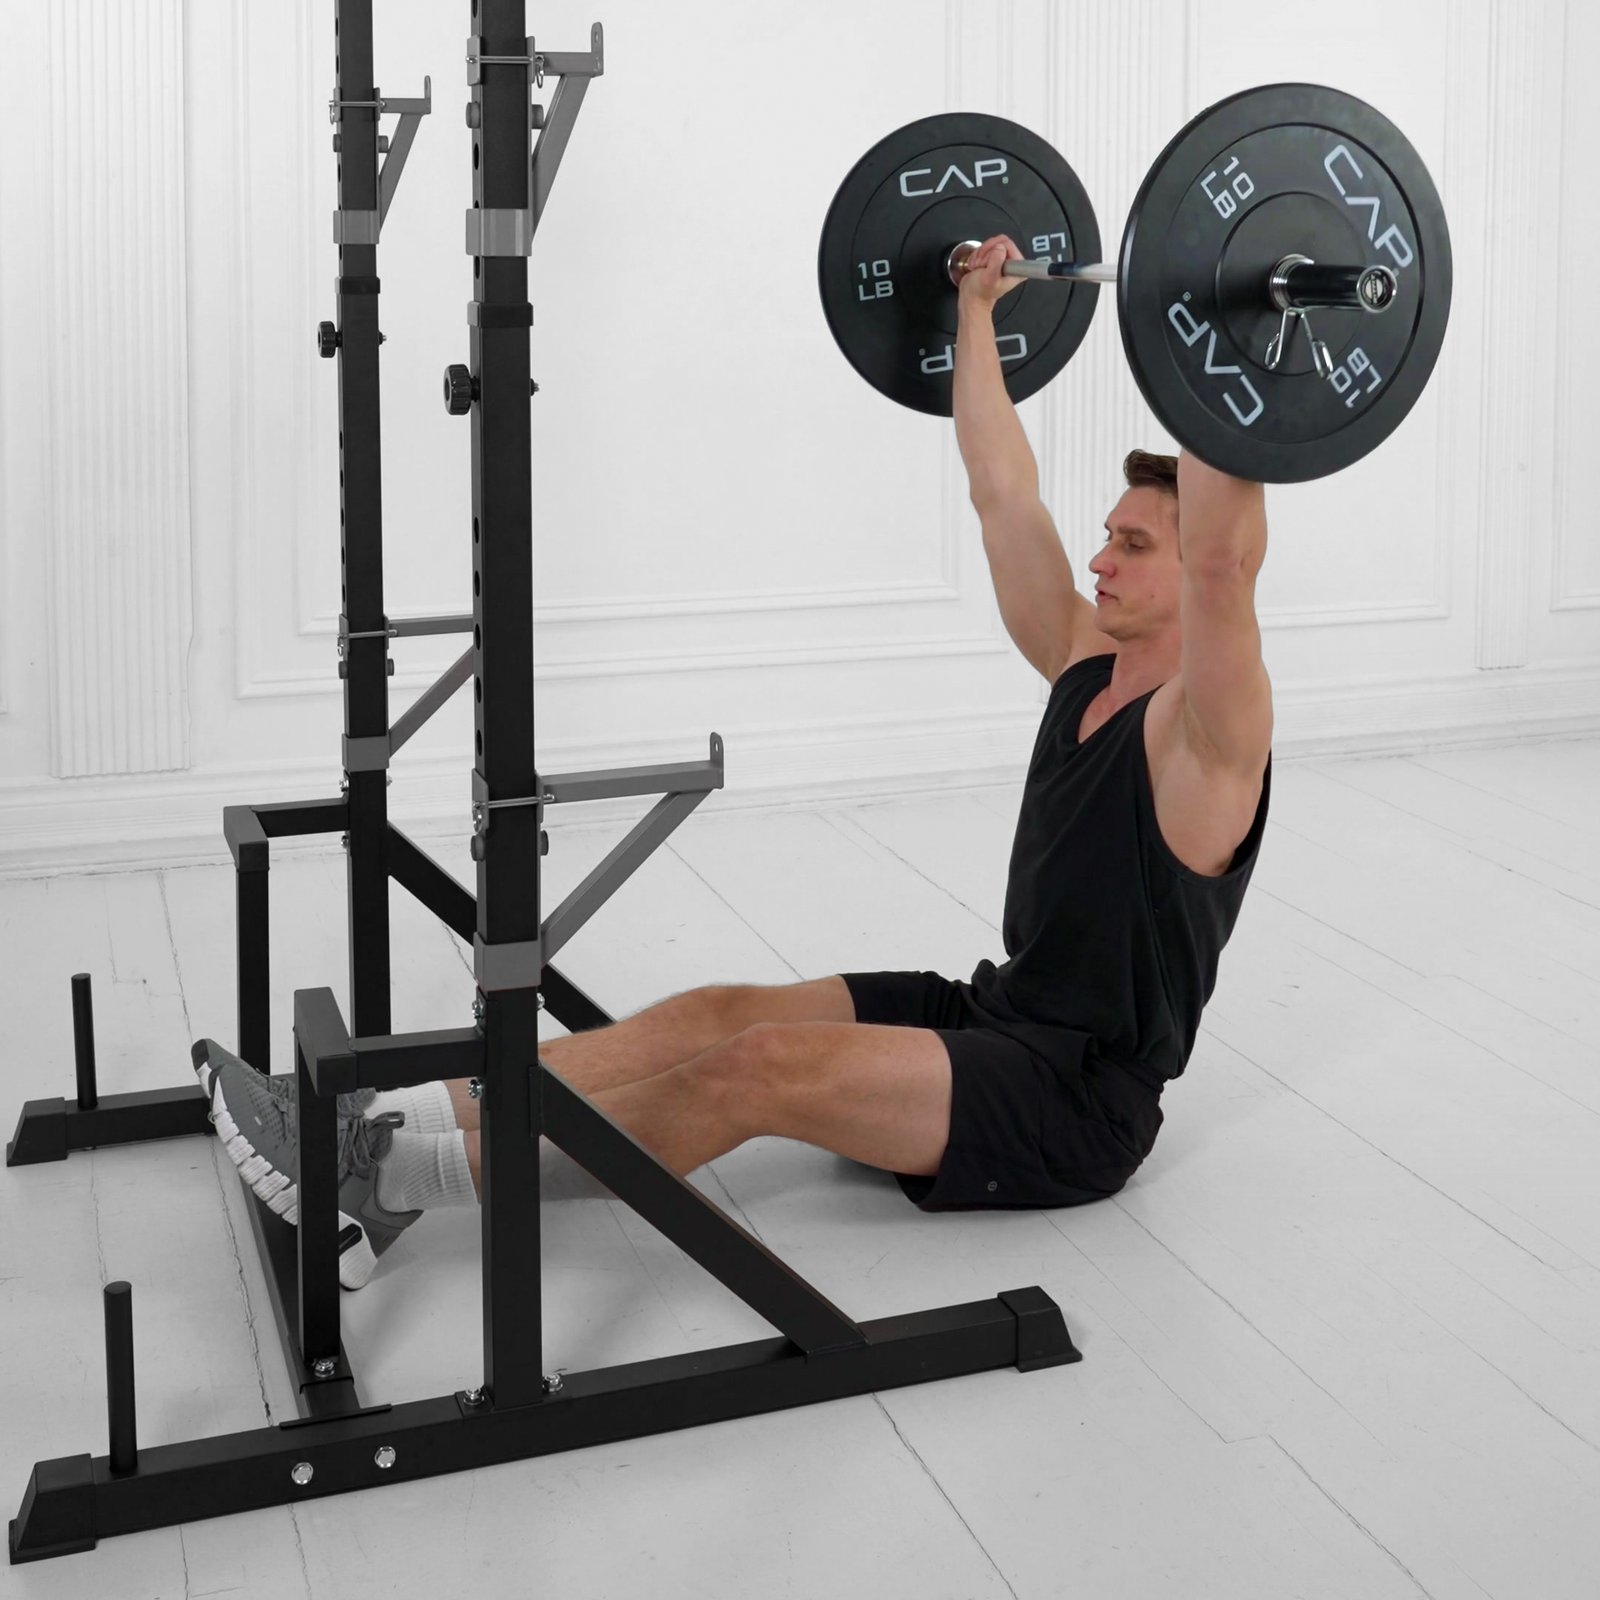
Start with equipment before chasing range of motion. A light barbell can be placed on correctly set low rack hooks with appropriate safety bars. Arrange the hooks so you can unrack with a short, controlled movement while seated; avoid trying to clean a heavy bar from the floor into an awkward starting position. Keep your legs clear of the rack uprights and leave room to rerack safely.
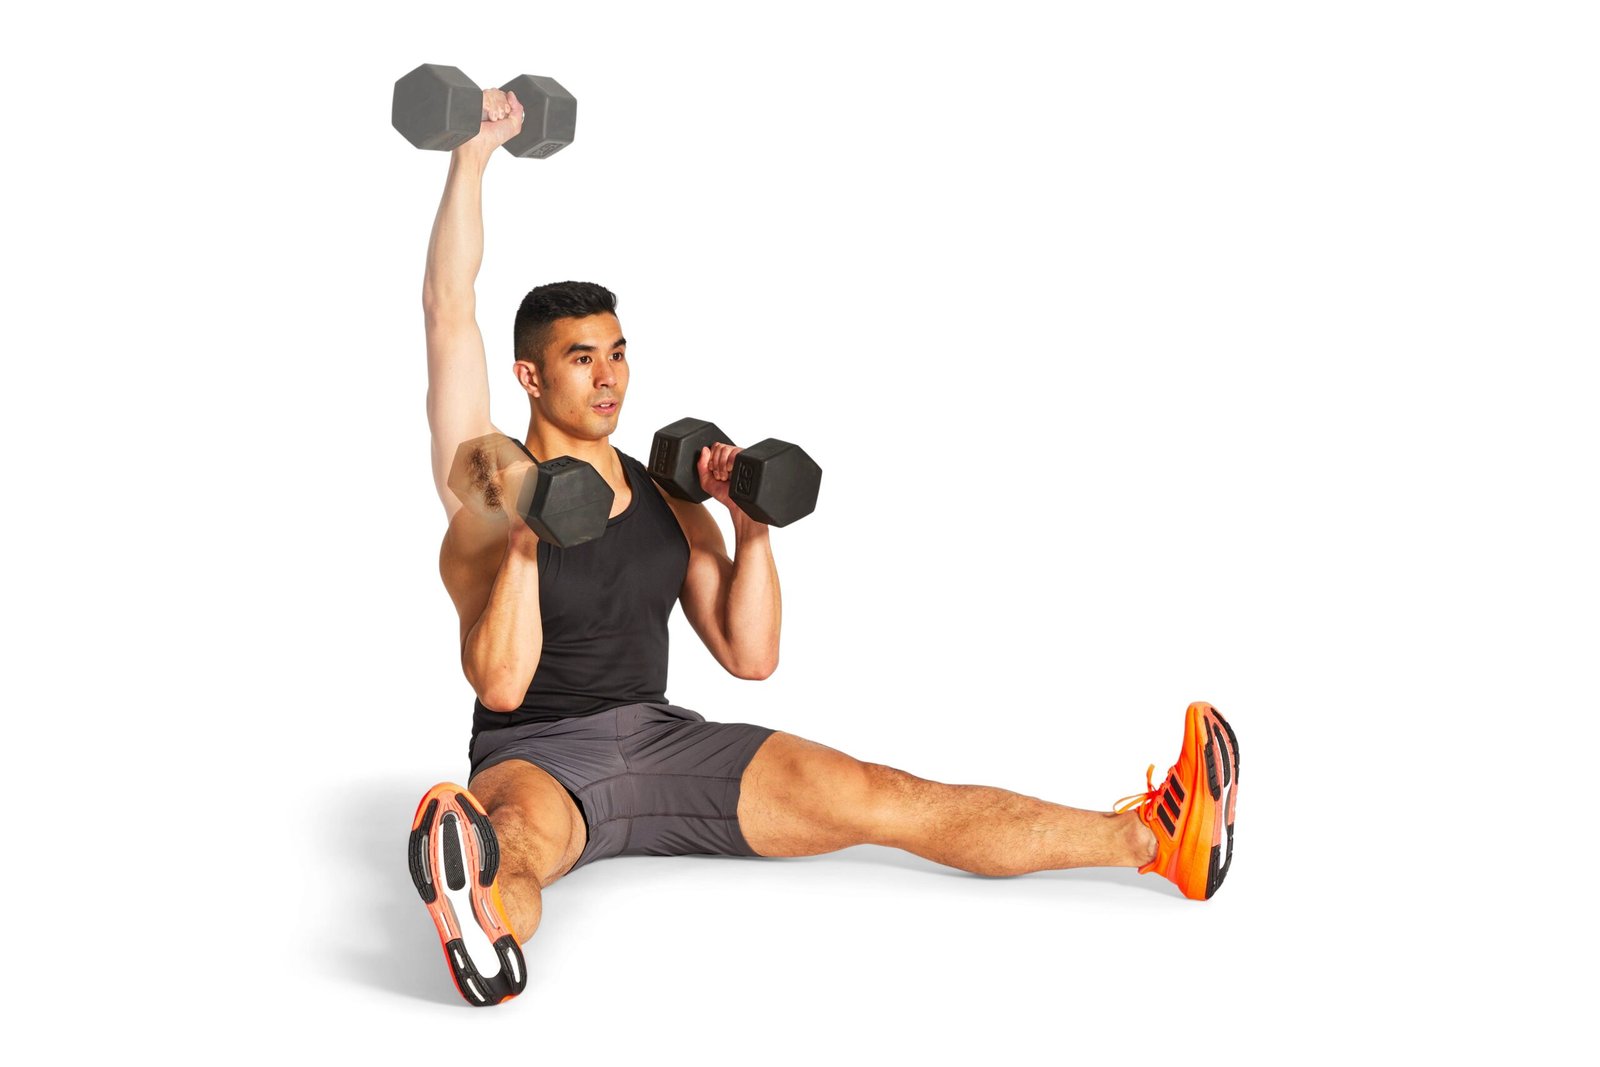
Sit tall on your sit bones with legs extended forward and feet separated as needed for balance. A slightly wider leg position can make it easier to remain upright, but it should not become a stretch contest. Bring ribs over pelvis rather than forcing your chest up with an exaggerated arch. Take a comfortable full grip, usually just outside shoulder width for a barbell, and start with wrists roughly above elbows.
The most important early test uses no external load: can you sit upright with both arms raised overhead without rounding the low back, leaning far backward or shrugging painfully? If not, there is no benefit to insisting on a heavy floor-seated barbell immediately. A small elevation under the pelvis, a lighter dumbbell, a slightly wider leg position or a normal seated press can be an appropriate regression. Do not force straight legs when hip or hamstring restrictions pull the pelvis sharply backward.
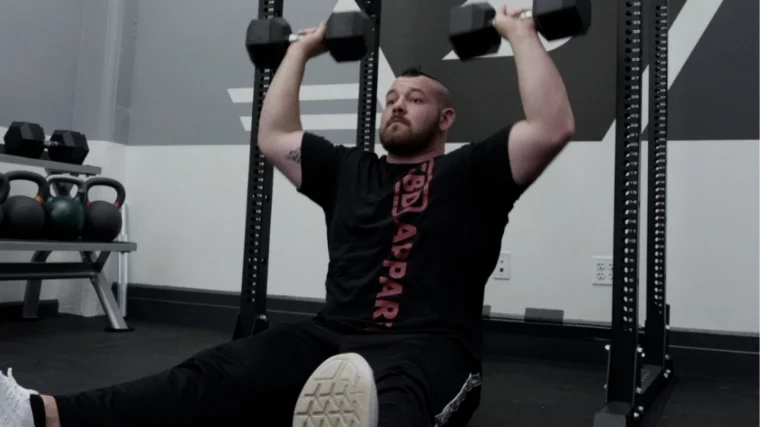
For dumbbells, start with a manageable pair brought safely to shoulder height. If getting into position requires wrestling with the weights, the loading is already too ambitious. A spotter may help with hand-off, and a clear floor matters as much as the weight in your hands. Prepare the exit from the set before the first rep.

Equipment Worth Exploring
Explore equipment, accessories and gear from our carefully selected range.


Foldable Wall Rack
Wall-mounted folding squat rack designed to save floor space between workouts.


Competition Plates
Competition-style bumper plates for Olympic lifts and loaded strength training.


Grip Plates
Rubber-coated weight plates with handholds for loading barbells and machines.

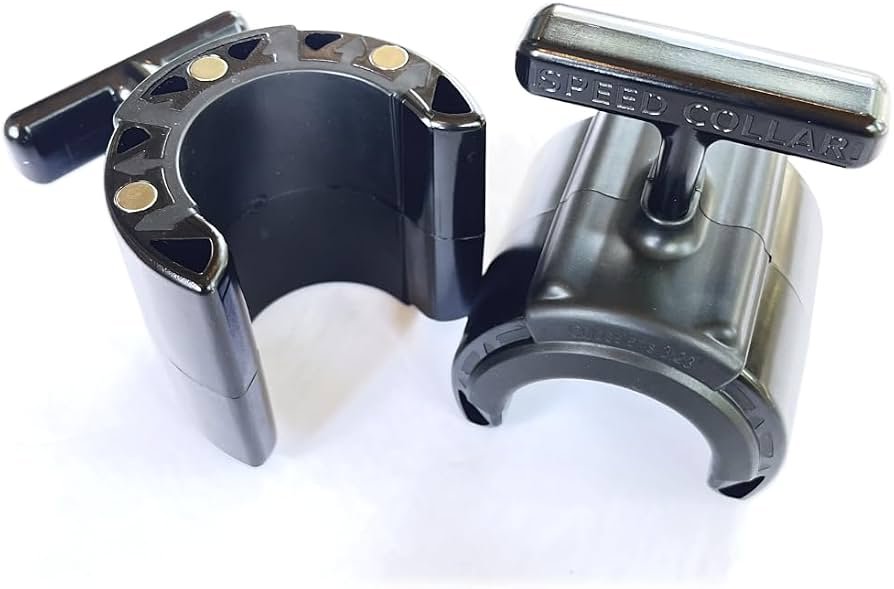
Speed Collar
Quick-release collars designed to secure weight plates on standard two-inch Olympic bars.
Press through a clean path instead of leaning away
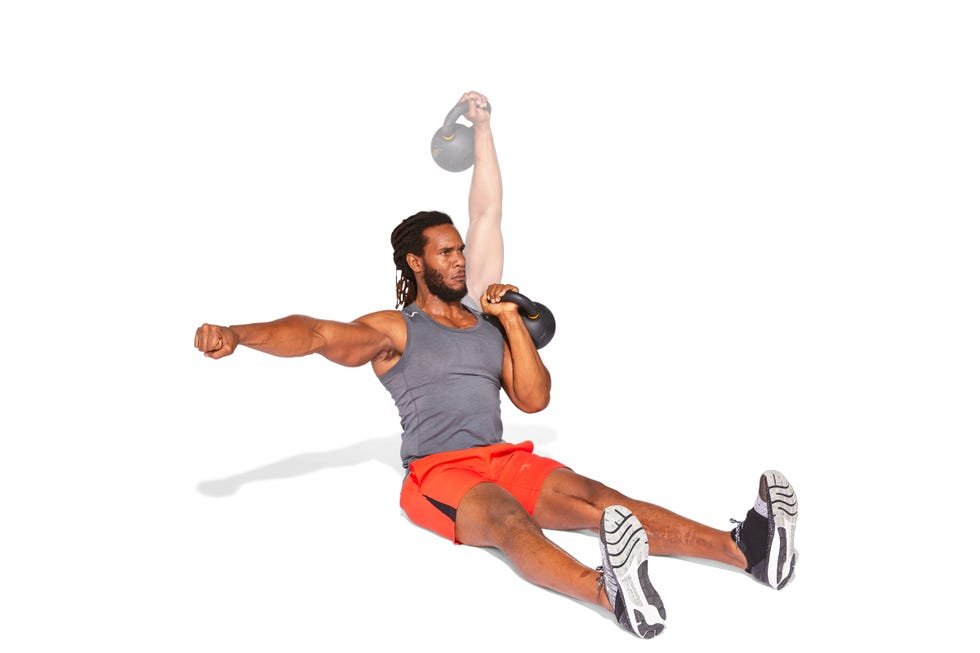
Brace the trunk as though someone were about to nudge you off balance. Your shoulders should not begin the lift by tipping the torso backward. Start pressing while keeping forearms supportive beneath the load. With a barbell, move the chin back just enough to let the bar pass your face, then bring the head back into a natural position as the bar rises. At lockout the load should be supported above the shoulders rather than held far in front of the body.
Use a controlled lowering phase. Allow elbows to bend while guiding the weight back toward the upper chest or shoulder-height start position. A light pause can help check whether ribs, pelvis and legs stayed stable. If every descent ends with a collapsing torso, the challenge has moved from pressing strength to survival. Reduce load or repetitions.
Three simple cues are worth trying independently: sit tall, ribs over pelvis, and press to a balanced overhead position. Do not pile on ten simultaneous cues. Film a light set from the side and look for excessive backward lean, shifting hips and a load path that wanders forward. Video is more informative than deciding whether a rep merely felt difficult.
A mild change in head and upper-back position is normal during overhead pressing. The aim is not to freeze every joint but to avoid turning the exercise into a floor-seated incline press. Keep the motion smooth and stop if a joint produces sharp pain. This is a strength exercise, not an endurance test for uncomfortable joint angles.

Bodybuilding Shirts & Workout Gear
Bodybuilding shirts, tanks and gym gear for lifters chasing muscle, size, symmetry and the pump.

Shoulder Press Dost Thou Even Press Medieval Knight Cre T-Shirt
Show some gym-day personality with “Shoulder Press”.


Shirt & Barbell Heartbeat , Gymbros & Meme Lovers T-Shirt
Heavy lifts, good laughs, and a little “Funny Gym Shirt & Pump” energy.

Iron Gains – Heavy Metal Workout Decal Gym Sticker
Bring “Iron Gains” attitude to your water bottle or laptop.

Defy Gravity Shirt Old School Weight Strongman Meme T-Shirt
Bring “Defy Gravity” humor to your next gym day.

Skull Gym Pullover Heavy Weights Training Uplift Iron C Hoodie
Bring “Hoodie Skull” gym humor to lazy days and post-workout plans.

Hot Metal Skull Gym Shirt Workout Gift Uplift Iron Club T-Shirt
Show some metalhead attitude with a playful “T-Shirt Hot Metal Skull” tee.

Power Stoic Bodybuilder Greek God Marble Sculpture T-Shirt
Heavy lifts, good laughs, and a little “Power Stoic Bodybuilder Greek God Marble” energy.

Gold Skull , Uplift Iron Club Gym Decal, Hardcore Fitne Sticker
Put “Gold Skull” gym humor on your laptop, bottle, or gym gear.

Skull Muscle Shirt Heavy Weights Gym Training Uplift Ir Tank Top
Train hard, laugh a little, and rep “Tank Top Skull Muscle”.
Barbell, dumbbells and kettlebells train the pattern differently
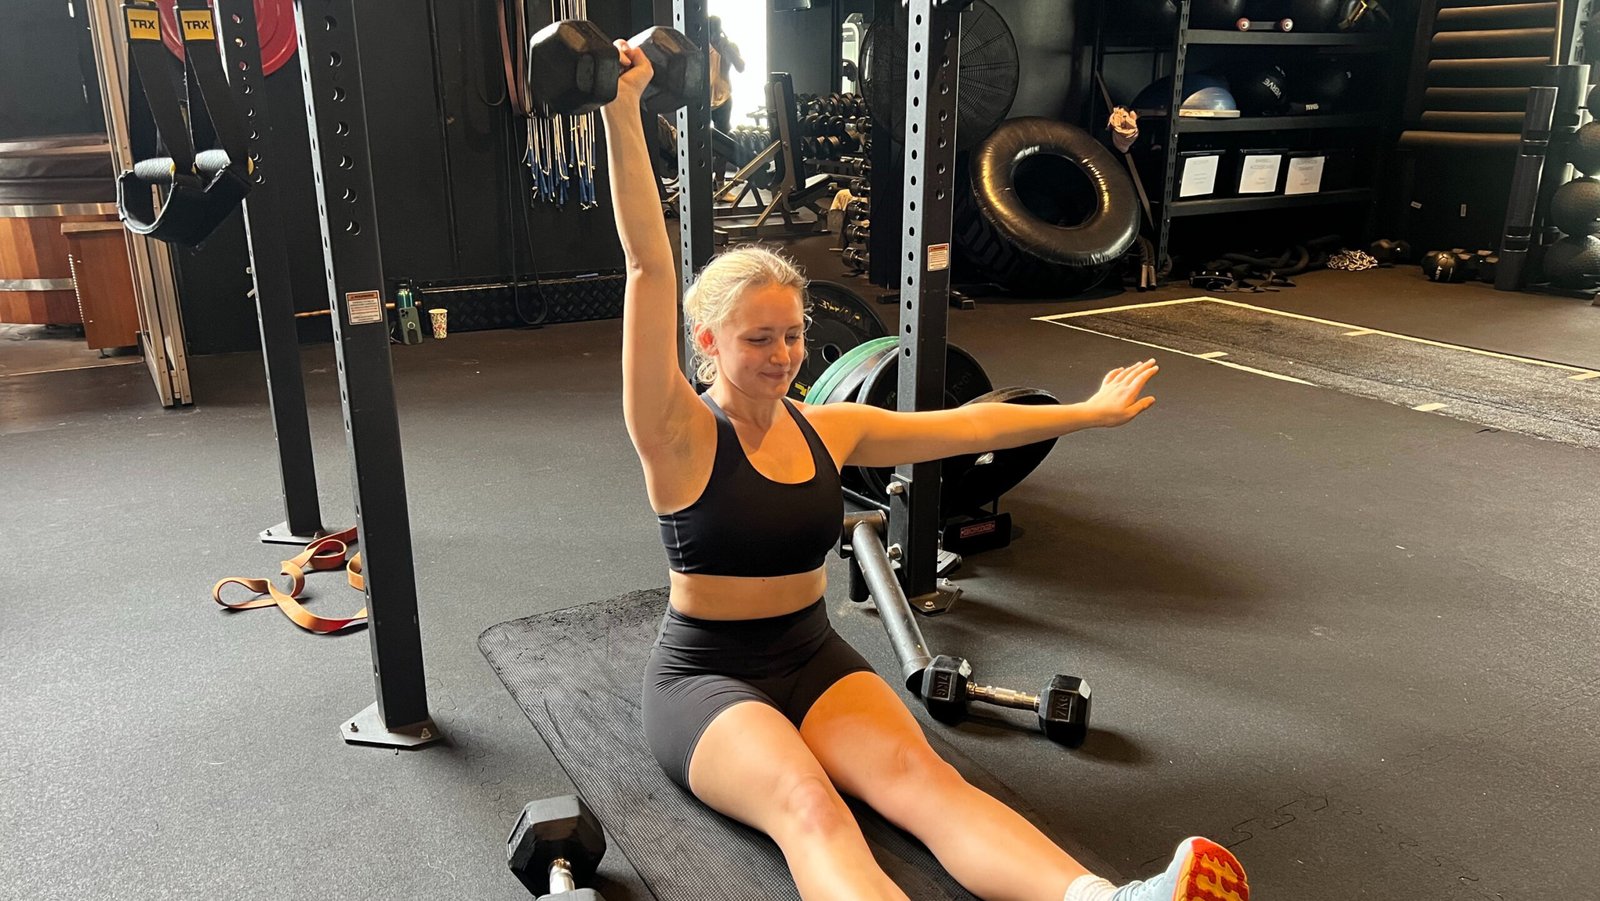
A barbell Z press lets both hands share one fixed implement. It is easiest to set up consistently in a rack with proper hooks and safeties. Small weight increases make it well suited to planned strength progression. However, a straight bar also dictates a shared hand position. Some lifters find that less comfortable than a neutral-grip alternative.
Dumbbells allow each shoulder to move with a little more freedom. They can be held with palms facing inward or turned gradually as you press. That flexibility often makes a dumbbell version a practical starting point, although two moving weights demand coordination and sensible setup. Use a load that allows a tall torso for the entire set, not merely the first two reps.
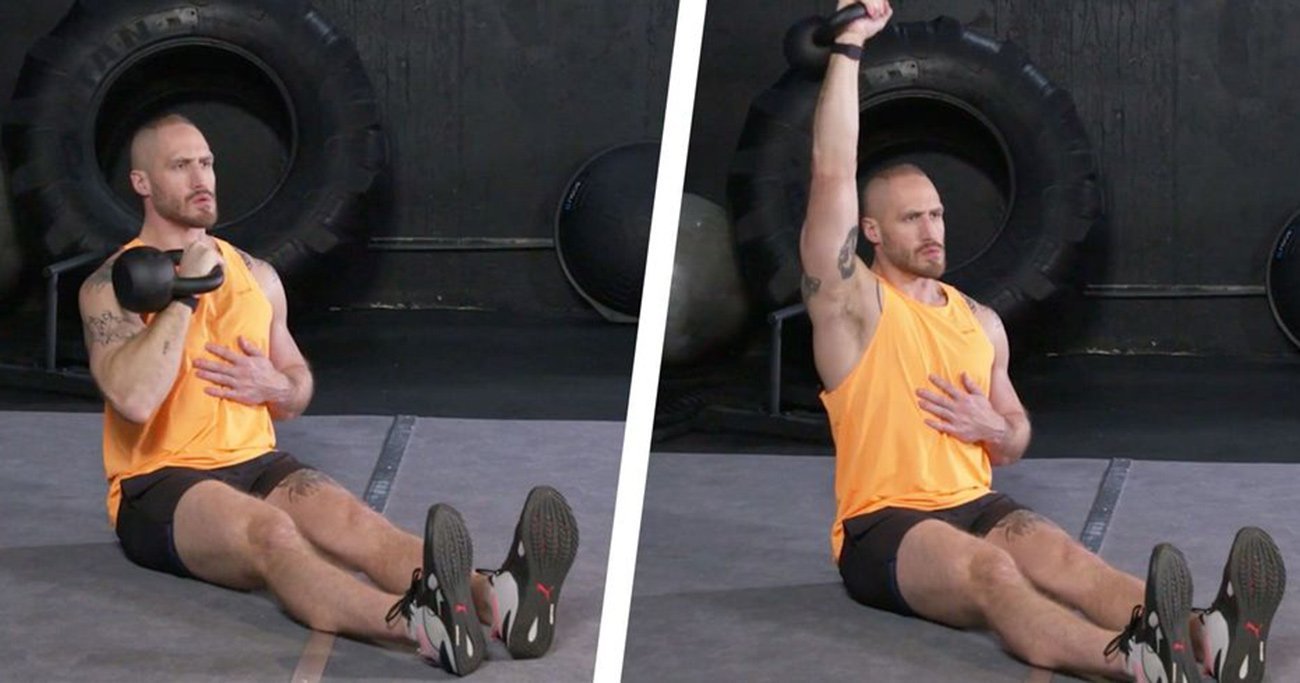
A single kettlebell or dumbbell adds an anti-rotation challenge. With one arm pressing, the torso tries to lean or twist. Begin light, keep the free arm relaxed or slightly extended for balance and complete the same number of technically sound reps on both sides. The goal is not to stay perfectly motionless at any cost; it is to avoid letting the weight determine your posture.
These versions are alternatives, not a fixed difficulty ladder. A stable dumbbell may be easier to manage than a heavy bar, while an asymmetrically loaded kettlebell may be demanding at low weight. Pick an implement that provides a stable start, repeatable overhead path and useful loading progression. If maximal standing overhead strength is your priority, continue practicing the standing lift too. The Z press is supplementary, not a direct substitute for standing-specific skills.
Five mistakes that make the movement less useful
1. Leaning back as the load leaves the shoulders. This often signals too much weight or a poor starting position. Reduce the load and film a side view. A rep that starts as a press and ends as a backward fall is not a reliable benchmark.
2. Forcing the legs perfectly together. There is no prize for a narrow base if tight hamstrings rotate the pelvis backward. Spread the feet slightly and keep the torso comfortably tall. Leg position should support pressing technique, not become an extra flexibility contest.
3. Letting the ribs flare upward. A dramatic arch may help the bar clear the face, but it changes the demands and can hide a mobility restriction. Exhale gently between reps if you need to reset, stack ribs over pelvis and return to a controllable weight.
4. Rushing the lowering phase. Dropping the bar toward the shoulders or bouncing it off supports removes the chance to maintain tension. Lower deliberately to the same start position and pause only as long as you can preserve your setup.
5. Confusing discomfort with productive challenge. Normal muscular effort and hard trunk bracing are expected. Sharp shoulder, wrist or spinal pain is not the goal. Change grip or implement, reduce range if appropriate or choose a better-tolerated press. Persistent pain deserves qualified clinical guidance.
When a problem repeats, change one variable at a time. Lighter weight, a wider leg stance or fewer reps can reveal more than another elaborate coaching cue.
Equipment Worth Exploring
Explore equipment, accessories and gear from our carefully selected range.


Rubber Hex Dumbbells
Rubber-coated hex dumbbell pairs with a stable shape for home and commercial strength training.


Cast Iron Kettlebells
Textured cast-iron kettlebells for swings, squats, carries, and full-body training.


A six-week plan for better shoulder pressing
Use this progression once or twice weekly, ideally after your main lift if heavy standing presses or bench work are the priority. Begin with a weight that leaves about two to three clean reps in reserve. Rest two to three minutes between challenging sets. Do not count a failed seated position as a rep earned.
- Weeks 1–2: learn the setup. Perform three sets of six to eight light reps. Pause briefly at the top and lower with control. Keep the same implement and floor position between sets. If posture breaks before rep six, reduce the load.
- Weeks 3–4: build repeatable volume. Perform three sets of eight to ten with the same technique standard. Once every set reaches the top of the range without leaning, add the smallest practical load increment next time and return to the low end.
- Weeks 5–6: consolidate strength. Perform four sets of five to eight. Increase weight slightly only if the preceding phase was consistent. The first and last clean rep should look alike. If they do not, repeat the lighter load for another week.
A sample upper-body day might begin with a primary standing overhead press, continue with the Z press, then include a row or pulldown and lighter shoulder work such as lateral raises or rear-delt exercises. If the Z press is your primary compound shoulder exercise, place it first while fresh and follow it with lower-fatigue accessories. This is a practical template, not a claim that the exact six-week sequence has been experimentally proven superior.
Progress should be recorded by weight, repetitions, perceived effort and quality of posture. A note such as “three sets of eight, no backward lean, symmetrical lockout” tells you more than a load that rises while your torso slowly reclines.
At the end of week six, compare a filmed light set with the first week. Better control at the same weight, more clean reps or modest extra load are useful signs of progress. If your shoulders progress well with another press and the floor position remains restrictive, there is no obligation to keep the variation. Choose exercises you can load, recover from and repeat consistently.
Funny Gym Shirts & Workout Gear
Funny gym shirts, tanks, hoodies and workout gear for lifters who like training hard.

Old School Weight Strongman – Meme Shirt & Top T-Shirt
Show some powerlifting attitude with a playful “Old School Weight Lifter Strongman Graphic” tee.

The Original Atlas Stone Shirt – Greek Mythology T-Shirt
Heavy lifts, good laughs, and a little “The Original Atlas Stone” energy.

Mount Liftmore Strongman Brian Shaw & Eddie Hall T-Shirt
Rep “Mount Liftmore Strongman” humor in and out of the gym.


Enter Strongman Crewneck Pullover Sweater Metal Music S T-Shirt
Show some gym-day personality with “Enter Strongman”.


Path To Gains Stoic Greek God Marble Sculpture & T-Shirt
Heavy lifts, good laughs, and a little “Path to Gains Stoic Greek God Marble” energy.

Lightning Skull Gym Shirt Workout Gift Uplift Iron Club T-Shirt
Bring “T-Shirt Lightning Skull” humor to your next gym day.

Flaming Skull Gym Shirt Workout Gift Uplift Iron Club F T-Shirt
Bring “T-Shirt Flaming Skull” humor to your next gym day.

Muscle Mommy Lifting Club for Gym Girls, Bodybuilding & T-Shirt
Heavy lifts, good laughs, and a little “Muscle Mommy Lifting Club” energy.