Advertising disclosure: This page includes affiliate product links that may earn us a commission, as well as products from our own store.
Glute-Ham Raises: Set the GHD, Own the Lowering Phase and Build Hamstrings
A glute-ham raise can humble a strong deadlifter before the first set reaches five reps. With your ankles secured and your body working against gravity, a small change in knee angle can turn a manageable descent into a long, demanding lever. The solution is not to swing harder. It is to set the machine correctly, learn the range you can control and build strength there.
Unlike a generic back extension, the glute-ham raise challenges the hamstrings to bend the knees while the hips and trunk contribute to control. There are several legitimate exercise versions, including a longer movement that adds a hip hinge. Knowing which one you are practising makes technique cues and progress records much more useful.
1. Understand the job of your hamstrings and the GHD
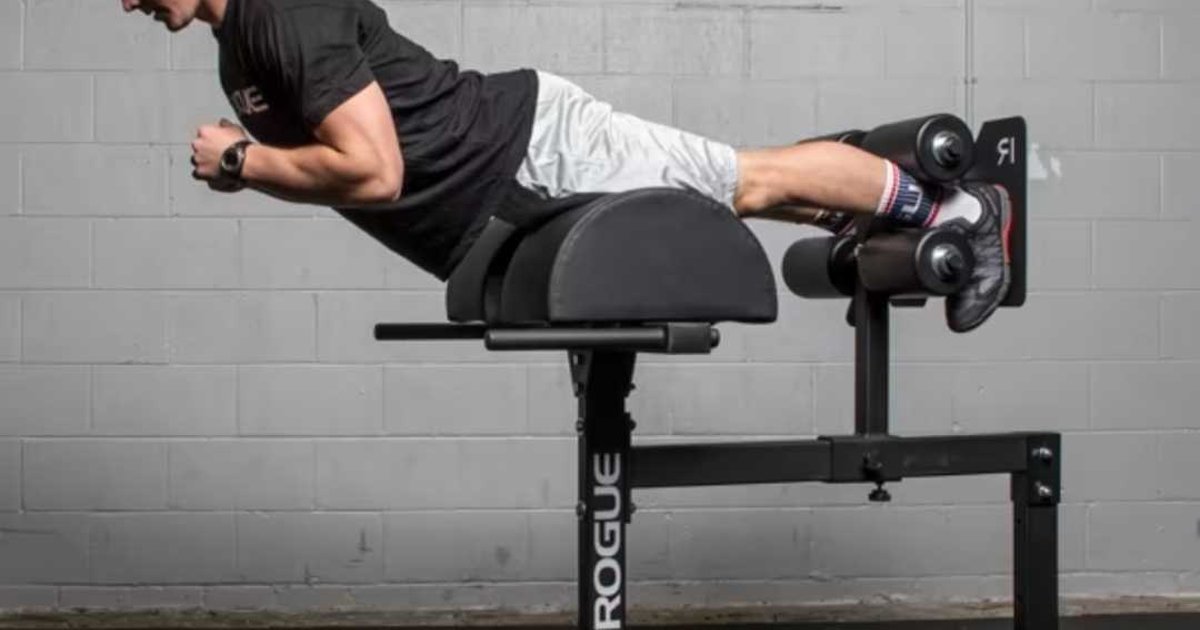
Your hamstrings cross the hip and, for most of their muscle mass, the knee. That gives them two major jobs in strength training: helping extend the hip and helping flex the knee. A Romanian deadlift heavily trains the hip-hinge role; a seated or lying leg curl emphasizes knee flexion. A glute-ham raise can challenge both roles in one bodyweight movement, although the precise emphasis changes with your technique and range.
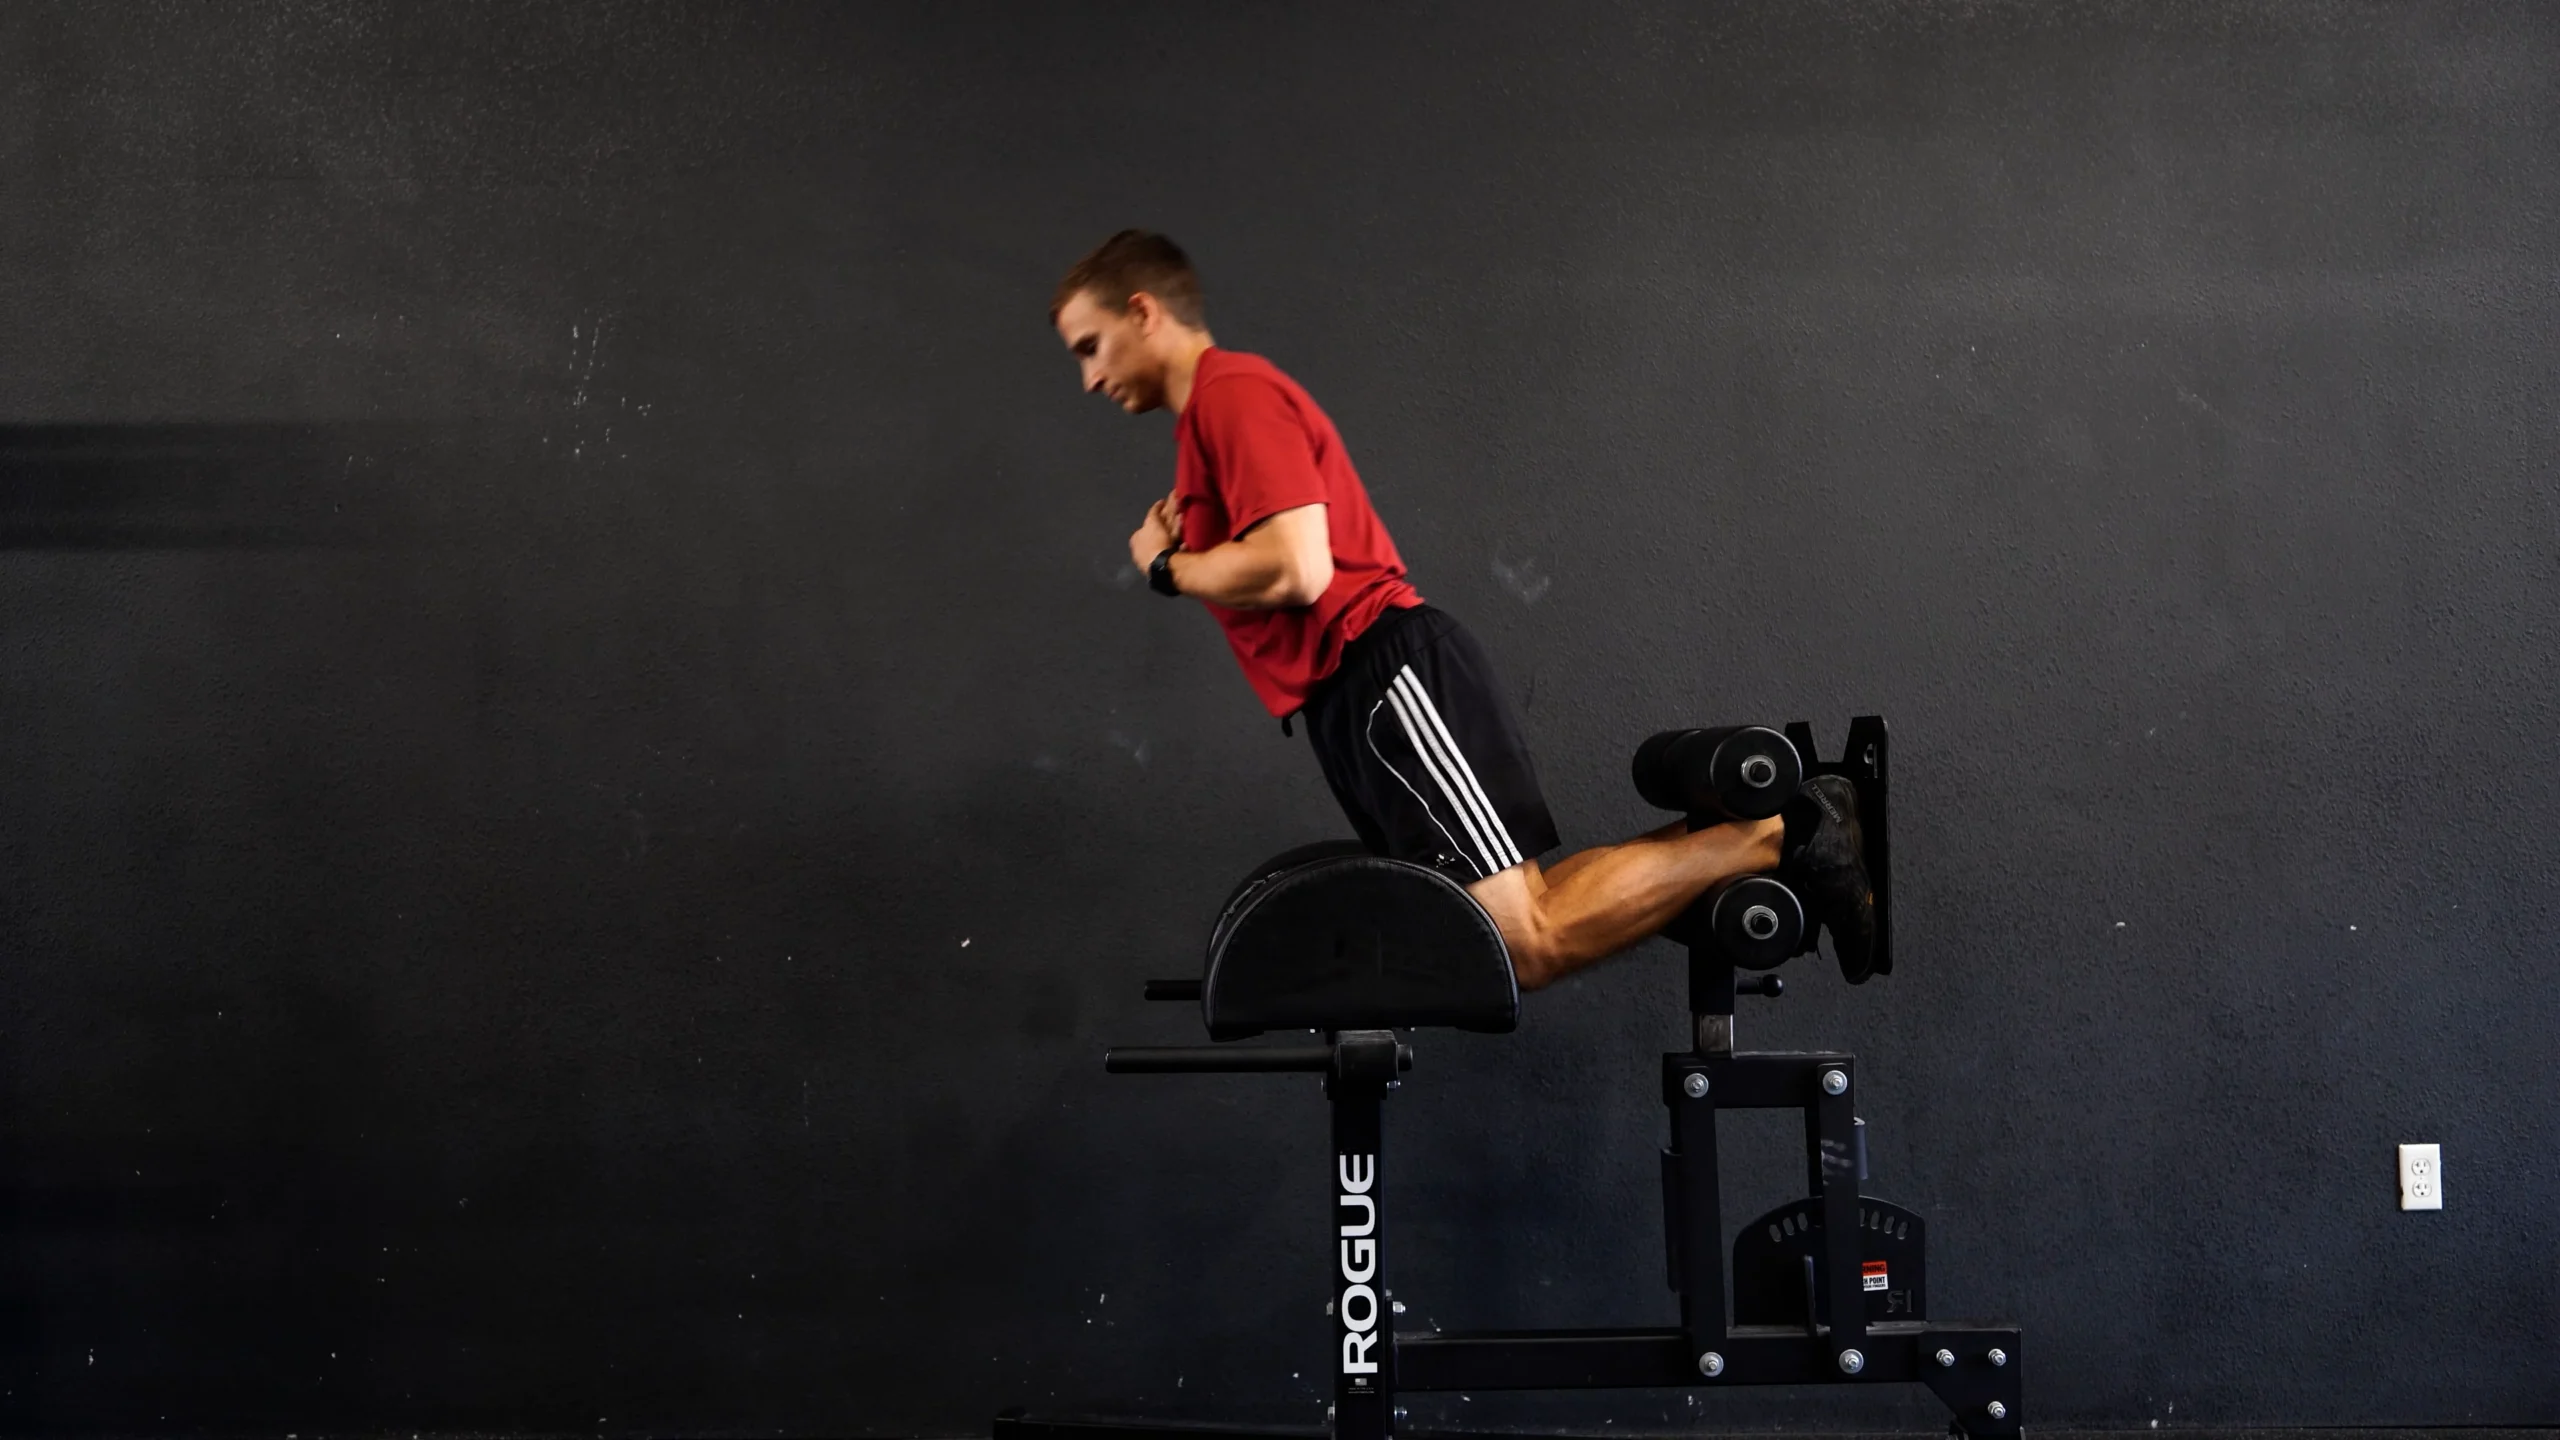
The glute-ham developer is more than a rounded pad. The footplate and ankle rollers create a secure anchor; the curved thigh pad supports you while you move around the knees and, in a longer version, the hips. With the torso upright and knees bent, the lever is relatively short. As the knees straighten and your body approaches horizontal, gravity demands more control. That is why one smooth five-second descent can feel harder than several hurried repetitions.
The standard knee-dominant version keeps shoulders, hips and knees lined up during the initial lowering phase, then pulls the torso back up by bending the knees. A fuller textbook version continues below horizontal by letting the hips flex, followed by hip extension before the knees finish pulling you upright. Neither version is automatically superior for every lifter. Pick a recognizable movement standard and keep that standard consistent across your training log.
Do not confuse this with a GHD sit-up, where the person faces upward and extends through the trunk, or with a Nordic curl, where the knees are supported on the floor and the ankles are anchored behind. These movements can share equipment or muscle demands without being interchangeable. In particular, performing a Nordic on the wrong GHD configuration can create an unstable ankle anchor.
Glute-ham raises are assistance work, not a magic substitute for all posterior-chain exercises. If your programme already has squats, a hinge and direct hamstring curls, the GHR is another way to train controlled knee flexion. If it causes knee, ankle or low-back discomfort rather than muscular effort, reduce the range, change the support or select a different exercise.
2. Set the footplate, rollers and thigh pad before the first rep
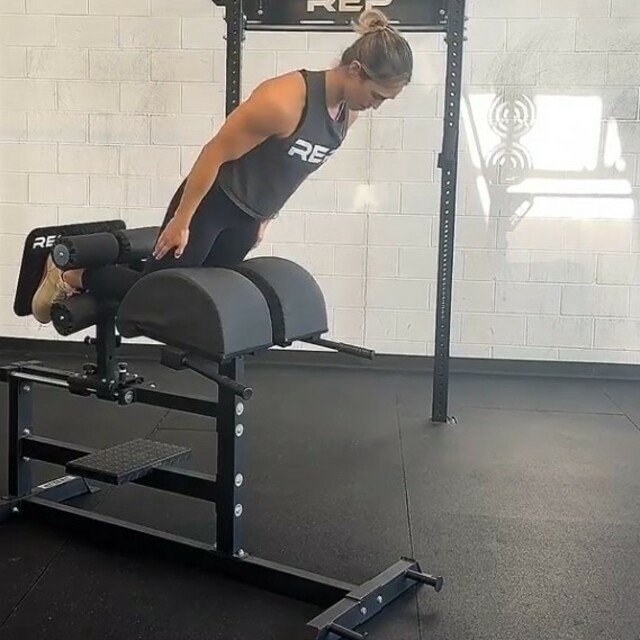
Start by adjusting the machine for your shin length. Place the feet firmly against the footplate, with the ankles held between the padded rollers rather than balancing on their edges. The front of the lower thighs should settle on the rounded pad just above the knees. The knees need enough room to change angle without scraping the hard frame. A very tall or short lifter may need a substantially different footplate position from the previous user.
Climb onto the platform using its steps or handles. Test the support with both hands still available before crossing your arms. The ankle rollers should retain the feet throughout a gradual forward lean; if your heels slide, your feet twist awkwardly or the footplate rocks, reset the apparatus. Check any adjustable pin or locking mechanism rather than assuming the machine stayed secure after someone else used it.
A useful starting test is an upright torso with approximately bent-right-angle knees, followed by a small controlled lean. The pelvis and torso should move together rather than the lower back folding sharply. A neutral head position is easier to maintain if you look toward the floor ahead of the pad instead of craning toward the mirror. Keep breathing rather than using a breath hold as a substitute for control.
The exact relationship of knees and pad depends on the equipment’s geometry. If the pad crowds the kneecaps or you feel pressure concentrated on a tiny strip of tissue, alter the footplate distance so pressure is better distributed along the lower thighs. If you are sitting too far forward, your hips may lose meaningful support. Adjust one variable at a time and retest a short range rather than fixing poor fit by bending your body around the machine.
Use a partner for the first unfamiliar setup if possible. Some GHDs have useful side handles or a stable bar in front that allows assisted repetitions. Others do not. Never grab an unsecured object or wedge the feet under loose weight plates just to make a difficult movement possible. A leg curl machine is a perfectly good alternative when the GHD configuration does not fit or anchor you safely.

Equipment Worth Exploring
Explore equipment, accessories and gear from our carefully selected range.

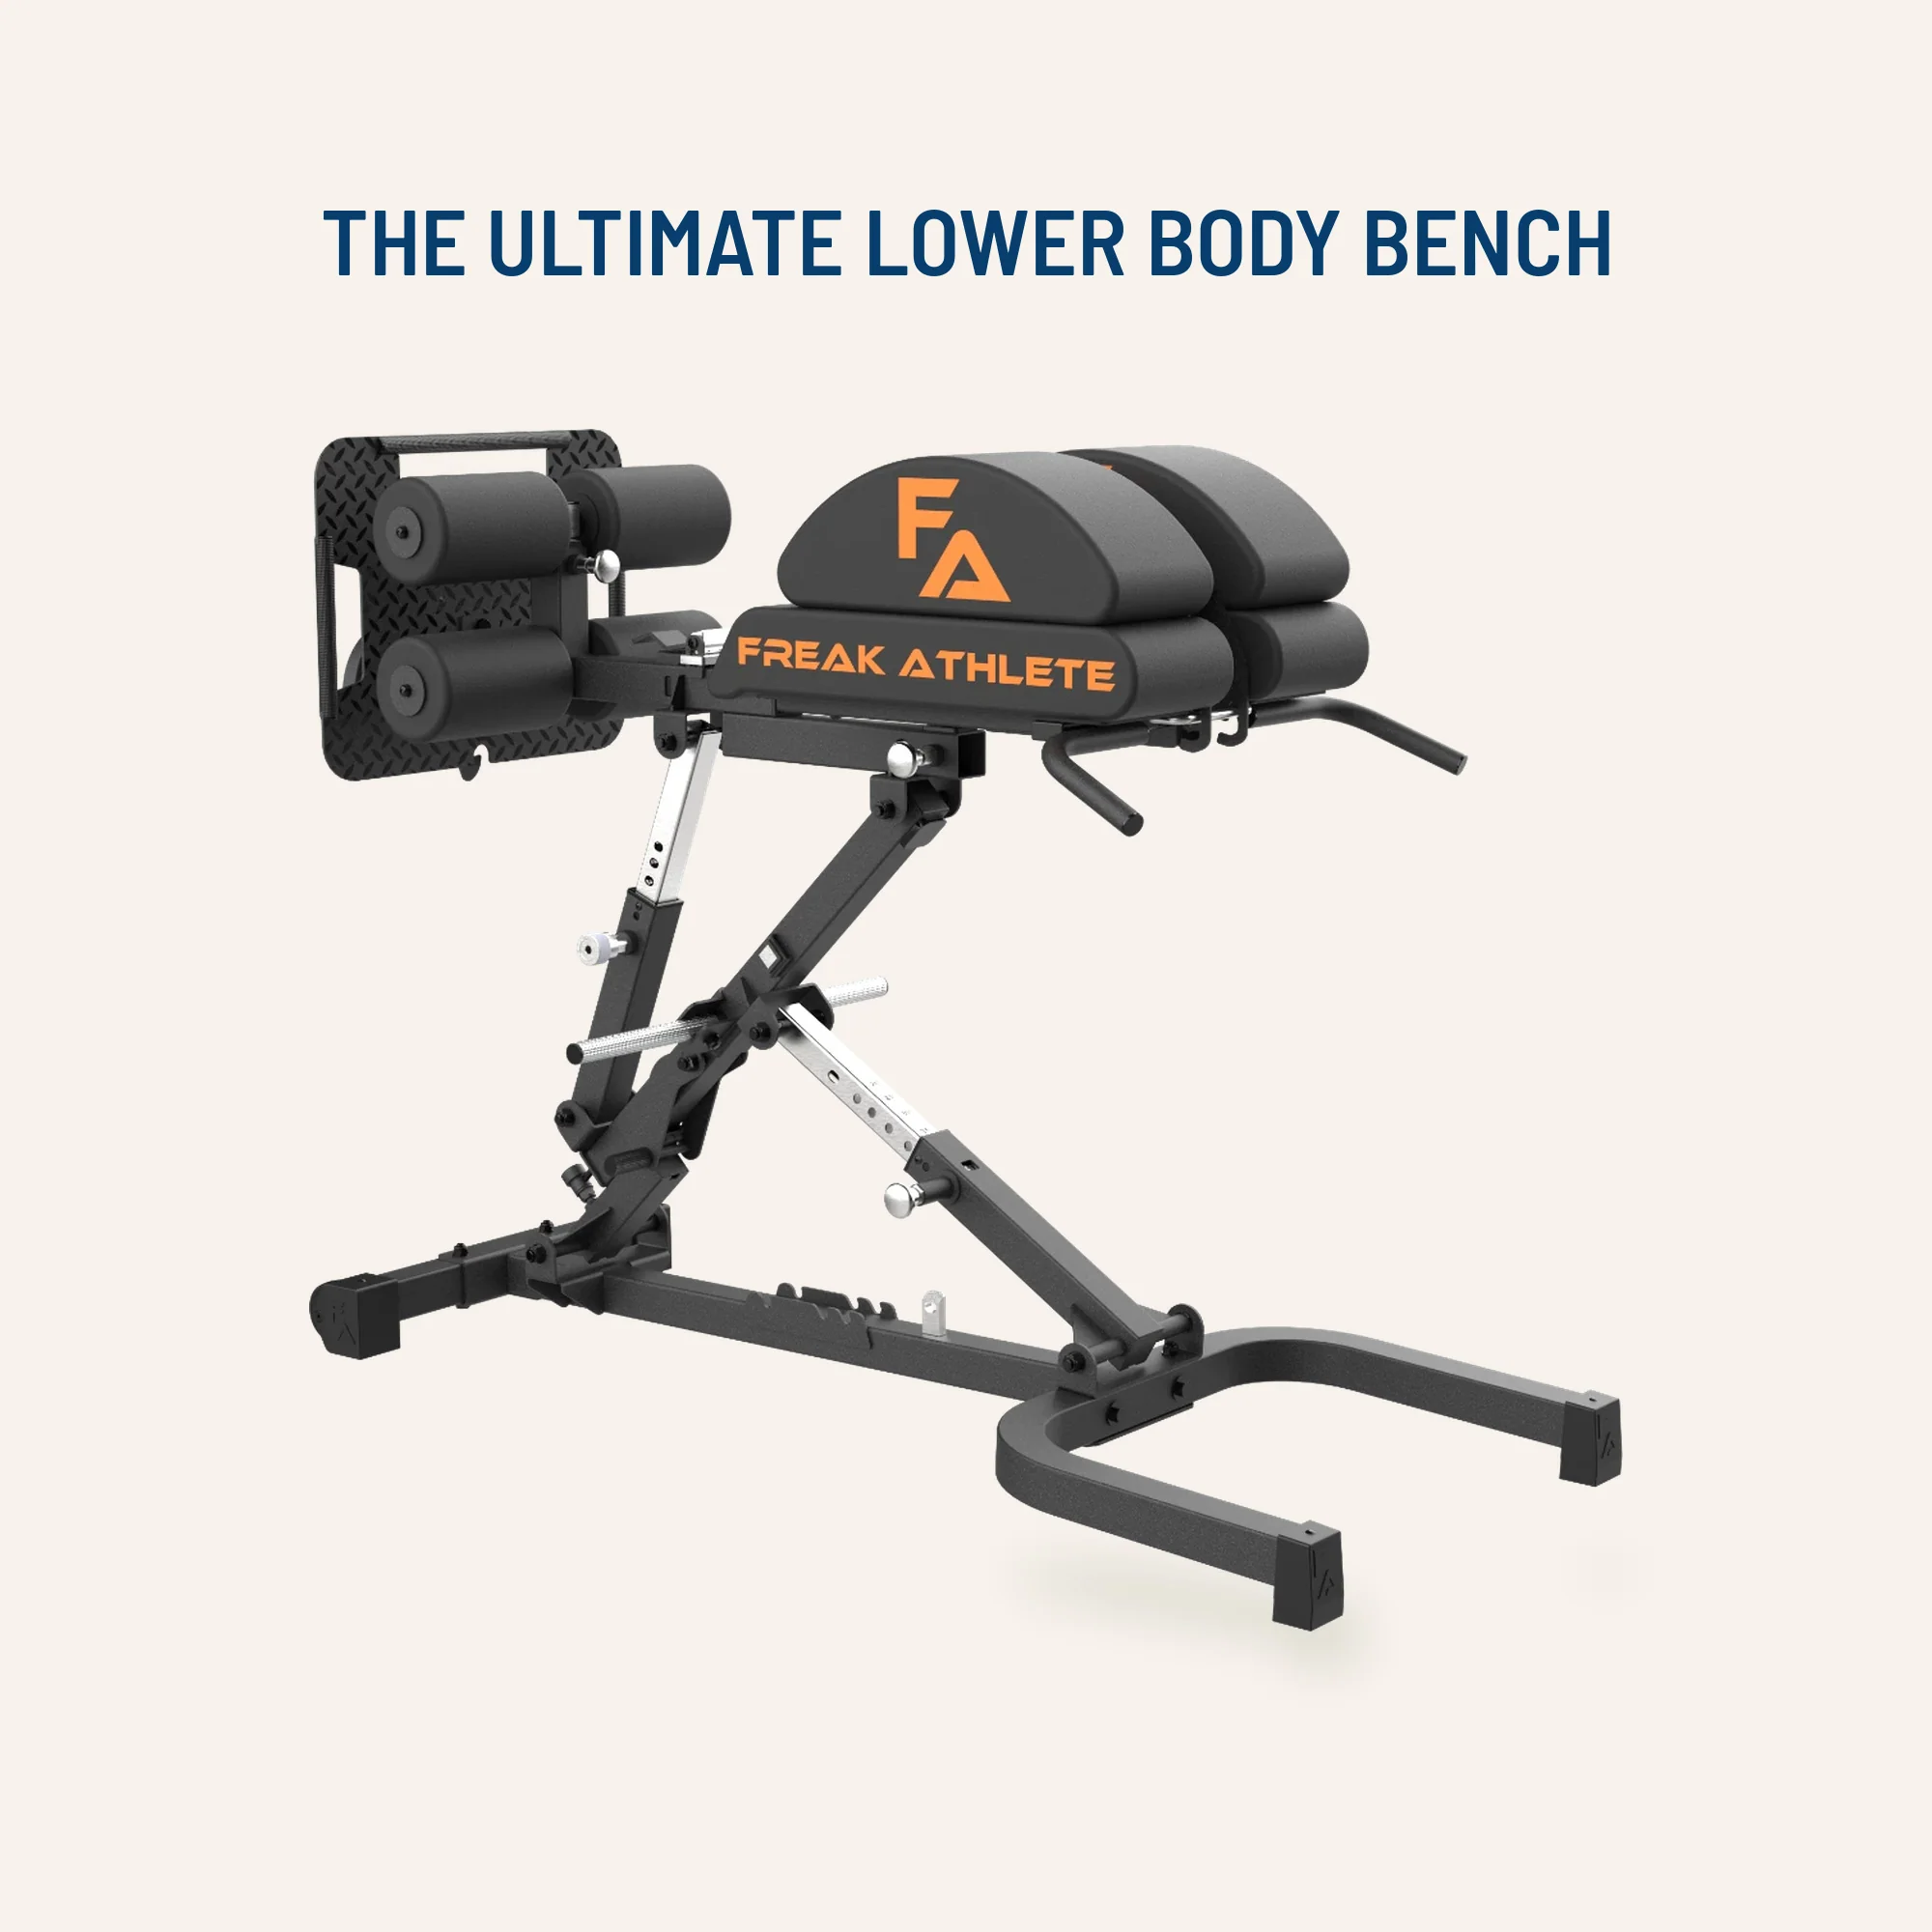
Glute Ham Developer GHD-820
Adjustable glute-ham developer with contoured pads and a fold-out knee support.


45° Hyperextension HPX-650
Angled back-extension trainer with split padding, a ribbed footplate and resistance-band pegs.

Leg Extension/Curl BCO-780
Leg extension and lying leg curl combo with plate loading, band pegs and a cable-loading option.

Seated Leg Combo BCO-680
Adjustable seated leg extension and leg curl machine with band pegs for added resistance.


HUSLA Leg Extension Pad
Pad attachment designed to increase usable range of motion on compatible leg-extension machines.

3. Own the descent and distinguish two valid movement ranges
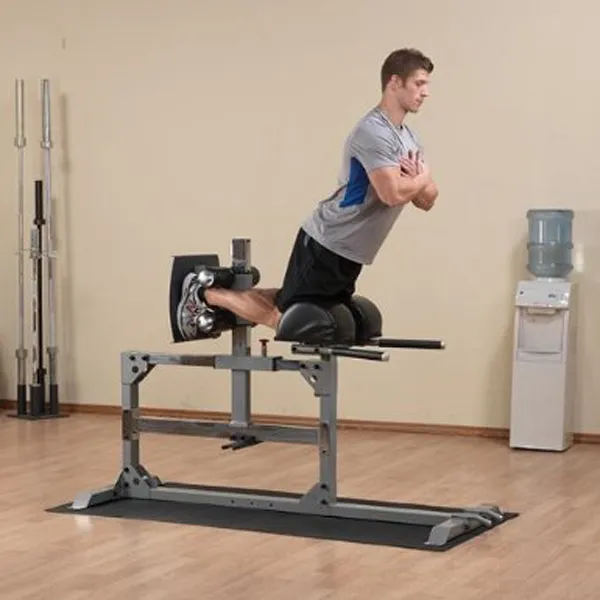
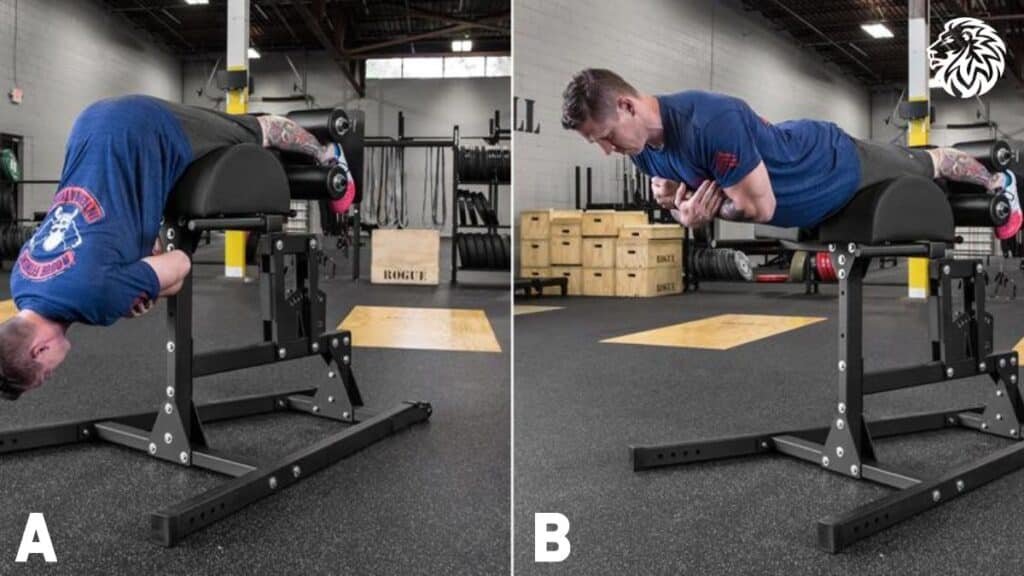
From the upright position, brace the trunk lightly, keep the hips extended and let the knees open gradually as the torso travels forward. Imagine resisting the floor instead of diving toward it. Your shoulders, hips and knees stay roughly in one line during this knee-dominant part. Stop while you still have enough control to change direction; there is no prize for dropping through the final few inches.
For the shorter GHR, the body approaches horizontal and then the hamstrings flex the knees to draw you back upright. A controlled two- or three-second descent followed by a steady return is a practical starting rhythm. Do not bounce the knees into the pad, fling the arms upward or snap through the low back to steal the return. The torso and thighs should look like one deliberate lever.
A longer variation adds a distinct hip movement below the horizontal position. After the knees are extended, the hips can fold over the curved pad and the torso continue downward. To return, extend the hips first toward a straight horizontal body, then flex the knees to finish rising. This version has a more involved movement sequence; it should not be mistaken for an error simply because a strict knee-only demonstration looks different.
The useful question is whether the motion is intentional. A controlled hinge at the bottom of a planned full-range variation is different from losing stiffness suddenly halfway through a knee-dominant rep. Likewise, a little assistance from the hands can be appropriate when deliberately practising a difficult position, but random hand pushes make repeatability difficult to judge.
Film one set from the side if you cannot tell where your hips begin to bend. Compare the first and last rep: is the ankle anchor stable, do the knees move at a similar pace and can you still pause for a moment near the hardest angle? A set of four technically consistent repetitions is more valuable as a progress benchmark than eight that turn into a series of hurried falls.
4. Scale the exercise without turning it into a different movement
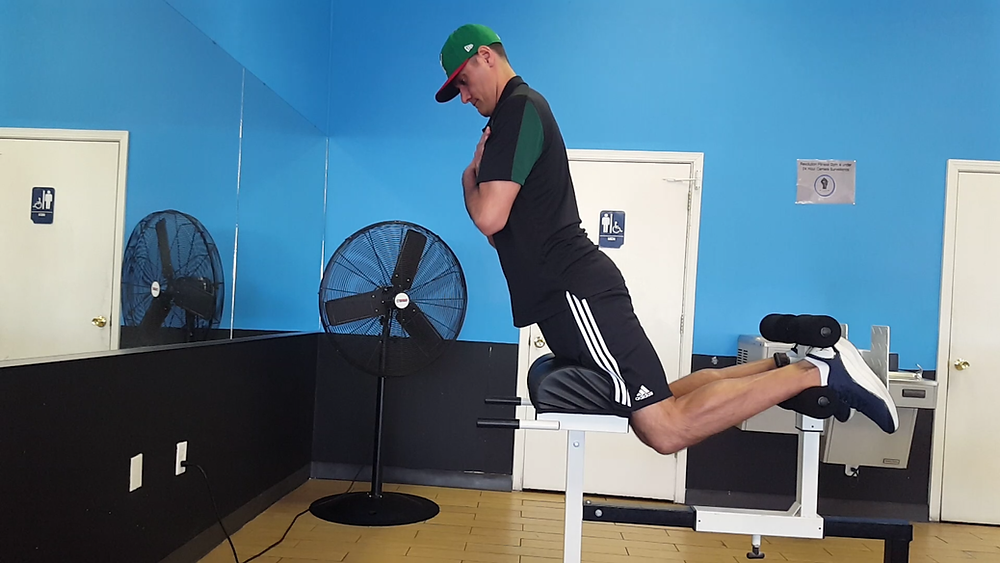
Many experienced lifters lack the knee-flexion strength to return from a long, unassisted GHR on day one. Start with short-range repetitions where you can lower and rise without panic. Add range before adding load. If you need help, use a stable machine handle, a partner’s controlled assistance or a properly mounted assistance band. Choose one support method and record it.
Eccentric-only practice can be useful, but it is not an excuse to free-fall. Lower under control for two to four seconds, then use the handles or your feet to reset safely. Two or three clean negatives may be enough for a first working set. Stop before the hamstrings cramp repeatedly or your descent becomes uncontrolled. Assistance should make the movement reproducible, not create the illusion of unassisted strength.
Body position also changes difficulty. Arms crossed over the chest provide a consistent baseline. Hands near the shoulders or extended farther forward shift the body’s mass and may increase the challenge; an added plate or vest makes the lever more demanding again. Those are later progressions, not the first solution when a lifter cannot maintain position through bodyweight reps.
Nordic curls are a useful related option when a real GHD is unavailable, but their knee-on-pad setup, leverage and typical emphasis on lowering are different. Do not label a band-assisted Nordic as an identical glute-ham raise in your log. If you mainly want knee-flexion volume with easily adjustable resistance, seated or lying leg curls may be a better place to build baseline strength before returning to a challenging GHR.
For lifters whose knees or ankles protest, investigate the equipment fit first; then try a shorter motion or a machine curl. Avoid forcing a painful bodyweight exercise through its hardest angle. The ideal assistance level is the smallest amount that lets you keep the planned tempo and preserve the same movement pattern on every repetition.
Equipment Worth Exploring
Explore equipment, accessories and gear from our carefully selected range.

Grip Plates
Rubber-coated weight plates with handholds for loading barbells and machines.


Rubber Hex Dumbbells
Rubber-coated hex dumbbell pairs with a stable shape for home and commercial strength training.

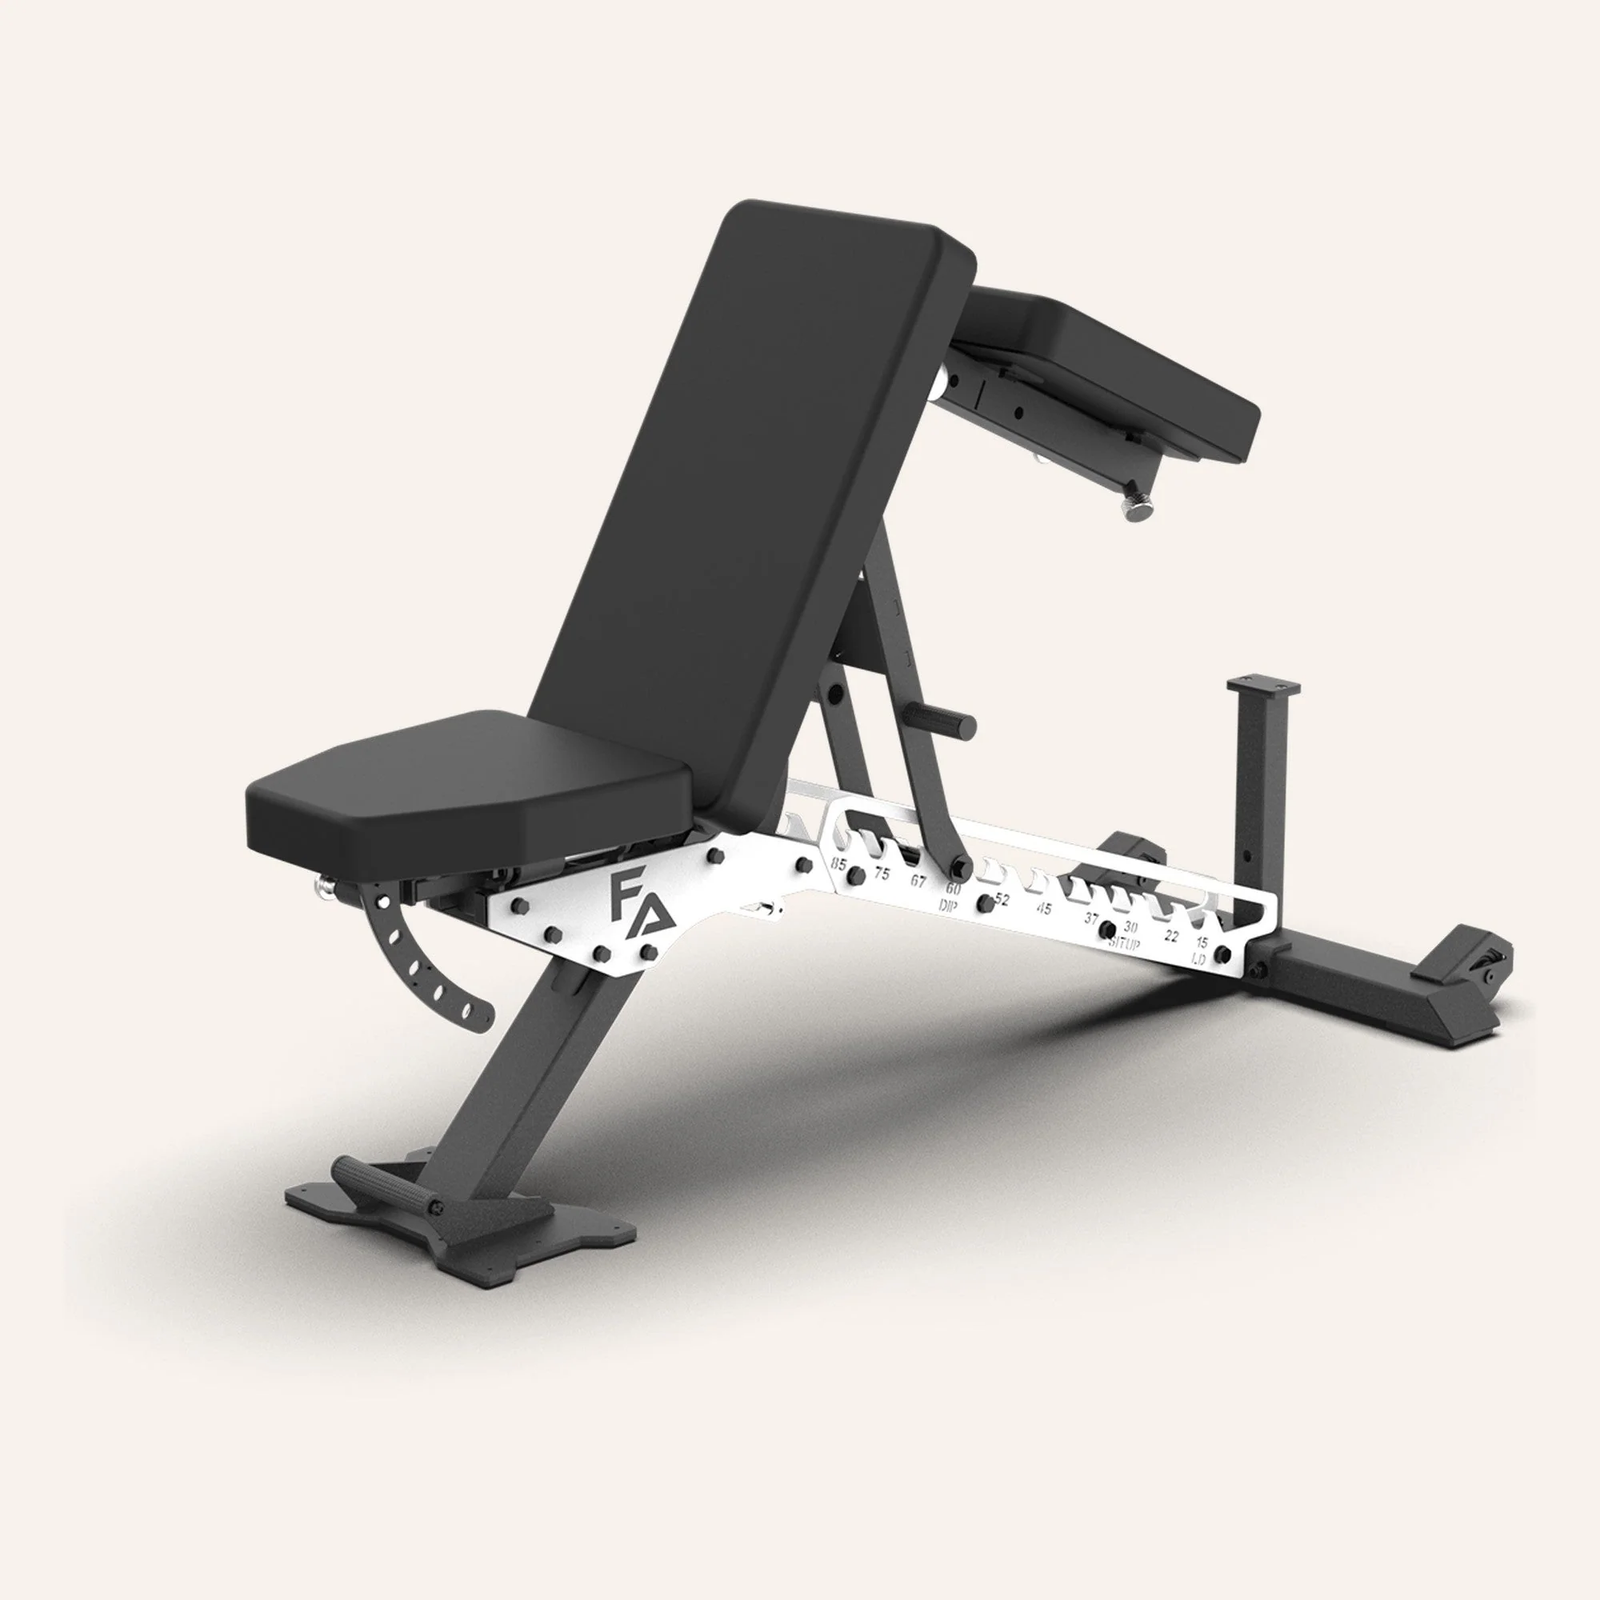
Multi Bench MBX-650 2.0
Adjustable multi-bench with roller adjustment, 15 backrest positions and accessory mounts.

Open Hex Bar
Open-frame trap bar with multiple handles for deadlifts, carries, and lower-body training.


5. Programme hamstring work, recover and earn the next progression
A GHR belongs where it helps your programme, not where it merely looks impressive. On a day built around heavy deadlifts or Romanian deadlifts, place demanding bodyweight GHR work after the main hinge so tired hamstrings do not compromise your priority lift. If posterior-chain strength is the main target and you are already competent on the GHD, a fresh GHR set may also serve as a focused accessory before lighter leg-curl work.
Start with two sessions per week or fewer if your hamstrings are already receiving plenty of direct work. A practical beginning is two working sets of four to eight controlled assisted or unassisted reps, resting around two minutes. This is a starting example, not a research-proven universal prescription. Leave enough repetitions in reserve to maintain the same lowering speed on the final rep.
In weeks one and two, use a consistent pad position and assistance level. Film an early set, count clean reps and note whether the horizontal position is controlled. In weeks three and four, remove a little assistance or extend the range only after meeting the same standard across both sets. During weeks five and six, aim for another technically consistent repetition, a smoother pause or a lower assistance setting—not all three changes at once.
Choose a single progression metric for the next fortnight: clean reps, seconds spent lowering, usable range or assistance setting. Logging all four is useful; chasing all four simultaneously makes it hard to know what improved. A sample note might read: ‘GHD setting 4; band assisted; 2 × 6; three-second lowering; controlled to horizontal.’ This gives the next session an objective target.
If the GHR leaves the hamstrings severely sore for days, it is probably too much new eccentric volume. Scale back sets, range or frequency and build gradually. Most lifters will also benefit from keeping a hip-hinge movement in the broader week, because a GHR cannot replace every strength quality trained by squats, deadlifts, pulls and curls. Train the muscle through multiple useful tasks without trying to cram them all into one session.
The goal after six weeks is not necessarily a weighted set. Being able to use the same machine setting, lower smoothly, return without momentum and repeat that standard next week is real progress. Once that is reliable, extra repetitions or modest loading have a meaningful foundation. Keep the exercise difficult because the hamstrings are working, not because the equipment is badly adjusted.

Leg Day Shirts & Workout Gear
Leg-day gym shirts and workout gear for lifters who never skip squats, lunges and lower-body punishment.


Deadlift You Must Star Wars Yoda & Leg Day Gains Hoodie
Keep it laid-back with a little “Deadlift You Must” attitude.

Leg Day Gains | LEGO Muscle Shirt For Squats & Deadlift Tank Top
Add some leg-day attitude to training with “Leg Day Gains”.

Deadlift Lovers Grim Reaper Skeleton Sweater & Leg T-Shirt
Add a playful “Deadlift Lovers” touch to your casual rotation.

Zombie Deadlift Deadlift Lovers & Leg Day Meme Tank Top
Show some personality between sets with “Zombie Deadlift”.

Funny Viking Deadlift Shirt For Gym Bros | Leg Day Gain T-Shirt
Heavy lifts, good laughs, and a little “Viking Deadlift” energy.

Heavy Metal Deadlift – Skeleton Gym Vest for Powerlifti Tank Top
Your gym-day look, with a playful “Heavy Metal Deadlift” twist.

Leg Day Squats Deadlifts Decal Meme Vinyl Sticker
Give your everyday gear a playful “Leg Day” twist.

Leg Day Is Calling You Sweater Squats & Deadlifts T-Shirt
Add a playful “Leg Day Is Calling You” touch to your casual rotation.

Never Skip Leg Day Gym | LEGO Workout For Squat & Deadl Hoodie
Bring “Never Skip Leg Day” gym humor to lazy days and post-workout plans.