Advertising disclosure: This page includes affiliate product links that may earn us a commission, as well as products from our own store.
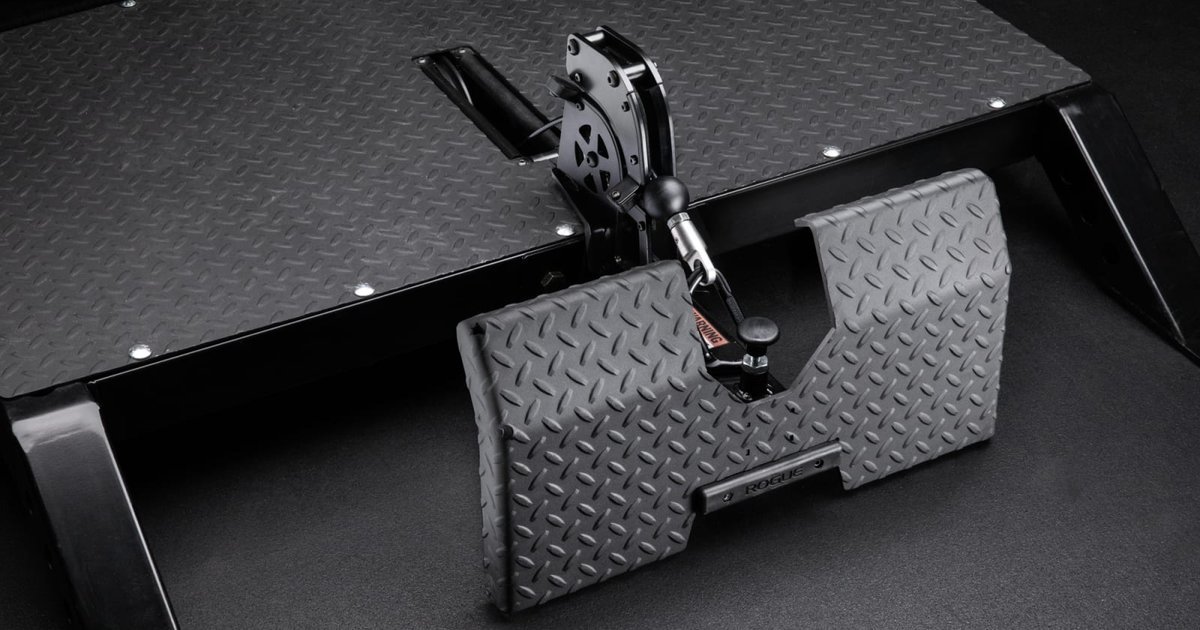
The Rogue Rhino Low Row Attachment is not another version of the Monster Rhino belt squat. It is a separate accessory that turns an existing Rhino platform into a seated horizontal-pull station. That distinction matters if you already own the machine and want more back work without giving up another wall of your gym. The accessory has a quick-removal mount and an adjustable footplate, but its practical value depends on access, cable travel, storage and how often you actually row.
Understand what the low-row add-on actually changes
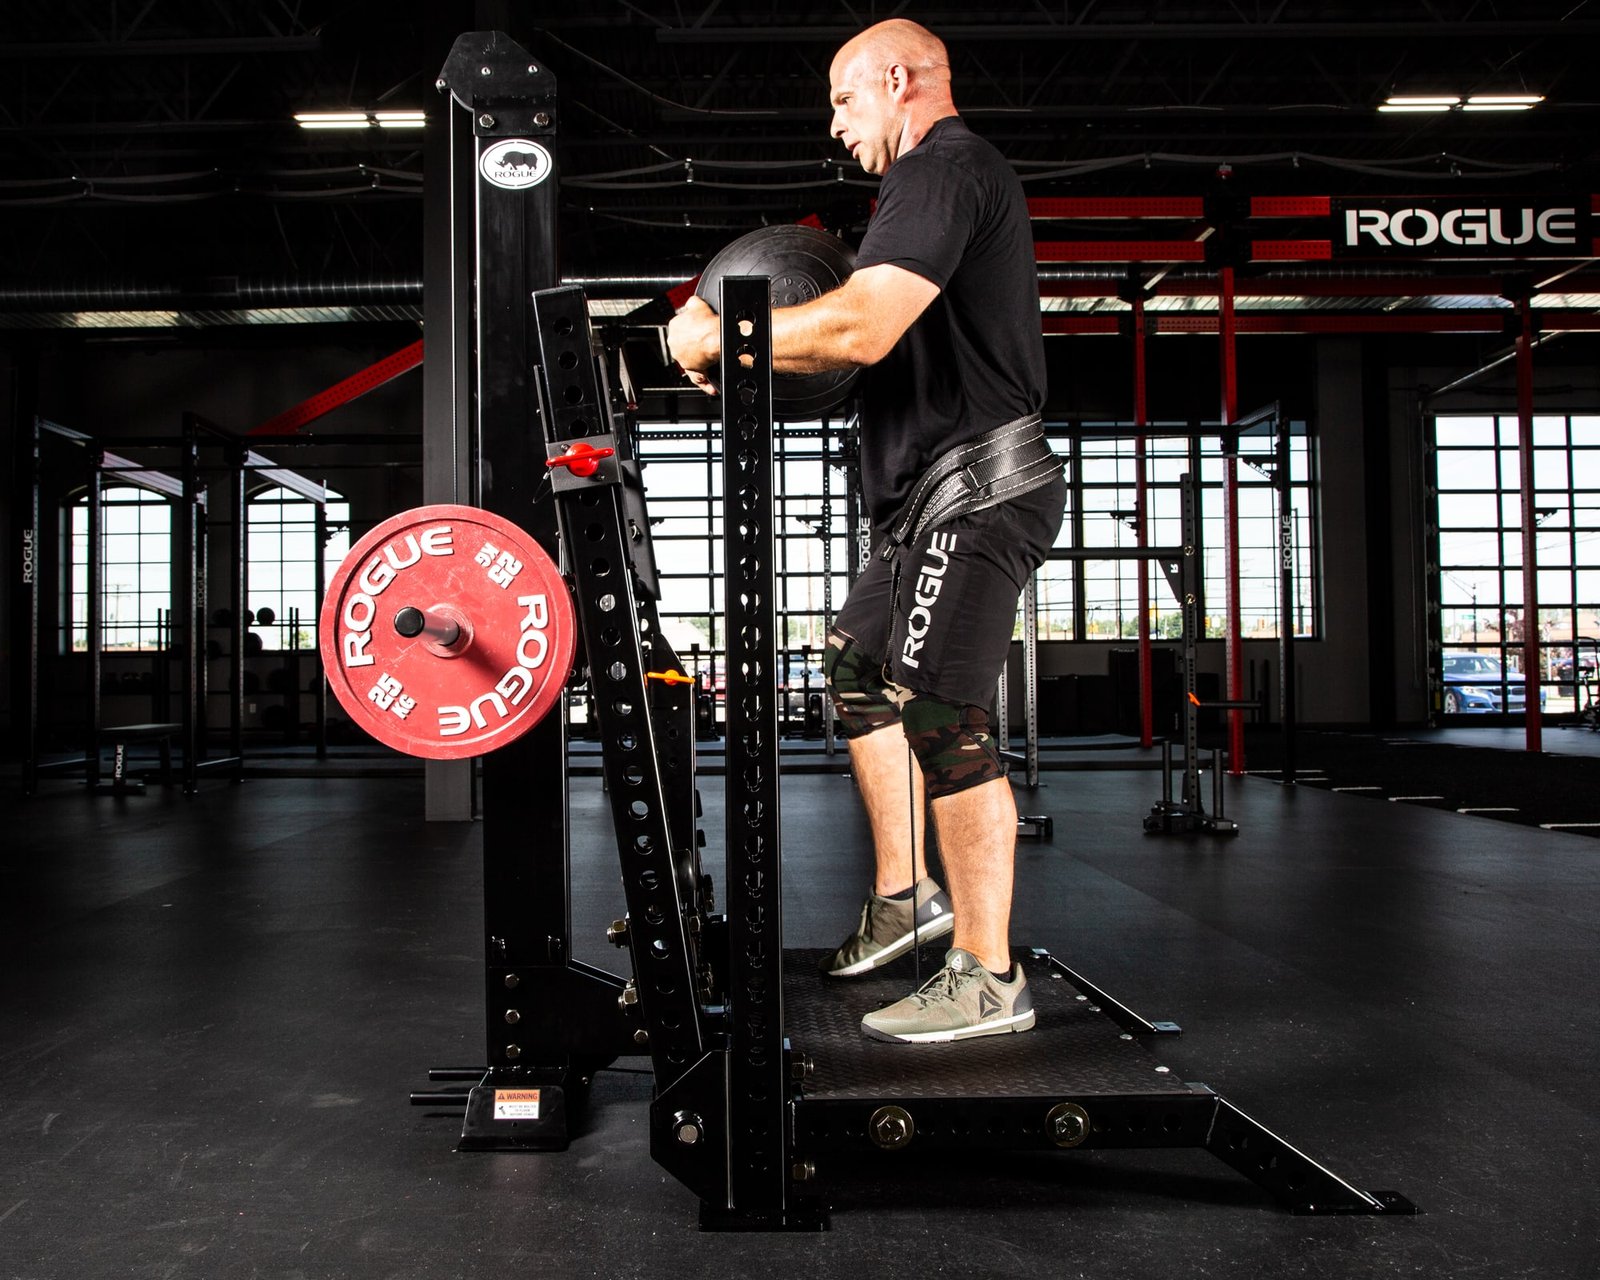
The original Rogue Rhino is a hip-loaded belt-squat machine. Its trolley and cable provide resistance while you stand on the platform and squat against a belt. The low-row accessory repurposes that existing resistance for pulling, rather than introducing a second weight stack. It is therefore an upgrade for an existing Rhino owner, not an independent cable row that works without the Rhino. The official product is specified as compatible with Rogue Rhino Belt Squat platforms.
When you install the low row, a foot-bracing structure and redirect pulley sit at the platform’s front. That permits a seated pull toward the torso while the Rhino’s underlying load system supplies resistance. The visual difference from an ordinary stand-alone row tower is striking: your legs brace against an add-on plate, and the Rhino remains behind the pulling path. It does not suddenly behave like a chest-supported row or a plate-loaded lever machine; you must stabilize your own trunk.
The distinction between the Rhino’s freestanding version and a rack-integrated drop-in version also remains important. Both may accept the low-row accessory, but the space around the host machine and the route into a seated setup are different. A low row attached inside an occupied rack can interfere with other exercises or with a bench. Check the existing machine, access path and intended sitting location instead of assuming that adding just one compact component costs no useful room.
The manufacturer’s June 2025 introduction described quick-attach keyhole hardware and an adjustable tread plate. These are specific design changes rather than a new claim about how much muscle you will gain. For an owner, the real question is whether the extra setup delivers more high-quality sets of rows than your current cable, dumbbells or chest-supported station. A second movement pattern can be valuable, but versatility alone is not proof that an accessory is worth buying.

Equipment Worth Exploring
Explore equipment, accessories and gear from our carefully selected range.

Linear Row LRX-750
Dual-sided rowing machine for supported rows, bent-over rows and varied pulling movements.

Lateral Row Machine LRM-720
Rowing machine with independent lever arms, an adjustable seat and chest support.

GymPin Barbell Row Handle
Heavy-duty handle attachment for barbell, landmine and T-bar rows.

T-Bar Row Attachment
Welded barbell attachment that connects a D-handle bar for landmine and T-bar rows.

Angles 90 Grips
Flexible grip attachments that allow natural wrist movement during pulling exercises.


GymPin Ergo Handles
Pair of ergonomic cable handles shaped for comfortable triceps and pulling exercises.

VForce Lat Tower
Wall-mounted cable tower with pivot arms and adjustable 1:1 or 2:1 pulley ratios.
VOLTRA
Compact digital cable trainer with smooth, adjustable resistance.
Mount the 44-pound accessory and lock the footplate
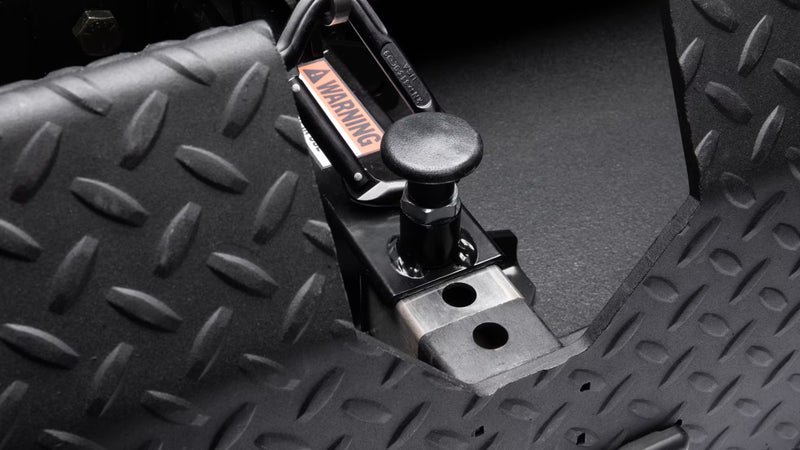
Rogue lists the attachment at 44 pounds, with a roughly 22-inch width, 14.5-inch height and depth that varies from about 15 to 22 inches depending on its position. That is a meaningful object to lift, position and store, even though it attaches without tools during routine changeovers. Owners should distinguish the initial installation of the Rhino’s mating plate from the day-to-day action of hooking the low-row assembly into it. Follow the current manufacturer instructions for the exact Rhino version.
The keyhole pegs engage the mating plate at the platform front, while a captive pop-pin selects the tread plate setting. Inspect the mating hardware, seat the pegs completely and confirm nothing lifts or shifts under a light test pull. Do not assume that a partially dropped-in pin is locked because the footplate feels stiff with no load. Test it before routing a cable and before sitting far enough back that a sudden release could throw you off balance.
The integrated tread plate has eight positions spanning approximately 11 to 18 inches from the platform face. These are adjustment distances, not a promise that every body size or rowing style will be comfortable. If your knees are jammed against your chest, move the plate or change where you sit. If your knees lock out and your hips slide as soon as the trolley loads, bring the bracing surface closer. Aim for secure footing with a slight, controllable knee bend.
Keep the Rhino’s own installation requirements in force. A freestanding Rhino still needs the floor anchoring prescribed by Rogue; a low-row attachment is not an alternative method of stabilizing the base. Clear access around the platform and keep fingers away from keyholes, pulleys and pinch points. Rogue explicitly directs owners to remove the low-row assembly when it is not being used, so the storage location is part of installation planning, not an afterthought.

Bodybuilding Shirts & Workout Gear
Bodybuilding shirts, tanks and gym gear for lifters chasing muscle, size, symmetry and the pump.

Nice Traps Big Back – Halloween Horror Jigsaw Meme Hood Hoodie
Keep it laid-back with a little “Nice Traps Big Back” attitude.

Demon Back Big Back & Lat Workouts Vest Tank Top
Your gym-day look, with a playful “Demon Back” twist.

Strong Back Bodybuilder | Meme Hooded | The Simpsons Wo Hoodie
Bring “Strong Back Bodybuilder” gym humor to lazy days and post-workout plans.

Back Sabbath Back Day Heavy Metal Back Training Workout Tank Top
Train hard, laugh a little, and rep “Back Sabbath Back Day”.

Lat Spread Mickey Mouse Hooded Meme Hoodie
Make your off-duty look more fun with “Lat Spread”.

Back To The Sci-Fi Meme Decal Water Bottles & Gear Sticker
Stick a little “Back to” humor on your favorite gear.

Train Back You Must Gym | Funny Yoda Bodybuilding Meme Hoodie
Make your off-duty look more fun with “Train Back You Must”.

Shirt Pull Day – Back & Biceps Meme Top T-Shirt
Heavy lifts, good laughs, and a little “Pull Day Graphic” energy.

Big Back SpongeBob Decal Water Bottles Meme Sticker
A fun “Big Back” touch for bottles, laptops, and lockers.

Lat Man Big Back – With Huge Lats – Vest Back Day Tank Top
Your gym-day look, with a playful “Lat Man Big Back” twist.
Route the cable, choose a seat and measure usable travel
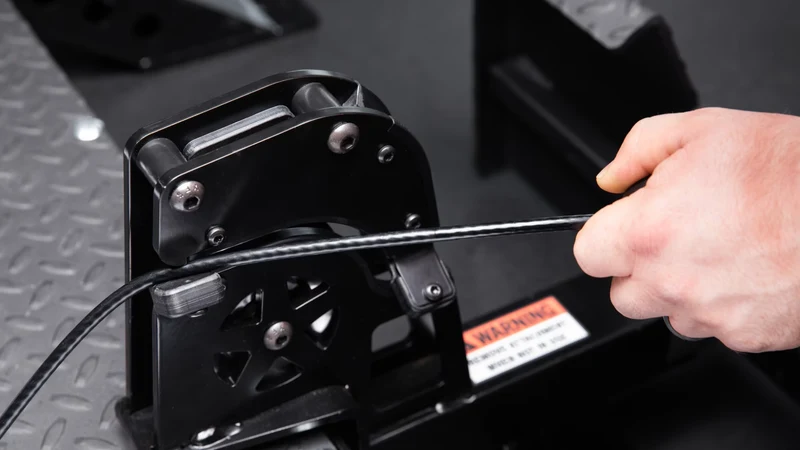
The low-row pulleys redirect the existing Rhino cable toward a seated handle. When preparing the station, first secure the host machine, check that its load is safely parked and follow the manufacturer-specified cable route. A cable laid across a sharp platform edge or threaded outside the pulley track is not an acceptable shortcut. Run a very light, partial-range trial to check for rubbing, binding, poor alignment or unexpected movement before performing a demanding set.
You can often set up a seated position on the floor or an appropriate stable bench, provided both give a straight and unobstructed pulling line. Avoid stacking unstable pads to create artificial height. Before loading plates, reach forward with a neutral spine, then draw the handle toward the lower ribs while keeping your feet firmly against the tread plate. The starting point should let the arms extend without the trolley bottoming out, and the finishing point should not require your elbows to be dragged excessively behind the body.
One practical limitation worth checking is actual available cable travel. The Rhino was designed primarily around its belt-squat movement, so an owner’s cable length, hardware setup and seating position determine how much useful rowing motion remains. You cannot infer a universal row stroke simply from the footplate’s eight settings. Some owner reports describe tight cable routing or shortened travel on particular configurations. Treat these as reasons to measure your own configuration, not proof that every Rhino has a defect.
Try a short set with a compact neutral-grip handle before purchasing a collection of long bars. A very wide bar may hit the knees or interfere with the platform earlier than expected. Make sure both handles and any accessories are rated and compatible with the intended cable connection. Record the chosen plate location and seating distance if multiple people use the same station; switching between settings repeatedly can otherwise make the same load feel inconsistent.
Use the row as back work, not a demonstration of the stack
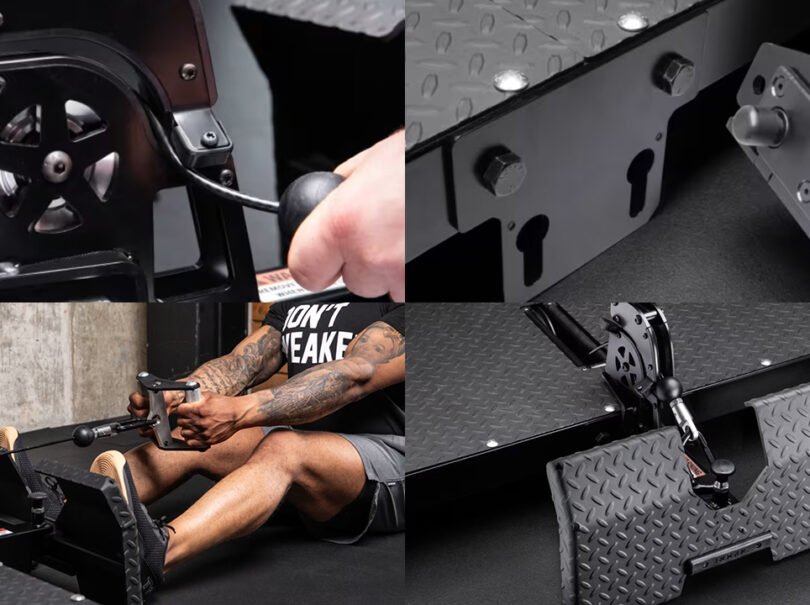
A properly set low row can train the lats, mid-back, rear deltoids and elbow flexors, depending on the chosen elbow path and grip. With a closer handle, draw the elbows toward the lower ribs and keep your torso mostly stable. With a broader path, upper-back and rear-shoulder involvement may be felt more, but do not exaggerate the differences as though each handle isolates one muscle. These patterns are general anatomy, not exact activation guarantees for this particular product.
Begin with the arms reaching forward, shoulders free to move comfortably and knees still softly bent. Pull smoothly without using a violent hip hinge to accelerate the trolley. At the top, pause briefly with the handle near the torso and the ribcage stacked over the pelvis. Return over a controlled count until the shoulder blades can move naturally and the arms extend again. There is no need to deliberately wrench the shoulders forward just to claim a larger stretch.
If the weight increases but your torso starts throwing itself backward, the change may be mostly momentum. Reduce the plates until the path becomes repeatable. A simple working set may involve eight to twelve controlled repetitions with one to three technically good reps left. Rest long enough that the next set reflects back-muscle effort instead of gasping for breath. Stop for sharp pain, cable snagging or movement of the mounting assembly rather than forcing an arbitrary number.
Compare this to a chest-supported machine row carefully. The Rhino add-on gives the feet a stable brace but does not support the chest, so trunk endurance and the seat setup can become limiting factors. It also does not replace pull-ups or pulldowns, where the arm angle and resistance path differ. Use the low row to fill the horizontal-pull slot if it is comfortable and consistently loaded; do not buy it to chase a claim that it is inherently more effective than an existing row.
Equipment Worth Exploring
Explore equipment, accessories and gear from our carefully selected range.

Multi Pull Smith Rack MPHR-780
All-in-one rack with a Smith machine, functional trainer, lat pulldown and low row.

VForce Wall Trainer
Space-saving wall-mounted functional trainer with pivoting cable arms and variable resistance ratios.

VForce 2IN1
Half rack and pivot-arm functional trainer with switchable 1:1 and 2:1 pulley ratios.

Trinity Lat Machine LSW-850
Weight-stack pulldown tower offering three cable directions and adjustable seated support.

Leather Lifting Straps
Padded leather straps support grip during heavy rows, deadlifts and pulling exercises.

GymPin D Handle Bar
Multi-use steel D-handle bar for cable rows, pulldowns and other cable exercises.

48in Aluminum Lat Bar
48-inch aluminum lat pulldown bar with knurled grip and rotating center swivel.

Lat Pulldown Set
Multi-grip cable attachment set for pulldowns, rows, and varied upper-body training.
Premium Carabiner
Durable carabiner for connecting cable attachments and training accessories.
Decide whether it earns the space and a four-week trial
For weeks one and two, train the new station once or twice per week with two sets of eight to twelve reps. Focus on repeating the same footplate hole, seated position, grip and depth. A moderate starting resistance is more informative than a one-rep maximum on an unfamiliar cable route. Write down setup notes, not just plate weight. If the pulley drags or the cable travel prevents full comfortable movement, investigate the mechanics before adding extra resistance.
During weeks three and four, work toward the top of a controlled eight-to-fifteen-rep range before increasing load by the smallest useful increment. If you already have extensive rows in your program, exchange a similar exercise rather than adding unlimited volume. Keep your hardest pulling day away from other sessions that already exhaust your lower back or forearms. The goal of a short trial is to see whether the station contributes reliable, progressive work.
The buying decision is not just the accessory’s listed price. Include possible regional shipping, the location of the machine, the effort of lifting and removing a 44-pound attachment, and a safe place to set it down. A rack-mounted Rhino may need particularly deliberate storage planning because the low-row assembly can occupy the space where a bench or another lifter would normally go. A dedicated cable row may take more permanent area but save daily changeover time.
An owner who uses the Rhino for leg work several times per week and lacks a suitable horizontal cable pull may get genuine utility from the upgrade. Someone who already has a reliable lat-pulldown low-row combo, seated cable station or excellent chest-supported row should compare real training overlap rather than collecting functions. You can keep belt-squat training and low-row training in the same program without pretending that they target identical muscles or offer identical recovery demands.
The useful conclusion is straightforward: the Rhino Low Row is a distinctive, adjustable accessory introduced for the existing Rogue platform, not a redesigned belt squat or a universal back-training breakthrough. Confirm your host configuration, mount correctly, establish usable cable travel, then evaluate the station with several weeks of controlled rows. If setup friction means you rarely use it, its clever mechanics cannot compensate for an underused purchase.
Funny Gym Shirts & Workout Gear
Funny gym shirts, tanks, hoodies and workout gear for lifters who like training hard.

The Empire Lifts Back – Star Wars Back Day Meme Pullove T-Shirt
Add a playful “The Empire Lifts Back” touch to your casual rotation.

Back In Gym Back In Black Album Cover Parody AC/DC Heav T-Shirt
Add a playful “Back In” touch to your casual rotation.

Black Panther Big Back Gym Funny Meme Decal Gym Gear La Sticker
Put “Black Panther Big Back” gym humor on your laptop, bottle, or gym gear.


Pull Up or Shut Up Crewneck Pullover Sweater for Calist T-Shirt
For laid-back days and bodybuilding humor: “Pull Up or Shut Up”.

Always Pull Yourself Up Tank
Show some personality between sets with “Always Pull Yourself Up”.

Calisthenics Heartbeat Decal for Water Bottles Laptops Sticker
Put “Calisthenics Heartbeat” gym humor on your laptop, bottle, or gym gear.

Shirt – Lord Of The Calisthenics Rings – Meme T-Shirt
Rep “Lord of the Calisthenics Rings” humor in and out of the gym.

Pull Up Not Out Hoodie
Show off your bodybuilding humor in a laid-back “Pull Up Not Out” hoodie.