Advertising disclosure: This page includes affiliate product links that may earn us a commission, as well as products from our own store.
Two Jefferson Lift Setups: Compare Shoulder Direction, Bar Rotation and Clearance
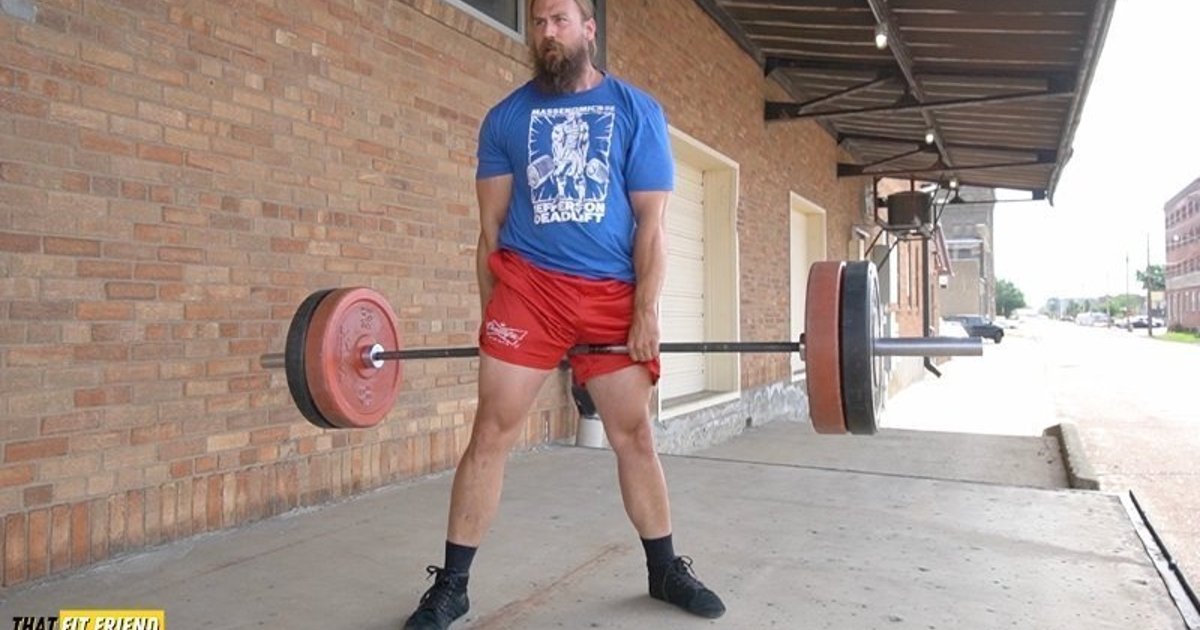
Two lifters can stand astride the same bar and perform noticeably different Jefferson lifts. One faces more across the shaft; the other lines the shoulders up more along it. The distinction matters when you compare a training video or decide whether a change in setup actually helped.
This comparison focuses on those two arrangements of the straddle deadlift. It is not the Jefferson curl, and it is not an argument that one stance is universally superior. The aim is to compare the movement you perform, using a manageable load and consistent observations, before assigning meaning to the number on the bar.
Shoulders across the shaft or more along it?
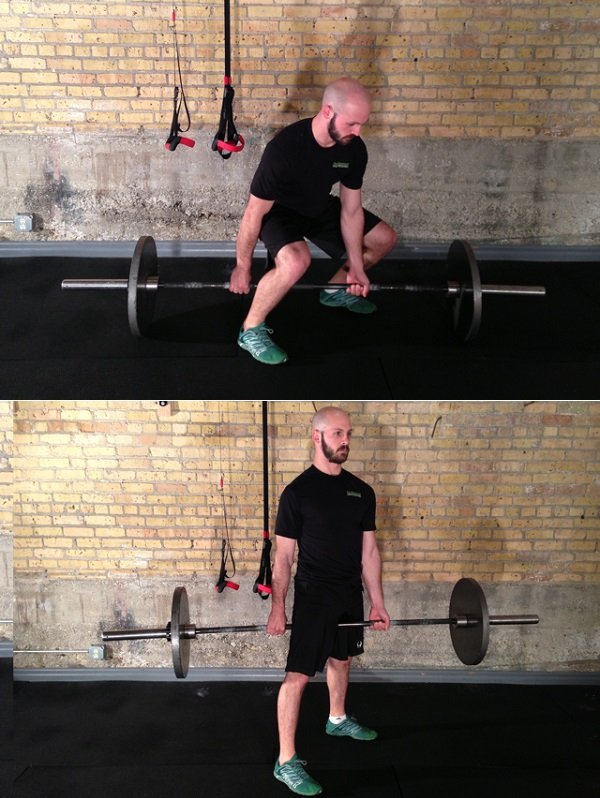
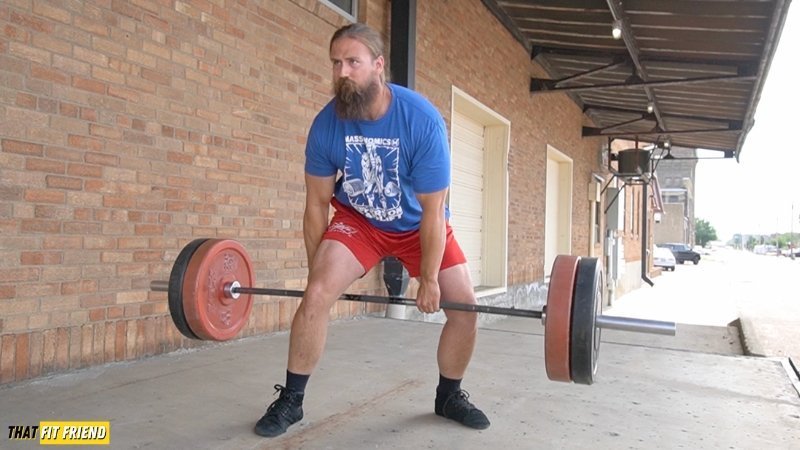
Both versions place a leg on each side of the bar and a hand in front and behind the body. With the shoulders more perpendicular to the shaft, the bar may rotate as you finish. With the shoulders more parallel to it, the pull can involve less bar rotation. These are useful descriptive categories, not angles every lifter must reproduce exactly.
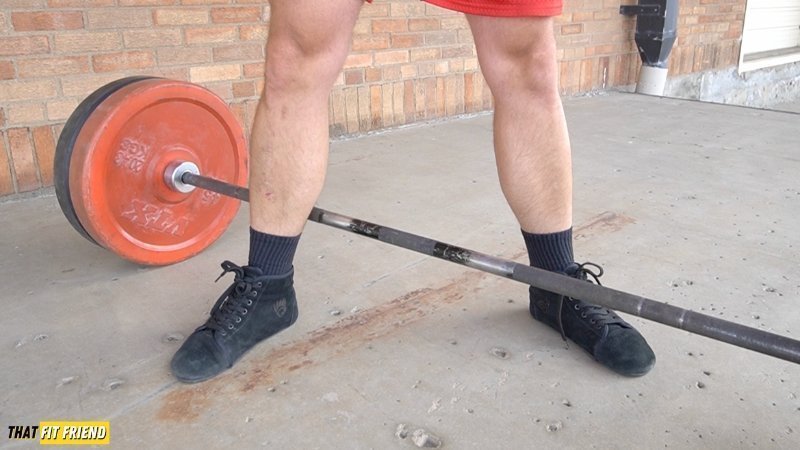
In the more parallel arrangement, the feet are offset around the bar. The lead leg can feel more heavily involved at the start. That is a reason to approach the position cautiously rather than assuming that a straighter-looking bar path makes the lift easier for every part of the body.
Begin by identifying what your video actually shows. Imagine a line joining your shoulders and another following the bar. Record whether they are mostly parallel, mostly perpendicular or somewhere between. Without that description, two sets labelled only “Jefferson deadlift” can conceal a substantial setup change.
Do not force the torso into a geometric category at the expense of a comfortable reach and workable clearance. The categories help describe a lift; they are not a mobility test to pass. If neither arrangement feels manageable, another exercise can remain the better training choice.
Match the hand arrangement to the stance being tested
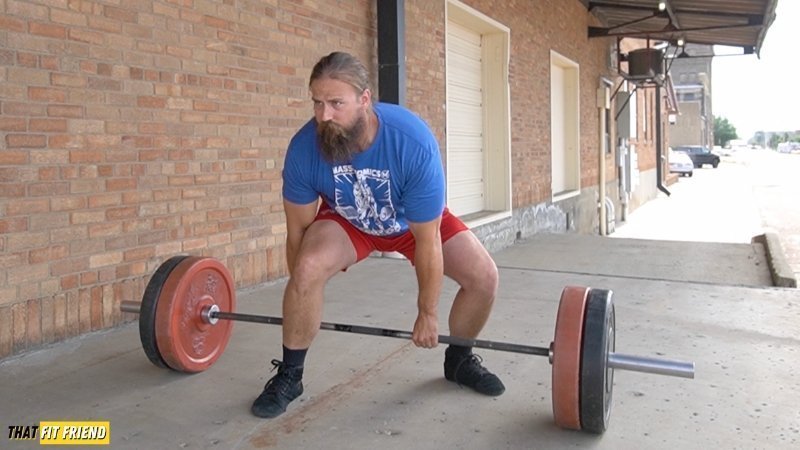
Establish the stance, then reach down with one hand in front and the other behind. A mixed grip is common, but it is not a licence to yank with a bent arm. Keep the arms long and use a secure grip. If the bar cannot be held reliably with a manageable load, reduce the task rather than trying to recover a slipping heavy repetition.
Grip width changes where the bar meets your body at the finish. Check that clearance slowly with a light load. A little adjustment may help, but narrowing your hands beyond what you can comfortably control creates a new problem. Find a position that allows the whole repetition, including the return to the floor.
Do not solve clearance by suddenly twisting away from the bar under load. Put it down, reset and change the starting arrangement. A small camera-angle change can reveal whether the shaft is approaching the front leg, the rear leg or your clothing. That is more useful feedback than simply pulling harder.
Record which foot leads and which hand is in front. If you practise the mirrored arrangement, introduce it as its own learning task. The less familiar side may need a lighter load. Equal numbers are not worth chasing through positions you cannot yet control.
For a comparison, give each setup a separate name in the log. “Across-bar, right foot forward” is more informative than “normal stance.” Keep a reference photograph of the unloaded arrangement so you can recreate it without guessing from memory.
Separate deliberate bar rotation from losing control
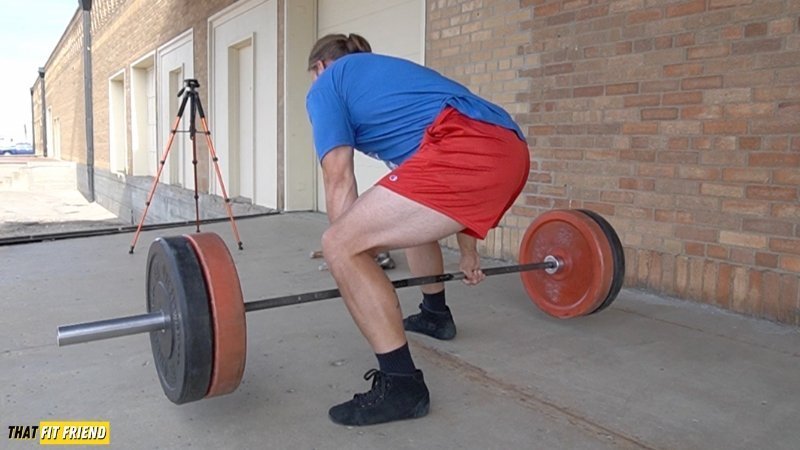
Once the setup feels workable, brace for the lift and push through the feet to stand. Use the legs and hips together rather than treating the exercise as an arm pull. Keep the load close to its intended path, and finish standing without exaggerating a backward lean to create the appearance of a stronger lockout.
The descent deserves the same attention as the pickup. Bend the hips and knees as needed to lower the bar under control. Let the plates settle before another repetition so you can check that the bar and feet still occupy the intended positions. Bouncing through an unfamiliar stance can conceal a setup that has drifted.
Use a simple three-point review: did the bar clear your legs, did your feet remain where intended, and could you lower the weight deliberately? These checks do not certify perfect technique. They give you concrete reasons to repeat a manageable load or adjust it before progressing.
Compare your first and final repetition on video. If the final pickup begins from a different position because the bar rolled away, that is a different task. Reset it instead of turning every repetition into a new improvised solution. Stop the set when you cannot maintain the arrangement you chose.
A bar turning predictably as you stand is different from a sudden twist to escape contact. Review when the movement begins and whether you can reverse it under control. A front view can show rotation, while a second view can reveal clearance hidden by your legs. Put the camera outside the lifting area.
Hold the equipment constant for a useful comparison
A straight barbell, suitable plates and compatible collars provide a straightforward setup. Plate diameter affects the starting height: small plates can put the shaft lower than full-diameter plates even when the total weight is light. Note that difference before comparing two sessions. A lighter load with a lower pickup is not automatically an easier repetition.
The equipment below includes straight bars, plates, change plates and collars. Check specifications and compatibility rather than assuming every bar or collar fits every sleeve. Keep the lifting area clear and use a floor suitable for the equipment. This exercise does not require collecting several versions of each item.
A trap bar or a pair of dumbbells can offer a different lifting option when the straddle arrangement does not suit your goal. Those are alternatives, not identical Jefferson deadlifts. If you change implement, start a separate log entry. Likewise, grip straps alter what your hands must do; they should not disguise a setup you cannot manage.
Keep the exercise in proportion to your programme. You can explore an unusual barbell movement without replacing the squat, hinge or other leg work you already perform consistently. Choose it because you want to practise this particular lift, not because its novelty proves it builds more muscle or makes another deadlift obsolete.

Equipment Worth Exploring
Explore equipment, accessories and gear from our carefully selected range.


Leather Lifting Straps
Padded leather straps support grip during heavy rows, deadlifts and pulling exercises.


Competition Plates
Competition-style bumper plates for Olympic lifts and loaded strength training.

Grip Plates
Rubber-coated weight plates with handholds for loading barbells and machines.

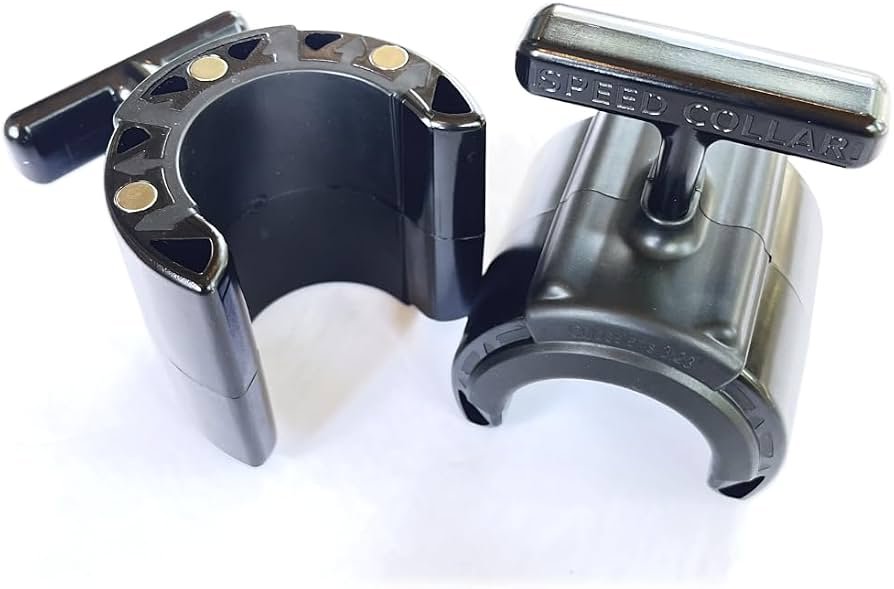
Speed Collar
Quick-release collars designed to secure weight plates on standard two-inch Olympic bars.
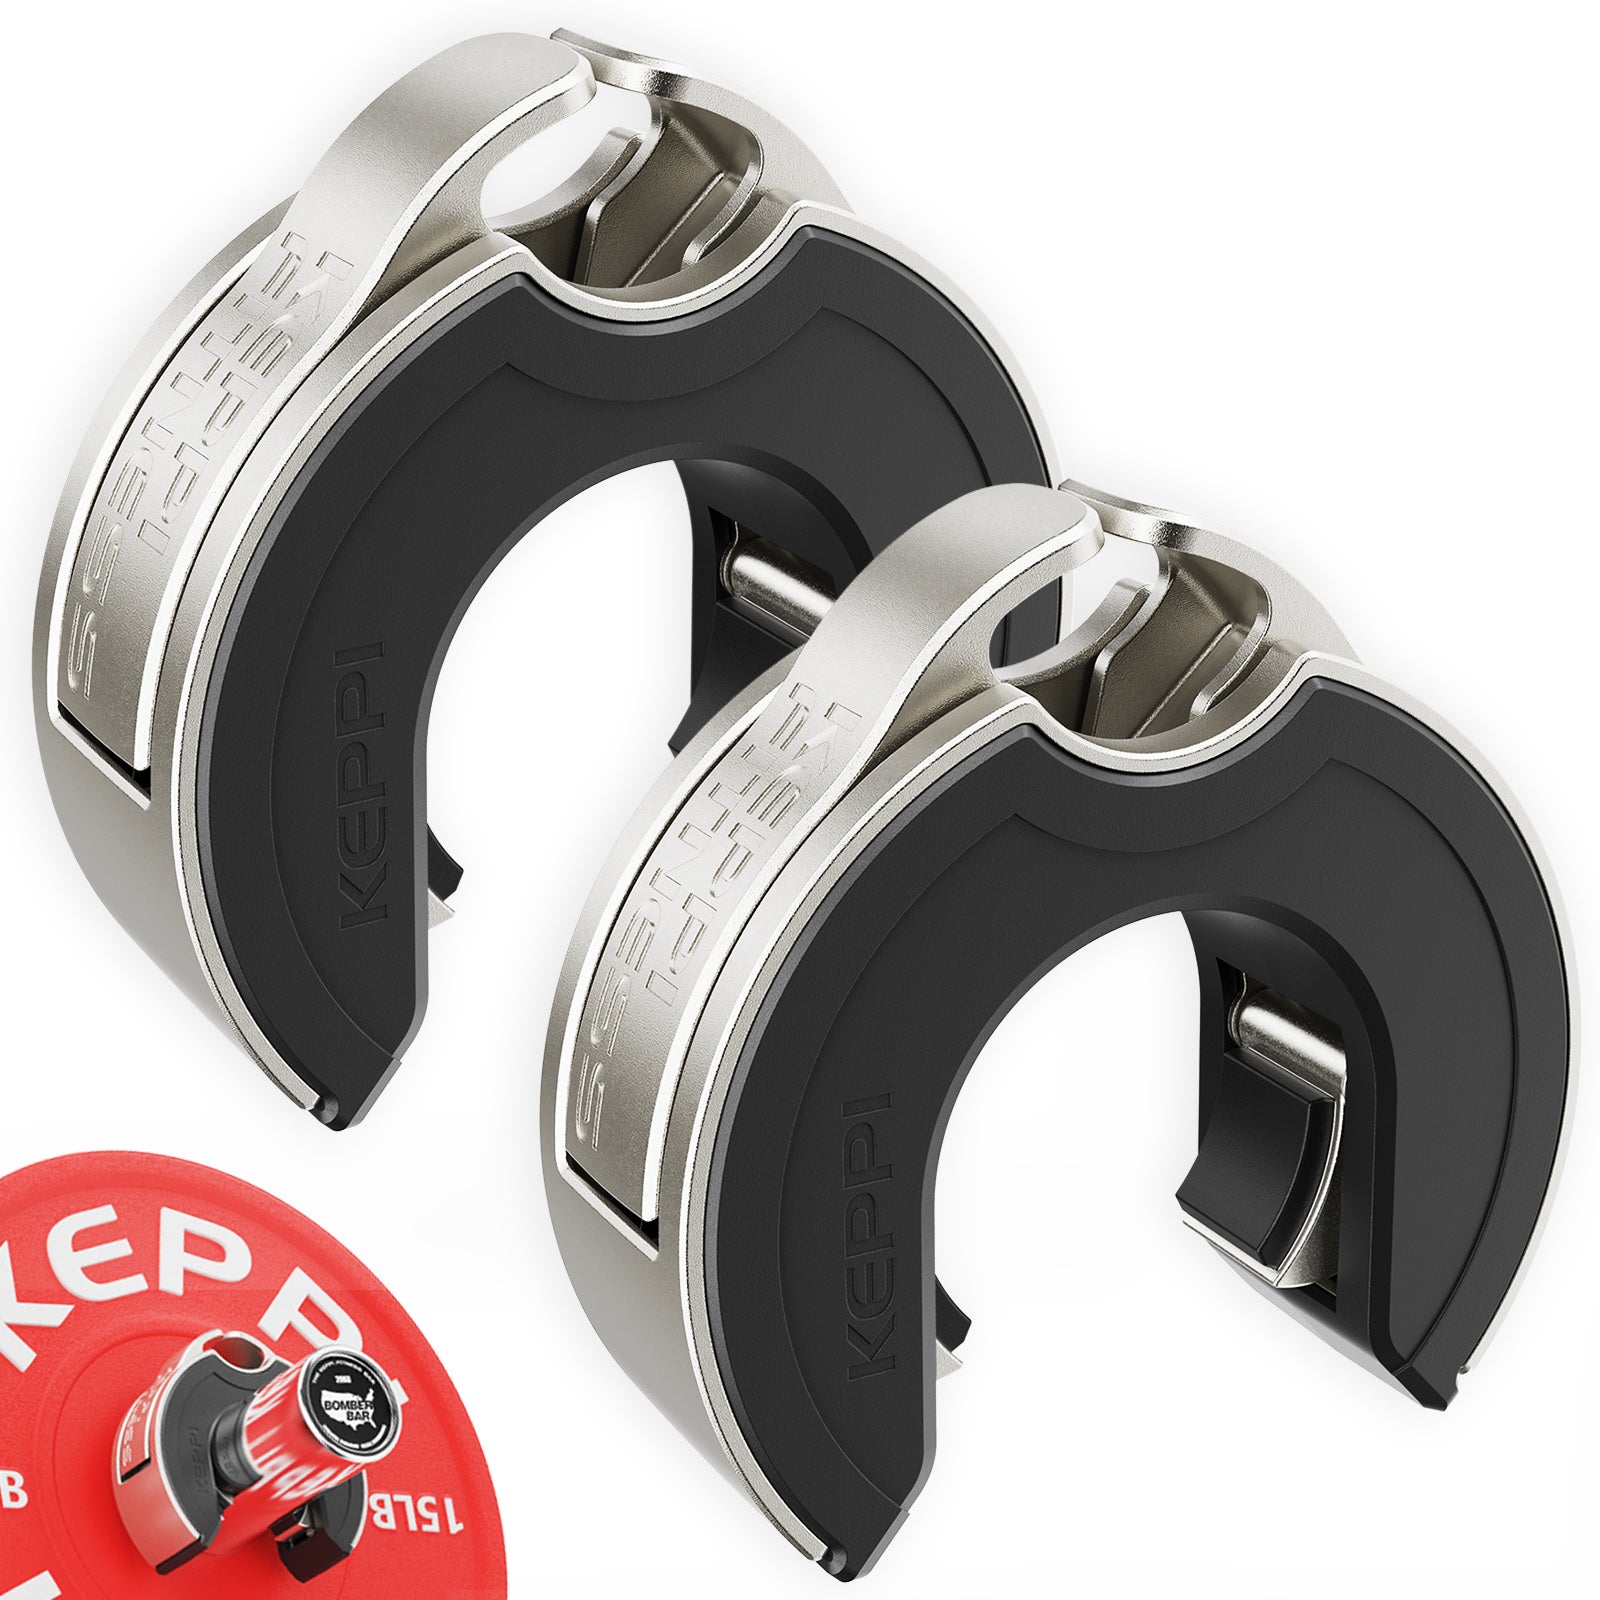
Keppi Open Collars
C-shaped magnetic Olympic barbell collars with a quick-lock mechanism and grippy lining.


Compare the setups before progressing either one
Your first sessions should establish a reference, not a record. Choose a manageable load and a small amount of practice that leaves you able to repeat the same setup. There is no special percentage of your conventional deadlift that guarantees an appropriate Jefferson starting weight. Familiarity with another lift does not remove the need to learn this one.
An illustrative log entry could read: “Light straight bar; full-diameter plates; left foot forward; three controlled repetitions; complete reset each time.” Add the actual load and your reason for ending the set. This is an example of useful information, not a tested prescription or a required set-and-repetition scheme.
Keep several details stable while you learn: footwear, bar, plate diameter, foot arrangement and grip. When those are consistent, an extra controlled repetition or a modest load increase is easier to interpret. Changing all of them at once makes it difficult to know whether strength improved or the task simply became more favourable.
If you try both shoulder arrangements, use manageable familiarisation rather than a maximum contest. Note clearance at pickup and finish, whether the bar rotates, which leg feels limiting and how easily you can reset. Feeling different is useful information, but it is not a measurement of muscle activation or proof of a particular adaptation.
A later session can repeat the same comparison with the order reversed if both versions remain comfortable. That helps you notice whether the second attempt simply suffers from fatigue. It does not turn your training log into a scientific trial, but it reduces one obvious reason for a misleading verdict.
Write down the next progression before starting it. For example, repeat the same load with cleaner resets before adding a small plate increment. If a heavier attempt makes you shift your feet, bend an arm or rush the descent, return to a load you can organise. Do not rewrite your definition of a successful repetition after seeing the number.
Pain or an inability to clear the bar is a reason to stop that version, not a challenge to force through. Another lift may serve your training goal more comfortably. The Jefferson deadlift can remain an optional skill rather than a test you must pass to count as a serious lifter.
The deadlift and barbell designs below fit the broader lifting-day theme; the artwork is merchandise, not evidence of exercise performance. The useful training standard stays practical: choose a workable stance, keep the bar path predictable and add difficulty only when you can repeat the lift you intended.

Funny Gym Shirts & Workout Gear
Funny gym shirts, tanks, hoodies and workout gear for lifters who like training hard.

Barbell Crossed Weights 45LB Plate Hardcore Crewneck T-Shirt
For laid-back days and powerlifting humor: “Classic Barbell Crossed Weights 45LB Plate”.

Deadlift Viking Skull Crewneck for Powerlifters, Norse T-Shirt
For laid-back days and Viking humor: “Deadlift”.

Deadlift Cyberpunk Skull Muscle Shirt for Powerlifters, Tank Top
Train hard, laugh a little, and rep “Deadlift”.

Deadlift Wasteland Skull Graphic , Hardcore Bodybuildin Tank Top
Add some deadlift attitude to training with “Deadlift”.

Deadlift Fiery Skull Decal , Hardcore Gym Accessory Gif Sticker
Put “Deadlift” gym humor on your laptop, bottle, or gym gear.

Deadlifts & Dragons Fantasy Swoleplaying Meme & Top T-Shirt
Heavy lifts, good laughs, and a little “Deadlifts & Dragons” energy.


Barbell Flag American Pride Workout | Gym Jumper | Funn T-Shirt
For laid-back days and powerlifting humor: “Barbell Flag American Pride”.


Heavy Metal Deadlift – Gymbro Leg Day & Gains T-Shirt
Make gym days more fun with “Heavy Metal Deadlift” style.