Advertising disclosure: This page includes affiliate product links that may earn us a commission, as well as products from our own store.
Hatfield Squats: Set the Support, Squat With Your Legs and Track Assistance
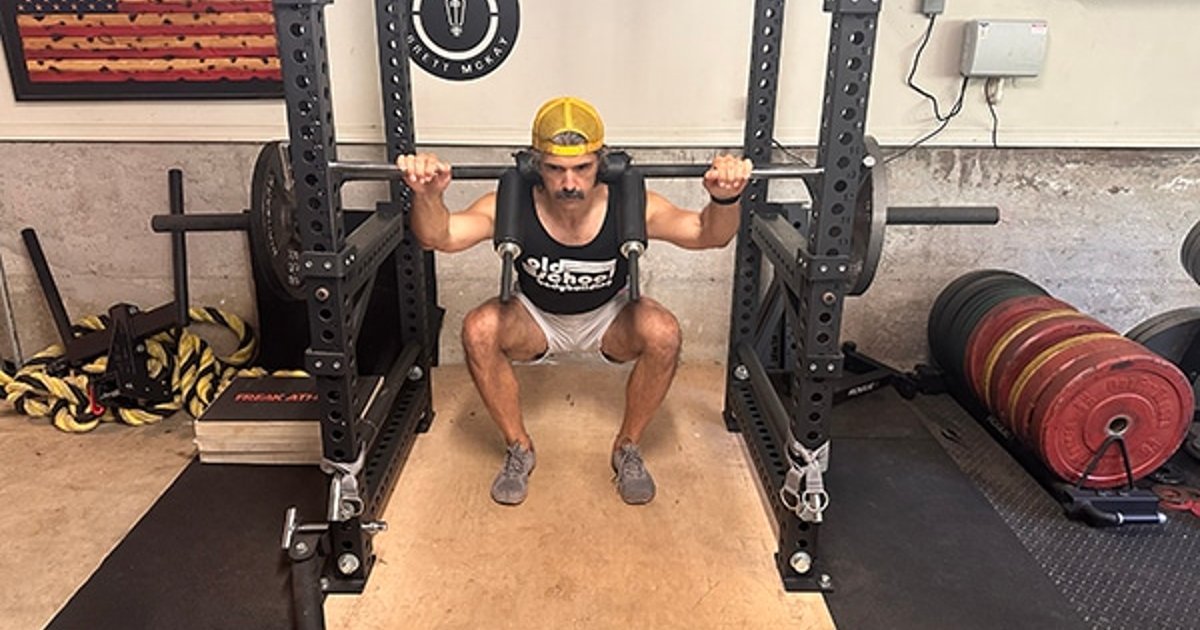
There is a special kind of squat that lets you keep the familiar loaded shoulder position while borrowing stability from the rack in front of you. The Hatfield squat uses a padded safety squat bar and a separate, fixed place for your hands. That second point of contact is the defining feature. Done well, it can let you concentrate on a consistent knee-and-hip bend instead of fighting for balance. Done badly, it becomes an unmeasurable mixture of squatting and pulling yourself upright.
The crucial decision comes before the first repetition: are your hands there for balance, or will you intentionally use them for assistance? Both are legitimate training variations, but they are not interchangeable. Here is a practical way to set up the equipment, make your technique repeatable, compare the exercise with other squats and progress without pretending the number on the plates tells the whole story.
1. Build a stable rack and hand-support setup before loading
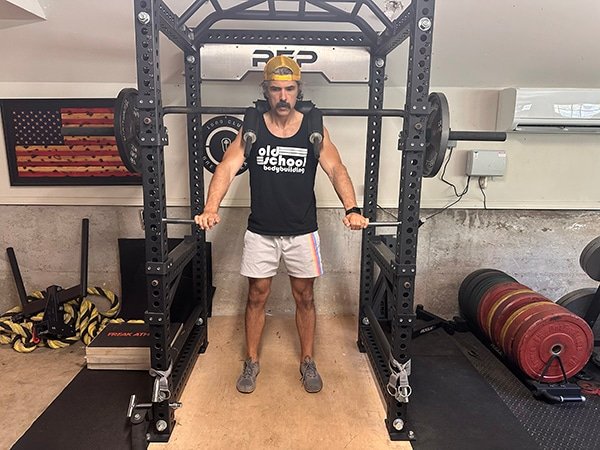
Start with a genuine safety squat bar, not a straight bar resting across your back. Its padded yoke and curved shafts are designed to stay positioned over your upper back when your hands are elsewhere. A straight bar normally requires your hands to secure it; releasing a straight bar to grab the rack is not a safe substitute. Different safety bars also weigh different amounts, so record the actual bar model or its verified mass rather than assuming every specialty bar weighs the same.
Position the safety bar in a stable power rack at a J-hook height that lets you get underneath, stand up to clear the hooks and walk out without rising onto your toes. Set safety pins or straps below the lowest point your loaded bar reaches during your intended squat depth. Test that clearance with the empty bar. On a missed repetition, those safeties must be able to accept the load without requiring you to twist or jump away. A pair of handles for your hands is not a replacement for the safeties that catch the bar.
Next, choose a genuinely fixed front support: bolted rack uprights, manufacturer-rated rack-mounted handles or another carefully secured support specifically suited to the load direction. A second bar placed in suitable J-cups can work in some racks only when it cannot roll, dislodge or interfere with the safety bar. Avoid loose benches, movable stands and improvised handles that could shift when you lean or pull. Test both sides of your support before stepping under any weight.
Your hands should meet the support comfortably without folding your torso forward or forcing your elbows far behind you. Many lifters find waist-to-lower-chest height workable, but arm length and rack geometry decide the actual setting. Stand far enough from the uprights that the safety bar and plates cannot strike the J-hooks during the squat; stay close enough to reach the handles without a long lean. Mark your stance position on the platform if that makes future sessions repeatable. Always check plate collars and the space around the sleeves.
The first trial is with the empty safety bar. Walk it out, set your feet roughly as you would for a comfortable squat, lightly touch the supports and complete several slow repetitions. If you cannot find a secure hand position or use the full intended range without colliding with the rack, change the setup or choose another lower-body exercise rather than making a loaded compromise.

Equipment Worth Exploring
Explore equipment, accessories and gear from our carefully selected range.

Safety Squat Handles
Barbell squat handles that reduce shoulder positioning demands during high-bar squats.


Multi Pull Smith Rack MPHR-780
All-in-one rack with a Smith machine, functional trainer, lat pulldown and low row.

Foldable Wall Rack
Wall-mounted folding squat rack designed to save floor space between workouts.


Competition Plates
Competition-style bumper plates for Olympic lifts and loaded strength training.

Grip Plates
Rubber-coated weight plates with handholds for loading barbells and machines.

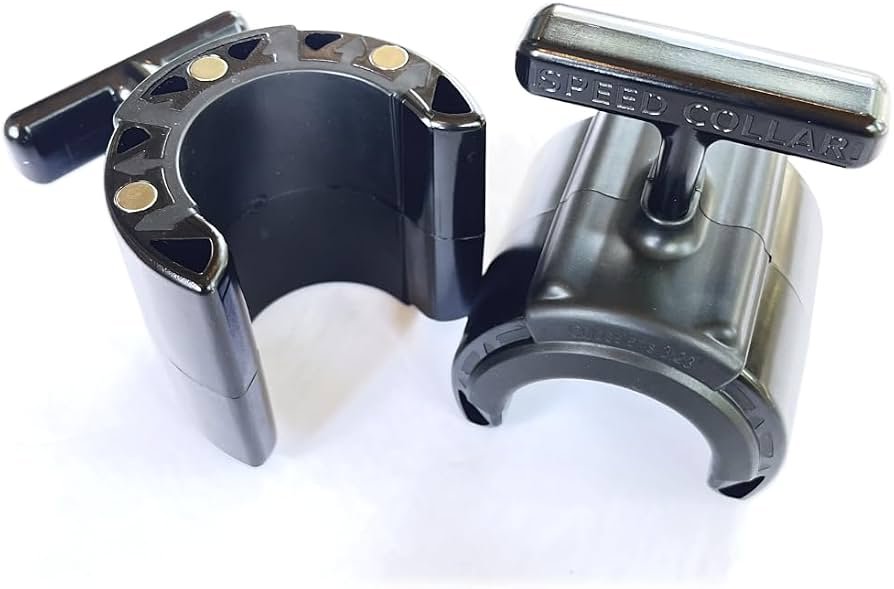
Speed Collar
Quick-release collars designed to secure weight plates on standard two-inch Olympic bars.

GymPin Squat Wedges
Non-slip 15-degree squat wedges help elevate the heels for deeper quad-focused squats.
2. Brace, descend under control and let the legs initiate the ascent
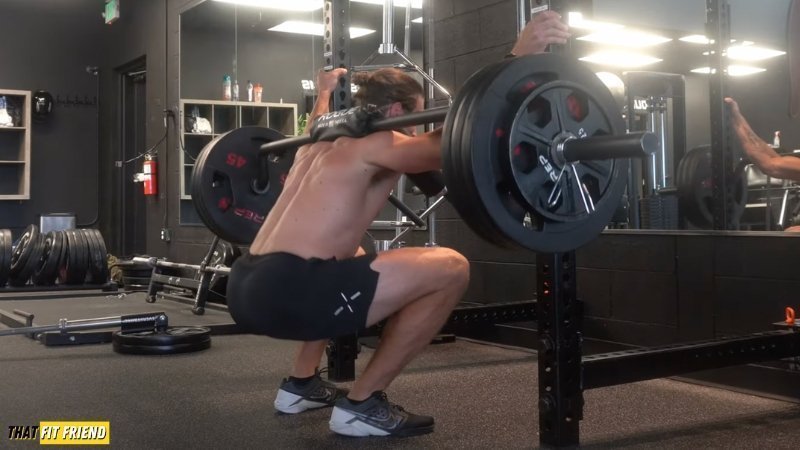
With the padded yoke centered across the upper traps, straighten your knees to lift the bar off the hooks and take only the steps required to reach your support. Before the descent, establish even pressure through the whole foot and take a controlled breath to brace your trunk. Set your hands against the fixed supports with the amount of tension decided in advance. You should not have to tug your torso into position just to stand still.
Bend at the hips and knees together and allow your knees to follow the direction of your toes. Keep the heels grounded and descend as far as you can while maintaining the chosen foot pressure, spinal position and balanced bar path. A more upright torso can feel natural in this variation because the rack steadies you, but there is no mandatory perfectly vertical torso angle. A slightly different body angle may be appropriate for your build and bar geometry. Depth is a repeatable, controlled position, not a competition to touch the floor at any cost.
At the bottom, resist the temptation to bounce or release your brace. Initiate the rise by pressing the floor away with the legs. Your quadriceps extend the knees while the glutes and adductors help extend the hips; your upper back and abdominal muscles work to keep the loaded torso organized. The support can stabilize the path, but it does not switch off those demands. Think of the handles as steering assistance until you deliberately decide otherwise.
When your knees and hips are extended, finish the repetition without snapping the knees backward or throwing your chest up. Reset your breath while standing, then repeat. A controlled lowering phase and a consistent bottom position are more valuable than artificially slowing each repetition until the set becomes mostly a balance drill. If the bar shifts sideways, your heels rise, or the support begins taking far more bodyweight as fatigue builds, end the set or reduce the load.
For initial practice, two or three sets of five to eight technically similar repetitions with an easy-to-moderate effort are plenty. You should be able to identify the role of your hands and describe how hard your legs worked after every set. The goal is to establish a version that you can reproduce before chasing numbers.
3. Decide whether your hands stabilize or actually help lift the weight
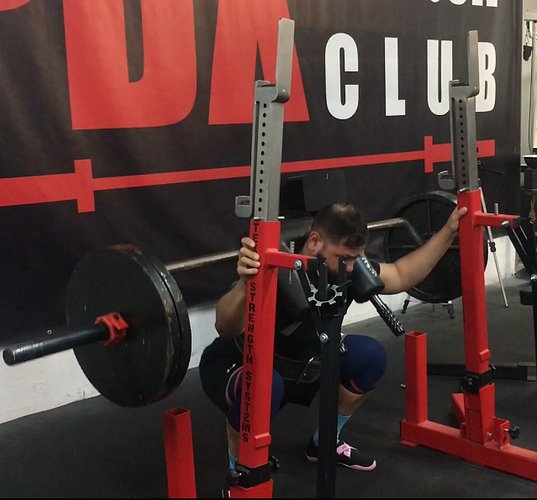
A Hatfield squat is neither automatically an unassisted squat nor automatically an assisted one. It depends on what you do with your arms. In a balance-focused set, your hands maintain position, counter small shifts and contribute minimal upward force. In a deliberately assisted set, you also pull against the support to help yourself stand, especially near the sticking point. Both can provide useful leg training, but a heavier assisted set does not prove that your legs can lift that same weight without help.
That distinction matters most when a rep starts to slow. Suppose you complete eight repetitions at a given weight with nearly weightless hands, then next week add ten kilograms while pulling hard on the uprights from the first rep. The plates are heavier, but the movement has changed. The honest progress marker is not just the displayed load; it includes your degree of assistance, depth and control. You do not need sensors to appreciate the difference. Simple notes such as fingertip balance, light pull on final two reps or intentional assistance throughout are already useful.
If your main goal is quadriceps hypertrophy, keep the arms fairly quiet and use a load that lets the legs remain the primary mover. If your goal is a controlled eccentric overload or additional repetitions after the legs approach fatigue, planned arm assistance may make sense. That is a separate, intentionally assisted prescription. Avoid casual changes of assistance inside a set if you intend to compare it with previous workouts, and never use the supports to justify a reckless weight jump.
Log four things together: the exact safety bar and total load, support type and approximate height, your working depth and repetition scheme, and a short assistance note. You can also record how far your toes sit from the rack or another floor reference. Film one set from a safe side angle if you want to compare bar position later; do not film at the expense of using safeties or maintaining attention.
One subtle mistake is treating hand position as decoration. An unstable handhold can change your balance mid-rep, and a long forward reach can move you into a different torso angle. Another is using the arms so aggressively that the legs no longer determine the movement. Recheck the support and the intent before loading heavier, not only after a poor set.
4. Know what a Hatfield squat does and does not replace
A regular high-bar or low-bar back squat requires you to stabilize the load without front-hand support. That is part of its skill demand. The Hatfield variation removes some of that balance challenge and can allow a controlled lower-body effort with a different emphasis, but it is not the same lift. Neither your best Hatfield weight nor your assisted repetitions can be reliably converted into a conventional squat one-repetition maximum.
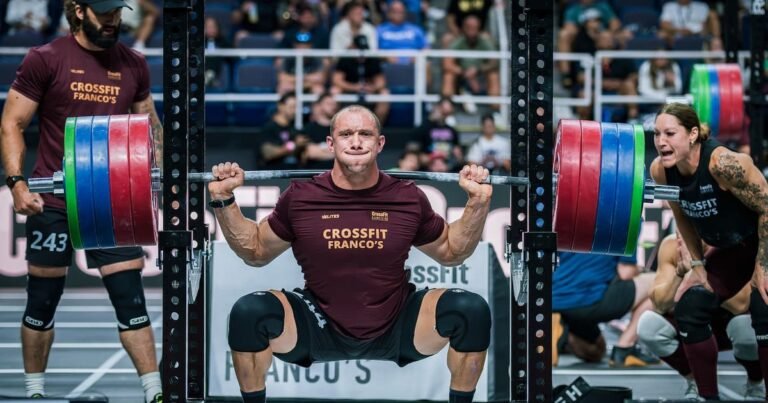
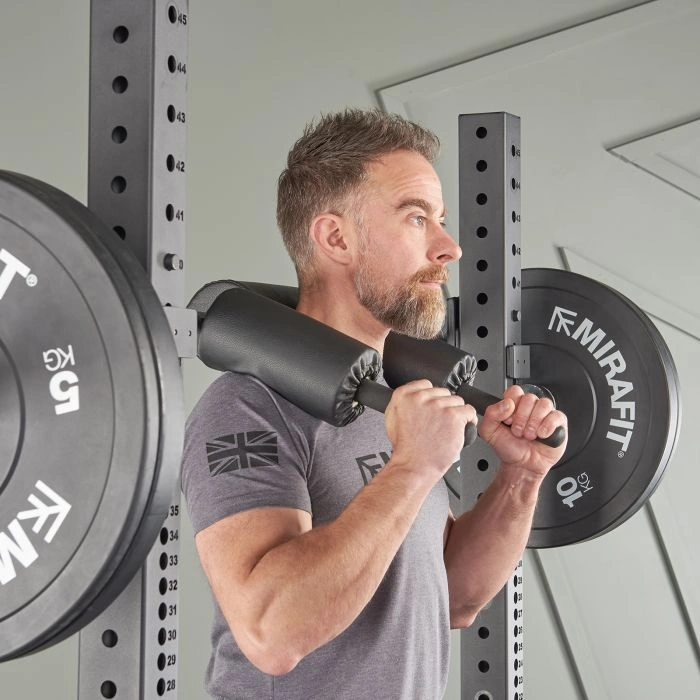
Compare it next with an ordinary safety-bar squat. The padded yoke is similar, but you normally hold the safety bar’s own handles or squat hands-free rather than grip an external support. If the photo shows a lifter holding only the bar’s built-in handles, that is an ordinary safety-bar variation, not the externally supported Hatfield version. Keeping that distinction clear matters for technique advice and tracking. Even when the same bar is used, the support changes the task.
A belt squat shifts the principal external load toward the hips instead of carrying a loaded bar across the shoulders. A hack squat or leg press supports and constrains the body in different ways. All can help build lower-body training volume, but their joint positions, stability requirements and spinal loading patterns are not interchangeable. The Hatfield squat is attractive when you specifically want a squatting movement under a shoulder-supported bar while using your hands for repeatable external stability; a simpler machine may be better when that rack arrangement is unavailable.
Do not treat claims of automatic knee-pain relief, guaranteed back protection or faster growth as established properties of the exercise. Some lifters report finding the supported version more comfortable, but comfort varies with joint tolerance, setup, load and movement depth. If a squat produces sharp pain, numbness or unusual instability, stop and seek an appropriate professional assessment rather than assuming the hand support makes it medically safe.
For home gyms the buying order is simple: a stable rack with properly rated safeties, a genuinely suitable safety bar and a secure front support come before specialty accessories. The equipment nearby may offer alternatives for the same leg-training goal, but neither a cambered straight bar nor generic squat handles should be mislabeled a complete Hatfield setup on its own.
5. Progress for six weeks without confusing assistance with strength
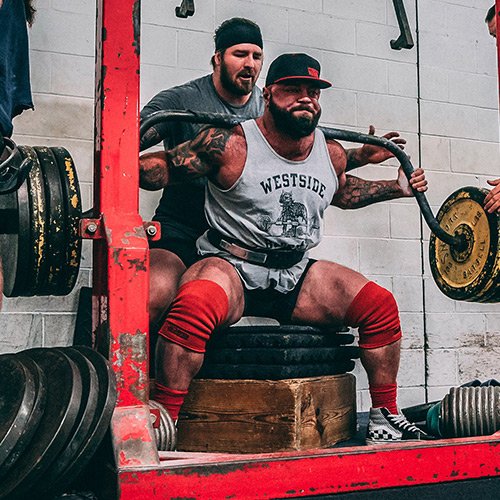
For a lifter who already has basic squat experience, the following is an illustrative practice block, not a research-tested six-week protocol. Use your own starting load after testing the bar, rack and support. Keep effort comfortably below failure during the first two weeks. Train the Hatfield squat once or twice weekly, leaving enough recovery time around heavy conventional squats or other demanding leg sessions.
- Week 1: Establish the foot marks, support height and safety position. Complete 3 × 6 with the empty bar or a light load, controlling the lowering phase and using the hands mainly for balance. Write down your actual bar mass.
- Week 2: Repeat 3 × 6–8 at the same setup. Add repetitions only if the depth, bar track and hand pressure look comparable. Stop each set with several repetitions in reserve.
- Week 3: Move to 3 × 8 at a moderate, repeatable effort. If all eight are stable, consider the smallest sensible plate increase next session rather than making a large jump now.
- Week 4: Try 4 × 6–8 with the same assistance rule. More work is useful only if your technique remains consistent; reduce a set if fatigue changes the motion.
- Week 5: Progress by one to two reps across the session or a small loading increase, not both automatically. Film or audit one set and compare the amount of arm help with your earlier notes.
- Week 6: Use 2–3 controlled work sets and review six weeks of loads, reps, depth and assistance. Decide whether another block should emphasize cleaner unsupported-style balance, planned assisted overload or simply a different squat variation.
For hypertrophy-oriented accessories, a common working range is six to twelve repetitions at a load you control, with the legs remaining the limiting factor. Heavy low-repetition work requires a particularly conservative approach because external assistance can tempt you into numbers the lower body cannot reproduce. Do not test a maximum solely to impress yourself with a Hatfield total.
One practical pairing is to perform your main squat pattern first on one lower-body day, then use modest Hatfield volume later in the week as a different stimulus. If the session already includes demanding leg presses, split squats and hinges, you may need fewer additional sets. Training stress still counts even when the hands make the balance feel easier. If you lack a suitable safety squat bar or stable rack, use a regular controlled squat variation or an appropriately set-up machine rather than improvising the support.
The best result of a Hatfield block is not the largest plate stack. It is a series of repetitions you can explain: same bar, same support, same range, a clear amount of help, and gradually more high-quality leg work. Keep that record honest and the exercise becomes useful instead of merely impressive-looking.

Leg Day Shirts & Workout Gear
Leg-day gym shirts and workout gear for lifters who never skip squats, lunges and lower-body punishment.

Leg Day Thou Shalt Not Skip Leg Day Medieval Knight Gym T-Shirt
Make gym days more fun with “Leg Day” style.


Funny Squat Inspector Gym | Edgy Workout Sweater For Le T-Shirt
Bring “Squat Inspector” humor to your everyday gym style.

I Love Squats | Leg Day Pink Heart Plate Graphic T-Shirt
Show some leg-day attitude with a playful “I Love Squats” tee.

Leg Day Decal Water Bottles & Equipment Meme Sticker
A fun “Leg Day” touch for bottles, laptops, and lockers.


Paranoid About Leg Day Black Sabbath Heavy Metal & T-Shirt
Rep “Paranoid About Leg Day Black Sabbath” humor in and out of the gym.

Squats Leg Day Heavy Weights Meme – Essential Top T-Shirt
Bring “Squats Leg Day Heavy Weights” humor to your next gym day.


Squat Here | Edgy Muscle Shirt | Gym Humor Meme Workout Tank Top
Show some personality between sets with “Squat Here”.