Advertising disclosure: This page includes affiliate product links that may earn us a commission, as well as products from our own store.
Gorilla Rows: Set the Kettlebells, Hold the Hinge and Train Your Back
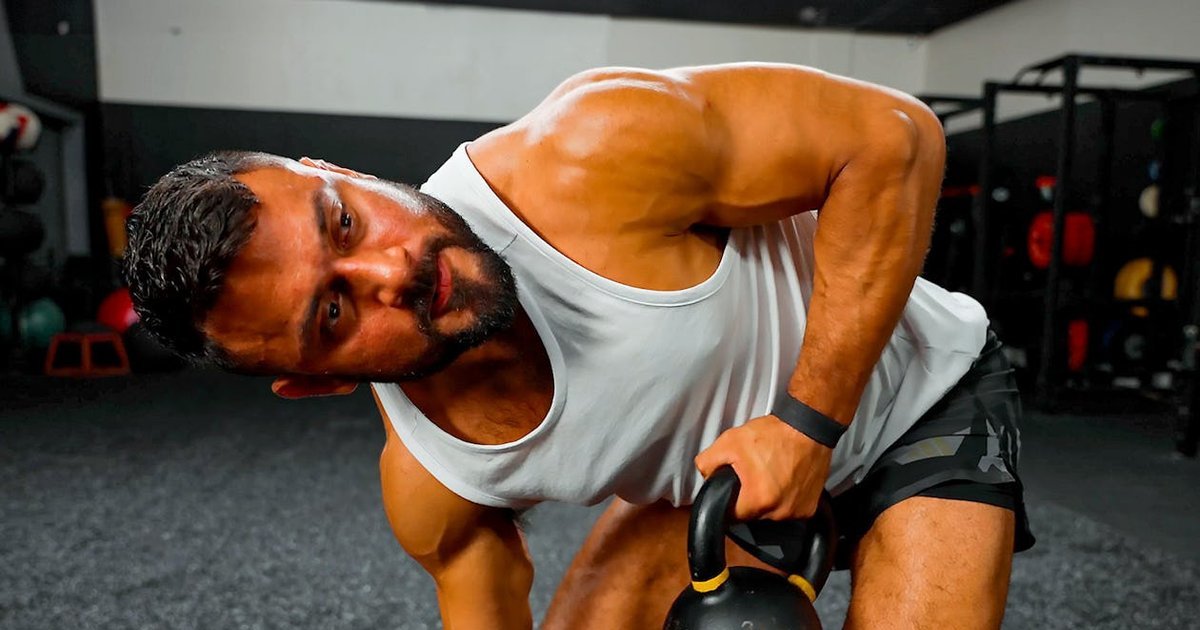
Gorilla rows look simple: put two kettlebells between your feet, hinge over them and row one weight while the other stays on the floor. But there are three things happening at once. Your back moves a kettlebell, your opposite hand supplies a stable contact point, and your hips and trunk hold a bent-over position without turning the set into a string of improvised deadlifts. When those jobs are separated, the exercise becomes much easier to repeat, load and evaluate.
This is a practical guide to the alternating two-kettlebell gorilla row, not a promise that the exercise builds more muscle than every other row. You will learn how to make room for the bells, choose a realistic weight, pull without excessive twisting, compare alternatives and progress the movement over six weeks. A single bell with a bench or stable support is a useful alternative, but it is not quite the same two-bell setup.
Set two kettlebells on the floor and own the starting position
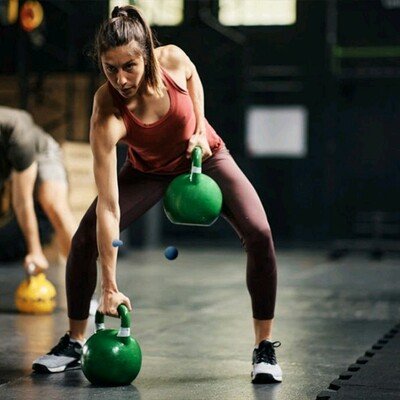
Put two stable kettlebells on a flat, non-slip surface with their handles facing a direction your wrists can comfortably grip. Stand so both bells fit between your shoes, starting around shoulder-width or a little wider. The precise width matters less than having an unobstructed path for each bell and enough hip room to bend down without your knees colliding with the handles. Keep loose mats, plates and other obstacles out of the arc of the bells.
Before you start rowing, rehearse the hinge without weights. Soften your knees, send your hips backward and fold forward until you can reach the handles while keeping your ribs and pelvis reasonably aligned. A slightly bent-knee, wide stance is normal; a deep squat that forces your chest upright changes the movement. If you cannot reach low kettlebell handles without rounding uncomfortably, place them on stable matching risers or choose a bench-supported row instead. Do not balance heavy weights on an improvised, unstable stack.
Grip both handles. The nonworking arm should be long and actively press into its grounded kettlebell. This hand is a support, not a dead arm, and the bell should stay planted when the opposite one moves. Check that the supporting bell will not roll or tip. Keep your feet flat and spread your weight across each foot. You should feel your trunk and hips working to hold the position before you perform a single rep.
Use a light enough pair to complete several quiet, even repetitions. The weight written on each kettlebell is the individual bell weight, not a promise that you are moving both at once. Adjustable kettlebells are useful when increments are small enough to improve technique before loading; fixed bells are perfectly suitable when they are stable and matched. Dumbbells may be used for a similar movement if their starting height and support are safe, but the grounded support and handle height will feel different.
A useful warm-up is two rounds of five unweighted hinges, followed by one light set of four pulls per arm. If you cannot keep the bells and torso in the same general starting position throughout that light set, solve the setup before choosing a heavier pair.

Equipment Worth Exploring
Explore equipment, accessories and gear from our carefully selected range.


Cast Iron Kettlebells
Textured cast-iron kettlebells for swings, squats, carries, and full-body training.


Rubber Hex Dumbbells
Rubber-coated hex dumbbell pairs with a stable shape for home and commercial strength training.

Leather Lifting Straps
Padded leather straps support grip during heavy rows, deadlifts and pulling exercises.


Leather Wrist Grips
Padded leather lifting grips help support the hands and wrists on heavy pulling exercises.
Keep the hinge steady as one elbow rows toward the hip
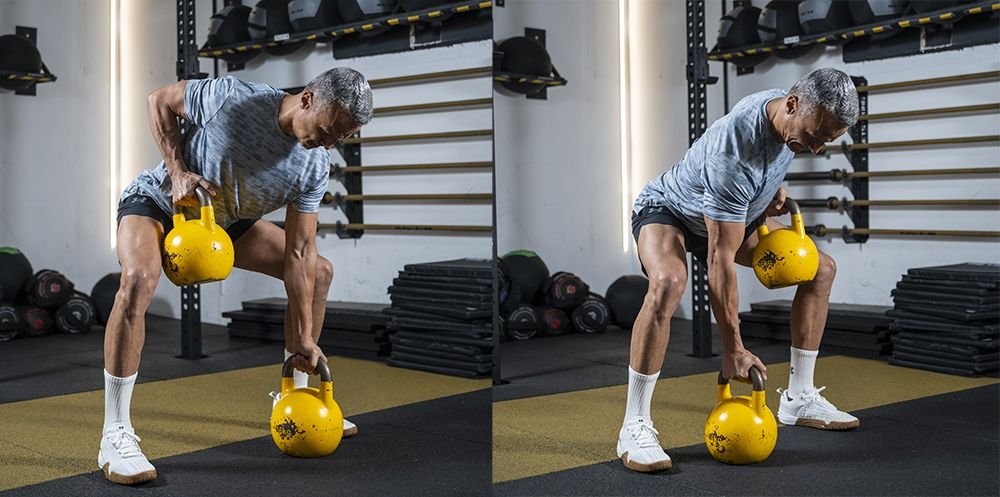
With both arms extended and the hinge held steady, take a comfortable breath and brace as though you were about to carry a heavy bag. Keep one kettlebell in contact with the floor. Pull the other toward the side of your lower ribs or hip by driving that elbow back. A close elbow path usually feels natural for this variation, but do not jam the upper arm against your torso or force an exaggerated finish. The working shoulder blade is allowed to move as you pull.
Lower the bell under control to the same floor position, let it settle and then row the other side. Returning one bell to the ground before switching gives you a clear repeat standard. Some lifters keep the weights hovering for continuous tension; that is a harder variation, not the default to learn first. If the hover makes your back tire before your pulling muscles, use the grounded reset and log it as a different variation.
Your hips should remain at roughly the same height from the first rep to the last. A little natural upper-back rotation can occur, but the common mistake is turning the whole chest toward the ceiling to lift more weight. Think of a stable waistband, not a frozen rib cage. Hold the unused handle firmly and press it into the ground while the working elbow moves. This gives your body a place to resist unwanted rotation without requiring a rigid, unnatural posture.
Use a smooth pull, a brief moment of control near the top and a deliberate return. You need not count an artificially slow five-second lowering phase, but the bell should not crash into the floor. Exhale through the demanding part if that helps maintain the brace, then reset your breathing between pulls. A short pause at the bottom is allowed; standing completely upright between every rep converts the movement into repeated setup work.
Counting matters: if you complete eight pulls with the right arm and eight with the left, record eight reps per side, or sixteen total alternating pulls. Keep that convention for every workout. If you switch to all right-side reps before all left-side reps, write that down too, because the support and fatigue pattern has changed.
Correct five technique mistakes before increasing the load
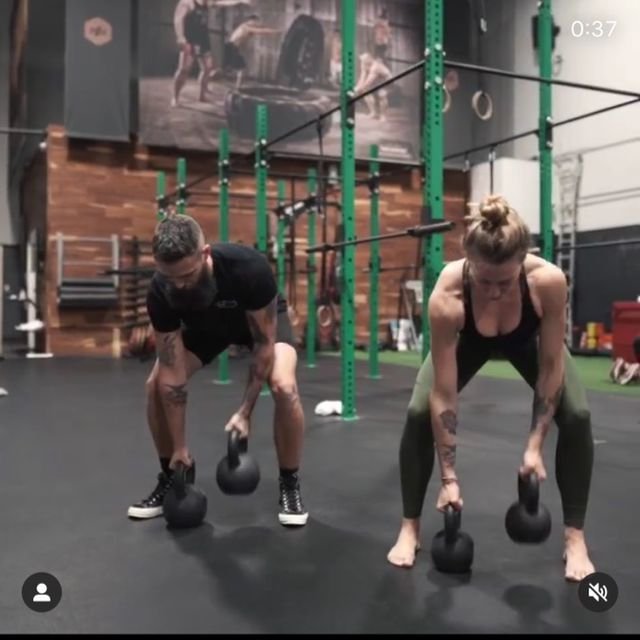
1. Turning the row into a torso twist. When the weight becomes ambitious, a lifter may rotate the shoulders and hips together to swing the bell higher. A small shoulder movement is not automatically wrong; a dramatic change in the position of your belt buckle means the loading is no longer comparable. Reduce the load and pull the elbow only as far as you can without losing the hinge.
2. Rising with every pull. If your hips shoot upward, your knees lock and your chest lifts between sides, your back muscles are not performing the same repetition each time. Reset both bells, shorten the set or use a slightly higher stable starting position. You should be able to tell which muscles fatigue first instead of spending the entire set catching your balance.
3. Forgetting the floor-side hand. Passive fingertips on the second bell allow the torso to sag or rock. Press into the grounded handle and keep that arm long without locking it aggressively. If the bell slips, rolls or slides, stop and improve the support; do not try to rescue the movement mid-rep while holding a heavy kettlebell in the other hand.
4. Yanking with the biceps. Biceps help bend the elbow, but a row is not supposed to be a standing curl performed sideways. Start from an extended arm, move the elbow toward the rear pocket and finish without aggressively shrugging the shoulder toward your ear. A lighter bell often lets you feel a more consistent upper-back contraction than one you can barely lift.
5. Accepting a painful position as a form cue. A deep hinge can be uncomfortable for some backs or hips; a very close grip can irritate a wrist; an extreme pull can aggravate a shoulder. Change stance, starting height, range or exercise. Muscular effort is expected, but sharp pain, numbness or symptoms that worsen with each repetition are reasons to stop and reassess, not evidence of a productive workout.
Filming one light set from in front and one from the side can make these errors visible. Check whether your hips move up as the set goes on, whether your feet shift and whether one arm rows substantially higher by twisting. The recording is a technique reference, not a competition to create the most dramatic before-and-after clip.
Compare gorilla rows with supported rows and other back exercises
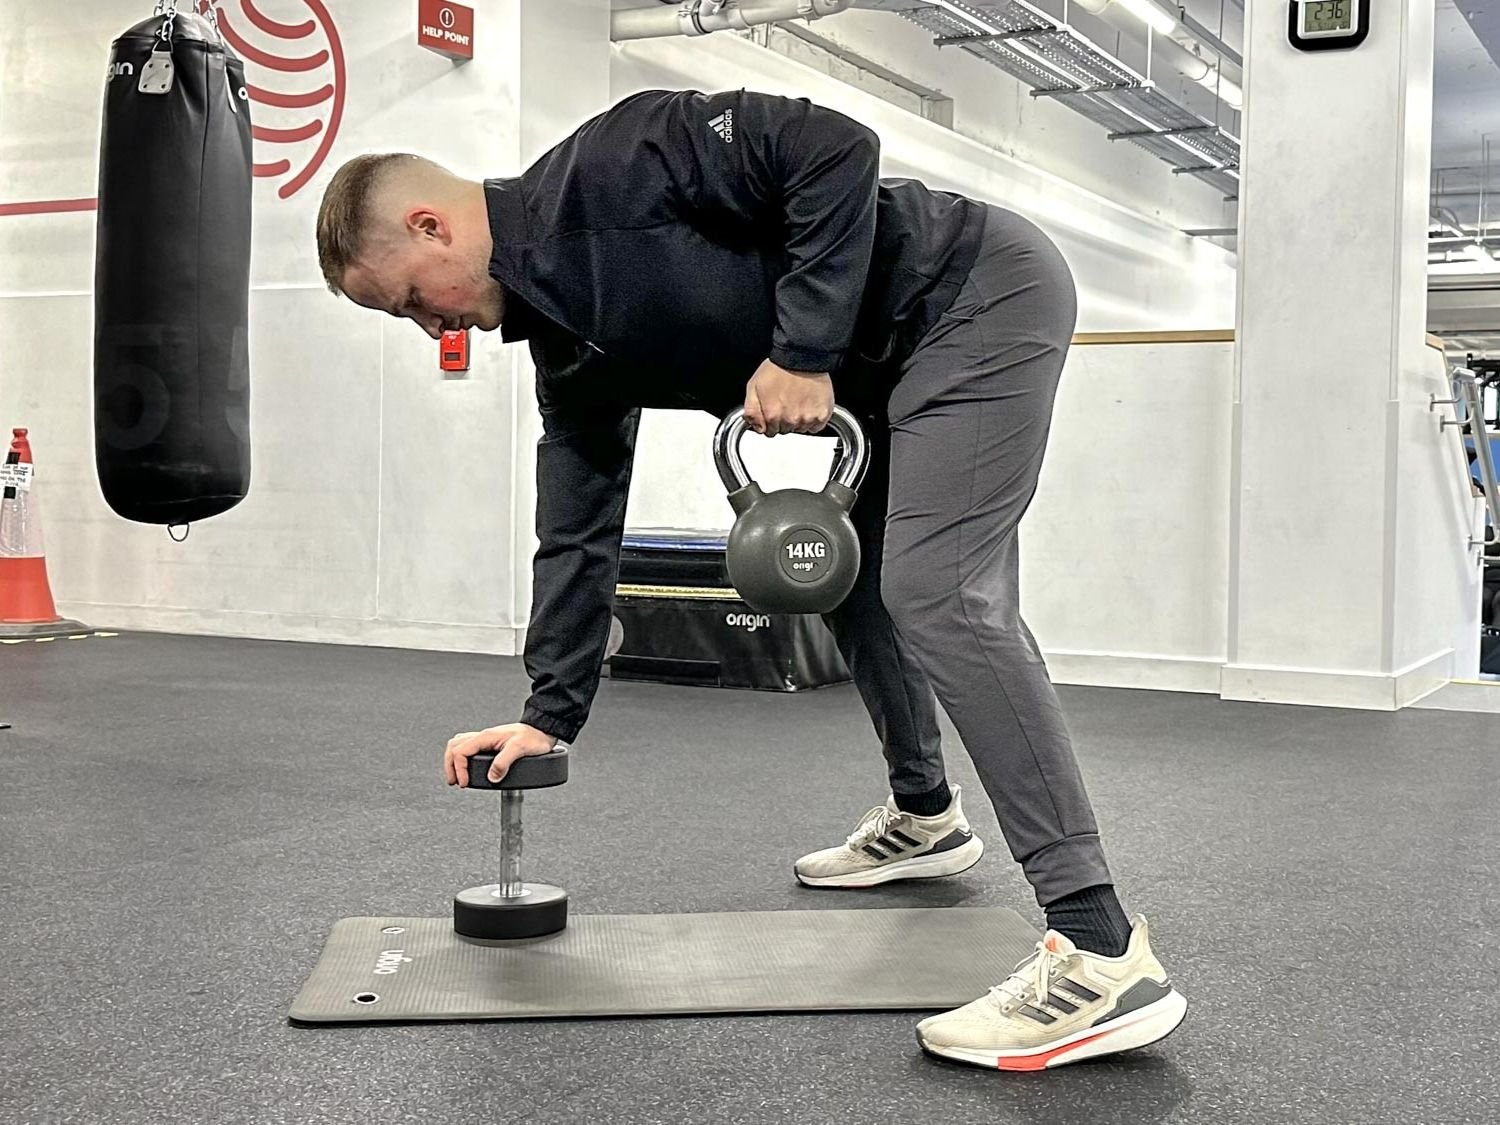
The gorilla row is a hinged, alternating row with a grounded opposite-hand support. It is different from a high-plank renegade row, where the hands are on dumbbells or kettlebells while the body resists movement in a plank. If you cannot hold a high plank comfortably, gorilla rows do not require one. The hinge may be more limiting for your lower back and hips, while the renegade row asks much more of a plank position and generally uses less pulling load.
A one-arm row with the free hand on a bench or solid rack support is often a better choice when you want more focus on the pulling arm and less fatigue in the hip hinge. A chest-supported row removes still more of the holding demand. Those options are not inferior; they simply allocate effort differently. A seated cable row can also let you match load and range precisely while keeping the torso comparatively supported. For an upper-back-focused day, combining one unsupported row with one supported row is often more useful than treating them as rivals.
For a compact workout, put gorilla rows after your primary squat or hinge if that work matters most, or early in a back session while you are fresh enough to hold a consistent position. They can pair with push-ups or a light press in a circuit, provided the circuit does not force you to race the repetitions. If your previous exercise already exhausted your lower back, a supported row may be the more productive second pull.
Resistance machines, cable units and landmine attachments can offer other rowing paths when you do not own two kettlebells or prefer a guided line of pull. That is the role of the following equipment choices: alternatives to compare with the movement, not implements you need to perform the two-bell version. Choose equipment based on the setup you can repeat and the part of the session you want to train.
Equipment Worth Exploring
Explore equipment, accessories and gear from our carefully selected range.

Linear Row LRX-750
Dual-sided rowing machine for supported rows, bent-over rows and varied pulling movements.

Lateral Row Machine LRM-720
Rowing machine with independent lever arms, an adjustable seat and chest support.

T-Bar Row Attachment
Welded barbell attachment that connects a D-handle bar for landmine and T-bar rows.

GymPin Barbell Row Handle
Heavy-duty handle attachment for barbell, landmine and T-bar rows.


Trinity Lat Machine LSW-850
Weight-stack pulldown tower offering three cable directions and adjustable seated support.

VForce Lat Tower
Wall-mounted cable tower with pivot arms and adjustable 1:1 or 2:1 pulley ratios.
VOLTRA
Compact digital cable trainer with smooth, adjustable resistance.

Go-Tone Pro
Portable digital cable trainer with up to 66 lb (30 kg) of adjustable resistance.
Progress gorilla rows for six weeks without chasing sloppy reps
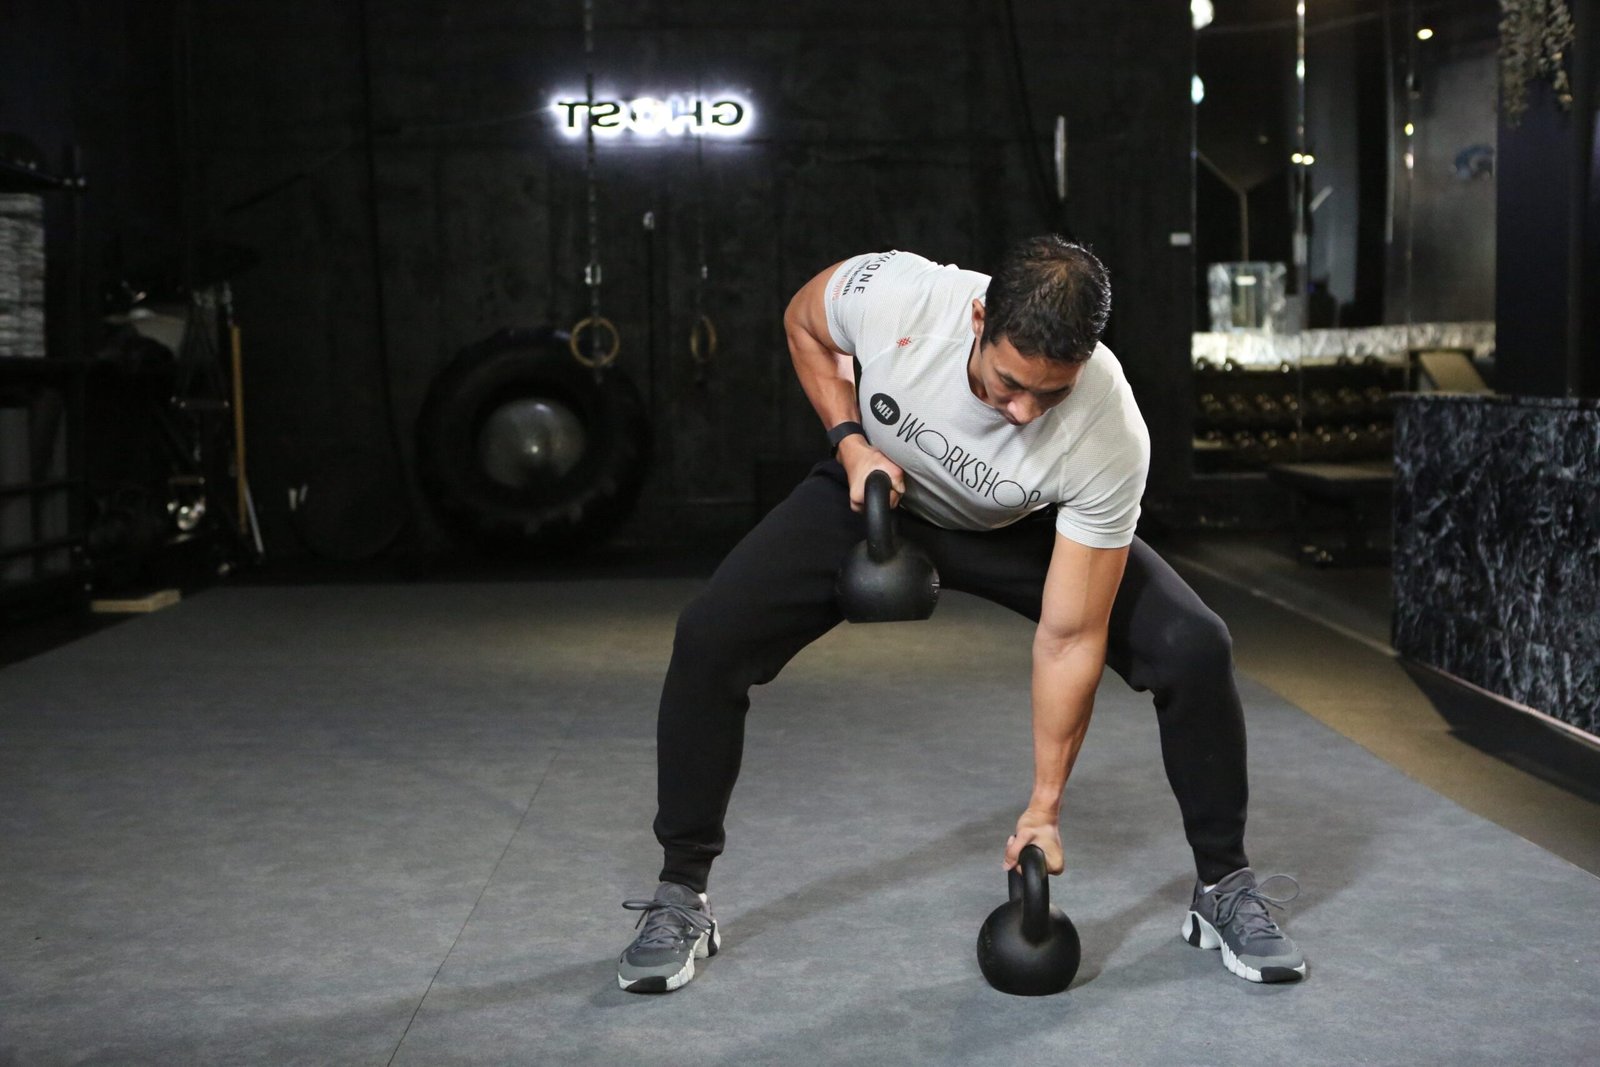
Start with two sessions a week on nonconsecutive days. Keep the same handle height, footwear, surface and basic row style across a progression block. Use a weight that leaves roughly two or three clean pulls in reserve on each arm in the first week. Most lifters will progress faster by making the hinge and floor contact consistent than by adding weight the moment a set feels easy.
- Week 1 — learn: two sets of six pulls per arm, with a clear grounded reset. Rest around 90 seconds between sets. Keep the torso position identical from start to finish.
- Week 2 — repeat: three sets of six to eight pulls per arm, using the same pair. Make both sides look similarly controlled before adding repetitions.
- Week 3 — accumulate: three sets of eight to ten pulls per arm. If the final two reps cause an obvious hip hike or torso swing, stay at the lower end.
- Week 4 — earn a small increase: when every set at the top of the range is controlled, move up one modest kettlebell increment and return to three sets of six to eight. Otherwise keep the old pair and improve control.
- Week 5 — consolidate: build toward three or four sets of eight per arm. Take enough rest to keep each side honest; avoid training to complete technical failure.
- Week 6 — evaluate: repeat your week-three load and compare clean reps, range and control. If progress is real, start another block with slightly more weight or a new rep target, not with a more aggressive twist.
These numbers are a practical example progression, not a trial-proven optimal schedule for every lifter. A beginner may need only one or two working sets; an experienced lifter may use a different rep bracket. Adjust volume around the rest of your back work, your recovery and whether the hinge or grip becomes the bottleneck. If the bells are too heavy to raise without swinging, continue with lighter technique sets or switch to a bench-supported row.
When sides differ, start with the side you can control less well, then match that side’s reps with the other rather than adding increasingly sloppy extras. Write down each bell’s weight, reps per side, number of sets, rest interval and whether the bells returned fully to the floor. A short note such as “hips rose on last two left reps” tells you more than a personal record with no technique context.
The setup can be genuinely minimal: two secure kettlebells, a clear floor and clothing that lets you hinge and move the shoulders. If you train in a small home gym, leave enough space to set each weight down without hitting furniture, toes or the edge of a raised platform. The apparel below is optional training gear for kettlebell and back-day enthusiasts, not a performance requirement.

Bodybuilding Shirts & Workout Gear
Bodybuilding shirts, tanks and gym gear for lifters chasing muscle, size, symmetry and the pump.


Lat Man Big Back – Hooded With Huge Lats – Jumper Hoodie
Stay casual and show some superhero attitude with “Lat Man Big Back”.

Big Back SpongeBob Bodybuilders Back Day Vest Tank Top
Show some personality between sets with “Big Back”.

Shirt Pull Day – Back & Biceps Meme Top T-Shirt
Heavy lifts, good laughs, and a little “Pull Day Graphic” energy.

Hardcore Gains Gym | Funny No Pain No Gain Workout Swea T-Shirt
For laid-back days and lifting humor: “Hardcore Gains”.

Slim Shady Kettlebell Gym | Funny Rap God Workout Decal Sticker
Stick a little “Slim Shady Kettlebell” humor on your favorite gear.

Hells Kettlebells Hells Bells Parody AC/DC Heavy Metal Hoodie
Stay casual and show some metalhead attitude with “Hells Kettlebells”.


Happy Kettlebell Emoji Smiley Kettlebell Workout Shirt Tank Top
Bring “Happy Kettlebell Emoji” humor to your next lifting session.

Skull Kettlebell Gym | Heavy Metal Lifting Funny Workou T-Shirt
For laid-back days and metalhead humor: “Skull Kettlebell”.
Ultimately, the best gorilla-row set is one you could reproduce next week. Keep one bell grounded, keep your hinge honest, match clean pulls side to side and progress only when your setup remains under control.