Advertising disclosure: This page includes affiliate product links that may earn us a commission, as well as products from our own store.
Spider Curls: Bench Angle, Dumbbells vs EZ-Bar and a Six-Week Biceps Plan
Spider curls turn a familiar biceps exercise into a surprisingly honest test. With your chest supported against an incline bench, it becomes much harder to rock the hips or lean backward when the final reps get difficult. The reward is not a special kind of muscle that ordinary curls cannot build; it is a consistent way to load elbow flexion and see what your arms can actually do.
The setup matters more than the name. A bench that places the arms at the wrong angle, dumbbells that scrape the upholstery or an EZ-bar that twists your wrists can ruin an otherwise useful variation. This guide covers the practical setup, how to select the implement, where the exercise differs from preacher and incline curls, and a six-week plan that does not pretend every lifter needs the same number of sets.
Set the Bench Before You Touch the Weight
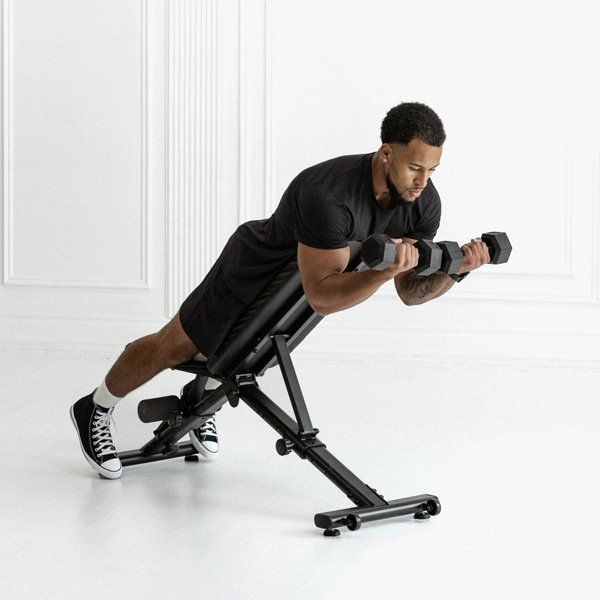
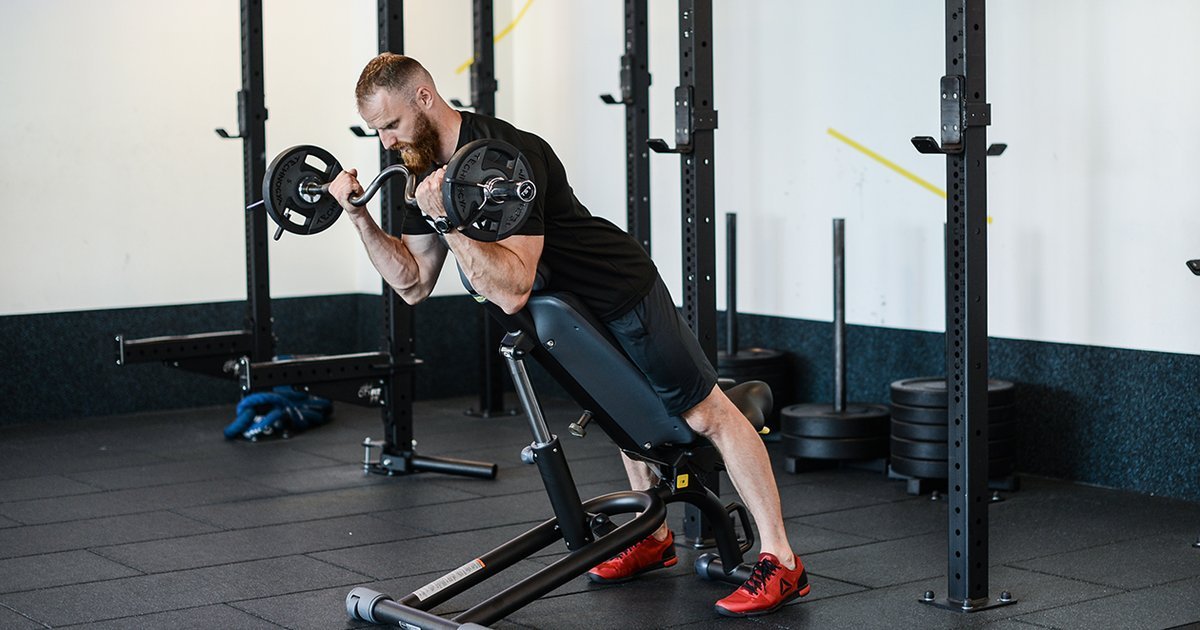
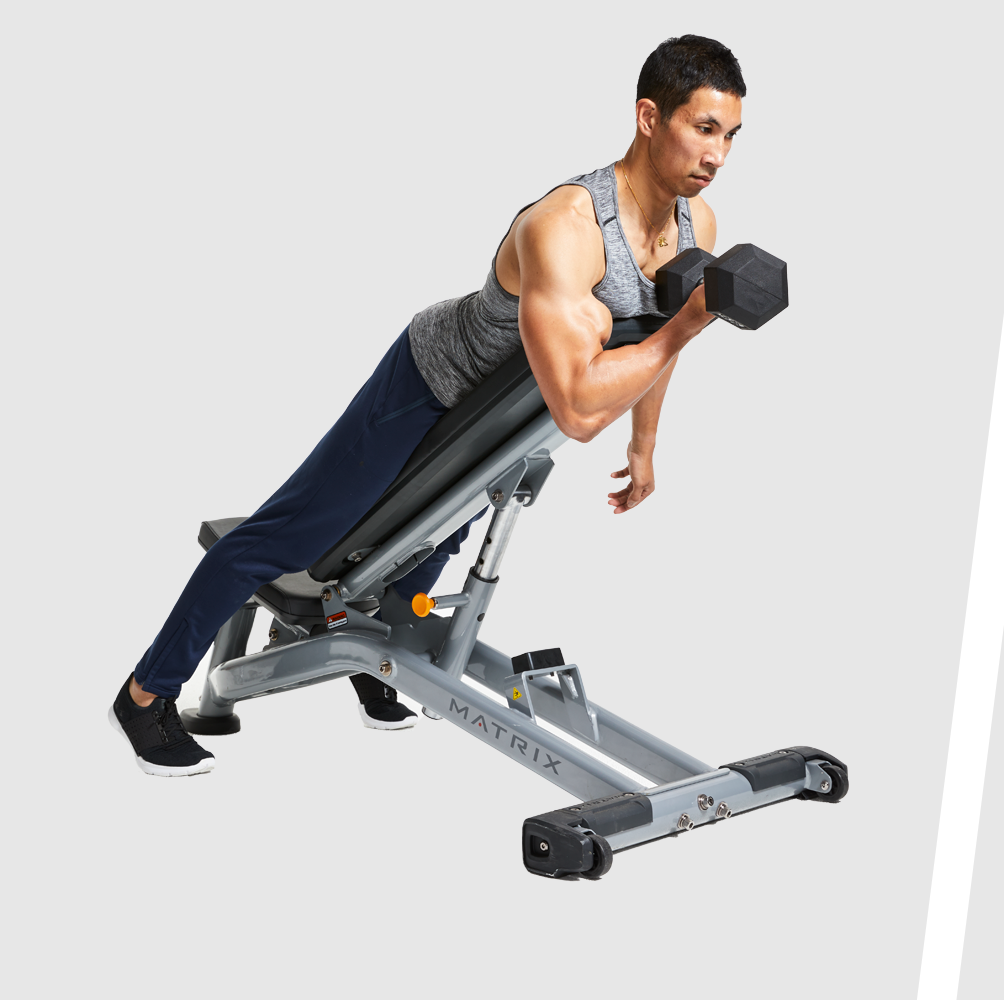
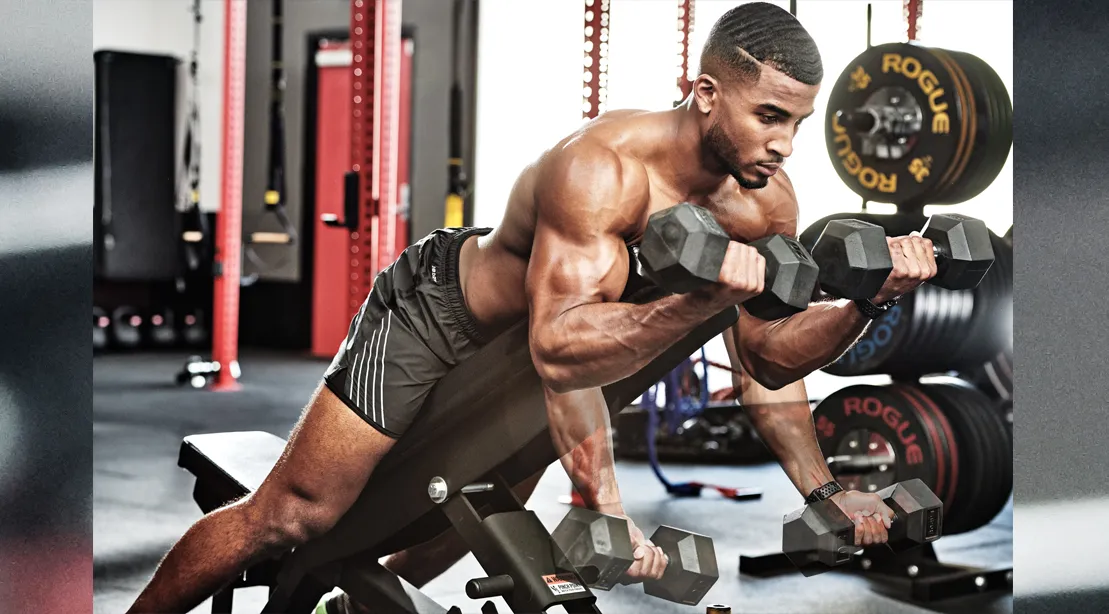
The equipment does the first part of the coaching. Set an adjustable incline bench around 45 degrees as a practical starting point, then lean your chest against the back pad while your arms hang freely past its top edge. The angle is not a magic hypertrophy setting. It simply needs to support your torso without forcing your shoulders to reach awkwardly or letting the weights strike the bench. Thirty to sixty degrees can work depending on bench construction, arm length and where your feet can brace.
Find a stable position before you curl. Plant your feet far enough behind the seat to stop sliding forward, maintain a quiet neck and keep your chest connected to the pad. If the seat interferes with your stance, use a secure straddle position or reposition yourself rather than tipping your weight onto your toes. Ideally, your upper arms start nearly vertical beneath the shoulders and have room to bend without the elbows scraping the pad.
For dumbbells, set the weights where you can pick them up without twisting your shoulder. A light pair is preferable to an impressive pair you can barely reach. For an EZ-bar, test the empty bar first: a heavily loaded bar can be awkward to lift from the floor after you have already leaned onto the bench. A partner handoff or a safe, accessible starting point is more important than maximizing the number on the plates. Once your body is locked into position, the set should be about elbow movement rather than solving a balance problem.

Equipment Worth Exploring
Explore equipment, accessories and gear from our carefully selected range.



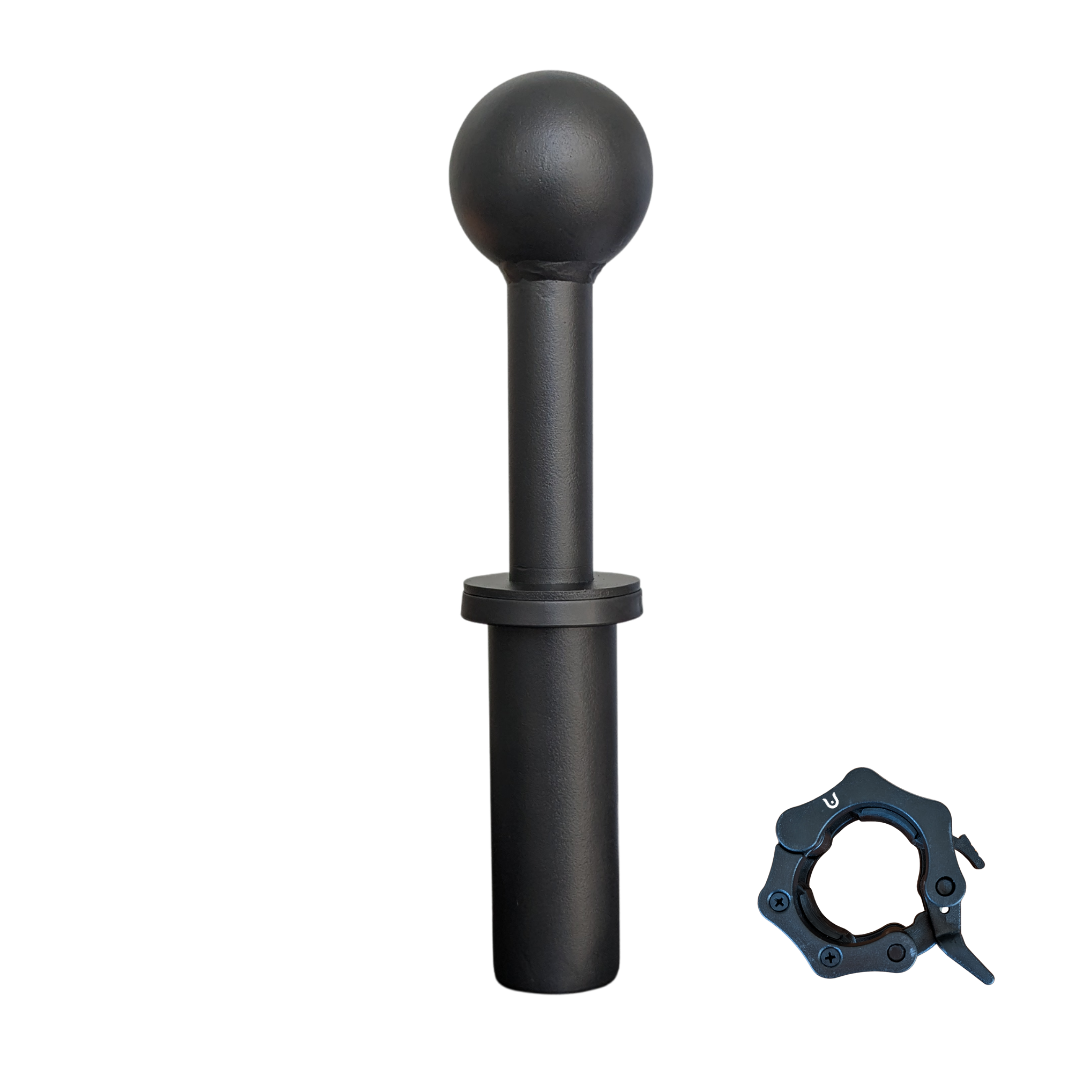
FID Bench MAX
Adjustable bench offering flat, incline, and decline positions + adjustable headrest.


GymPin Ergo Handles
Pair of ergonomic cable handles shaped for comfortable triceps and pulling exercises.

Perform a Strict Rep From the First Inch to the Last
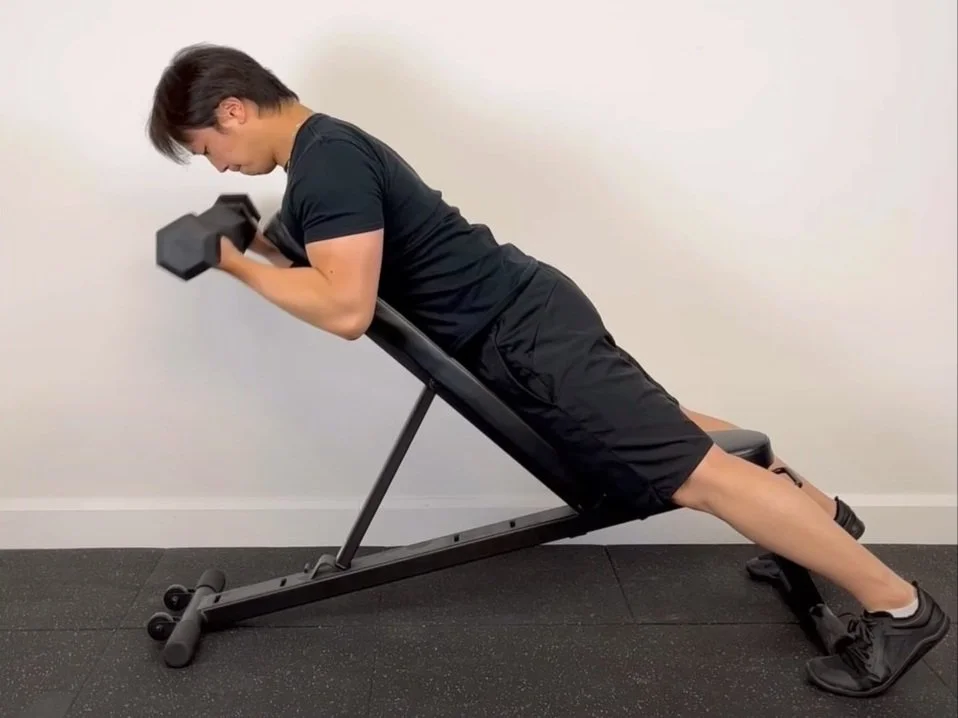
Begin with your arms hanging and palms turned forward. Take a breath, gently brace your trunk against the bench and bend at the elbows without swinging the upper arms backward. Think of bringing your hands up toward your shoulders while leaving the elbows in approximately the same place in space. The dumbbells may follow a slightly curved path because the forearm rotates about the elbow; there is no need to force a straight line through the air.
Continue only as far as the weight can travel without shrugging your shoulders or lifting your chest. At the top, pause briefly if you can do so without turning the move into a shoulder flexion or a row. Lower deliberately over roughly two seconds, returning to a comfortably extended elbow instead of dropping the load. Avoid deliberately snapping the elbow straight under tension. The bottom is a place to regain control for the next rep, not to bounce.
Use your first set as a technical calibration rather than a test of bravery. If the last three reps require you to arch, yank the elbows behind the body or brace so hard your breathing becomes chaotic, the load is too high for this version. A useful working set ends when you could perhaps complete one or two additional repetitions with the same controlled upper-arm position. That approach makes repetitions more comparable from week to week and gives the exercise a clear purpose: accumulating demanding biceps work without assistance from the hips.
Which Muscles Work and Where Gravity Loads the Curl
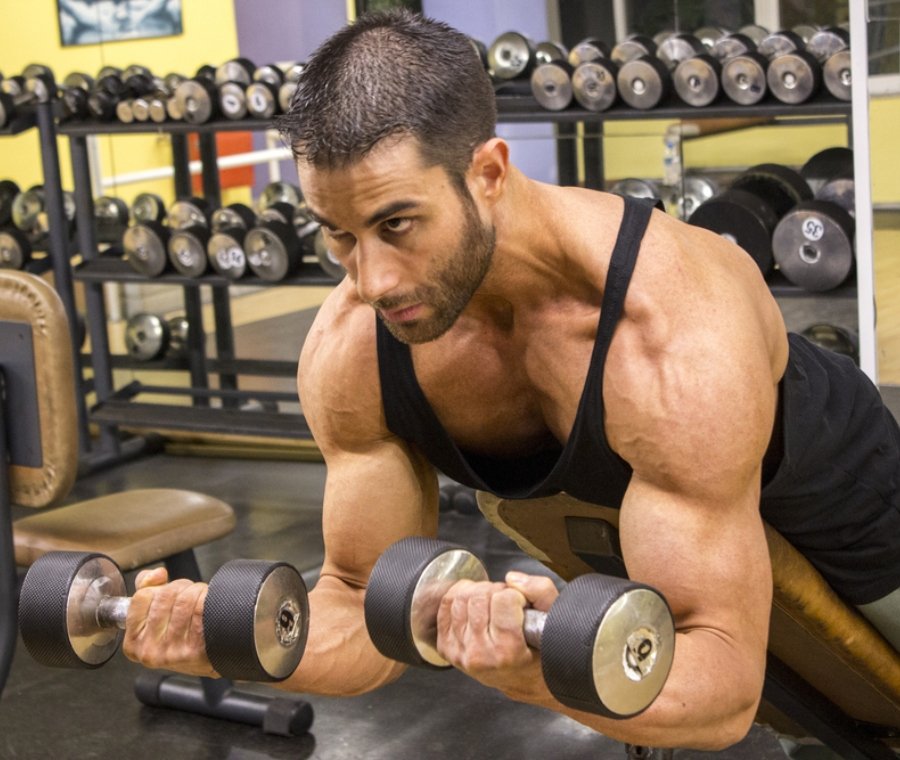
The biceps brachii is the main elbow flexor here, with important help from the brachialis and the brachioradialis. The biceps also supinates the forearm, which is one reason a palms-up dumbbell grip feels different from a neutral hammer grip. Your forearm and hand muscles stabilize the weight; the bench primarily limits torso and upper-arm movement. None of that means you have completely isolated a single muscle or removed the need to control the shoulder.
The force you feel changes through the repetition. A hanging dumbbell pulls vertically downward. When the forearm points roughly toward the floor at the bottom, its perpendicular distance from the elbow joint is small; when the forearm approaches horizontal, that lever arm increases. The top of a spider curl can therefore feel especially demanding around the middle-to-upper portion of the movement. This is a practical description of resistance mechanics, not proof that one part of the biceps will grow faster.
It is tempting to advertise the spider curl as the unique shortcut to a taller biceps peak or the only move that trains the short head. Those claims go beyond what a grip change and bench angle can establish. Both biceps heads participate in elbow flexion, and individual muscle shape is influenced by anatomy as well as training. A spider curl is valuable because it makes the work controlled and easy to repeat. Its strongest feature is not a secret head-specific effect; it is the difficulty of hiding weak repetitions behind body swing.

Bodybuilding Shirts & Workout Gear
Bodybuilding shirts, tanks and gym gear for lifters chasing muscle, size, symmetry and the pump.

Unleash Inner Arnold Tee
Heavy lifts, good laughs, and a little “Unleash Your Inner Arnold” energy.

Curls The Girls Shirt – Bicep Curls Top & Gymbros T-Shirt
Rep “Curls For The Girls” humor in and out of the gym.

Muscle Mountain – Bicep Mountain Meme Decal for Water B Sticker
Stick a little “Muscle Mountain” humor on your favorite gear.

GymTok – TikTok Parody Bicep Crewneck for Gymbros and F T-Shirt
Show some gym-day personality with “GymTok”.

OnlyGains Big Biceps Sweater & Meme Fans T-Shirt
Bring “OnlyGains Big Biceps” humor to your everyday gym style.

Guns N Poses – Rock Music Arm Day Meme Vest Muscle Shir Tank Top
Add some rock-and-lifting attitude to training with “Guns N Poses”.

Big Biceps Theory Meme Sweater Bro Science T-Shirt
Add a playful “Big Biceps Theory” touch to your casual rotation.

– Flex Armstrong Astronaut Moon Huge Arms Pullover Hoodie
Show off your bodybuilding humor in a laid-back “Flex Armstrong Astronaut Moon Huge Arms” hoodie.

Gym Dost Thou Even Curl Medieval Knight Bicep Hoodie
Show off your medieval humor in a laid-back “Dost Thou Even Curl Medieval Knight Bicep” hoodie.

Right To Bare Arms George Washington Decal Sticker
Stick a little “Right To Bare Arms” humor on your favorite gear.
Dumbbells, EZ-Bar and Hammer-Grip Variations
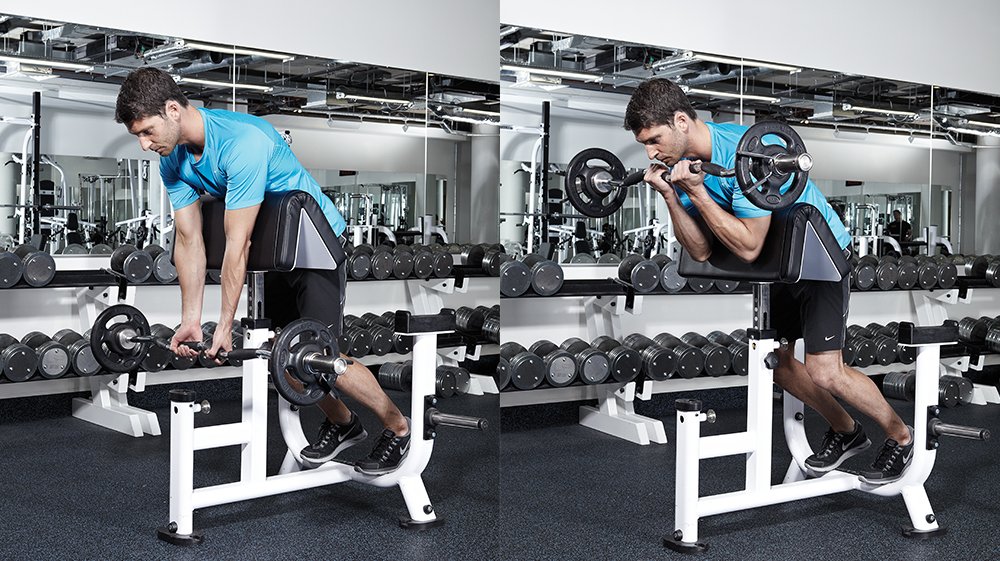
Dumbbell spider curls are the most flexible starting option. Each arm must contribute independently, and the wrists can rotate slightly to find a comfortable angle. If one side is less coordinated, do not force both dumbbells to reach an identical end position by twisting the shoulders. Start both sides with a similar controlled range and resist the urge to overcorrect with a heavier load on the stronger arm.
An EZ-bar spider curl lets both hands move one shared implement. The angled grips may be more comfortable than a straight bar for people who dislike a fully palms-up position. They do not automatically make the exercise safer for every wrist; bar width, grip and individual joint comfort matter. Choose a width that permits the elbows to bend naturally without drifting far sideways. Keep the bar close enough to avoid reaching forward with your shoulders but far enough from the pad to clear it at the bottom.
With neutral-grip spider hammer curls, the dumbbells face each other and the brachialis and brachioradialis can help more noticeably. This is a useful alternate arm exercise, not simply a superior way to perform the same supinated curl. A cable setup may also provide a different line of pull, though pulley position and clearance complicate the bench arrangement. Make cable attachments genuinely compatible with the exercise before adding them. If your goal is a repeatable biceps isolation movement, start with dumbbells; choose the bar for convenient simultaneous loading and the hammer variation for additional elbow-flexor variety.
How Spider Curls Compare With Preacher and Incline Curls
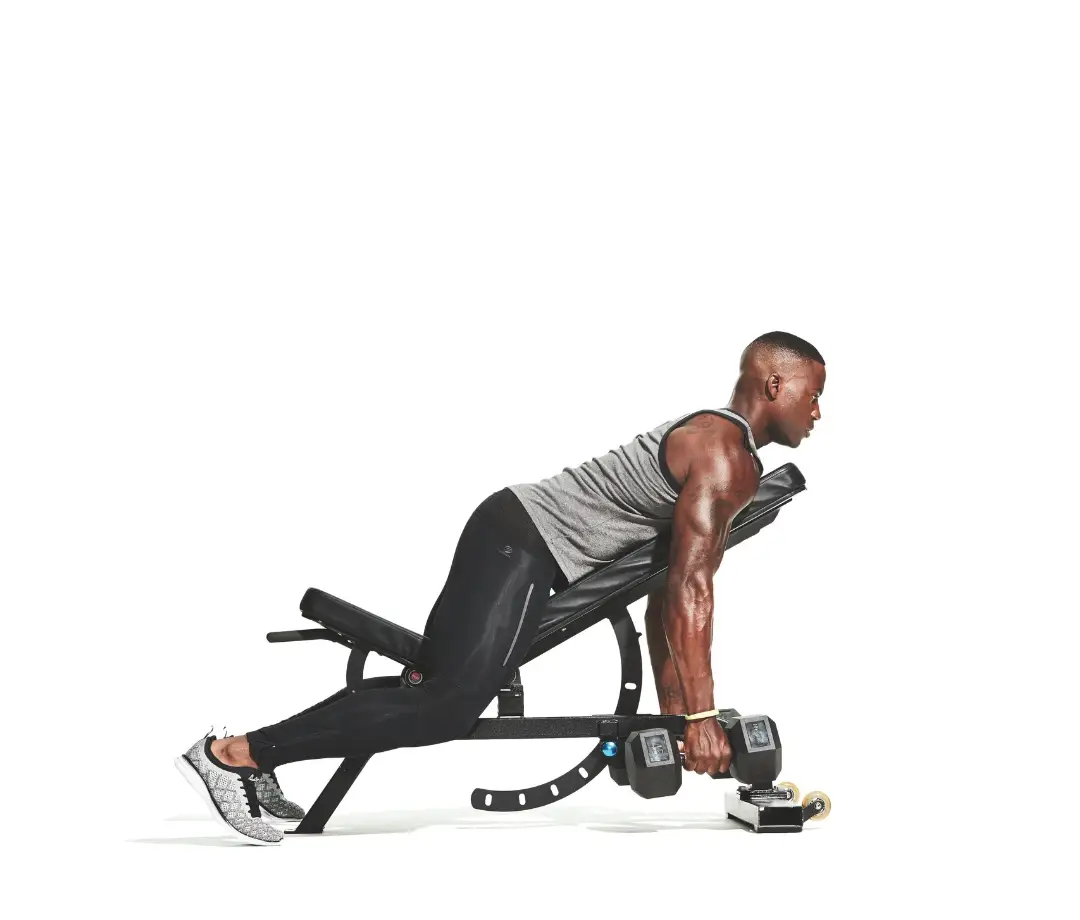
A spider curl places you chest down on an incline with the arms hanging near vertical. A preacher curl rests the backs of your upper arms against a sloping pad, usually placing the elbows in front of the shoulders. An incline dumbbell curl is the opposite torso orientation: you sit with your back on the incline, allowing the upper arms to hang somewhat behind the torso. All three can train the biceps, but their arm positions, stabilization and resistance curves differ.
With free weights, a preacher curl commonly feels demanding nearer the lower portion of the movement because the forearm becomes more horizontal against gravity at a different elbow angle. A spider curl often feels relatively light at the very bottom and more challenging as the forearms rise. Incline curls change the position of the upper arm at the shoulder and can make the beginning of the movement feel different again. None deserves an automatic growth championship just because it creates a dramatic sensation or a larger temporary pump.
For a simple arm routine, use one strict, supported curl and one complementary curl position rather than collecting half a dozen near-identical movements. Spider curls pair sensibly with incline curls or a standing cable curl if those are comfortable. If you already do high-effort pulling work and heavy preacher curls, adding more spider sets may simply increase fatigue without improving your weekly plan. Judge the exercise by stable form, elbow comfort, progressive performance and recovery—not by whether it looks more sophisticated than an ordinary curl.
Equipment Worth Exploring
Explore equipment, accessories and gear from our carefully selected range.
VOLTRA
Compact digital cable trainer with smooth, adjustable resistance.

Go-Tone Pro
Portable digital cable trainer with up to 66 lb (30 kg) of adjustable resistance.
GymPin D Cuffs
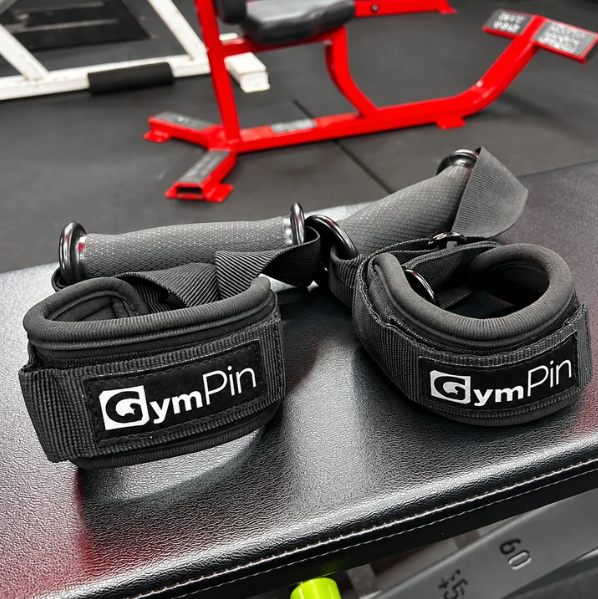
Adjustable wrist cuffs with textured grips for supported cable-machine exercises.
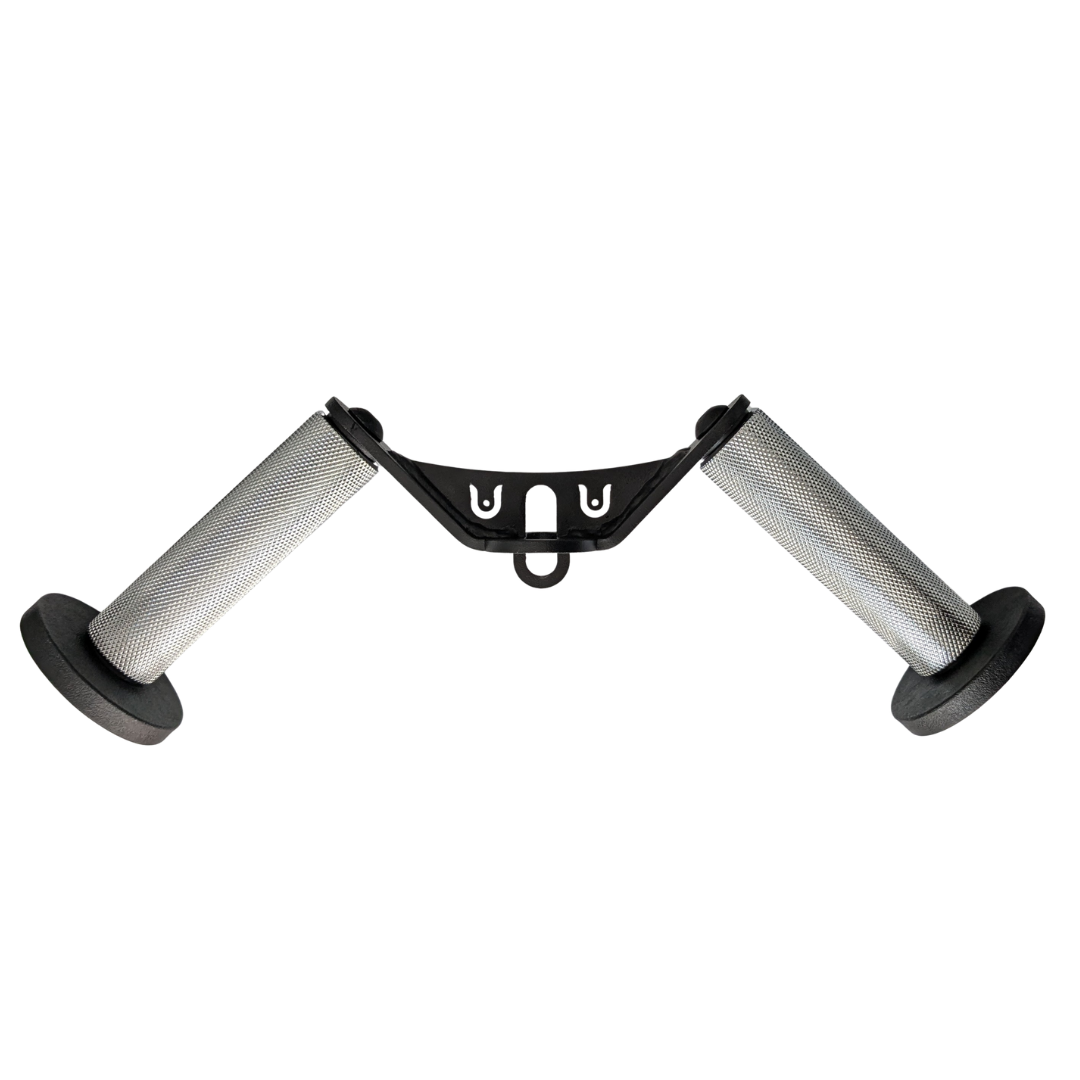
W Grip
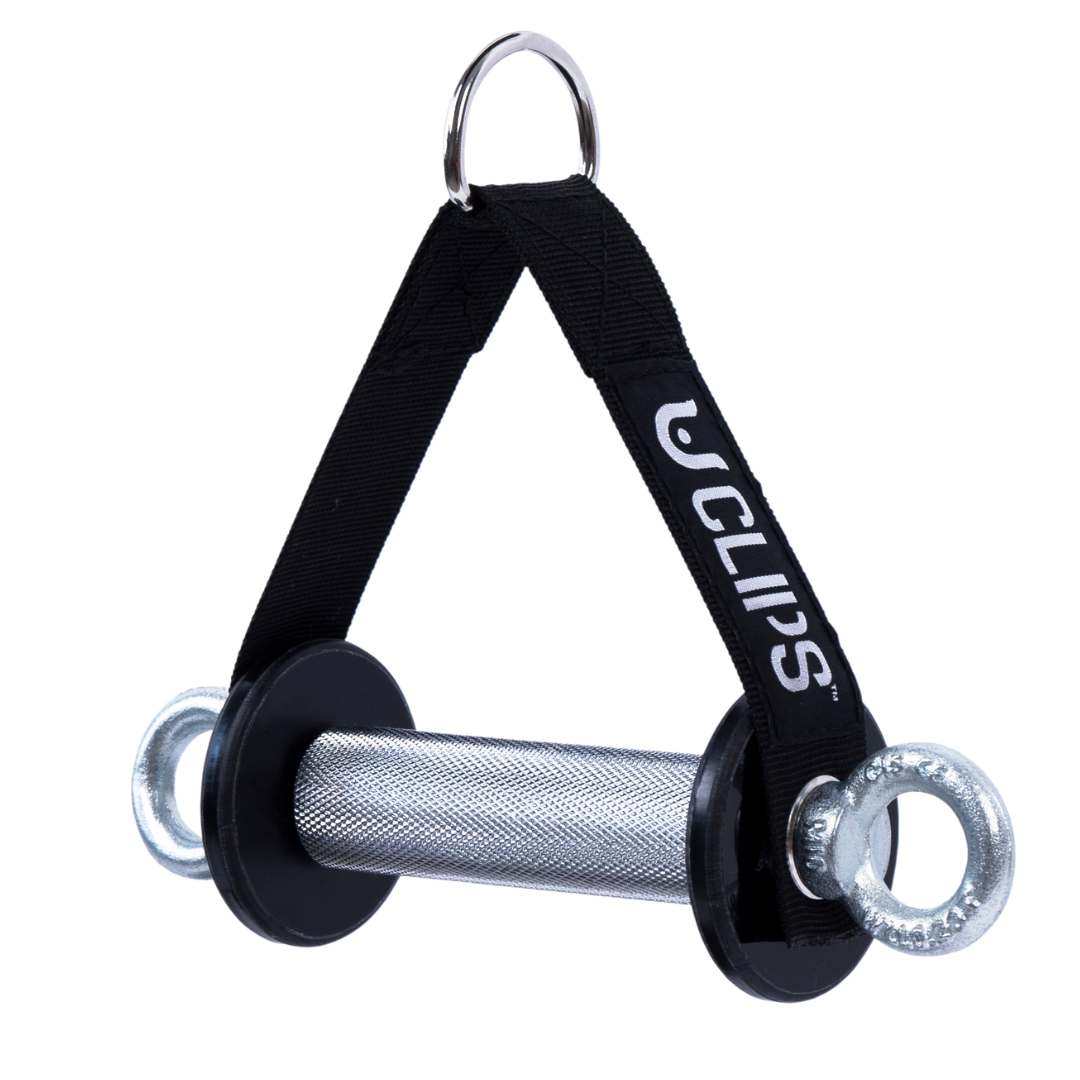
Angled cable grip for comfortable rows, pushdowns, and curls.

GymPin D Handle Bar
Multi-use steel D-handle bar for cable rows, pulldowns and other cable exercises.
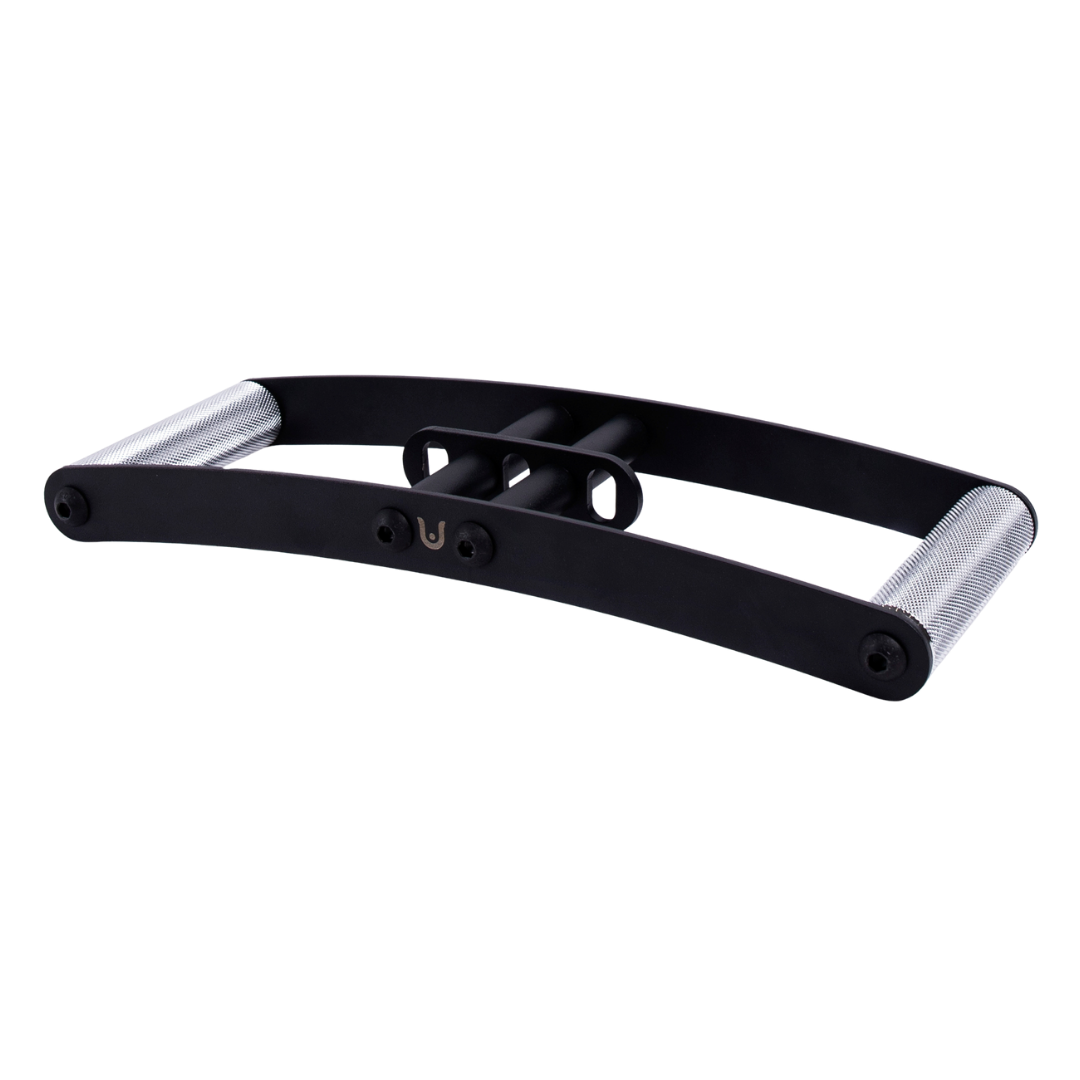
Horizon Grip
Ergonomic V-style cable grip for rows and back training.
Fix the Mistakes That Steal Tension or Irritate Your Joints
First, sliding too low on the bench may put the edge into your throat or make the weights collide with the seat. Reposition until your chest is supported and your arms can hang clearly. Second, rocking the torso turns a strict curl into a partial row. Reset your feet and reduce the load. Third, pulling the elbows backward to finish the rep changes the shoulder angle. Let the elbow bend do the job instead.
Fourth, throwing the weights down can remove the hard-to-track lowering phase and jar the elbow at extension. Take enough time to remain in control. Fifth, curling so high that the shoulders roll forward is not a bonus repetition. Stop when you cannot keep your upper arms reasonably steady. Sixth, using a grip that twists the wrists unnecessarily can make the forearms hurt before the biceps fatigue. Try a lighter dumbbell, a different EZ-bar grip or a comfortable neutral position without insisting that all options feel identical.
Seventh, pushing through sharp or worsening elbow pain is not productive overload. Muscle fatigue is expected; sharp joint pain, unusual tingling or increasing tendon irritation deserves a different approach. Try shortening the painful arc temporarily, lower the load, change the implement or switch exercises. Persistent or substantial pain calls for qualified clinical assessment. The most repeatable spider curl is not the one that uses the heaviest weight; it is the one you can reproduce across several weeks without accumulating avoidable discomfort.
A Six-Week Spider Curl Plan for Real Progress
Place spider curls after major back work or as an early isolation move on a dedicated arm day. Begin with two sessions per week separated by enough recovery for your elbows and biceps, ideally at least a day between sessions. Most lifters can start with two to three controlled sets each session. Pick a load that lets you finish 10–15 reps with roughly one to three good reps still available. Rest around 90–120 seconds between sets when the goal is consistent output, and keep the bench setting, grip and range of motion the same when comparing sessions.
- Weeks 1–2: two sets of 10–12 per session. Learn the setup and record your weight, repetitions and whether the chest and upper arms stayed steady.
- Weeks 3–4: aim for three sets per session if recovery and technique are good. Progress toward 12–15 clean reps before considering more weight.
- Week 5: add the smallest available weight increase only when every set reaches the top of your target range without compensations. Returning to 10–12 reps after that increase is normal.
- Week 6: keep the same volume if progress is continuing. If arms or elbows feel beaten up, cut one set and rebuild rather than chasing a forced personal record.
Do not treat these numbers as a mandatory dose. Lifters already performing many challenging pulling and curling sets may need fewer additional biceps sets; novices may find two modest sets plenty. Use consistent technique and logbook progression, not soreness, to decide whether the exercise earns its place. If you cannot progress with good form, inspect sleep, overall arm workload, nutrition and the size of your load increments before assuming that the biceps need another variation.
A practical pairing is spider curls plus a comfortable incline or cable curl on one day, with the second day emphasizing your back training and a smaller amount of arm isolation. That covers different arm positions without turning every workout into a marathon. Six weeks should show whether the spider curl improves control and useful performance. It will not by itself reveal which biceps head has grown or guarantee visible changes in arm shape; those depend on the whole training and recovery picture.
Funny Gym Shirts & Workout Gear
Funny gym shirts, tanks, hoodies and workout gear for lifters who like training hard.

Ha Ha Hammer Curls Joker Meme , Villain Top & Gains T-Shirt
Show some powerlifting attitude with a playful “Ha Ha Hammer Curls Joker Meme” tee.

For Whom The Bell Curls Metallica Kettlebell Heavy Meta Hoodie
Stay casual and show some metalhead attitude with “For Whom The Bell Curls”.

Lightning Curls Pikachu Meme – Pokemon Shirt & T-Shirt
Make gym days more fun with “Lightning Curls Pikachu Gym Meme” style.

Big Guns Rock Gym Funny Workout Muscle Shirt Who Love R Tank Top
Bring “Big Guns Rock” humor to your next lifting session.

Gym If You're Reading This It's Arm Day Drake Parody & Hoodie
Bring “If You're Reading This It's Arm Day Drake” gym humor to lazy days and post-workout plans.

Mind Muscle Perfection Brain and Biceps Gym for Science Tank Top
Bring “Mind Muscle Perfection Brain and Biceps” humor to your next lifting session.

Welcome to the Gun Show Tee
Show some rock-and-lifting attitude with a playful “Welcome to the Gun Show” tee.

I Love Gym Bicep Heart | Valentine's Day Gymbro Hooded Hoodie
Bring “I Love Gym Bicep Heart” gym humor to lazy days and post-workout plans.

The Real Rocky Mountains – Bicep Mountain Meme Pullover T-Shirt
Keep things casual with a little “The Real Rocky Mountains” attitude.

Dwight Schrute Gun Show The Office Bicep Vest Tank Top
Show some personality between sets with “Dwight Schrute Gun Show”.