Advertising disclosure: This page includes affiliate product links that may earn us a commission, as well as products from our own store.
Seal rows promise upper-back work without the body swing that can creep into heavy barbell rows. Their value depends on stable bench clearance, a repeatable bar path and a grip that your shoulders tolerate. Here is how to set them up, train them strictly and progress for six weeks.
What a seal row trains and why chest support matters
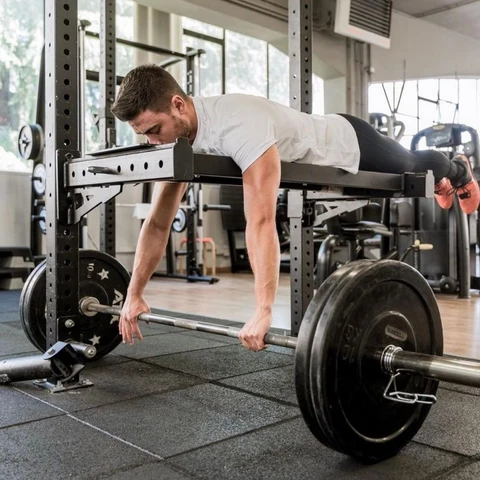
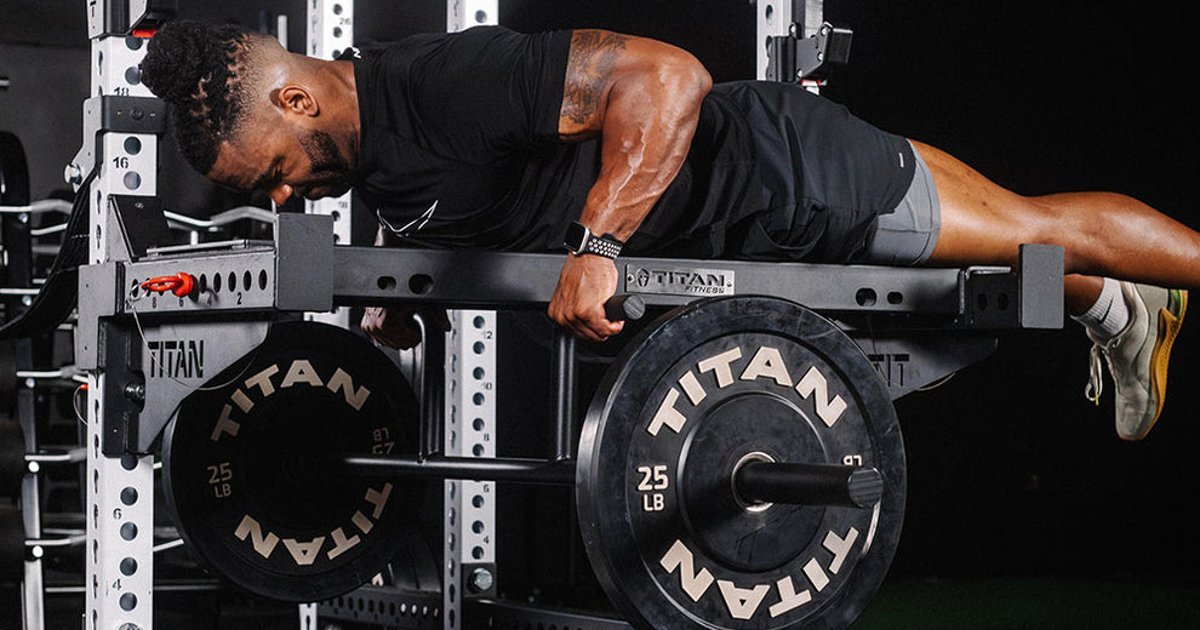
A seal row is a horizontal pulling exercise performed while lying face down on a raised flat bench. The bar starts below the body, and the arms pull it toward the torso while the chest stays supported. That fixed position removes most of the opportunity to drive the load upward with the hips or an increasingly upright torso.
Your lats contribute to drawing the upper arms back. The middle trapezius and rhomboids move and stabilize the shoulder blades; rear delts, biceps and other elbow flexors assist. The forearms hold the bar. A grip adjustment changes the movement emphasis, but no variation makes the seal row an isolation exercise for just one muscle.
Chest support also reduces the demand on the spinal erectors to maintain a long hip hinge, which can be useful after squats, deadlifts or other standing rows. It does not prove that seal rows grow more muscle than every other row, nor does it eliminate every kind of joint strain. Shoulder positioning, load and equipment quality still deserve attention.
Use seal rows when you want a repeatable, strict back movement and have a secure station. A well-designed chest-supported machine row can accomplish many of the same training goals. The important variable is a challenging and controllable pull performed regularly, not whether the equipment looks unusual.
Bench height and bar clearance: start with a stable setup
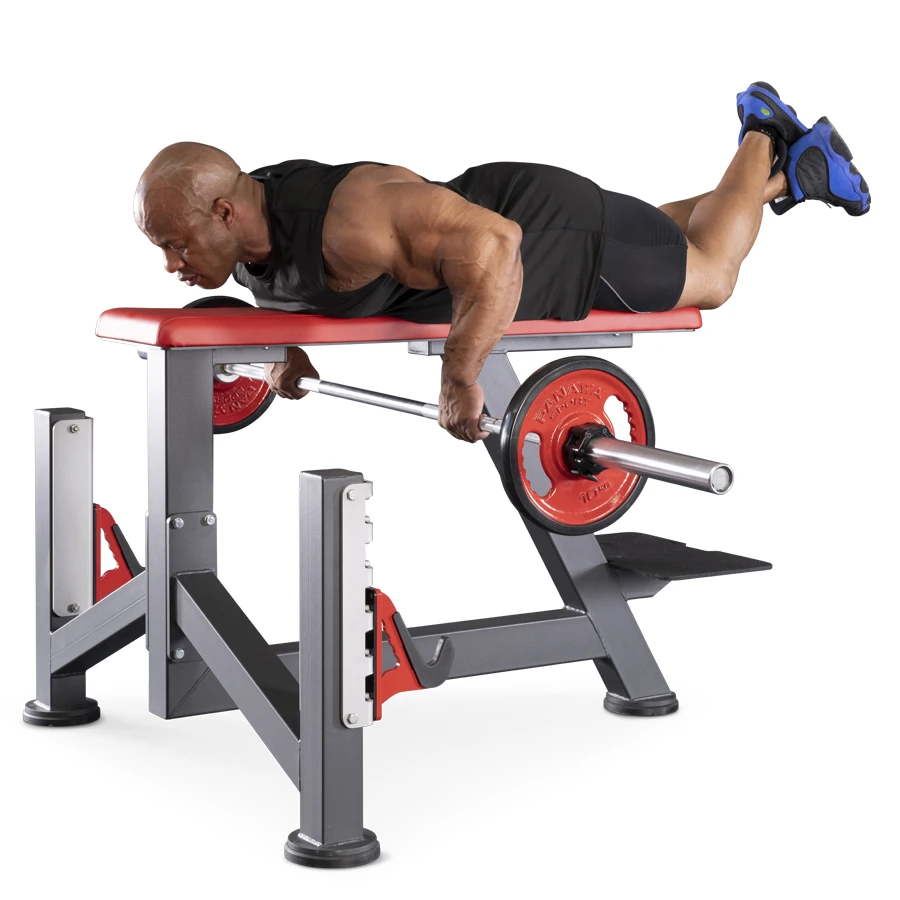
The bench must be high enough for the arms and loaded bar to travel through a useful range without the plates striking the floor prematurely. The correct height depends on arm length, plate diameter, bench thickness and bar geometry. There is no single number that works for every person and every bar.
A purpose-built seal-row bench is convenient because it is made to provide support and clearance. A manufacturer-approved rack pad can work as well. Do not raise a regular bench on loose stacks of plates or slippery boxes. Check that the platform cannot wobble, shift or tip, even as your center of mass changes during the pull.
Before loading heavy, test with an empty bar. Lie prone with the sternum supported, neck comfortably aligned and arms able to reach downward. Position your shoulders so the bench edge does not dig painfully into the upper arm. Check that the plates clear the uprights and support hardware through the entire path.
Follow the station’s intended leg or foot-support arrangement, rather than kicking the legs to lift more weight. Arrange the bar so it can travel toward the lower chest or upper abdomen without hitting the face, rack or pad. If you cannot safely reach the starting bar or exit the station under fatigue, redesign the setup or use another supported-row exercise.
Do not confuse a large available range with a mandatory painful range. The target is smooth, repeatable motion within comfortable shoulder limits. A secure incline-bench dumbbell row is better than an unstable improvised seal-row platform.
Strict repetition: pull with the back, not with a body heave
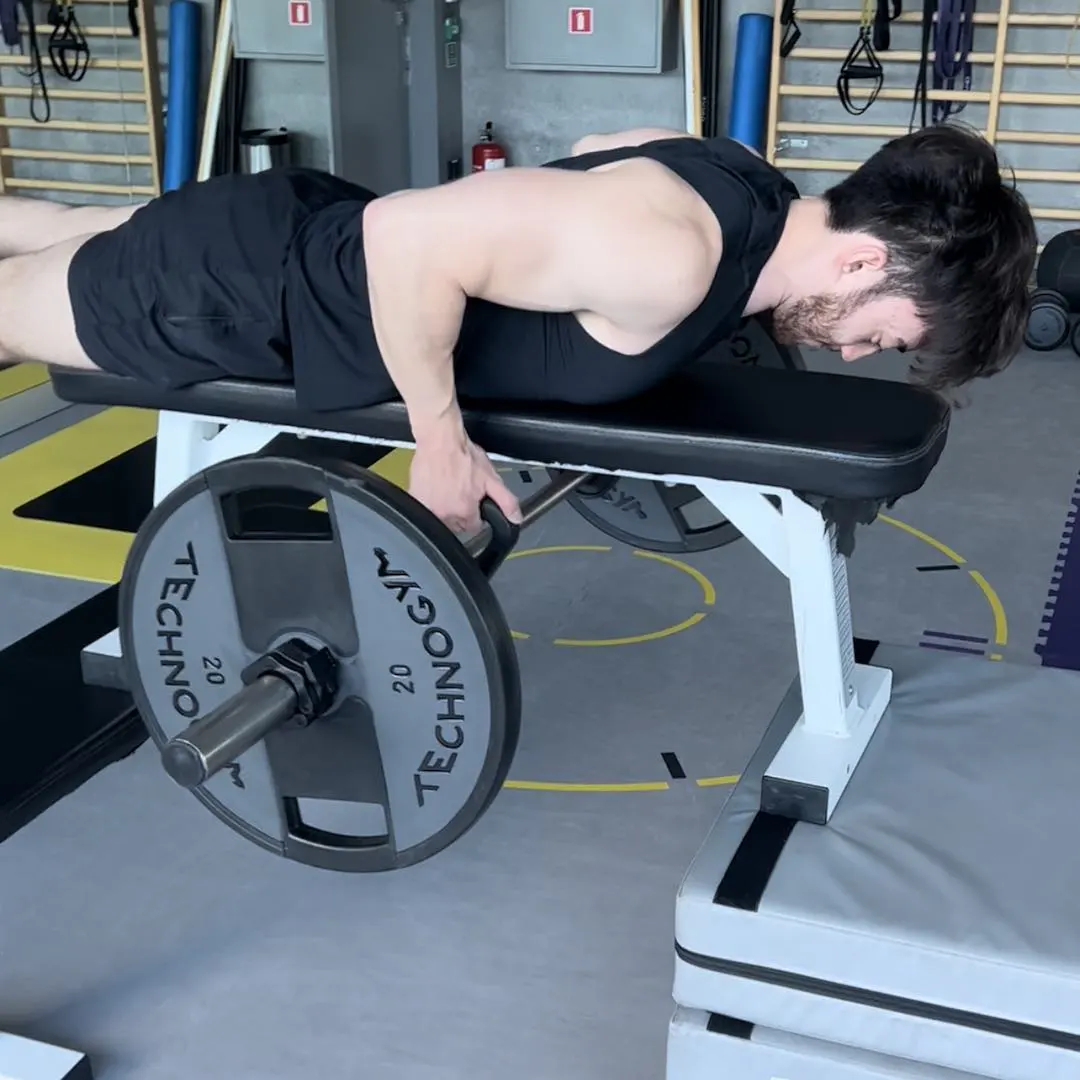
Start with a comfortable overhand grip around shoulder width or slightly wider, then let the arms extend down. Brace enough to maintain consistent chest contact with the bench. Pull the elbows back while guiding the bar toward the torso. The torso should not lift to meet the bar as the weight increases.
The exact endpoint varies by anatomy and bar type, but the upper abdomen or lower chest is a useful general destination. Keep the head reasonably aligned with the rest of the spine. Looking sharply forward or craning the neck is not needed to finish a repetition.
A brief pause near the top can help you judge whether you have completed the pull under control. Lower deliberately until you reach the available bottom stretch without bouncing the plates or yanking the shoulders into discomfort. Allow the shoulder blades to move naturally rather than forcing them into a rigid, exaggerated squeeze for the entire set.
The best tempo is one you can reproduce. For learning, roughly one second up and two seconds down can keep the movement controlled, but no special count guarantees extra muscle growth. Choose a load that makes the target muscles work without changing the bar path every time you approach the last repetition.
Consider filming a working set from the side. It will reveal whether the chest leaves the pad, whether the bottom range shortens with fatigue and whether the weight is moving through the same path on each rep. Record the grip and bar type alongside the load so later comparisons are meaningful.

Equipment Worth Exploring
Explore equipment, accessories and gear from our carefully selected range.

Linear Row LRX-750
Dual-sided rowing machine for supported rows, bent-over rows and varied pulling movements.

Lateral Row Machine LRM-720
Rowing machine with independent lever arms, an adjustable seat and chest support.



FID Bench MAX
Adjustable bench offering flat, incline, and decline positions + adjustable headrest.


Rubber Hex Dumbbells
Rubber-coated hex dumbbell pairs with a stable shape for home and commercial strength training.


Grip and elbow path: lats, upper back and shoulder comfort
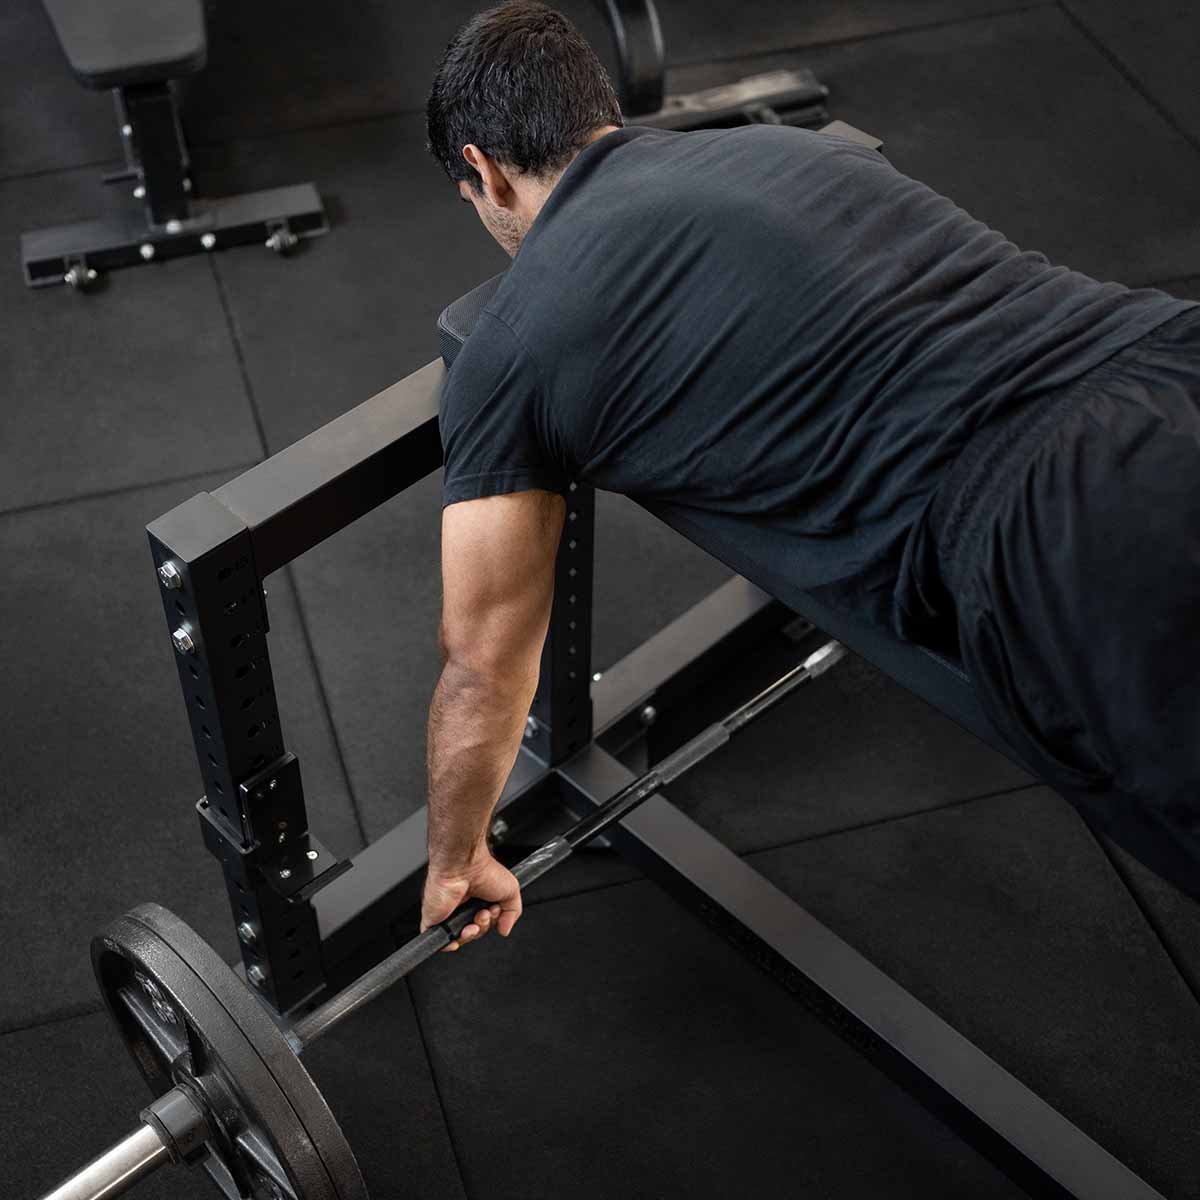
Grip width can change how a row feels, but the difference is an emphasis rather than a complete reassignment of muscle work. Pulling with elbows moderately closer to the sides and the bar toward the lower ribs can put more emphasis on shoulder extension and the lats. A slightly wider elbow path may feel more demanding for the upper back and rear shoulders.
Very wide grips can shorten your usable movement range. Very narrow grips can make the wrists and elbows uncomfortable. Try small adjustments during warm-ups and compare them at a similar load and torso position. A grip that allows a long, smooth pull without joint irritation is often more useful than one chosen for a theoretical perfect muscle angle.
Neutral or angled grips may be available on specialty seal-row bars. Dumbbells allow the hands to rotate independently. Changing grips also changes the exact bar path and sometimes the amount of clearance beneath the bench, so log different variants separately when tracking strength gains.
If forearm fatigue ends a back-focused set before the back itself is challenged, straps can be a practical tool for selected hard sets. If grip strength is a priority, train it directly in addition to rowing. The goal is to match the setup to your training objective rather than turning every set into an accidental grip test.
Sharp shoulder pain is not a cue to force a wider elbow position. Reduce the load, adjust the hand path or choose a different supported row. Smooth repetition quality matters more than a dramatic top position.

Bodybuilding Shirts & Workout Gear
Bodybuilding shirts, tanks and gym gear for lifters chasing muscle, size, symmetry and the pump.


Nice Traps Big Back – Halloween Horror Jigsaw Meme Deca Sticker
Put “Nice Traps Big Back” gym humor on your laptop, bottle, or gym gear.

Lat Man Big Back – Jumper With Huge Lats – Back Day T-Shirt
Add a playful “Lat Man Big Back” touch to your casual rotation.


I Love Deadlifts Muscle | Pink Heart Weight Plate Vest Tank Top
Add some deadlift attitude to training with “I Love Deadlifts”.

Slip Not Grip Training – Heavy Metal & Gymbros – T-Shirt
Heavy lifts, good laughs, and a little “Slip Not Grip Training” energy.

Funny Gymrat Mousetrap | Gym Rat Workout Sweater | Next T-Shirt
Keep things casual with a little “Gymrat Mousetrap” attitude.

Pull Up or Shut Up Hooded Pullover for Calisthenics Pul Hoodie
Keep it laid-back with a little “Pull Up or Shut Up” attitude.

Dead Pull Funny Gym Sweatshirt Crewneck Pump
Bring “Dead Pull” humor to your everyday gym style.

Skeleton Deadlift Deadlift Lovers & Meme Hoodie
Keep it laid-back with a little “Skeleton Deadlift” attitude.
Five seal-row errors that quietly reduce useful training
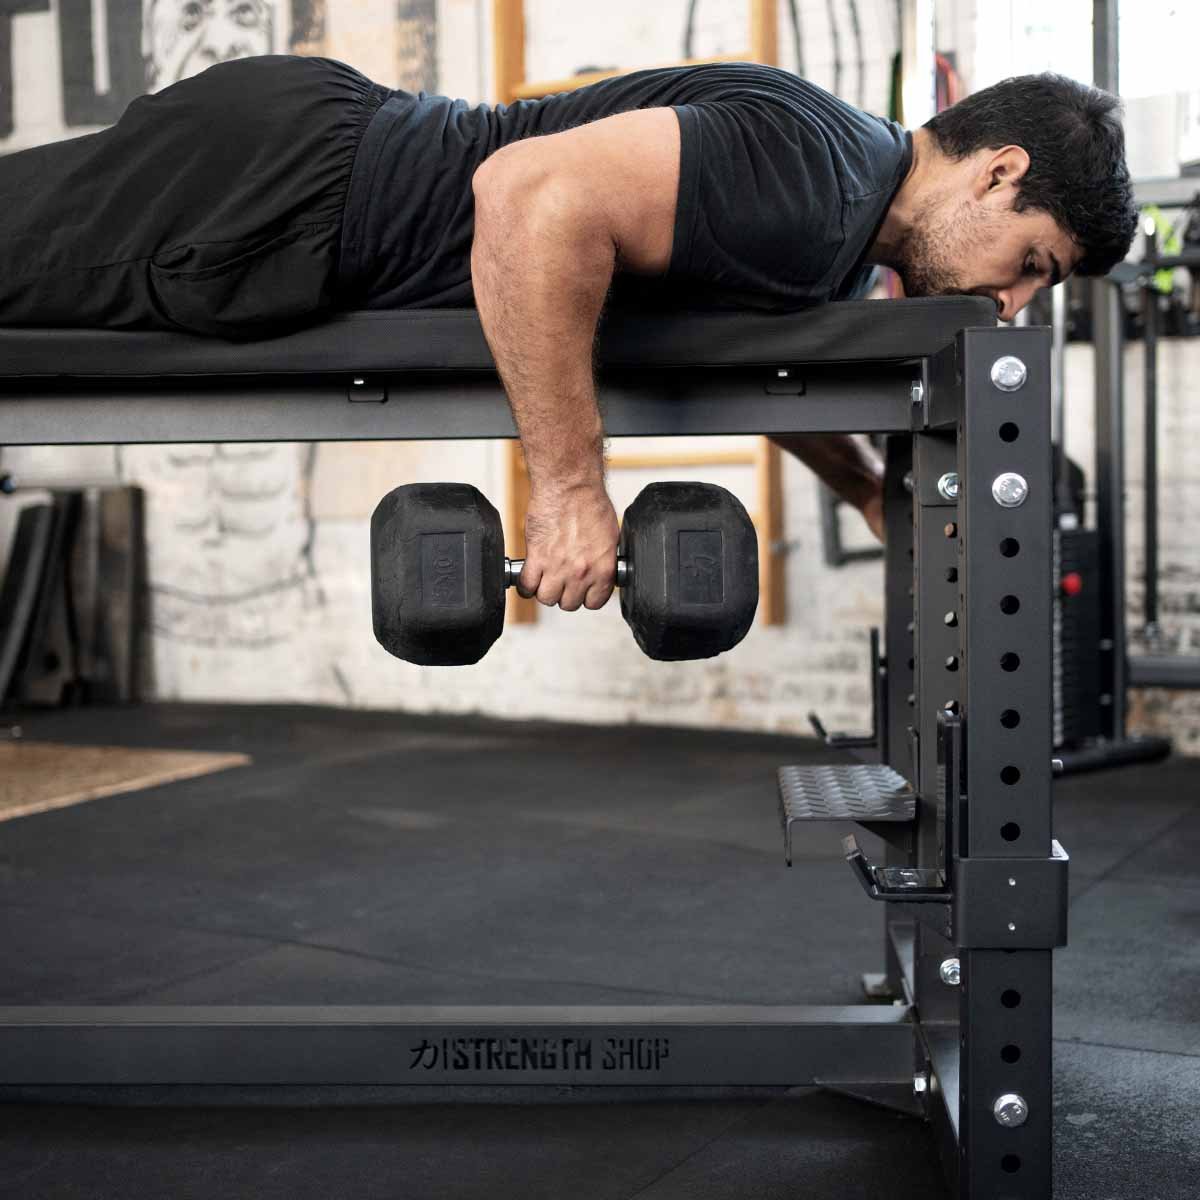
The plates touch the ground early. A low bench or oversized plates can limit the bottom range. Check clearance with a light load before working sets. Repeatedly bouncing the bar off the floor hides the problem instead of fixing it.
The chest leaves the pad. Lifting the ribs toward the bar to complete a heavy rep defeats the main benefit of support. Lower the weight until your chest stays in contact throughout. Small natural shifts may occur, but repeated torso heaving changes the exercise.
The neck juts forward. Looking up at the mirror while lying prone can make the position awkward. Keep the head relatively neutral and pull toward the torso, not toward the chin. Do not fight through neck or shoulder pain.
The last reps become half reps. Shortening the lowering phase when fatigue arrives makes progression hard to interpret. End a set at the last clean comparable rep, or label partial-range work honestly when it is deliberately programmed.
The station is unstable. A sliding bench, poorly secured pad or blocked bar path can create a problem that is far more important than a few kilograms of extra training load. Change the equipment or use an alternative instead of taking risks with an improvised platform.
Before a hard set, ask whether the bench is secure, the bar clears the floor, the shoulders are comfortable and the first and last repetition can share the same standard. Fixing these details usually gives more value than chasing a new rep scheme.
Straight bar, cambered bar, dumbbells or supported machines?
A straight barbell is simple to load progressively, but the shaft may contact the underside of the bench before the elbows have completed their comfortable travel. A cambered or dedicated seal-row bar creates additional hand clearance. That extra range is helpful only when the shoulders control it well; deeper is not automatically better.
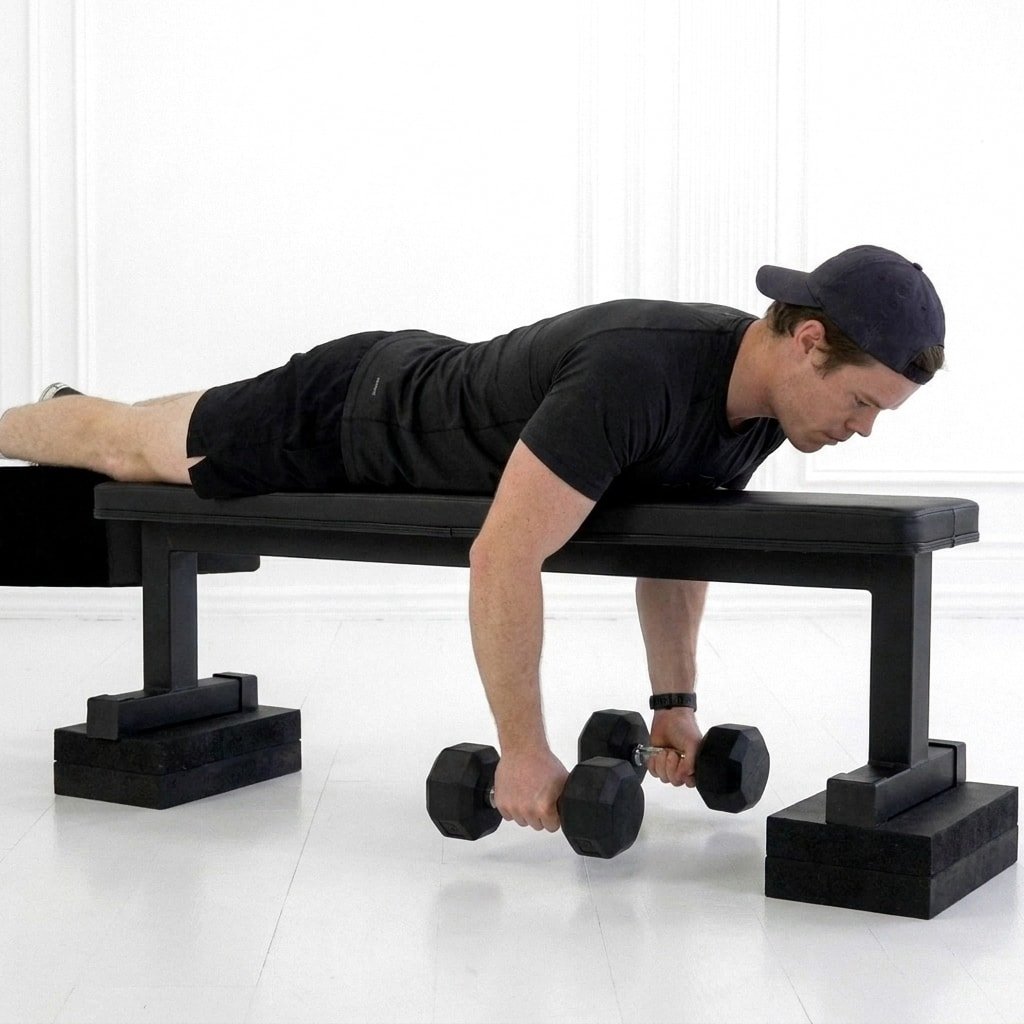
Two dumbbells can travel beside the pad and let the hands rotate naturally. They are often suitable for lifters who prefer independent arm movement. Heavy dumbbells can be awkward to reach or return from a high bench, however, so position them safely and avoid reaching for a load beyond your control.
An incline-bench dumbbell row is a practical alternative when a flat, elevated station is unavailable. It changes the torso angle and resistance direction, so the movement is not identical to a seal row. Nevertheless, it provides meaningful chest support and a challenging back contraction without requiring a custom station.
Chest-supported T-bar and plate-loaded row machines can offer more straightforward entry, exit and loading. Bent-over barbell rows place greater demands on the trunk and hip hinge; that can be valuable, but it may limit your back work after heavy deadlifts. Seated cable rows are another useful option when adjustable grip geometry or pulley positioning matters.
Choose equipment that gives safe access, a comfortable full range and a clear route to progression. A dedicated seal-row bench is excellent when it earns its space, but a reliable supported alternative used every week is preferable to a complicated setup that becomes a chore. Do not add extra rowing sets simply because you have discovered another bar.
Equipment Worth Exploring
Explore equipment, accessories and gear from our carefully selected range.


Leather Lifting Straps
Padded leather straps support grip during heavy rows, deadlifts and pulling exercises.

Leather Wrist Grips
Padded leather lifting grips help support the hands and wrists on heavy pulling exercises.

Angles 90 Grips
Flexible grip attachments that allow natural wrist movement during pulling exercises.

Multi Pull Smith Rack MPHR-780
All-in-one rack with a Smith machine, functional trainer, lat pulldown and low row.

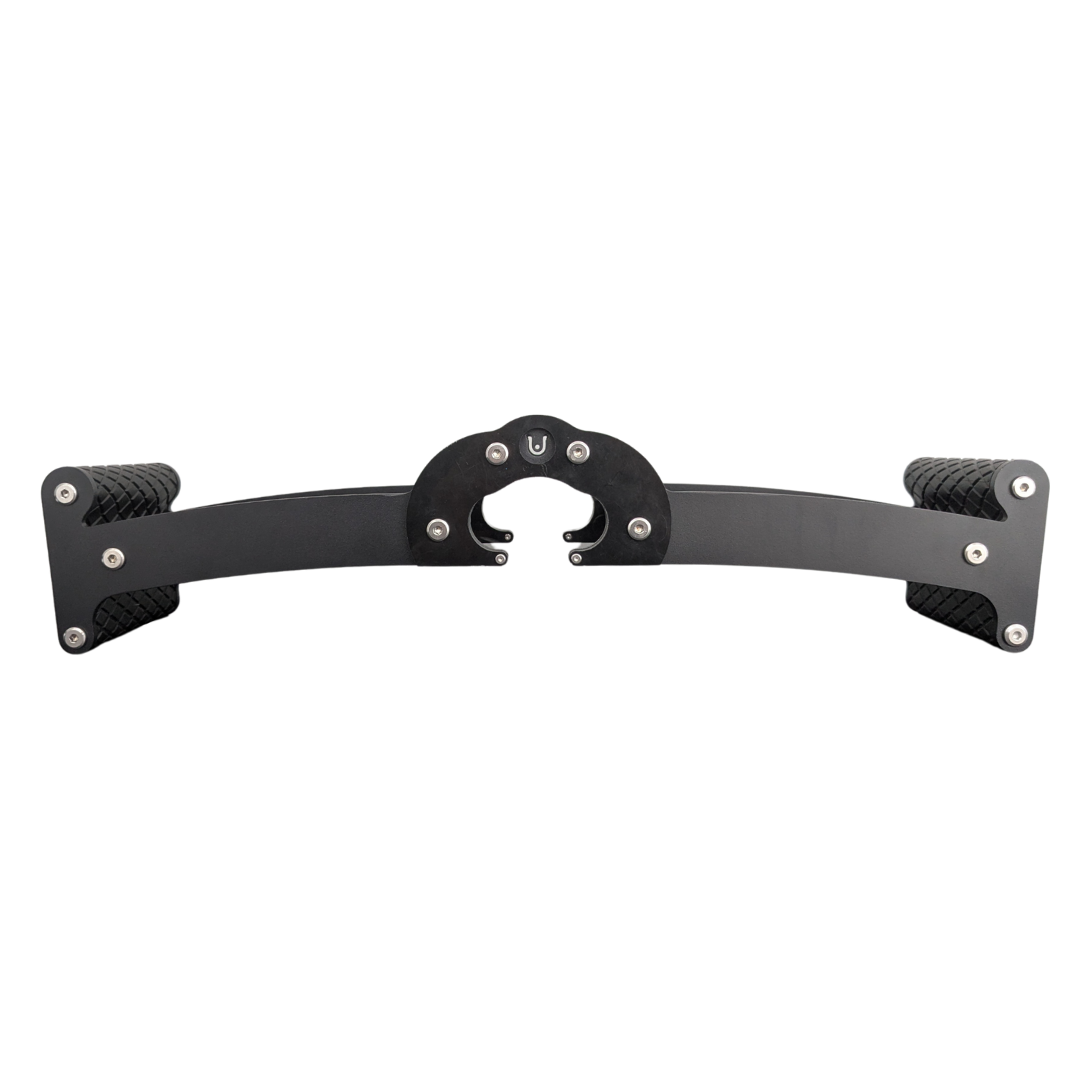
Back Bar
Multi-grip cable and landmine bar with a built-in deadlift jack.

GymPin Barbell Row Handle
Heavy-duty handle attachment for barbell, landmine and T-bar rows.
A practical six-week seal-row progression for a stronger back
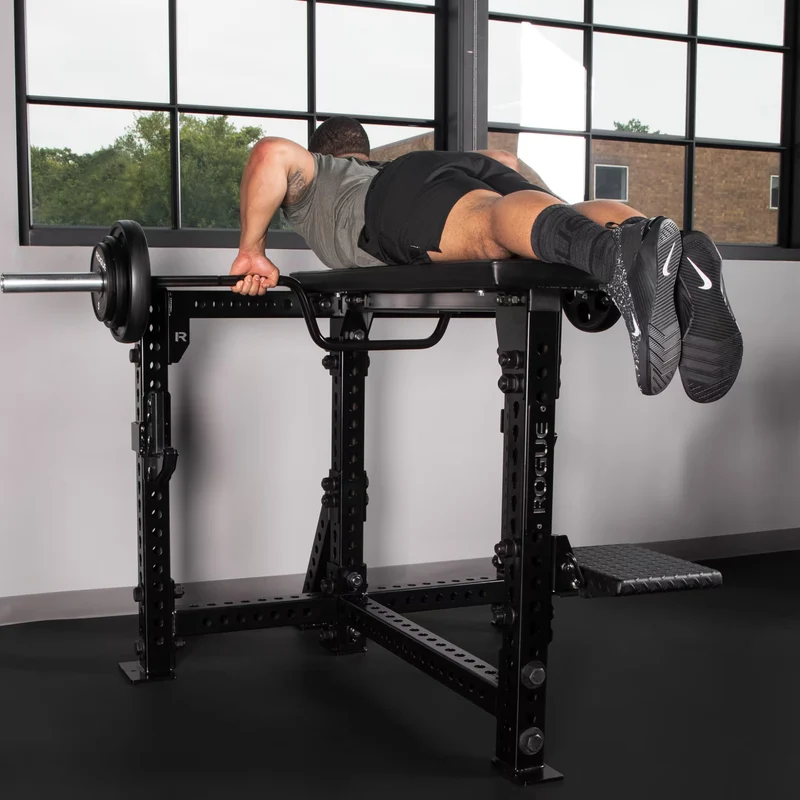
Perform seal rows once or twice weekly according to your existing back volume. This example uses two sessions and assumes you already tolerate loaded horizontal pulls. Warm up gradually, then choose a weight you can move with a stable chest and roughly two or three clean repetitions left in reserve. Keep the bench, grip and range consistent across sessions.
| Weeks | Sessions | Working sets | Main goal |
|---|---|---|---|
| 1–2 | 2 each week | 3 sets of 10–12 | Repeat strict full-range form |
| 3–4 | 2 each week | 3 sets of 8–12 | Add reps before adding load |
| 5–6 | 2 each week | Day A: 3 × 6–8; Day B: 3 × 10–12 | Small load increases with unchanged form |
Rest approximately two minutes between hard sets, longer if breathing or grip fatigue makes the next set sloppy. Apply double progression: when all working sets reach the top of the rep range with a comparable bar path and chest position, increase the weight by the smallest sensible increment. If the equipment has large load jumps, build another clean repetition first.
When back growth is the priority, place seal rows early in the session. If lower-back fatigue from squats or deadlifts is already significant, use the seal row later as a supported accessory. Pair horizontal pulling with a vertical pull such as a pulldown or pull-up, accounting for your other rows rather than stacking every variation at full volume.
At the end of the six weeks, compare the first and last sessions under the same movement standard. More clean repetitions, a small load increase or better control at the top can all indicate progress. If the shoulder or neck starts to dislike the setup, switch to a comfortable supported variation and keep the larger training plan moving.
Powerlifting Shirts & Lifting Gear
Powerlifting shirts and gym gear for squat, bench and deadlift lifters who live for heavy numbers.

I Want You To Deadlift Uncle Sam Patriotic – 4th Of T-Shirt
Rep “I Want You To Deadlift Uncle Sam Patriotic” humor in and out of the gym.

Siuuu Deadlift Cristiano Ronaldo Meme Football Jumper Hoodie
Keep it laid-back with a little “Siuuu Deadlift” attitude.

Uncle Sam Deadlift Patriotic – 4th of July Workout Meme Sticker
Stick a little “Uncle Sam Deadlift Patriotic” humor on your favorite gear.

Funny Patriotic Deadlift Gym – Statue Of Liberty 4th Of Tank Top
Bring “Patriotic Deadlift” humor to your next lifting session.


Funny Lift O'Clock Gym | Workout Sweater For Bodybuildi T-Shirt
Keep things casual with a little “Lift O'Clock” attitude.

Barbell Breaker Heavy Metal Workout Bar Breaker Lifting T-Shirt
For laid-back days and metalhead humor: “Barbell Breaker”.

Listen Heavy Lift Heavy Gym | Heavy Metal Workout Vest Tank Top
Train hard, laugh a little, and rep “Listen Heavy Lift”.

Muscle Mommy Lifting Club for Gym Girls, Workout & Body Hoodie
Make your off-duty look more fun with “Muscle Mommy Lifting Club”.

Barbell Flag USA Patriotic Gym | Funny Distressed Flag Sticker
Put “Barbell Flag USA Patriotic” gym humor on your laptop, bottle, or gym gear.