Advertising disclosure: This page includes affiliate product links that may earn us a commission, as well as products from our own store.
A hook grip is not simply an ordinary barbell grip squeezed harder. The thumb goes around the bar first, then the fingers secure it. That small change can make the difference between a grip that feels locked in and one that feels like an uncomfortable pinch with no obvious benefit.
Learning it is also a different task from finding out how much weight you can lift today. A useful introduction separates hand placement, the demands of the exercise and gradual practice. The aim is a repeatable hold for the snatch, clean or deadlift where appropriate, rather than winning a contest for thumb discomfort.
Wrap the thumb before closing the fingers
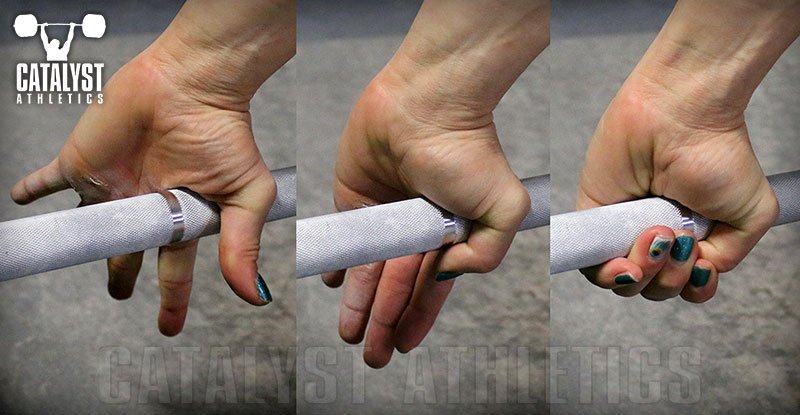
Begin by bringing the hand securely to the bar and wrapping the thumb around it. Then close the fingers over the thumb, commonly using the index and middle fingers to secure it. The remaining fingers still hold the bar. The important distinction is that the thumb travels around the shaft; it is not laid straight along it and crushed in place.
Hand size changes how that arrangement looks. Someone with longer fingers may cover more of the thumb than someone with shorter fingers. Copy the basic relationship between thumb, fingers and bar rather than forcing your hand to resemble a photograph exactly. A coach looking at your actual setup can identify a placement problem more reliably than a slogan about gripping harder.
Practise the sequence before adding much load. Set the hand, close the grip, then check whether the position stays consistent when you take up the slack. If you rebuild the hold differently on every attempt, the next useful step is another clear setup rather than a heavier bar. You are learning where the hand belongs.
There are two observations worth separating. The grip may feel unfamiliar, and it may also be poorly arranged. Feeling something new does not prove that the setup is correct. If the thumb is barely wrapped around the bar or the fingers repeatedly lose contact, review the position rather than treating discomfort as evidence of productive practice.
The photographs here show hand placement at particular moments. They cannot establish the pressure a lifter feels or the load that would suit you. Use the visible arrangement to understand the technique, then keep the practical test modest enough that you can stop and reset deliberately.
Understand what changes from a normal overhand grip
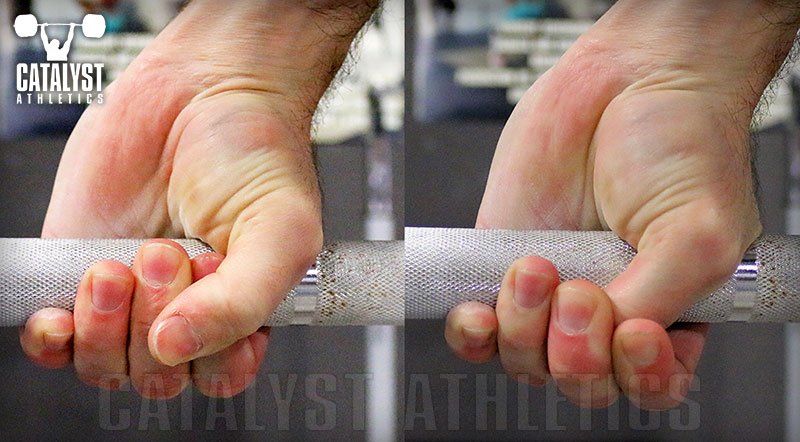
In an ordinary double-overhand grip, both palms face toward the lifter and the thumbs usually close outside the fingers. In a hook grip, both hands keep that overhand orientation, but the fingers secure the wrapped thumbs. It is a change in how the hand holds the bar, not a switch to one palm facing each direction.
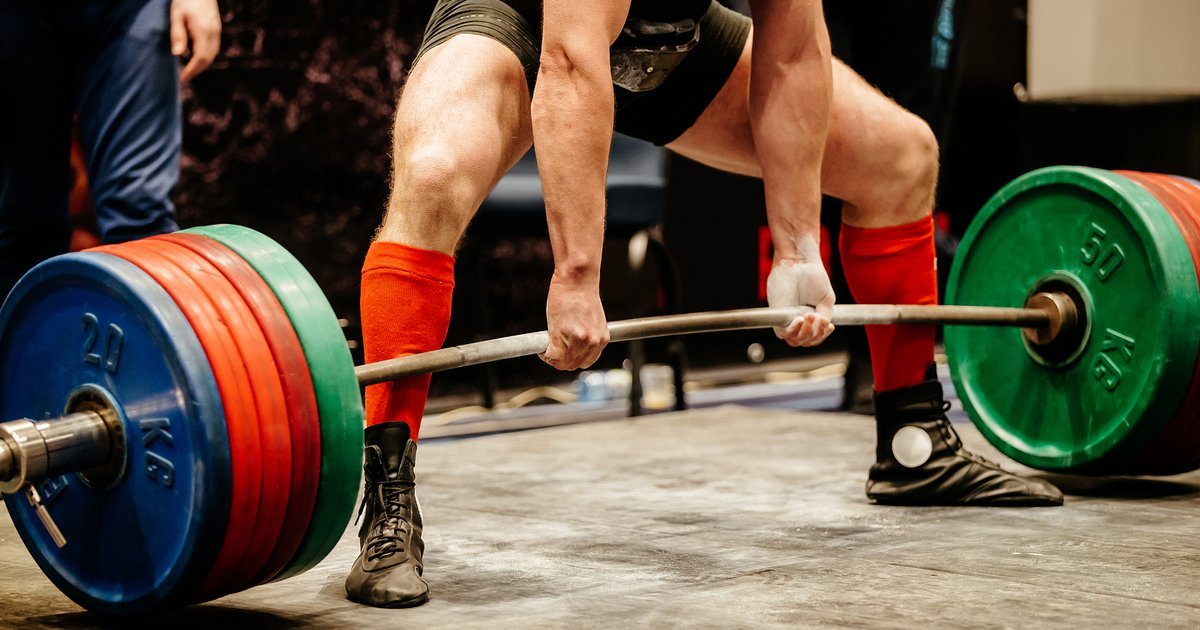
That last arrangement is the mixed grip often seen in deadlifting. It uses one overhand and one underhand hand position to counter the bar’s tendency to roll. It is a separate strategy. A photograph of a strong mixed-grip deadlift does not tell you that hook grip is wrong, just as a weightlifter’s hook grip does not establish the best choice for every deadlift session.
The snatch and clean add another requirement: the bar must move into a receiving position. A grip strategy needs to work with the entire lift, not just the first few centimetres from the floor. How the thumb is retained or released during the turnover is something to practise with appropriate coaching. Do not force a receiving position simply to keep the thumb trapped.
For a deadlift, decide whether you are practising the hook, testing an unassisted hold or completing a planned pulling set. Those purposes can lead to different choices. Record the grip alongside the weight so that a stronger hold does not get confused with a direct improvement in every other part of the lift.
Deadlift designs, barbell graphics and plate-math jokes celebrate the same lifting culture, but they do not choose your technique. The useful decision is which grip meets the task you have set. Keep that question visible when comparing your own training with another lifter’s clip.

Powerlifting Shirts & Lifting Gear
Powerlifting shirts and gym gear for squat, bench and deadlift lifters who live for heavy numbers.

I Love Deadlifts Gym | Funny Valentine's Weightlifting Sticker
Put “I Love Deadlifts” gym humor on your laptop, bottle, or gym gear.

Do You Even Deadlift Sweatshirt
Keep things casual with a little “Do You Even Deadlift” attitude.

Deadlift Skull Cyberpunk Powerlifting Pullover for Leg Hoodie
Show off your leg-day humor in a laid-back “Deadlift Skull” hoodie.

Deadlifter Life Shirt – Halloween Ghost T-Shirt
Rep “Deadlifter For Life” humor in and out of the gym.


Defy Gravity Isaac Newton Deadlift Meme Science T-Shirt
Heavy lifts, good laughs, and a little “Defy Gravity” energy.

Meme – Shhh I'm Doing Math Plate Math Weightlifting T-Shirt
Heavy lifts, good laughs, and a little “Shhh I'm Doing Math Plate Math” energy.

Platehead Skull Powerlifters & Weightlifters Meme Top Tank Top
Show some personality between sets with “Platehead”.

Deadlift Lovers – Grim Reaper Skeleton , Bros & Leg T-Shirt
Rep “Deadlift Lovers” humor in and out of the gym.

Skeleton Deadlift – Meme Deadlift Lovers, Leg Day & T-Shirt
Heavy lifts, good laughs, and a little “Skeleton Deadlift” energy.
Build a repeatable practice step before chasing load
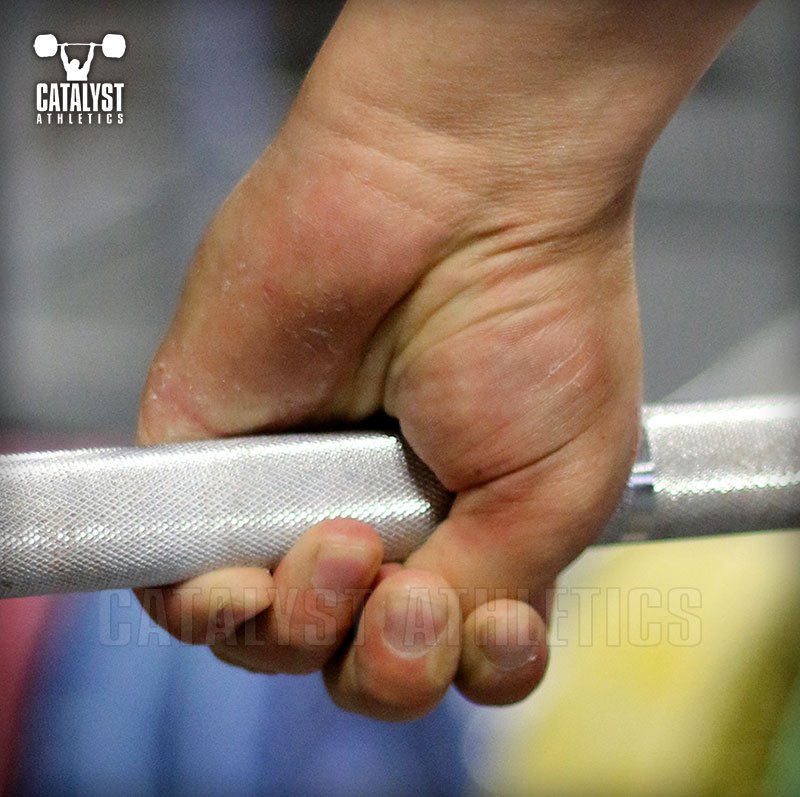
Start with a bar and load you can handle confidently using the intended exercise. The first goal is to find the same hand position repeatedly. You should be able to set the grip, perform the planned movement and return the bar with control. A heavier attempt that immediately changes the setup gives you less useful information about whether the skill is improving.
Here is an editorial practice example, not a tested training protocol: choose a small portion of your normal warm-up for deliberate grip practice. Keep the exercise and bar consistent. Make a brief note after the set about whether the thumb stayed wrapped and whether you had to reset. The point is to create a clear observation, not to add a second exhausting workout.
If that step becomes reliable, change one part of the task. You might use the same setup on another suitable warm-up set, or make a modest load increase within work you already control. Avoid increasing the load, repetitions and exposure all at once. If the hold deteriorates, return to the version that lets you practise the intended position.
Different lifters become comfortable at different rates. There is no deadline by which the grip must feel natural, and a difficult first session does not predict the final result. Equally, repeated pain is not a requirement to prove commitment. Stop and reassess an attempt that causes sharp pain, numbness or a loss of control.
Changing bars also changes the comparison. Shaft diameter, surface condition and knurling can affect how a hold feels. Note a switch rather than assuming that yesterday’s result should transfer perfectly. Consistency helps you identify what improved and what merely became a different task.
Give straps and grip work separate jobs
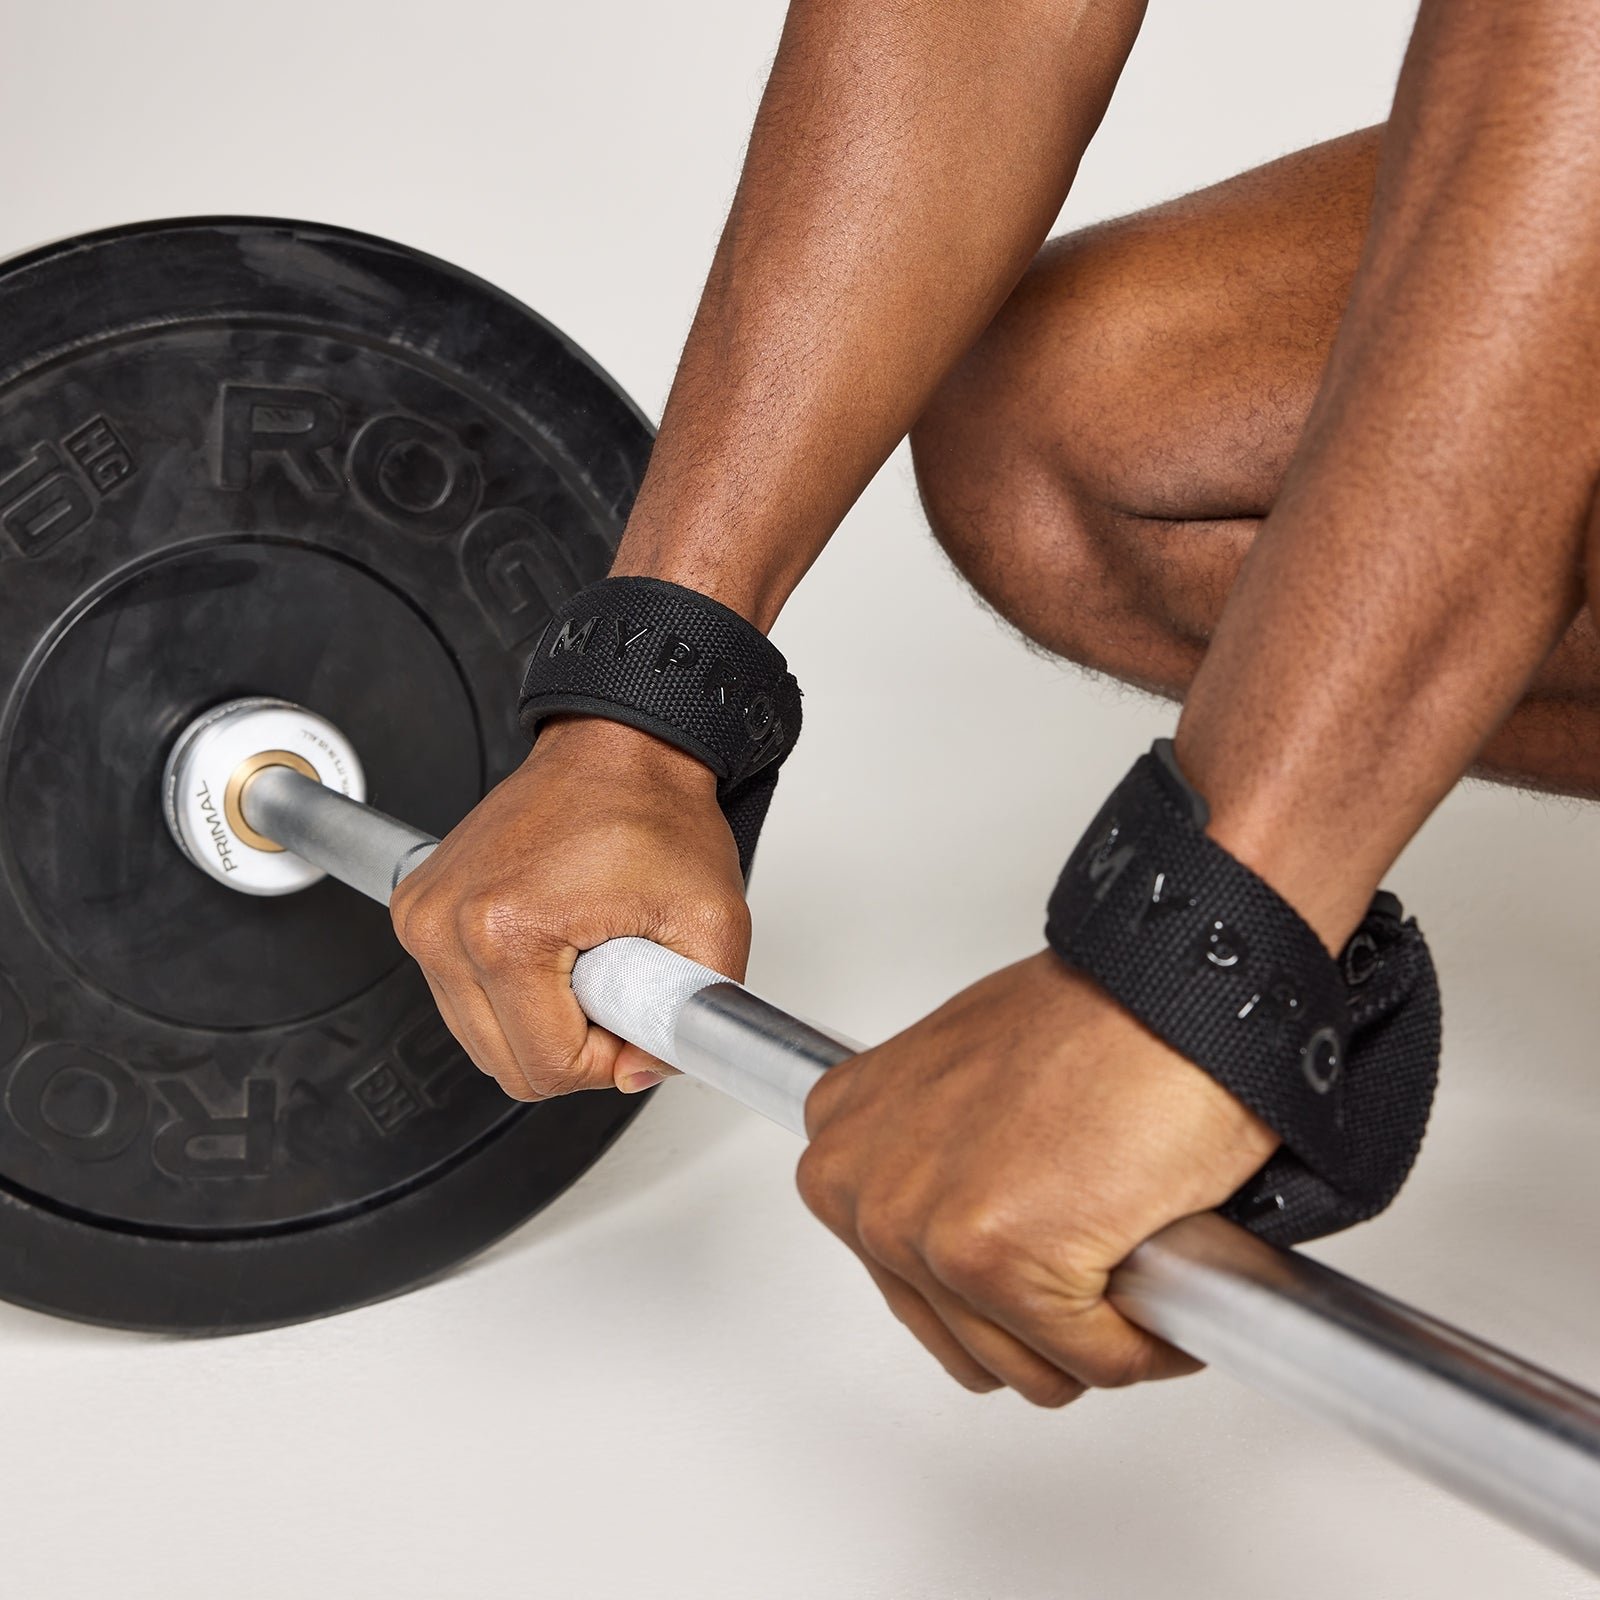
Straps connect the hand and wrist to the bar in a different way from an unassisted grip. They can help a lifter complete pulling work when holding the bar would otherwise be the limiting factor. That does not make a strapped set equivalent to an unassisted grip test. Both entries can be useful in a training log if they are labelled accurately.
A practical plan can distinguish grip practice from work intended mainly for the larger pulling muscles. For example, you might keep a manageable warm-up unassisted and use an appropriate aid for a separately planned set. That is a way to organise goals, not a rule that everyone should use straps or that every exercise is suitable for them.
Learn the intended use and release of any strap before loading it. A deadlift, a pulling variation and a lift involving a catch do not present identical demands. Do not transfer a setup from one movement to another simply because both start with a barbell. If you are unsure how the aid affects the full movement, get instruction before using it there.
The bar and plates deserve attention too. Select equipment appropriate to the exercise, secure the load as required and keep the training area clear. Bars, change plates, collars and pulling aids offer different functions. The equipment below is a comparison selection for those jobs; it is not a claim that buying an accessory automatically improves hook-grip technique.
Other grip tools can create their own exercises, but they do not reproduce the exact thumb-and-finger arrangement of a barbell hook grip. Treat improvement on a thick handle or a separate forearm drill as progress on that task. Then check whether your barbell setup actually became more consistent rather than assuming transfer.

Equipment Worth Exploring
Explore equipment, accessories and gear from our carefully selected range.


Competition Plates
Competition-style bumper plates for Olympic lifts and loaded strength training.


Leather Lifting Straps
Padded leather straps support grip during heavy rows, deadlifts and pulling exercises.


Grip Plates
Rubber-coated weight plates with handholds for loading barbells and machines.
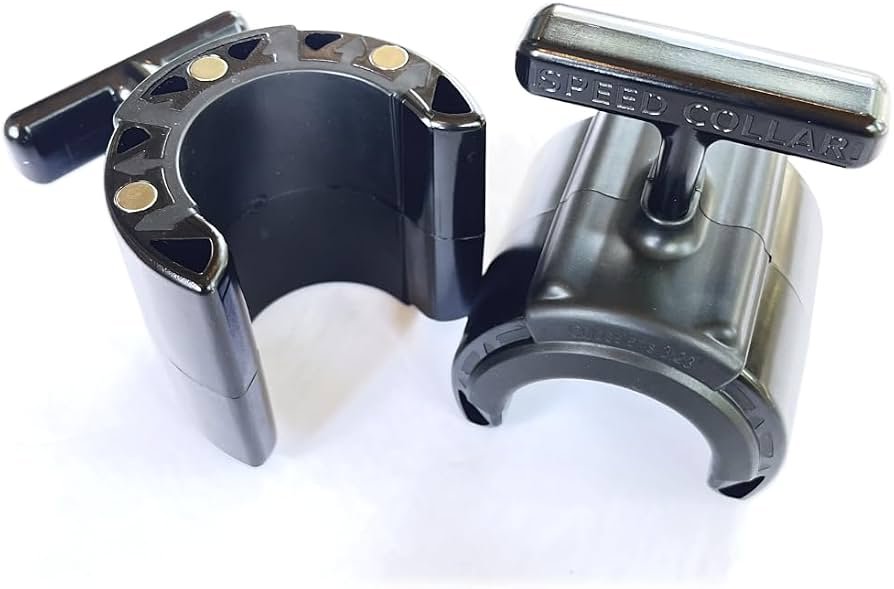
Speed Collar
Quick-release collars designed to secure weight plates on standard two-inch Olympic bars.
Use tape and a simple log without hiding the setup
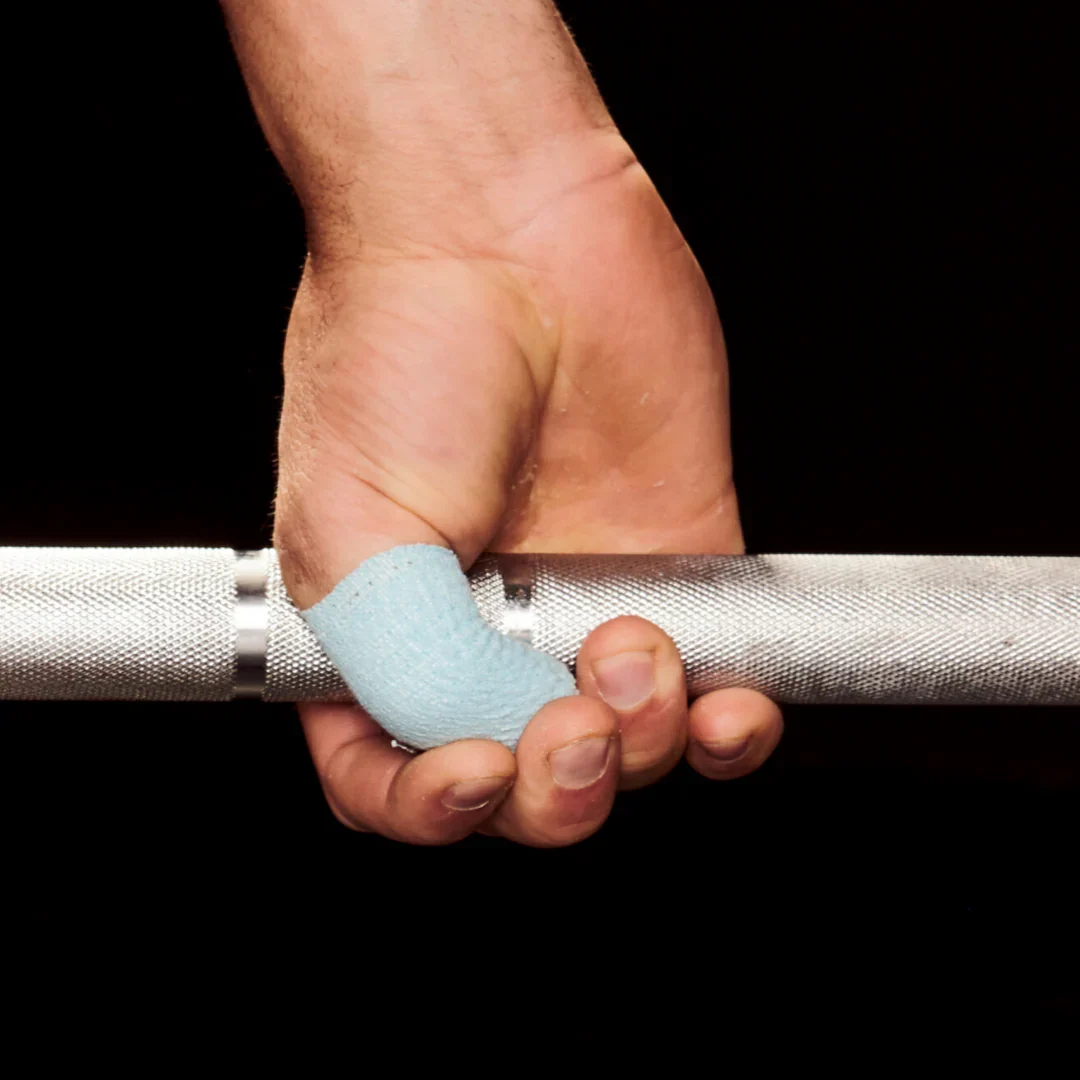
Thumb tape can change friction and the feel of contact with the bar. It does not create a hook grip by itself. A taped thumb still needs to wrap around the shaft and be secured by the fingers. Someone can wear tape while using a conventional overhand grip, so the presence of tape in a photograph is not enough to identify the technique.
If tape is used, it should allow the movement needed for the grip. Do not make it so restrictive that the thumb can no longer assume the intended position. Review the setup after applying it rather than assuming more layers produce a better hold. Tape is an aid to a technique you still have to learn.
A short log can keep the process honest. Record the exercise, the bar if it changed, the load and whether the set used hook grip, another grip or straps. Add one observation such as consistent placement or reset needed on the final repetition. That is more informative than writing grip felt bad without saying what actually happened.
Review several comparable sessions before drawing a conclusion. A secure setup on manageable work is a useful result even when the heaviest lift has not changed. If you cannot find a comfortable, controlled version, seek a technique check rather than forcing the same difficult attempt repeatedly. The next step should respond to what you observed.
A useful hook grip is a skill you can apply deliberately. Learn the thumb placement, choose the right task, practise with control and label the work clearly. The goal is to hold the bar for the lift you intend to perform, with fewer guesses about why the grip succeeds or fails.