Advertising disclosure: This page includes affiliate product links that may earn us a commission, as well as products from our own store.
Turkish Get-Ups: Master the Five Transitions Before Going Heavy
A Turkish get-up begins with your back on the floor and ends standing, one arm reaching overhead the whole way. Between those positions are several smaller skills: rolling onto an elbow, posting a hand, lifting the hips, sweeping a leg underneath and rising from a lunge. Each transition changes how the floor supports your body and how much control your shoulder needs.
That is why the best first goal is not a huge kettlebell. It is a slow, repeatable route through the positions, with enough reserve to reverse them. Here is how to build the movement from the ground up, understand its limits, and progress without confusing heavier with better.
Build the floor setup before lifting a kettlebell
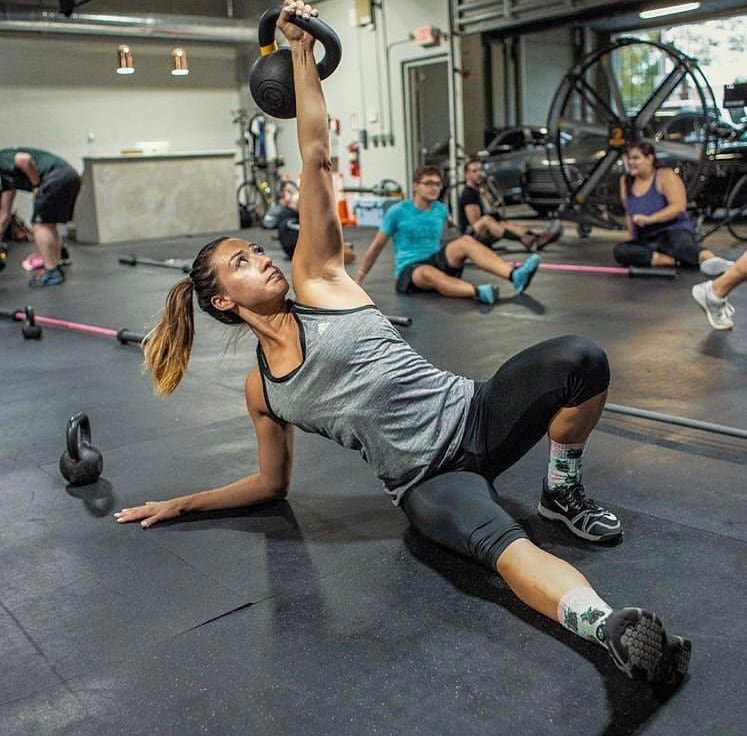
The Turkish get-up is not simply a sit-up followed by a lunge. It is a sequence in which the shoulders, trunk and hips keep reorganizing around one arm overhead. The challenge is holding a dependable position while the rest of the body moves. That makes it an excellent skill exercise, but a poor choice for rushed reps or showing off with a weight that cannot be controlled.
Begin on a clear, nonslip patch of floor with enough room to roll, extend the free leg and step into a lunge. A thin, stable mat can make kneeling more comfortable. Thick foam that shifts under the supporting hand can make the movement less predictable. Remove spare dumbbells, plates and bags from your path before the first repetition.
For your first sessions, use an empty fist rather than a kettlebell. You can try balancing a light shoe on the knuckles of your vertical arm to test whether you keep that hand facing the ceiling. This is a coordination drill, not a strength test. If the shoe tilts or drops as you change position, make the range smaller and practice the awkward stage separately.
For a right-hand get-up, lie on the right side, draw a light bell close with both hands, then roll onto your back before bringing it above the chest. The loaded-side knee bends, with the right foot planted; the left leg and left arm angle outward to provide room and a wide base. Keep the wrist approximately straight, the handle secure and the forearm pointing upward. Bring the weight back to the body with both hands when you finish instead of letting the bell fall to the side.
A dumbbell can work, although the balance feels different. Kettlebells hang around the forearm, while dumbbells distribute weight at both ends of the handle. That change affects how the wrist and arm respond during transitions. Starting with a lighter implement than your usual overhead press is sensible: the hardest part of a get-up is often not the vertical press, but stabilizing the arm while your base changes underneath it.

Equipment Worth Exploring
Explore equipment, accessories and gear from our carefully selected range.


Cast Iron Kettlebells
Textured cast-iron kettlebells for swings, squats, carries, and full-body training.


Rubber Hex Dumbbells
Rubber-coated hex dumbbell pairs with a stable shape for home and commercial strength training.

Leather Wrist Grips
Padded leather lifting grips help support the hands and wrists on heavy pulling exercises.


Roll to the elbow, then post the hand
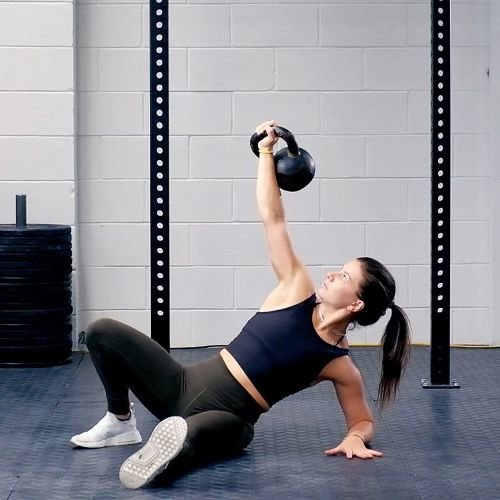
Start by pressing the bent-side foot into the floor and turning through the trunk toward the opposite elbow. With the bell in the right hand, move onto the left elbow. Think of rotating your chest diagonally rather than crunching straight forward. Your free forearm supplies support; your lifted arm stays stacked rather than reaching sideways to rescue the movement.
Pause once the elbow is down. You should be able to breathe and hold the overhead hand still for a second or two. If the elbow slides or the shoulder feels jammed, return to the starting position and adjust the free arm’s angle. The opposite elbow normally lands out to the side of the body, not directly beneath the ribs.
Push from the elbow onto the palm of that same hand. Place the supporting hand where it allows a strong, nearly straight arm without forcing the supporting shoulder to shrug. Your eyes can follow the bell during the early floor phases, but avoid twisting the neck into an extreme position merely to stare at the handle. Keep the rib cage controlled instead of flaring it to manufacture extra overhead range.
Two mistakes dominate this stage. First, people try to launch themselves upward with the loaded shoulder, turning the get-up into a crooked weighted sit-up. Second, they set the free hand too close to their hip and then have no room to move the hips off the floor. A few deliberate elbow-to-hand repetitions on each side usually teach more than one exhausting set of full get-ups.
Practice one checkpoint at a time: back to elbow, pause; elbow to hand, pause; then reverse both moves. A coach or training partner can watch whether the bell remains over the supporting shoulder and whether the free hand is planted firmly. The goal is not a perfectly frozen torso; it is controlled rotation with the load staying above a stable arm.
Raise the hips and sweep the leg underneath
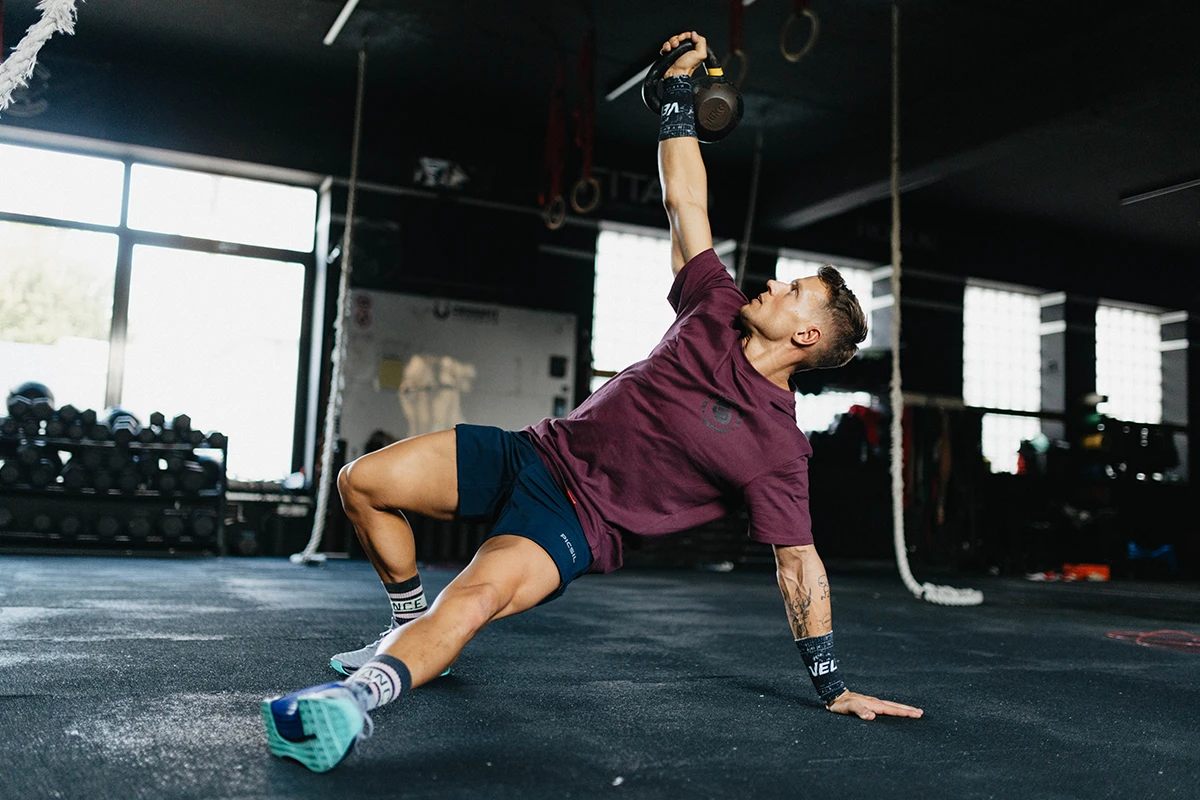
From the hand-supported sit, press through the planted foot and supporting palm to lift the hips. This creates room for the long leg to move underneath you. A full, dramatic bridge is not necessary for everyone; enough clearance to sweep the leg without dragging the knee painfully across the floor is the useful target. Keep the shoulder holding the bell working upward rather than allowing the arm to droop behind the head.
The sweep is where a slow exercise often becomes a scramble. Move the straight leg back under the body and place its knee on the floor, aiming for a stable position that lets the planted front foot and back knee share the task. Your free hand can remain on the floor while the leg travels. Avoid racing to remove that hand before the knee has reached a dependable landing spot.
Once the knee is down, shift the hips under the torso so that the body can rise into a tall half-kneeling position. The arm that was supporting you on the floor comes away only after your base is ready. As your torso becomes more upright, arrange the back shin and front foot so you are not balancing on a narrow tightrope. If your hips are stiff, practice the sweep without the bell, separately from the lunge.
The exercise demands both mobility and strength, but those qualities cannot be separated neatly. Hips need enough movement to let the knee travel under the torso; glutes and trunk need to control that movement; the shoulder needs to remain steady as the supporting hand and body position change. None of that proves the get-up is inherently superior to dedicated shoulder or leg exercises. Its value is combining demands that often appear separately in a gym program.
For a common regression, train only up to the high bridge or sweep and return to the floor. Another option is a half get-up from the back to the supported hand. The best partial variation is the one that addresses the stage where your bell starts drifting, without allowing fatigue to hide the error.
Stand cleanly and reverse every step
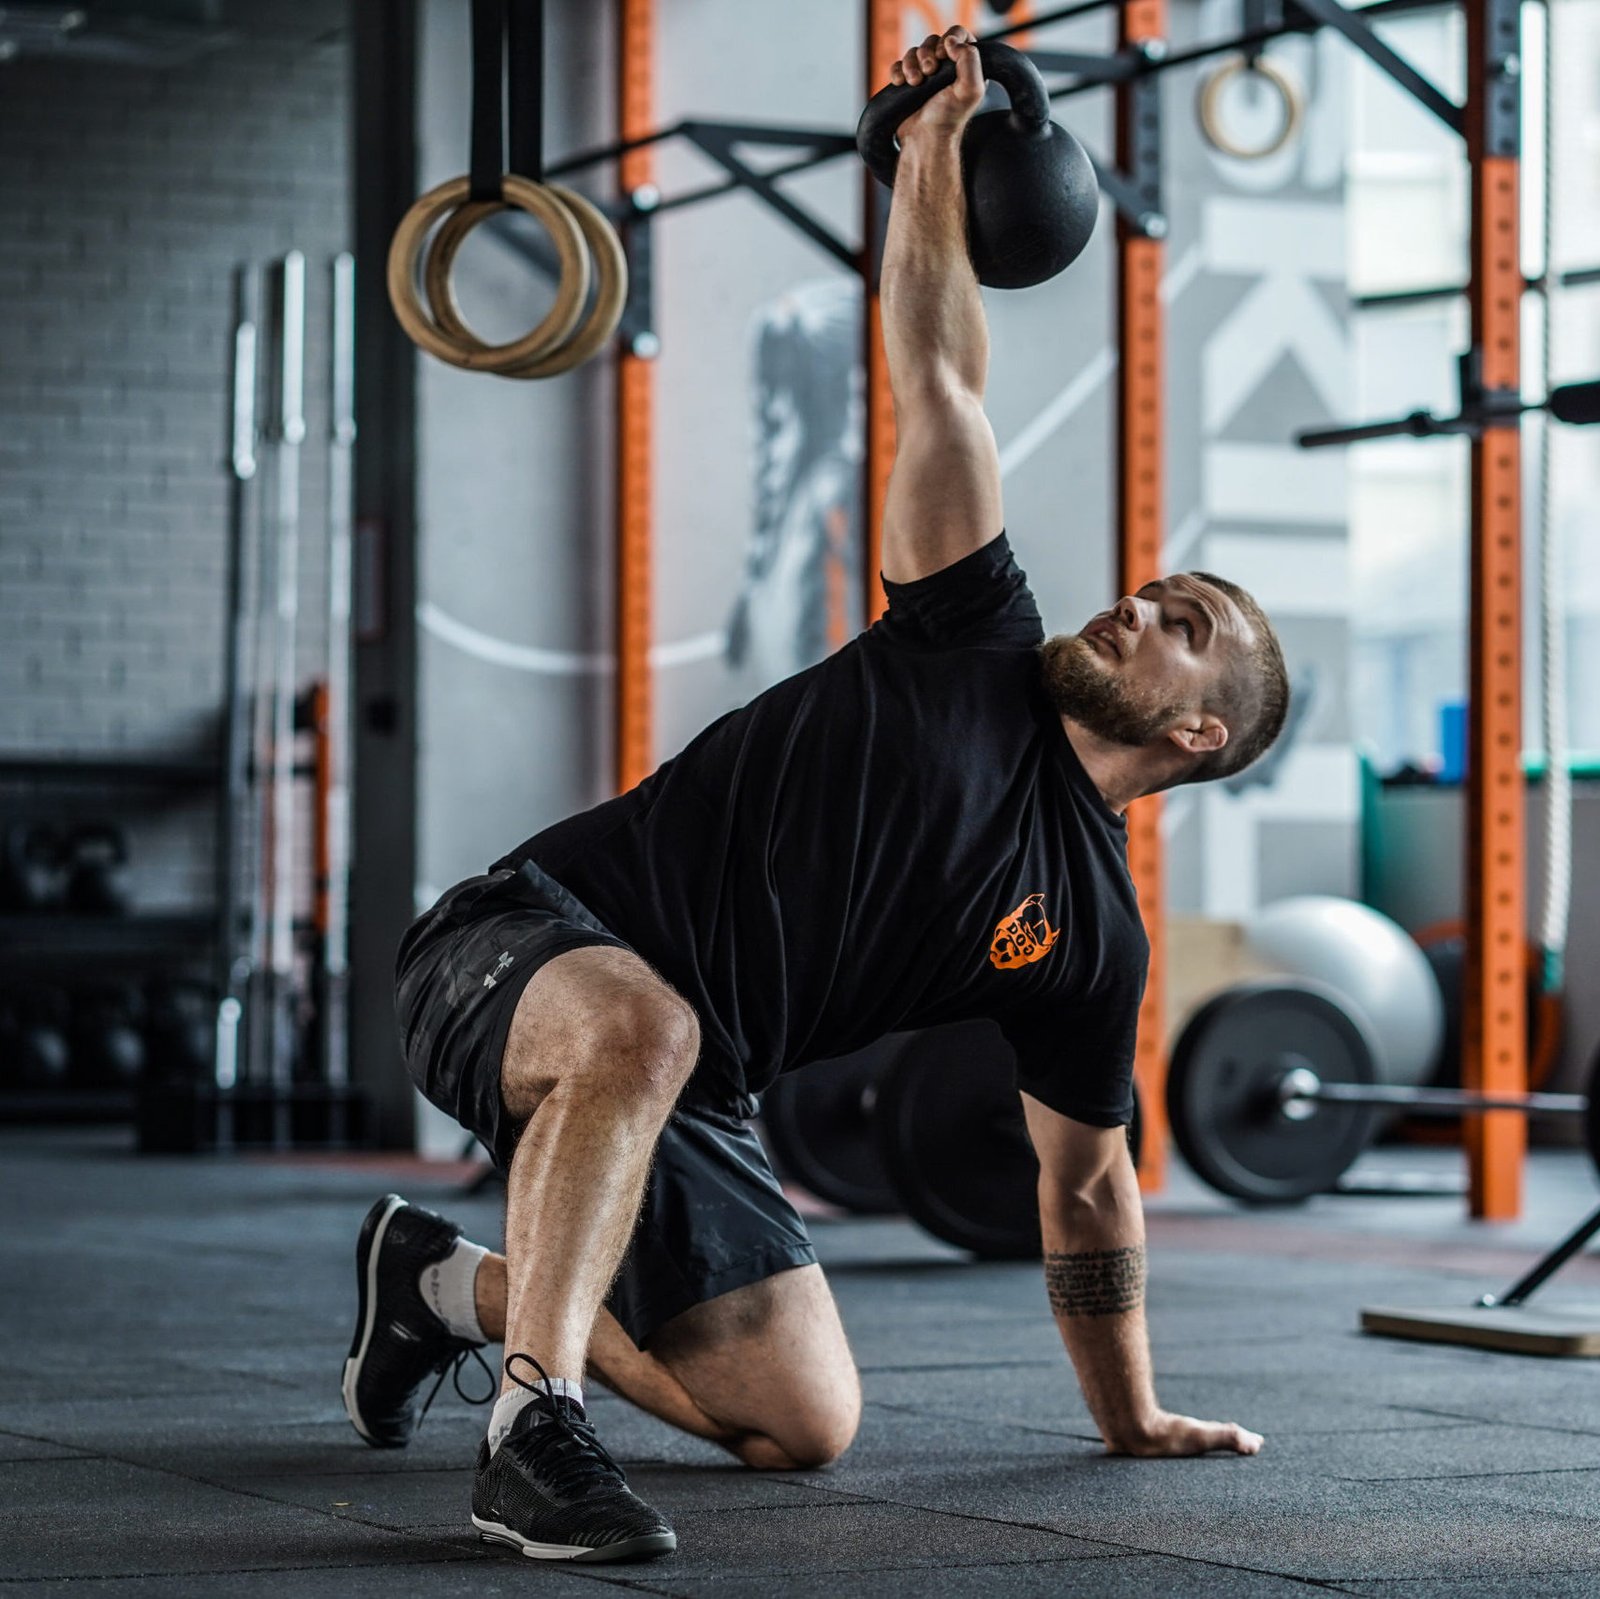
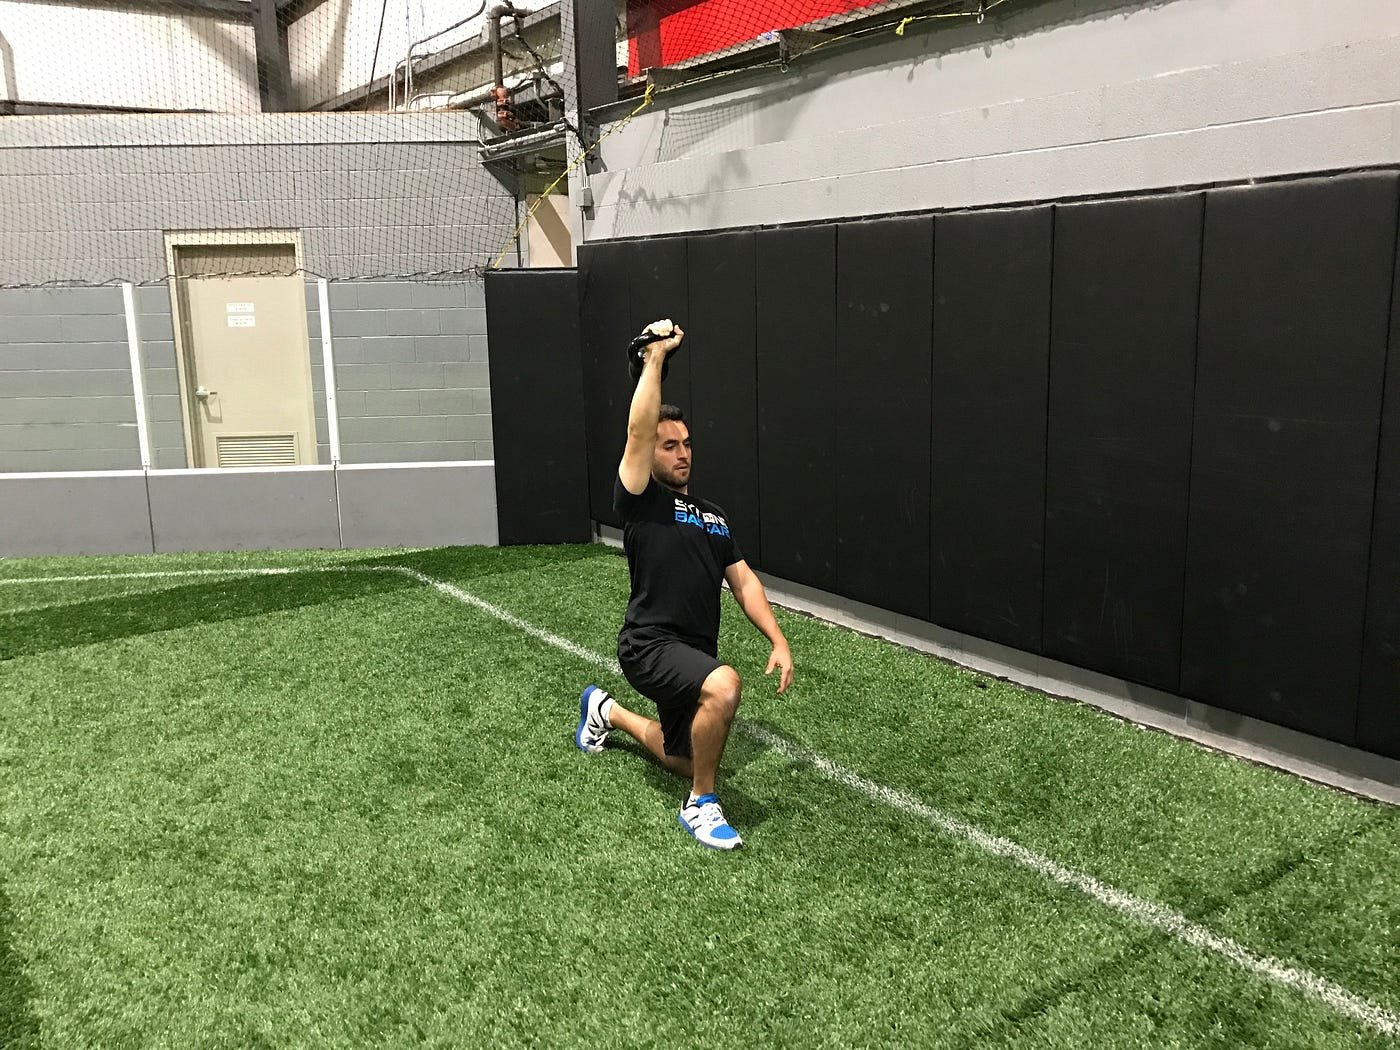
From the upright half-kneeling position, plant the front foot securely, brace gently and stand as you would during a controlled lunge. The loaded arm remains high, but its elbow should not have to bend and re-press the bell on the way up. Bring the feet together only when you have established a stable standing position. One complete repetition also includes the return to the floor.
For the descent, step back into the lunge, lower the back knee, then hinge the torso toward the free side until the supporting hand can reach the floor. Place the hand deliberately; do not collapse onto it. Move the rear leg forward through the available space, lower the hips, return from the palm to the elbow and finally roll onto the back. Keep the bell under control throughout instead of treating the downward half as an afterthought.
If standing is the hardest stage, practice unloaded half-kneeling lunges while one arm reaches overhead. If the hand-to-floor transition is awkward, rehearse the reach and sweep without a bell. A smaller, smoother movement beats forcing a deep lunge or an overhead position your shoulder cannot comfortably own. The descent is a useful test: a load that went up but cannot come back down through the same checkpoints may be too ambitious.
Maintain a comfortable breathing rhythm rather than holding your breath through the entire exercise. Short bracing efforts can make the transitions steadier, but you should still be able to reset between steps. Keep the hand under the handle, the arm controlled and the body moving at a pace that allows corrections. Stop if you experience sharp shoulder, wrist, hip or back pain; modify the movement or seek qualified assessment rather than pushing through it.
The Turkish get-up is often promoted as protection against injury, but a complex movement pattern by itself is not proof of injury prevention. Think of it as a trainable combination of floor mobility, unilateral control and overhead stability. Lifters with limited overhead tolerance can use unloaded versions or choose different exercises that suit the joint better.
A six-week progression for better get-ups
Two brief practices per week are enough to give this skill regular attention without swallowing an entire lifting session. Work when relatively fresh, preferably after a general warm-up rather than at the exhausted end of a hard shoulder workout. At every session, keep the same sequence on both sides and compare quality rather than competing for a record number of repetitions.
Weeks 1–2: learn the map. Practice unloaded roll-to-elbow and elbow-to-hand transitions for two or three controlled reps per side. Add two or three unweighted bridges and sweeps per side, then rehearse the half-kneeling-to-standing phase. Once the checkpoints connect smoothly, attempt one full unloaded get-up and one controlled return each side. Do not hurry the loading decision.
Weeks 3–4: connect the movement. Perform two sets of one or two complete unloaded get-ups per side, pausing at elbow, hand, knee and standing checkpoints. If everything stays stable, hold a light shoe above the fist or use the lightest manageable kettlebell for single repetitions. Rest as long as needed to maintain similar control on the second side. This is deliberately a technique prescription, not a test of aerobic capacity.
Weeks 5–6: add small, measurable challenges. Use a light bell for two or three sets of one to two clean reps on each side. Keep a one-second pause in the hand-supported, half-kneeling and standing positions. If the bell wobbles on the sweep or the knee drops during the descent, return to the previous load or shorten the session. Progress first by removing hesitation and improving symmetry; only then consider a small increase in bell weight.
On non-get-up days, ordinary strength work can still build the component qualities: split squats or lunges for leg drive, side planks for trunk control, easy bridges for hip extension, and presses or carries for suitable overhead endurance. These are not mandatory prerequisites. They are ways to address an identifiable weak link without rehearsing a difficult movement in a fatigued state.
Record four things in a training note: load used, number of completed singles per side, any stage where the arm lost its vertical line, and whether the descent looked as smooth as the ascent. A technically convincing get-up with a modest bell tells you more than a heavier lift with several missed hand placements. Over six weeks, the clearest improvement may be that the movement becomes quiet, repeatable and easy to explain.

Functional Fitness Shirts & Workout Gear
Functional-fitness shirts, tanks and workout gear for athletes who train strength, conditioning and everything in between.

Grunge Kettlebell Shirt Rock Music & Gymbros Top T-Shirt
Rep “Grunge Kettlebell” humor in and out of the gym.

Poisoned Apple Kettlebell : Enchanted Fairy Tale T-Shirt
Show some Halloween attitude with a playful “Poisoned Apple Kettlebell” tee.

Punisher Kettlebell Shirt – Meme & T-Shirt
Make gym days more fun with “Punisher Kettlebell” style.

Break The Stereotype | Feminist Workout Sweater For Str T-Shirt
For laid-back days and gym-girl humor: “Break The Stereotype”.

Pineapple Kettlebell – Kettlebell Meme Hooded Pullover Hoodie
Make your off-duty look more fun with “Pineapple Kettlebell”.

Strawberry Kettlebell – Viral Kettlebell Meme Vest Musc Tank Top
Train hard, laugh a little, and rep “Strawberry Kettlebell”.

Watermelon Kettlebell – Fruit Themed Workout Decal for Sticker
Stick a little “Watermelon Kettlebell” humor on your favorite gear.

OnlyGains Kettlebell Meme Decal Water Bottles & Sticker
Stick a little “OnlyGains” humor on your favorite gear.


Atlas Kettlebell Earth Lifting – Meme Top T-Shirt
Rep “Atlas Kettlebell Earth Lifting Graphic” humor in and out of the gym.
The most impressive get-up is often the least dramatic one: a steady wrist, a clean leg sweep, a controlled stand and an equally controlled return. When each checkpoint feels deliberate, the load can become a useful training variable instead of the thing dictating your technique. If a stage remains uncomfortable, keep practicing the parts that work and choose exercises that fit your actual range.