Advertising disclosure: This page includes affiliate product links that may earn us a commission, as well as products from our own store.
The landmine Romanian deadlift gives a familiar hip-hinge movement an unusual feature: one end of the bar follows an arc around a fixed anchor rather than traveling freely through space. That can make the load easy to locate and the setup feel more contained, but it does not automatically fix a rounded back, an unstable stance or a poorly controlled repetition. The lifter still needs to move primarily at the hips, keep the weight close and choose a range that the hamstrings can tolerate.
For most training plans, the main attraction is a repeatable way to practice the hinge and load the glutes and hamstrings without a second rack or a lengthy equipment change. The important questions are more practical than whether the movement looks unusual: Where should your feet be relative to the anchor? How much knee bend makes sense? And how do you progress when the free end of the bar does not behave exactly like an ordinary barbell?
What a landmine changes about the Romanian deadlift
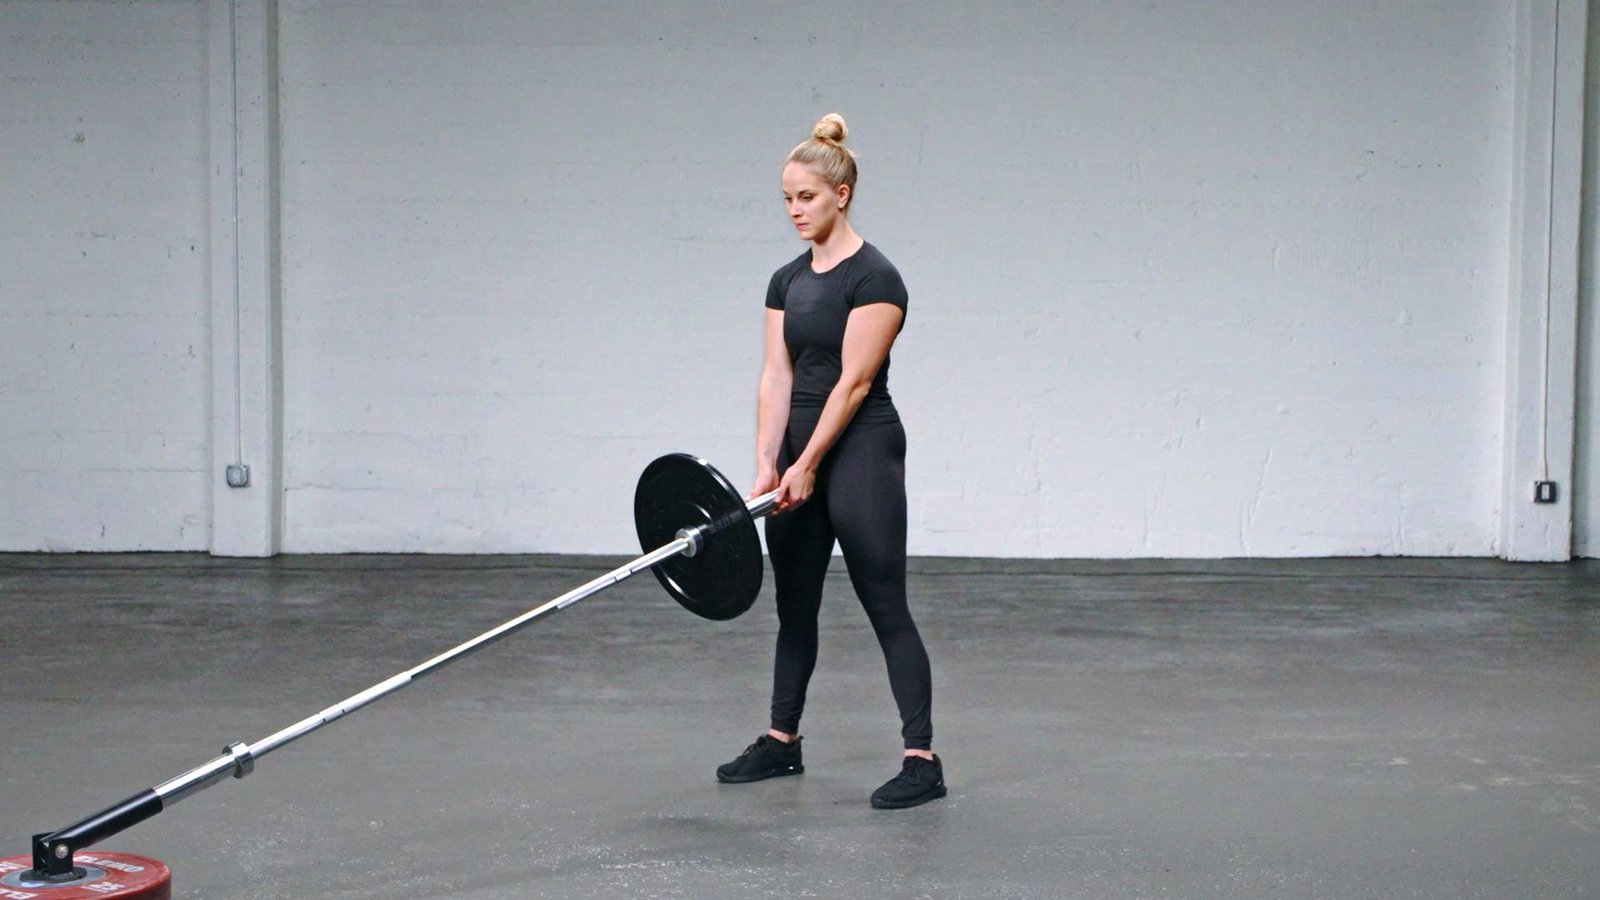
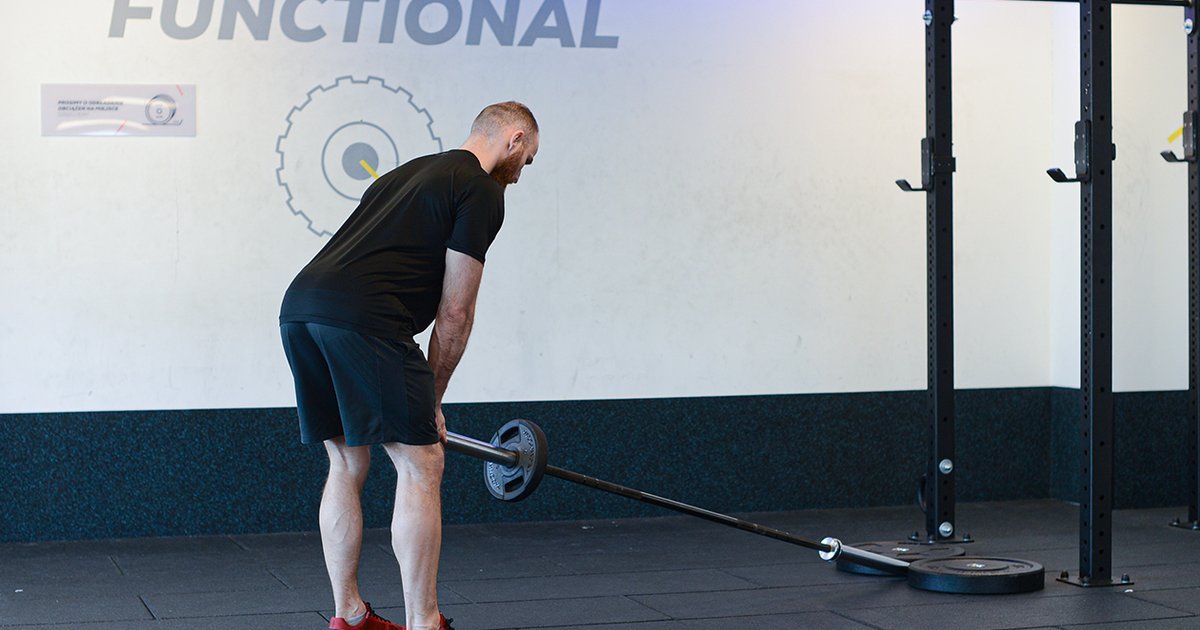
In a conventional Romanian deadlift, both hands hold a freely moving bar that usually travels close to the thighs and shins. With a landmine, one end of the bar rotates in a floor-mounted sleeve or a securely fixed corner. The free end therefore follows a curved path. Where you stand changes how the resistance feels throughout that path. A landmine RDL remains a hip-dominant exercise, but its line of resistance is not interchangeable with a straight-bar or dumbbell RDL.
The hamstrings resist hip flexion and help extend the hips as you stand. The gluteal muscles also contribute substantially during hip extension. Your trunk muscles work to maintain position while the legs and hips move. That is why the exercise can be useful for posterior-chain training even though you are not squatting deeply or pulling a heavy bar from the floor on every repetition. The visible motion should mostly be a backward movement of the hips, not a series of knee bends.
A landmine attachment should be considered a loading variation rather than a proven shortcut to greater muscle growth. There is no reason to claim that its curved path automatically recruits more hamstring fibers, prevents injury or builds the back better than a conventional RDL. Those outcomes depend on far more than the attachment: resistance, range, effort, weekly training volume and the consistency of your technique all matter. The equipment changes the constraints; the lifter still creates the stimulus.
The exercise also has a useful limitation. Because the bar rotates, its horizontal and vertical force components change as it moves. Consequently the number of plates on the bar does not tell you precisely how much force you feel at the hands throughout a repetition. Compare your landmine sessions using the same anchor, stance and loading arrangement rather than assuming that an equal plate count matches a straight bar.
Anchor the bar securely and find your starting distance

Start by checking the anchor before picking up the weight. A purpose-built landmine sleeve must be firmly installed and allow the bar to pivot without rocking or lifting out. If you use a corner arrangement, protect the contact surfaces and make sure the sleeve or bar cannot slip. Keep the pivot clear of people and loose equipment. Load plates on the free sleeve, secure them with suitable collars when appropriate, and verify that the path will not run into a bench, rack upright or wall.
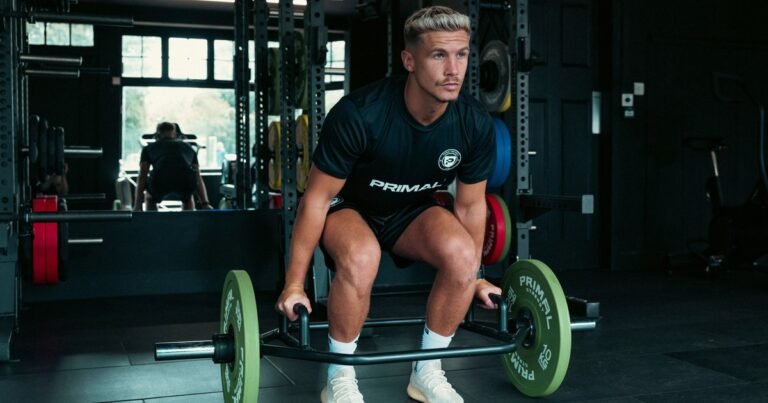
Face the free end of the bar and experiment with a stance roughly around hip width. Grasp the sleeve with both hands or use an attachment that permits a reliable grip. The bar should hang comfortably in front of your body without forcing your shoulders to roll forward. Keep the knees unlocked, distribute pressure across the feet and take a small step if needed to prevent the plate edge from striking your shins or the floor. Your exact distance from the pivot depends on your height, arm length and plate diameter.
Before adding load, make three slow practice hinges while the end of the bar is lightly loaded. Brace the abdomen, keep the ribs stacked over the pelvis, push the hips back and let the chest incline as a consequence of that hip movement. Pause when the hamstrings tighten or when maintaining your trunk angle becomes difficult. Stand by driving the feet into the floor and bringing the hips forward. A deliberate practice set is cheaper than discovering mid-set that the arc pulls you into an awkward position.
Keep your head roughly in line with your spine rather than craning upward to look in a mirror. Your shoulders can remain down and stable without needing to squeeze the shoulder blades violently together. If your stance has you reaching far out in front or leaning backward to keep hold of the bar, adjust your position. The setup should allow an unhurried hinge, not require you to fight the anchor on every rep.
Use your hips—not momentum—to move the weight
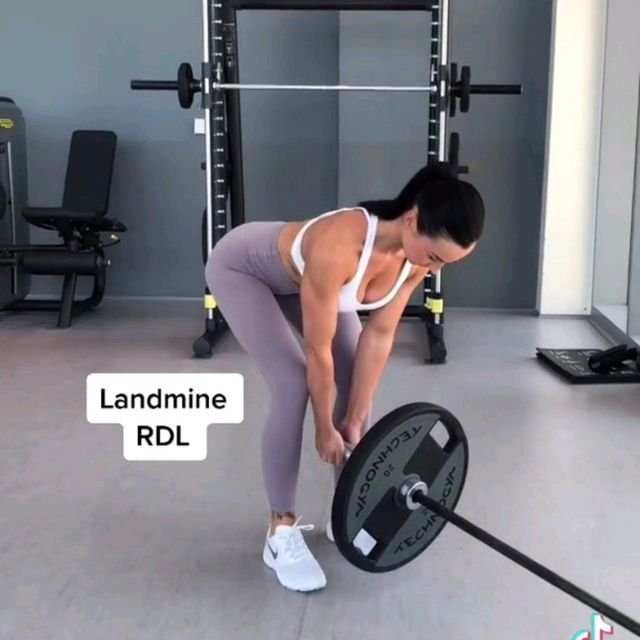
Think of the lowering phase as closing a car door with your hips while carrying groceries in both hands. The knees soften slightly, then stay at a fairly consistent angle as the pelvis travels backward. The torso tips forward because the hip joint flexes; the hands simply follow the bar along its prescribed path. This is not an upright row, a squat or a lower-back hyperextension. If the knees keep bending until the hips drop straight down, much of the intended hinge has been replaced by a different pattern.
Lower under control for roughly two seconds as a starting cue. Stop once you reach the depth where you can still hold a neutral, strong trunk and feel tension through the back of the thighs. You do not need the plates to touch the ground, and the movement does not become better merely because the bar reaches a lower point. Different limb proportions, hamstring tolerance and plate sizes produce different useful ranges. The bottom position is a technical boundary, not a contest.
To ascend, push through the midfoot, extend the hips and allow the body to stand tall without leaning dramatically backward. A clean finish has the ribs over the pelvis and the knees straight but not aggressively locked. Do not jerk the bar off the bottom or bounce it against the plates; doing so obscures whether you actually have strength and control through that portion of the range. A short pause at your chosen bottom depth is an effective way to expose the difference between control and momentum.
Grip can become the first limiting factor, especially with a thick sleeve and long sets. A secure handle attachment or lifting straps can make the exercise more manageable when they are already familiar and compatible with the hardware. However, do not add an adapter merely to compensate for a slippery or damaged part. If your hands fail while the posterior chain still has plenty to give, shorten the set or reduce the load and evaluate the setup rather than wrestling an unstable bar into position.

Equipment Worth Exploring
Explore equipment, accessories and gear from our carefully selected range.


T-Bar Row Attachment
Welded barbell attachment that connects a D-handle bar for landmine and T-bar rows.


Leather Lifting Straps
Padded leather straps support grip during heavy rows, deadlifts and pulling exercises.
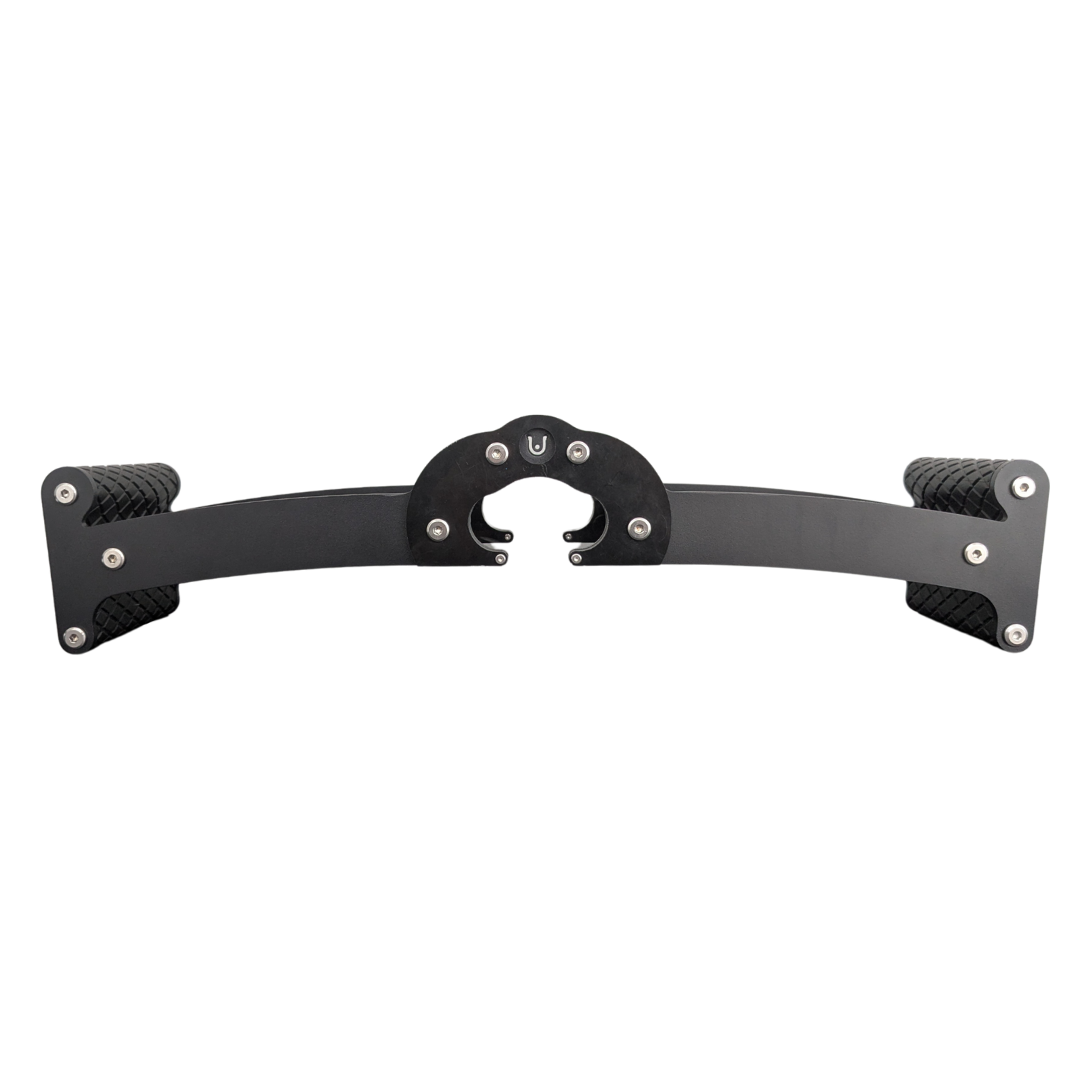
Back Bar
Multi-grip cable and landmine bar with a built-in deadlift jack.

Compare two-leg, staggered and single-leg variations
The two-leg landmine RDL is usually the easiest variation to teach and load. Both feet remain planted and the hands can share the bar, allowing attention to stay on the hip hinge. It suits a straightforward warm-up, supplemental hamstring training or a lower-body session where heavy conventional deadlifts are not the priority. The main variable to standardize is your distance from the pivot, because moving around changes the direction in which the bar tries to pull you.
A staggered-stance version moves one foot slightly behind the other, with most of the load on the front leg. This can emphasize the working side while retaining enough support to control balance. Start with a short step and keep your hips relatively square rather than turning the movement into a twist. Push the front hip backward and stop when that hamstring reaches a manageable stretch. Count both sides and avoid making the nonworking leg do an accidental full repetition.
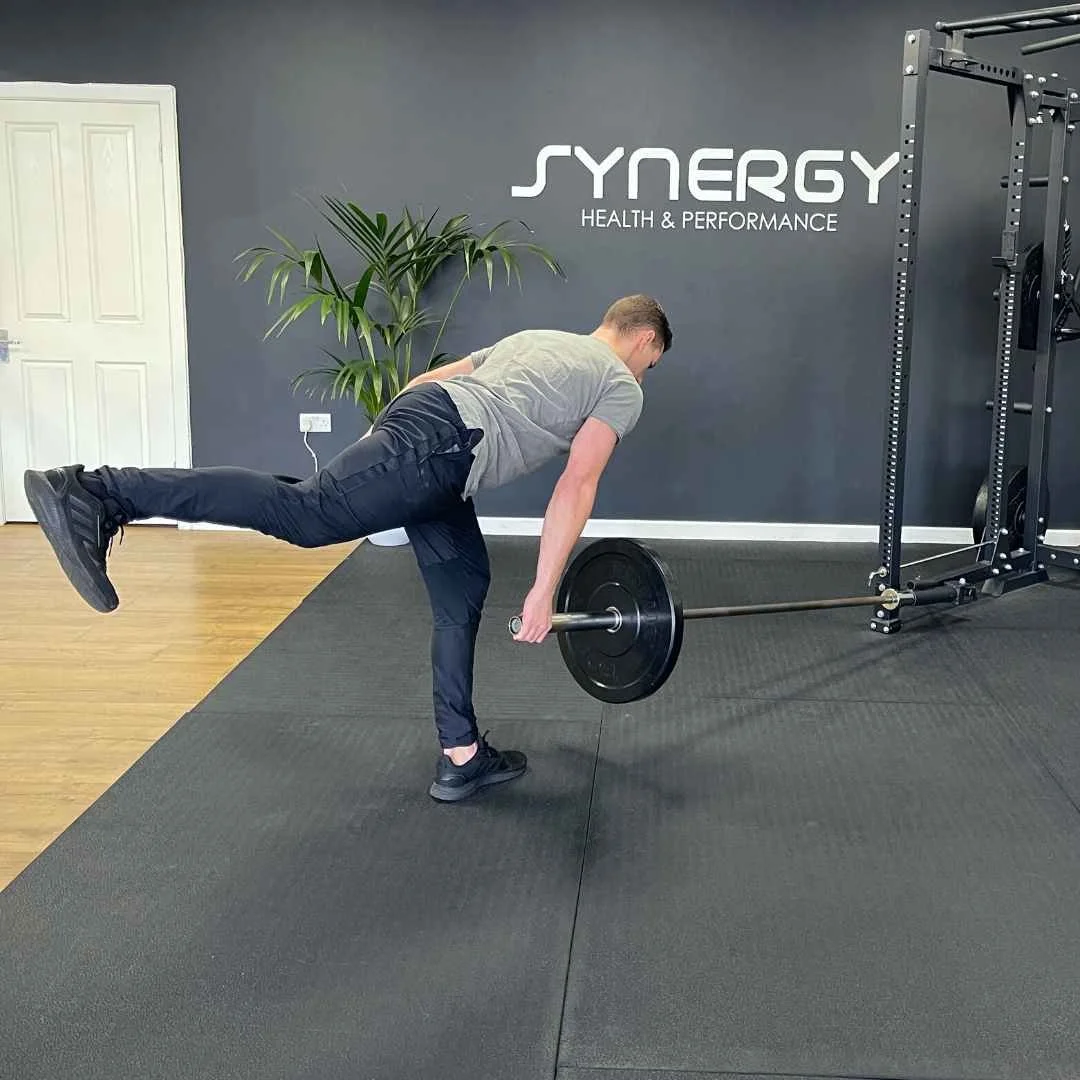
A single-leg landmine hinge demands considerably more balance. The free leg extends behind while the support leg maintains a slight knee bend. The landmine’s arc may help with the hand position but can also create an offset pull, depending on which side the handle is on. Do not assume the anchored bar guarantees stability. Use a wall or rack for light fingertip support while learning and choose less weight than you would for a bilateral version. The pelvis should stay reasonably level as the body folds.
For genuine single-leg strength, the most important comparison is not how impressive the weight looks. Use the same stance, hand placement, depth and support on both sides. A smooth supported set is often more productive than a longer unassisted set full of hopping and torso rotation. If unilateral work steals attention from the target muscles, keep the bilateral RDL as your main movement and use the single-leg version as lighter accessory work.
Build a four-week progression around repeatable reps
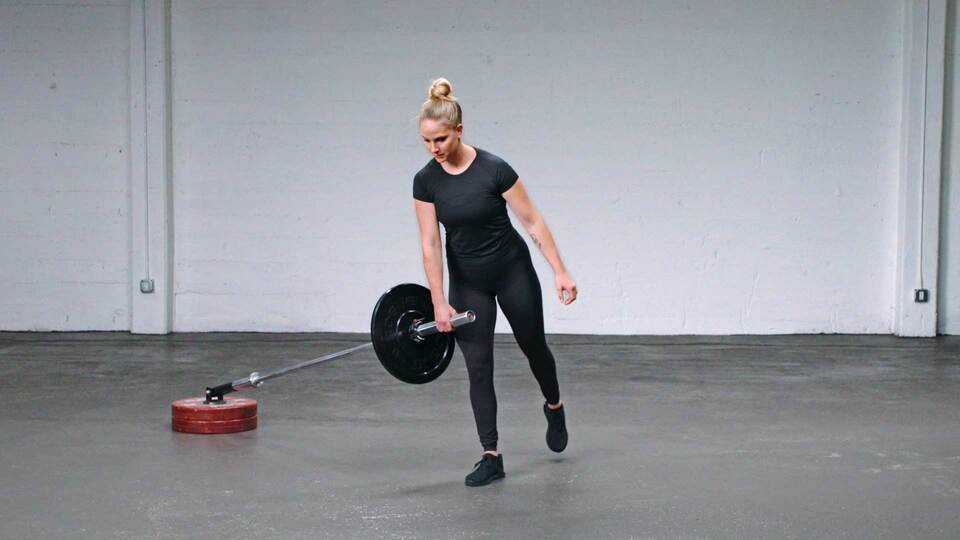
For a lifter who already knows how to hinge, two sessions per week can be enough to practice this variation without making it the centerpiece of every workout. Begin with two or three working sets of eight to twelve controlled repetitions at a load that leaves roughly two or three technically clean reps in reserve. Rest around ninety seconds to two minutes, extending that if breathing or grip prevents the next set from being equally controlled. First-week success means finishing the planned sets without shortening the hinge.
In week one, establish a comfortable stance, usable range and consistent tempo. Write down the plate loading, anchor height, handle choice, distance from the pivot and range you actually performed. In week two, keep those variables unchanged and add a repetition or two per set only if the torso and hips still behave the same way. You are trying to make the same exercise better, not quietly turning it into a shallower version so the number rises.
In week three, if all sets reach the top of the repetition range with two or more solid reps still available, increase the load by the smallest practical amount and return toward the bottom of the range. Plates at the free end can change leverage, so small changes are sensible. In week four, build those clean repetitions back up, or hold the load steady while improving control and bottom-position consistency. Treat the progression as a decision guide, not a requirement to increase every workout.
Place the exercise according to its purpose. If heavy squats or deadlifts are the day’s main lift, the landmine hinge may fit better afterward as two or three moderate sets. On a hamstring-focused day it can come earlier, with leg curls afterward for knee-flexion work. If soreness affects sprinting, sport or another lower-body session, reduce volume or move it farther away from those demands. Recovery is part of progression; accumulating fatigue is not automatically evidence of a better stimulus.

Leg Day Shirts & Workout Gear
Leg-day gym shirts and workout gear for lifters who never skip squats, lunges and lower-body punishment.

The Ultimate Deadlifter Shirt – Jesus Christ Bros & T-Shirt
Make gym days more fun with “The Ultimate Deadlifter” style.

Powerlift Deadlifts Powerage Album Parody AC/DC Heavy M Sticker
Put “Powerlift Deadlifts” gym humor on your laptop, bottle, or gym gear.

I Want You To Deadlift – Patriotic Uncle Sam 4th of Jul T-Shirt
For laid-back days and deadlift humor: “I Want You To Deadlift”.

I Love Deadlifts Valentine's Day Shirt | Black Heart We T-Shirt
Show some deadlift attitude with a playful “I Love Deadlifts Valentine's Day” tee.

Patriotic Eagle Deadlift Stars Stripes and Deadlifts Mu Tank Top
Bring “Patriotic Eagle Deadlift” humor to your next lifting session.

Deadlift Zombie Skull Gym Crewneck , Halloween Powerlif T-Shirt
Keep things casual with a little “Deadlift” attitude.

Deadlift PR or ER Horror Gym Shirt , Hardcore Halloween T-Shirt
Bring “Deadlift” humor to your next gym day.

Deadlift Post-Apocalyptic Skull , Hardcore Workout Pull Hoodie
Keep it laid-back with a little “Deadlift” attitude.

Trap Bar Deadlift Behold Thee Trap Bar Medieval Knight Sticker
Give your everyday gear a playful “Trap Bar Deadlift” twist.

Harley Quinn Booty Builder Gym Tank
Show some personality between sets with “Booty Builder”.
Correct common mistakes and know when to swap exercises
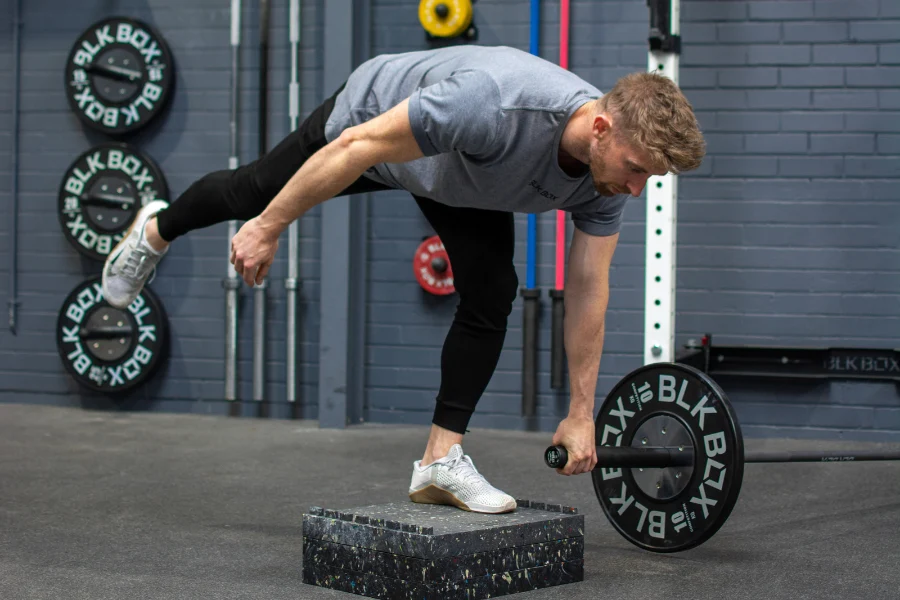
The most common mistake is turning a hip hinge into a squat. A lifter starts pushing the knees forward and dropping the hips, often because the plates hit the floor or the anchor position feels awkward. Move the feet, use a more manageable range and rehearse the backward hip motion with light loading. If the bar is too low at the start, raise it safely with appropriate plates or a stable starting arrangement rather than rounding the back to reach it.
Another error is chasing depth after the pelvis stops moving. That usually appears as the upper back curling, the shoulders being pulled forward or the lumbar spine changing position at the bottom. A small amount of individual spinal motion is unavoidable, but repeated loaded end-range collapse is not a useful target. Stop before losing trunk control and build tolerance gradually. The hamstring stretch is a cue, not a command to force the chest to the knees.
Grip and plate contact can also distort the lift. Loose attachments, a slipping bar end, oversized plates that strike the floor early or a sleeve that rotates unpredictably all deserve an equipment check. Do not attempt to correct these with extra speed or by twisting around the bar. For a unilateral version, repeated pelvic rotation or a swinging free leg usually signals that the load or balance demand has exceeded the goal. Use support, lighten the bar, or return to the two-leg version.
Finally, there is no obligation to keep the landmine version if the geometry does not suit you. Dumbbells allow each hand to travel freely beside the legs; a standard barbell makes the loading path familiar and easier to compare across sessions; a cable pull-through shifts the resistance direction; and a hip thrust may suit someone who wants an additional glute-focused movement without the same hinge range. Choose the variation you can load progressively, repeat safely and recover from. The best posterior-chain movement is the one whose stimulus you can actually measure and sustain.