Advertising disclosure: This page includes affiliate product links that may earn us a commission, as well as products from our own store.
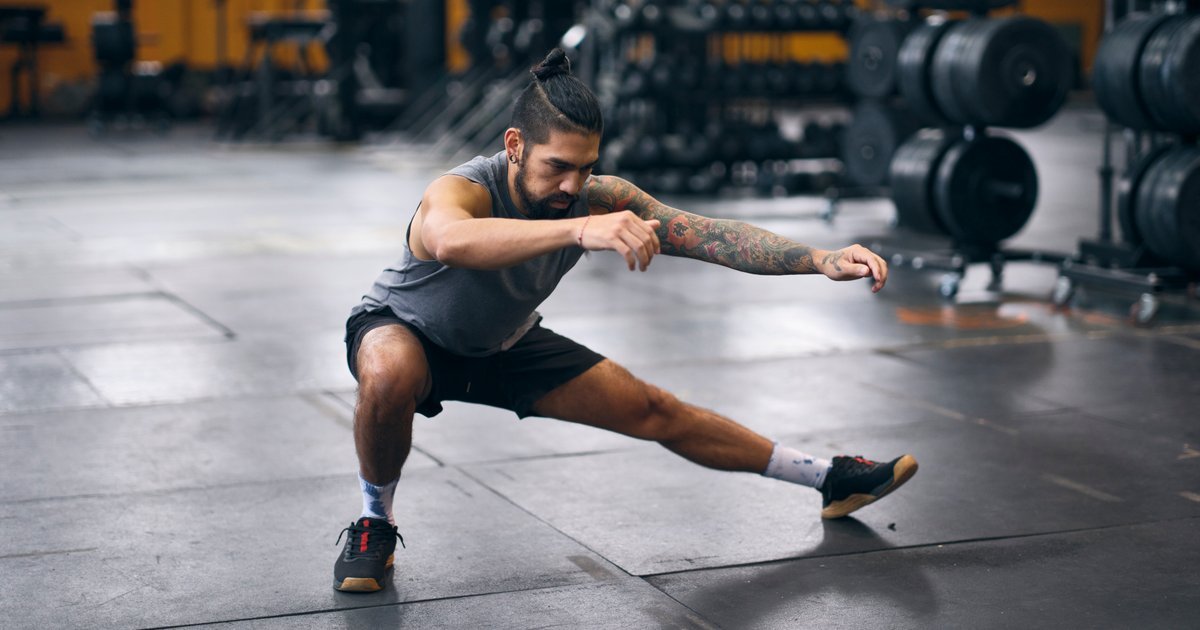
The Cossack squat looks like a deep side lunge, but the real challenge is not how close you can get to the floor. It is whether you can shift your weight sideways, keep the working foot rooted and control the opposite inner thigh as it lengthens. Done patiently, it is a useful accessory to conventional squats and hinges without requiring expensive equipment or extreme flexibility.
Here is how to choose your stance, solve the usual knee-and-heel problems, use assistance or a counterweight and practice the movement over six weeks without turning every rep into a forced stretch.
Why Cossack squats challenge a different kind of leg strength
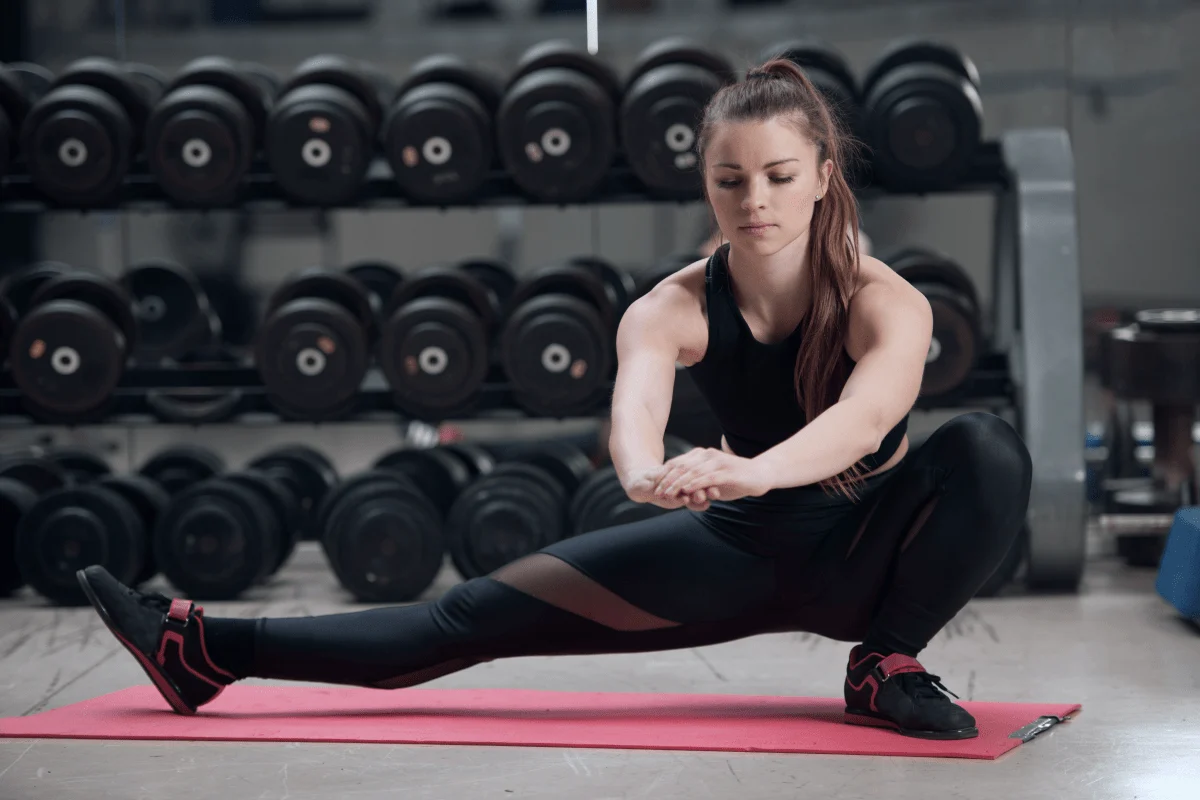
A normal squat mainly sends your body up and down. A Cossack squat asks you to shift sideways, keep one leg long and support most of your weight with the other. That changes the problem for your hips: instead of moving both knees and hips through nearly the same arc, you have to control a deep position on one side while the opposite inner thigh lengthens.
The bent leg performs much of the lifting through its quadriceps and glutes. The straight leg’s adductors and hamstrings experience a lengthened position, while your trunk works to manage a changing center of mass. Exact muscle contributions depend on depth, foot rotation, individual anatomy and whether you hold a counterweight. It is a useful combination of strength and active mobility, not a magical replacement for squats or a guaranteed cure for tight hips.
Think of the movement as a controlled lateral squat, not a contest to touch the floor. For many lifters, the first practical improvement is simply being able to shift more weight smoothly without twisting, falling onto the inside edge of the foot, or grabbing an unstable object for balance.
That makes Cossacks a useful accessory if your week already includes back squats, deadlifts or split squats, which usually emphasize forward-and-back patterns. A lateral move supplies a different coordination demand. It does not mean your regular lifts suddenly become unsafe without it, or that doing Cossacks alone creates sport-specific change.
Find a stance that your hips and ankles can actually use
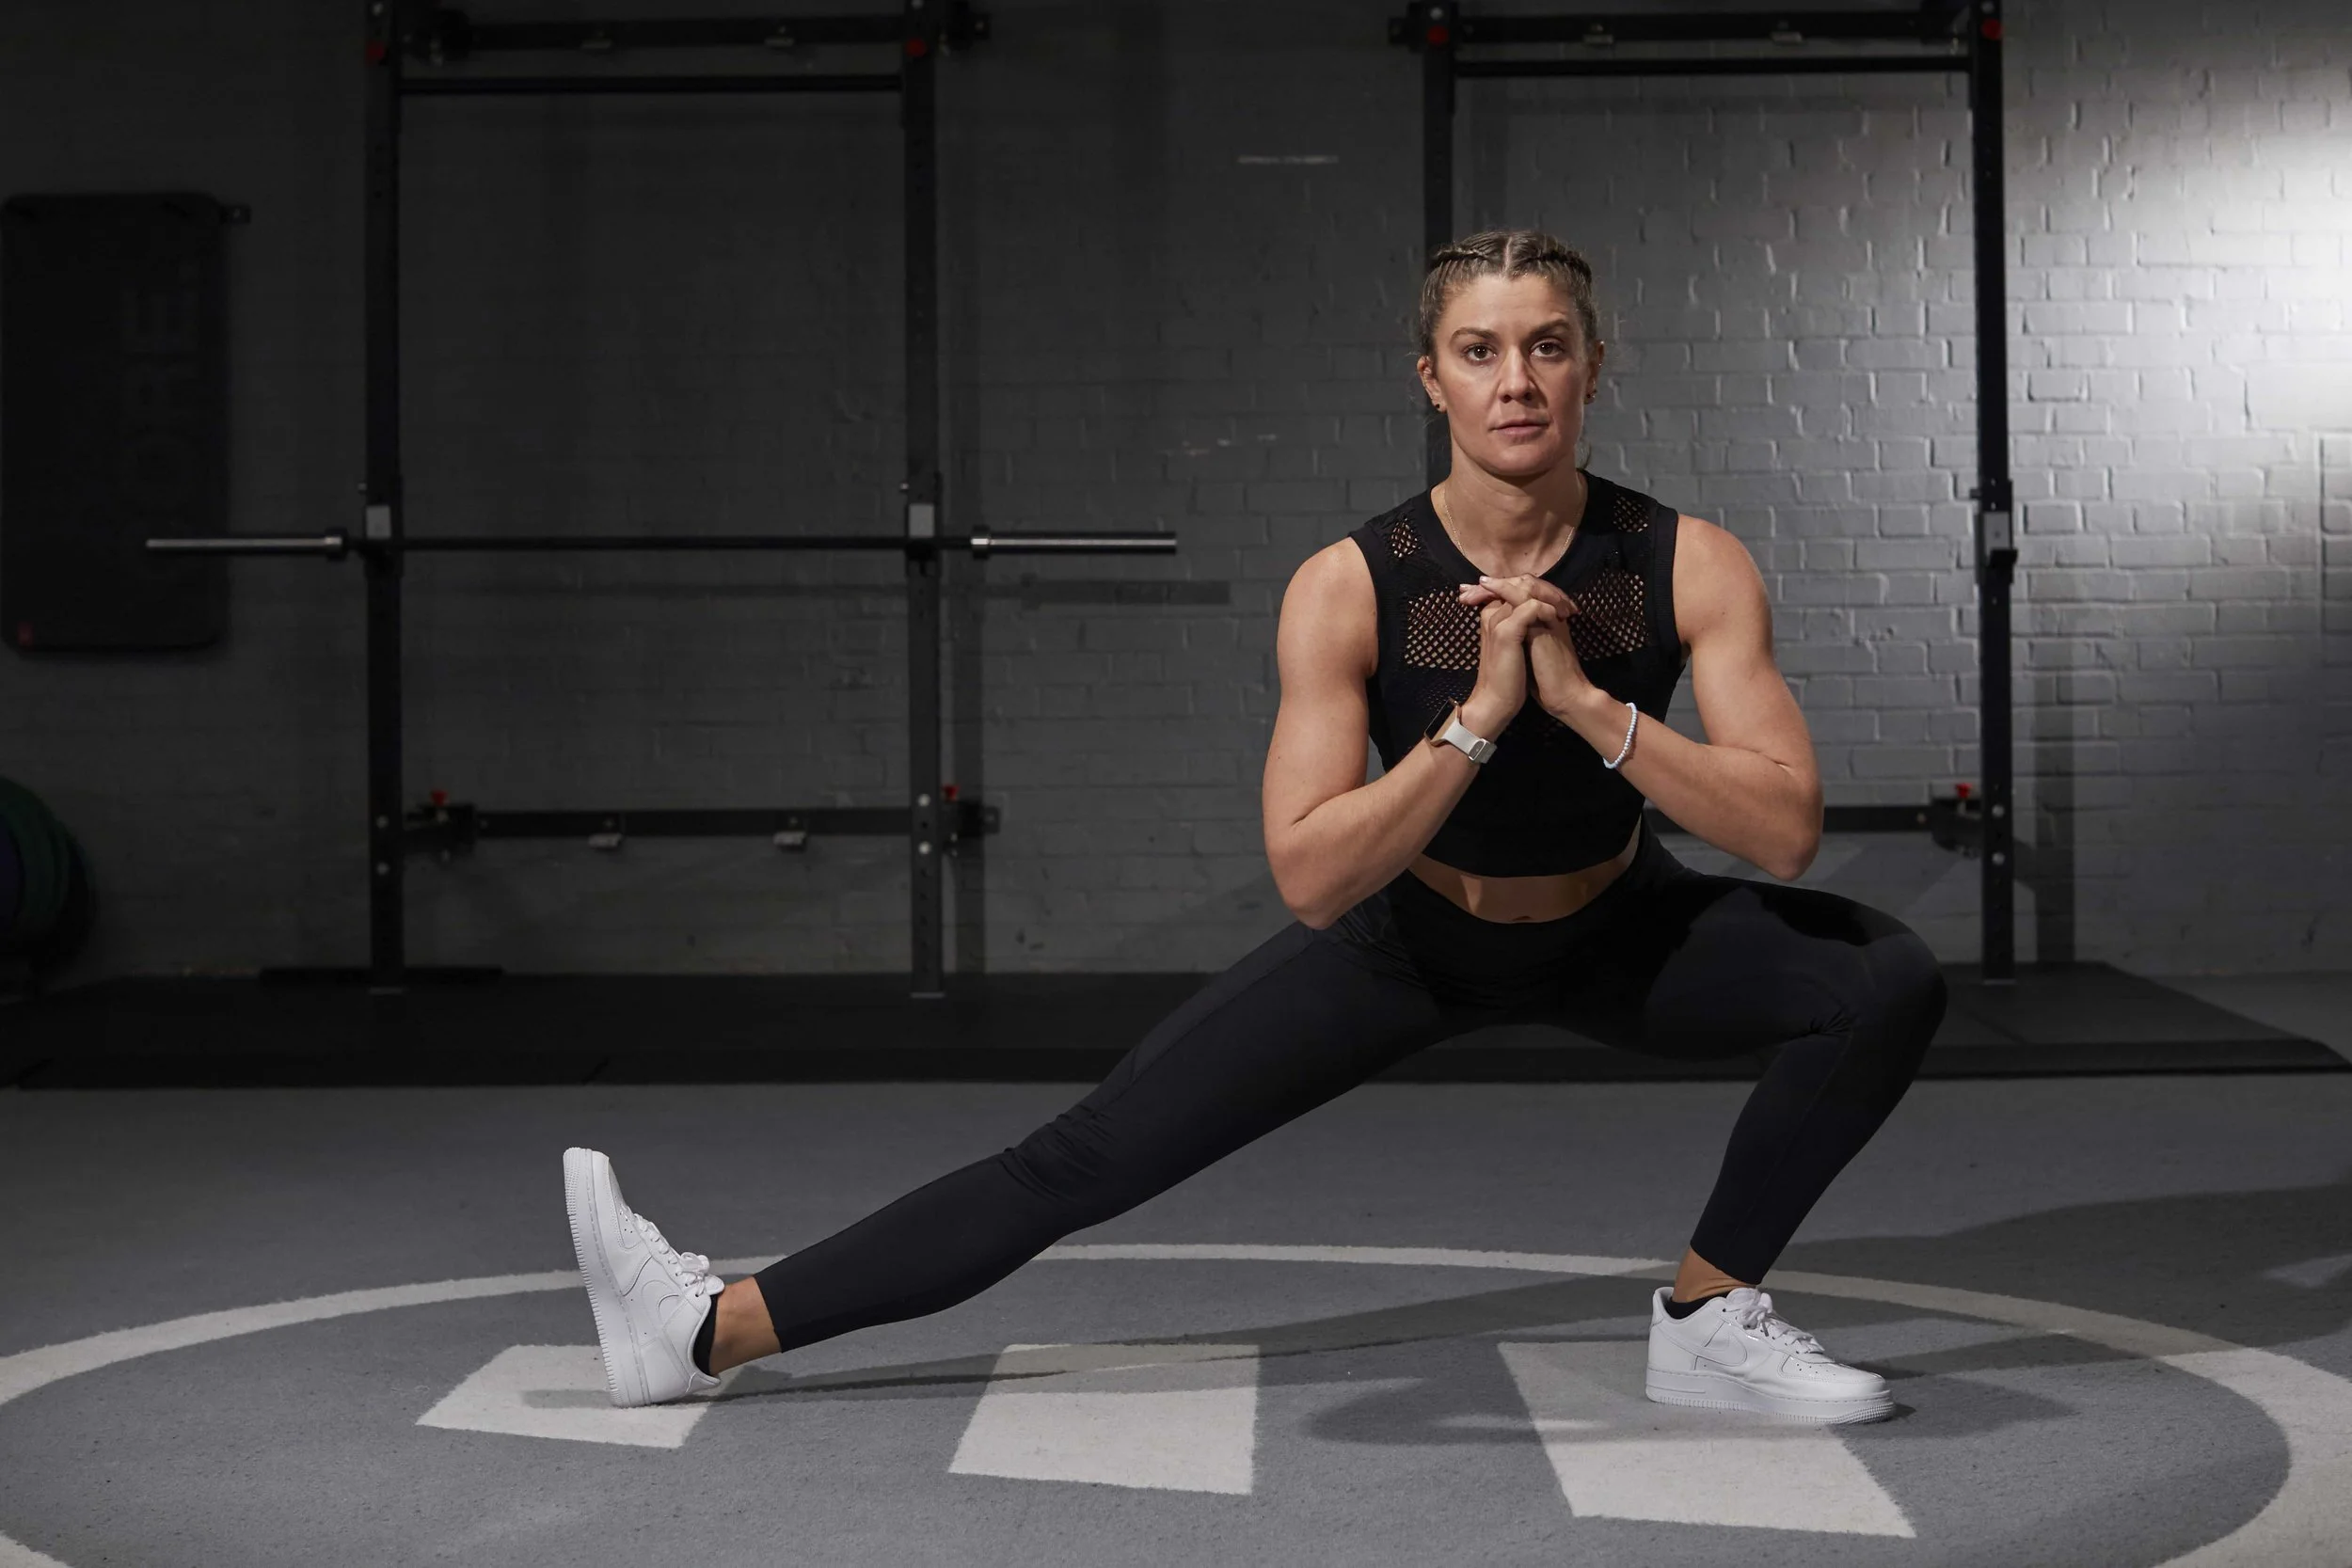
Begin on a dry, grippy floor with plenty of space to either side. A wide stance is essential, but a fixed measurement such as exactly twice shoulder width does not fit every hip. Start a little wider than your normal squat and move the feet outward until you can bend one knee while leaving the other leg mostly straight.
Point the bent-leg foot where the knee can travel comfortably, often slightly outward. Keep pressure across its heel, big-toe base and little-toe base. Your knee can travel forward over your toes; the important point is that it follows approximately the foot’s direction instead of collapsing inward while you force an unfamiliar depth. A vertical shin is not compulsory.
On the extended side, let the toes turn upward if your hip permits while the heel stays down. Some people find a flatter foot more comfortable in a shallower version. Do not aggressively wrench the extended knee into hyperextension or insist on a picture-perfect foot angle. You want a straight, active leg rather than a painful locked joint.
Lift the chest enough to balance but do not exaggerate a rigid upright torso. A little forward trunk incline is normal. If you lean farther forward every inch you descend, shorten the range and test whether your stance is too wide, your ankle is limiting you, or you are trying to descend below your current control.
Quick setup test: perform three slow left shifts and three right shifts without going deep. Both feet should remain planted in predictable positions. Adjust one foot at a time before adding a full squat.
Step-by-step technique for smooth, repeatable reps
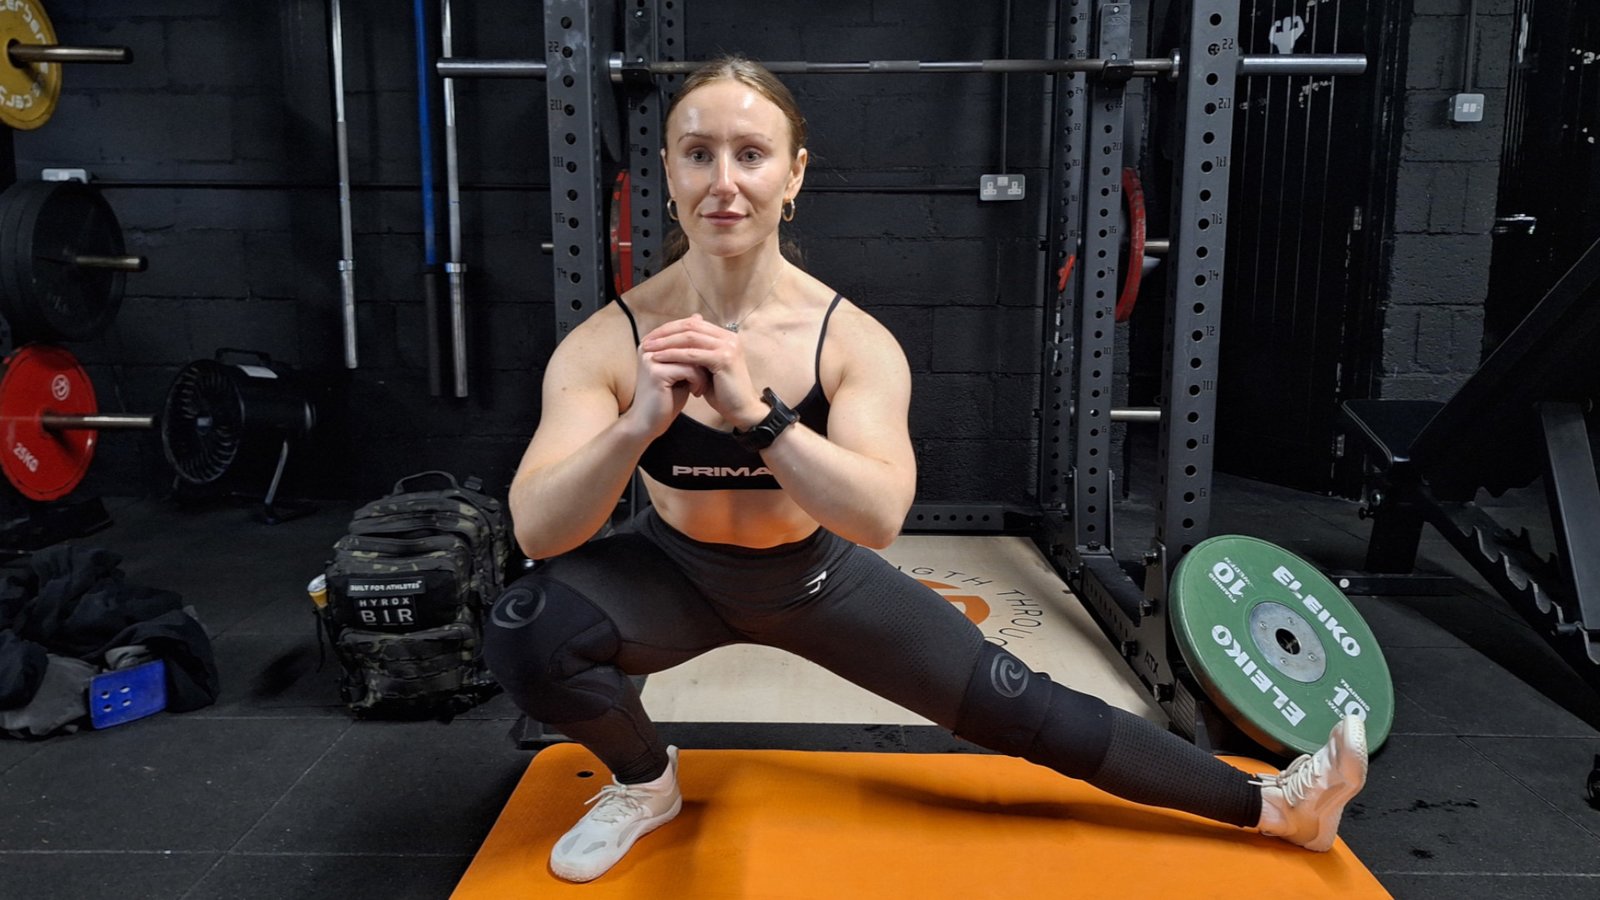
- Brace lightly: stand tall in your chosen wide stance, take a comfortable breath and reach your hands forward as a counterbalance.
- Shift toward one heel: bend that hip and knee together while letting the opposite leg lengthen. Move your pelvis over the working foot rather than trying to squat straight down between your feet.
- Lower under control: use roughly two to three seconds for the descent. Stop before the working heel leaves the floor, your knee suddenly dives inward, or your lower back has to round sharply to create extra depth.
- Own the bottom: hold one quiet breath for a moment. You should feel muscular effort and perhaps a tolerable stretch, not a sharp pinch in the groin, knee or hip.
- Stand using the bent leg: drive the floor away and return to the wide center position. Reset your breathing rather than bouncing into the other side.
- Repeat on the other side: treat each side as its own repetition, preserving whichever side needs the shorter range for now.
Film yourself from the front and a slight diagonal for one easy set. You are looking for a planted working foot, a deliberate horizontal weight shift, controlled hip level and a knee following the foot. The camera is useful because perceived depth can change when the pelvis rotates or the torso folds.
For the first two weeks, a strong baseline is two sets of four to six deliberate reps per side. You should finish with several clean reps still available. This exercise is not a place to test your highest possible load on day one; make the skill look nearly boring first.

Equipment Worth Exploring
Explore equipment, accessories and gear from our carefully selected range.

Cast Iron Kettlebells
Textured cast-iron kettlebells for swings, squats, carries, and full-body training.


Rubber Hex Dumbbells
Rubber-coated hex dumbbell pairs with a stable shape for home and commercial strength training.


GymPin Squat Wedges
Non-slip 15-degree squat wedges help elevate the heels for deeper quad-focused squats.


Foldable Wall Rack
Wall-mounted folding squat rack designed to save floor space between workouts.

FID Bench MAX
Adjustable bench offering flat, incline, and decline positions + adjustable headrest.
Common mistakes and how to diagnose the limitation
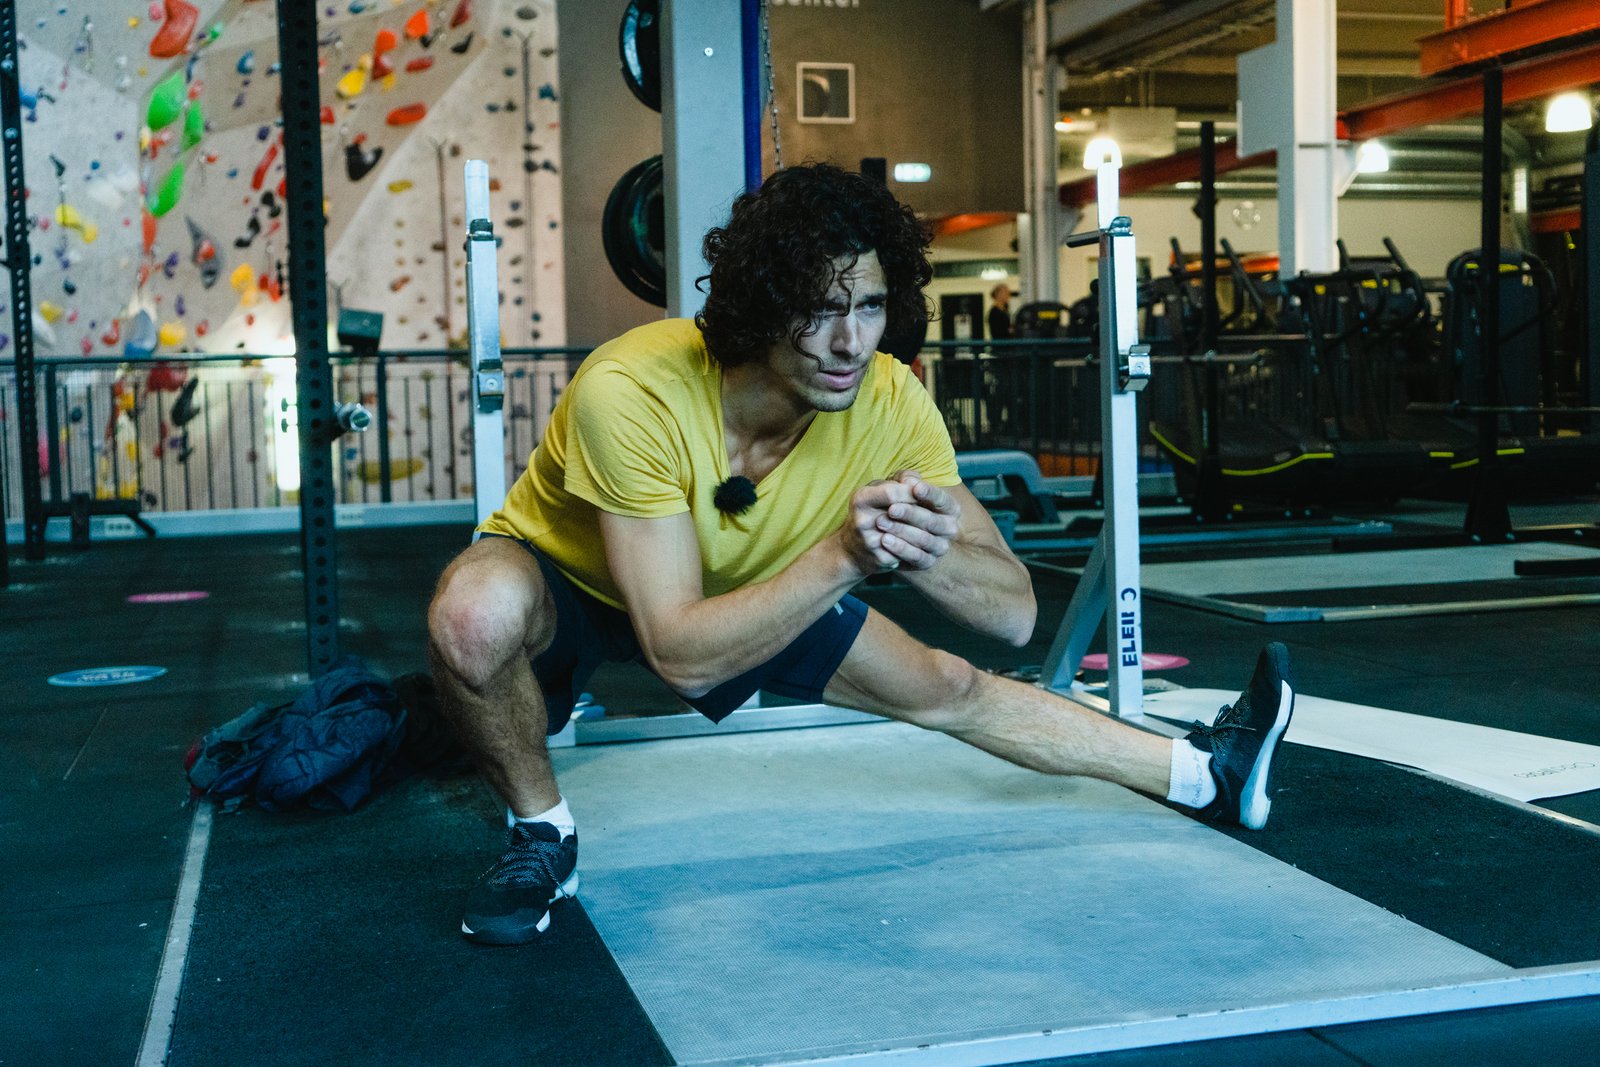
Chasing the floor: the most obvious error is descending until your hips are low only because the pelvis twists or the spine rounds abruptly. Reduce depth to the last point where you can pause without a balance rescue. A taller position with honest muscular tension is a better starting rep.
Working heel floating up: sometimes this comes from limited ankle dorsiflexion, but it can also come from rushing the weight shift or using too narrow a stance. Try a shorter descent, slightly changing toe turnout, and a few controlled ankle rocks outside the Cossack set. Do not automatically solve every heel lift with high wedges: changing elevation also changes the movement.
Knee collapsing inward: keep the working knee approximately in line with the toes as your weight transfers. You do not need to force the knee far outside the foot. Use a stable support so you can test a slower descent without falling.
Pulling the straight leg into a painful stretch: stretch sensation in the inner thigh is not permission to force range. Reduce stance width, keep the extended knee relaxed rather than pushed backward, and move within a comfortable range. Sudden groin pain, catching, instability or lingering joint pain are reasons to stop and seek individual assessment.
Rushing the transition: switching left-to-right without standing up creates a harder continuous low-shift variation. Save it for later. A centered reset gives you an opportunity to check posture and avoid momentum masking the side that needs work.
Supported, counterweighted and loaded variations
A stable support can make the Cossack easier to learn. Hold a rack upright or fixed railing at about chest height, keep your arms in front, and use only enough assistance to stay balanced. Do not pull on a loose dumbbell stand, an unsecured bench or a moving cable handle. A suspension trainer anchored correctly can also provide assistance, but anchor security matters more than the brand of strap.
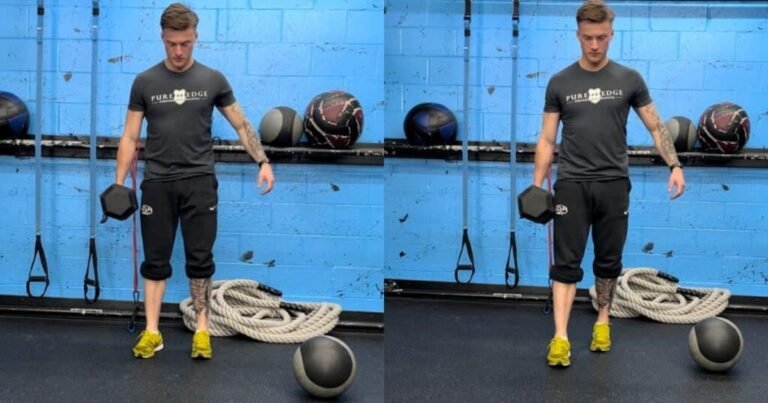
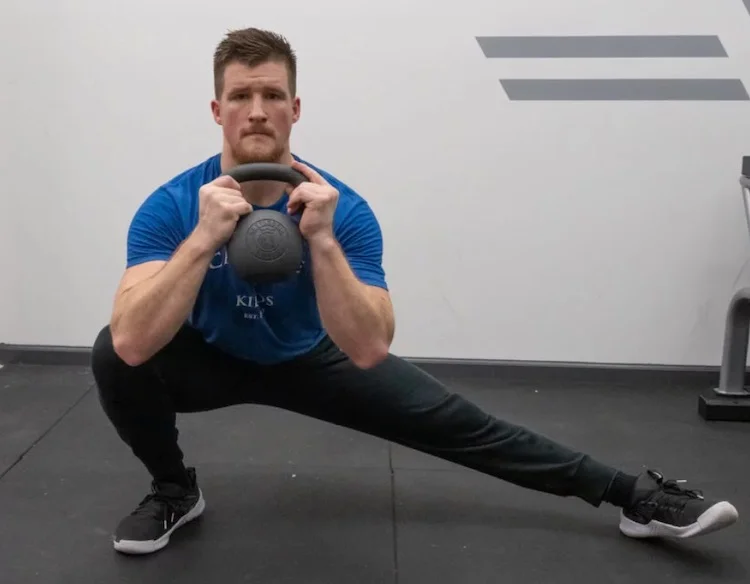
If you tend to tip backward, a light dumbbell or kettlebell held close in front of your chest may work as a counterweight. That is different from loading the movement hard: one small bell can make balance easier by shifting your center of mass. If you feel the weight driving your shoulders forward, lighten it or return to bodyweight.
From easiest to harder, try a shallow hand-supported Cossack, an unsupported shallow Cossack, a deeper controlled bodyweight rep, a short bottom pause, and then a modest goblet load. There is no need to add all the variables at once. An overhead version demands much more shoulder mobility and trunk stability and is not a beginner progression.
A pair of dumbbells or a kettlebell can be useful for other leg exercises in the same workout, but do not assume a machine or heavy external load is necessary for Cossack mobility work. For many lifters, owning four to eight strict reps per side is already a worthwhile challenge.
Keep your free hand near a fixed support while learning a loaded variation, and use enough open floor that a dropped bell will not strike either foot. Being able to demonstrate control on both sides matters more than matching a social-media depth photo.

Leg Day Shirts & Workout Gear
Leg-day gym shirts and workout gear for lifters who never skip squats, lunges and lower-body punishment.

Booty Building Mode Sweater Squat Day & Meme Fans T-Shirt
Show some gym-day personality with “Booty Building Mode”.

I Love Squats Gym | Funny Valentine's Leg Day Muscle Sh Tank Top
Add some leg-day attitude to training with “I Love Squats”.

Bunny Squats & Booty Motivation Cute Hoodie
Show off your leg-day humor in a laid-back “Gym Bunny” hoodie.

Shirt Never Skip Leg Day NSLD Meme – Chicken Legs & T-Shirt
Show some leg-day attitude with a playful “Never Skip Leg Day NSLD Meme” tee.

Fried Chicken Gains – Thanksgiving Leg Day Meme Decal f Sticker
Stick a little “Fried Chicken Gains” humor on your favorite gear.

OnlyGains Sweater Leg Day & Booty Gains Meme Top T-Shirt
Keep things casual with a little “OnlyGains” attitude.

Booty Out Of This World Gym | Funny Alien Meme Workout Hoodie
Bring “Booty Out Of This World” gym humor to lazy days and post-workout plans.


I Want You To Stop Skipping Leg Day Patriotic Gym – Unc Sticker
Give your everyday gear a playful “I Want You To Stop Skipping Leg Day” twist.

Muscle Mommy Gym – Peach Booty Training Graphic for Gym T-Shirt
Make gym days more fun with “Muscle Mommy” style.
Where Cossacks fit beside your normal leg training
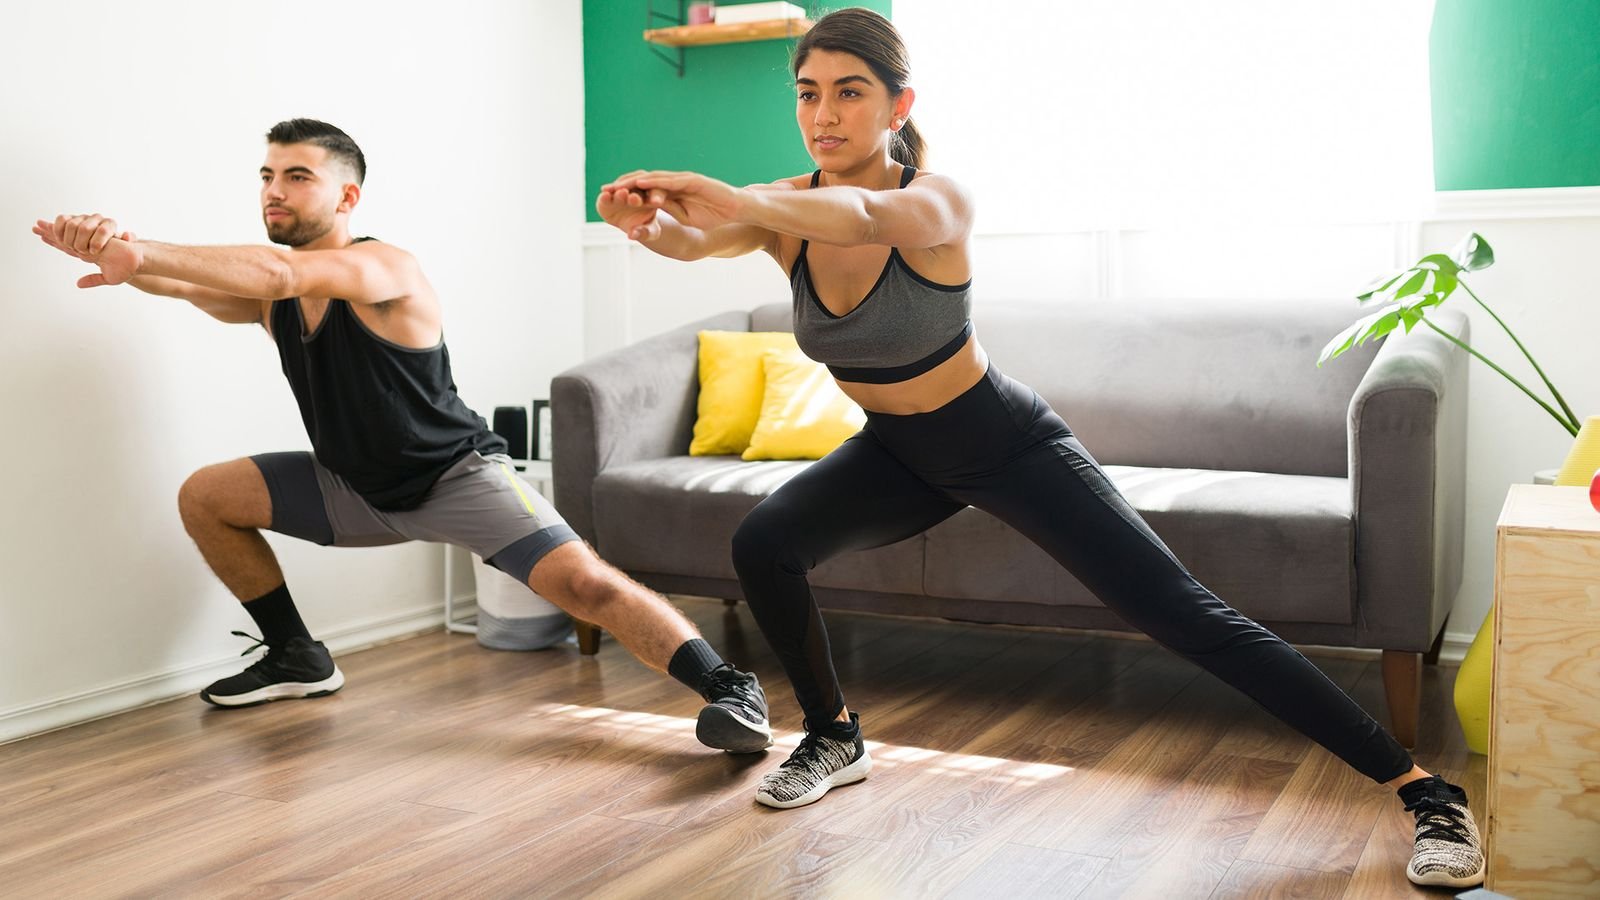
Think of the Cossack as a small accessory dose rather than the centerpiece of every leg session. If the goal is learning range of motion, put one or two light sets after a general warm-up, before heavy squats. If you are using a challenging weighted variation, place it later as accessory work so fatigue from the long lateral position does not undermine your main strength lifts.
A lateral lunge usually asks you to step sideways, load the receiving leg, and come back. A Cossack commonly starts from a static wide stance and asks you to reach deeper while keeping the opposite leg long. The two movements overlap but are not identical, and you might prefer a shallow lateral lunge as the easier entry point. A split squat emphasizes a different pattern again.
For a squat-and-hinge training week, one example is a heavy squat day with two easy Cossack sets and a second lower-body day with two slightly more demanding sets. Keep your existing quadriceps, hamstring and glute training; a few lateral reps should complement it, not displace everything that develops strength.
You can also use low-effort Cossacks between sitting periods, as long as you are warm and not forcing the stretch. The movement should look calm enough that it prepares you for training rather than pre-fatiguing the adductors before maximal effort. If groin soreness remains high for days, reduce the range, number of sets or frequency.
If your primary goal is larger legs, adequate hard sets across established squat, hinge and single-leg patterns still matter. A Cossack’s unique benefit is the combination of a side-to-side task and active end-range control, not a proven superiority over all other exercises.
Equipment Worth Exploring
Explore equipment, accessories and gear from our carefully selected range.

Standing Abductor
Plate-loaded standing hip abductor for targeted outer-glute and hip-stability training.

Studio V-Squat
Plate-loaded V-squat machine for supported lower-body strength training.

Leg Press/Hack Squat BPR-790
Convertible 45-degree leg press and hack squat machine with a broad footplate and band pegs.


Leg Extension/Curl BCO-780
Leg extension and lying leg curl combo with plate loading, band pegs and a cable-loading option.

Safety Squat Handles
Barbell squat handles that reduce shoulder positioning demands during high-bar squats.

Multi Pull Smith Rack MPHR-780
All-in-one rack with a Smith machine, functional trainer, lat pulldown and low row.

Grip Plates
Rubber-coated weight plates with handholds for loading barbells and machines.

A six-week plan for better range and stronger side-to-side control
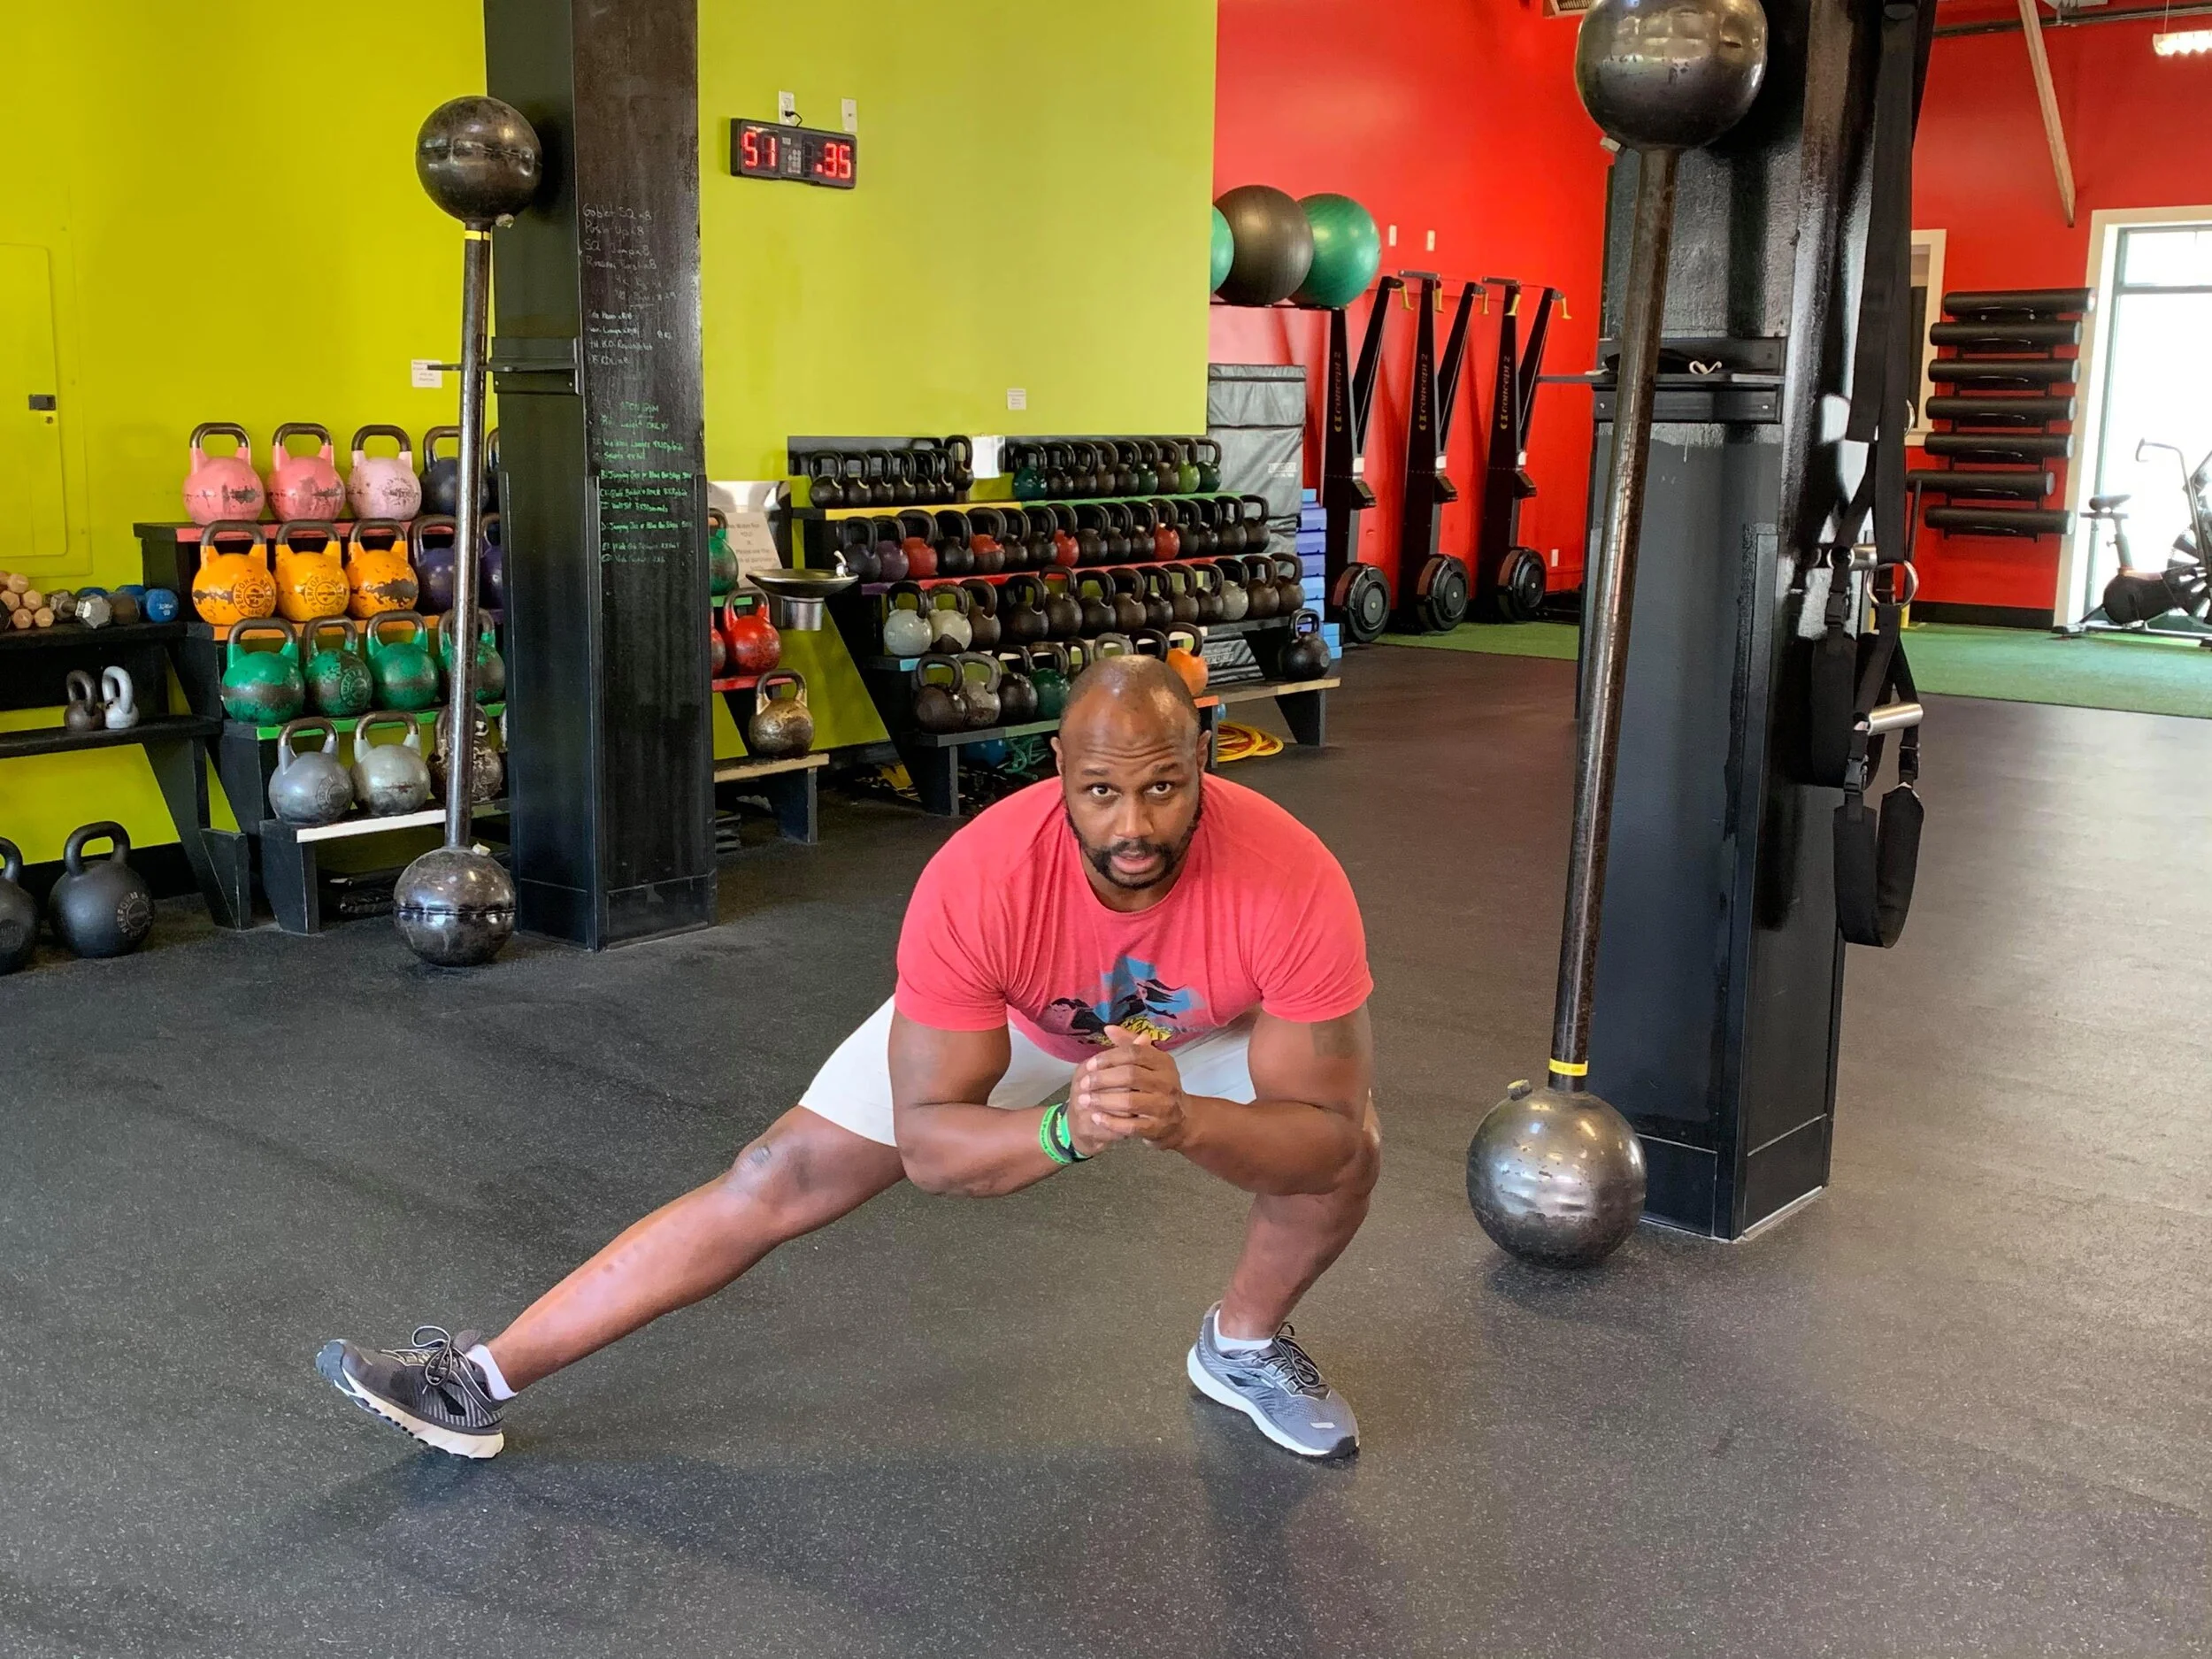
This is an original practice template, not a tested clinical protocol. Schedule two sessions per week with at least one day between them. Warm up with several minutes of easy walking or cycling, bodyweight squats, and a few shallow weight shifts. Use a depth that feels controllable on the tighter side rather than chasing parity by forcing both legs equally low.
| Weeks | Practice | What earns progress |
|---|---|---|
| 1–2 | 2 sets of 4–6 supported shallow reps per side, 2–3 seconds down | Stable foot and comfortable pause, no sudden twisting |
| 3–4 | 2–3 sets of 5–7 reps per side; use less hand assistance when ready | Controlled descent at the same depth on both sides |
| 5 | 3 sets of 5–8 reps per side, optional brief bottom pause | Consistent knee tracking and calm return to center |
| 6 | 2–3 sets of 6–8 reps per side; optional very light goblet counterweight | No balance rescue and no delayed groin or joint irritation |
Rest roughly 45–90 seconds after completing both sides, longer if control deteriorates. Progress only one element at a time: a little more depth, slightly less assistance, one extra rep, or an easier pause. A lighter session is entirely appropriate after heavy squat work or a demanding sports practice.
Record three repeatable observations: roughly how far you descended without heel lift, how confidently you could pause, and whether one side felt substantially different. Filming at the same camera angle can show changes without inventing centimeter-precise mobility improvements. Re-test the same easy set at the end of week six.
If progress stalls, check whether fatigue from other lower-body work increased. You can temporarily go back to supported reps. Some lifters will never look identical to the deepest online demonstration because anatomy, limb proportions and training history differ; controlled pain-free range is the useful outcome.
Bottom line: build the lateral squat gradually and keep it honest. It earns its place by making side-to-side positions stronger and more familiar, not by turning a risky bottom position into a party trick.
Functional Fitness Shirts & Workout Gear
Functional-fitness shirts, tanks and workout gear for athletes who train strength, conditioning and everything in between.

Vive Le Resistance Bands – Resistance Bands Warmup Reha Sticker
Bring “Vive Le Resistance Bands” attitude to your water bottle or laptop.

Hybrid Athlete – Strength & Endurance Gym Decal for Run Sticker
Put “Hybrid Athlete” gym humor on your laptop, bottle, or gym gear.

Live Love Lift Crewneck Pullover Sweater Gymbro Workout T-Shirt
Keep things casual with a little “Live Love Lift” attitude.

Heart Shaped Kettlebell Valentine’s Day Gym for Kettleb Tank Top
Bring “Heart Shaped Kettlebell Valentine’s Day” humor to your next lifting session.

Pineapple Kettlebell – Gym Meme Pullover Jumper T-Shirt
Bring “Pineapple Kettlebell” humor to your everyday gym style.

Cheeseburger Kettlebell – Burger Swings Meme Vest Muscl Tank Top
Train hard, laugh a little, and rep “Cheeseburger Kettlebell”.

Skull Kettlebell Gym | Heavy Metal Lifting Funny Workou Tank Top
Add some metalhead attitude to training with “Skull Kettlebell”.

Gym Is My Happy Place Happy Kettlebell Emoji Smiley Fac T-Shirt
Show some gym-day personality with “Gym Is My Happy Place”.

Muscle Mommy Pink Kettlebell Gym Design for Women, Lift Hoodie
Keep it laid-back with a little “Muscle Mommy” attitude.

Kettlebell Heart X-Ray – Valentine's Workout Vest Muscl Tank Top
Train hard, laugh a little, and rep “Kettlebell Heart X-Ray”.