Advertising disclosure: This page includes affiliate product links that may earn us a commission, as well as products from our own store.
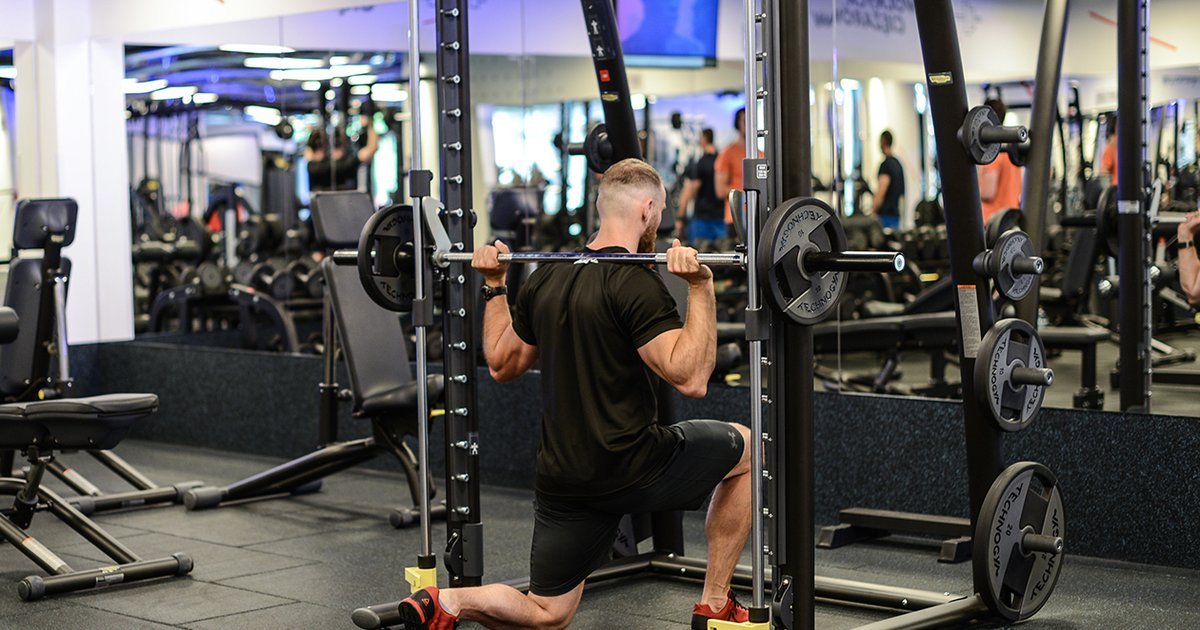
The Smith machine split squat is a useful way to train one leg at a time while the bar follows a guided track. That guided path can make the movement more repeatable, but it does not automatically choose your foot position, knee angle or comfortable depth. A split squat performed against the wrong bar path can feel awkward even before serious weight goes on.
The aim is to make the lead leg do most of the work while the rear foot provides just enough support to keep you in position. We will cover how to set the machine, check a working stance, control each repetition and build the exercise into a leg session without turning the Smith bar into a balancing crutch.
Set the Smith bar, safeties and room for both feet
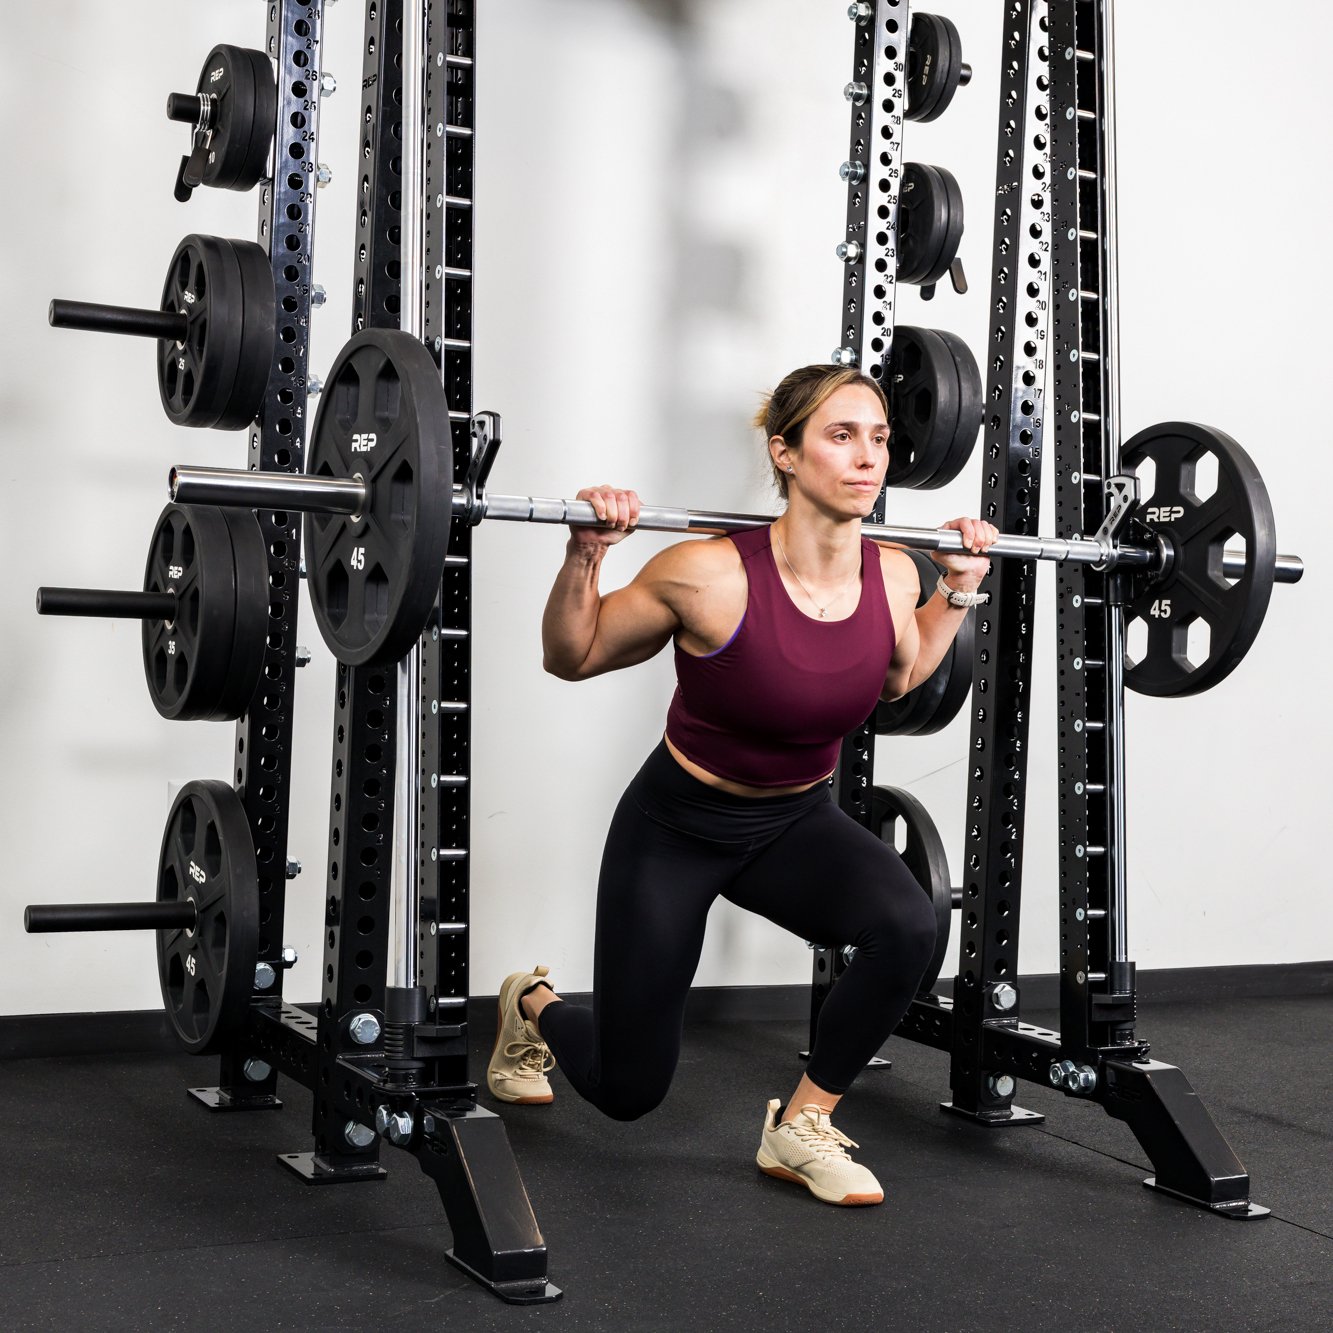
Start with the machine itself. Check whether the particular Smith bar travels straight vertically or along a slight diagonal. These are different geometries: a stance that feels natural on one station may need to move a few centimetres on another. Run the unloaded bar through the intended range and learn which wrist turn engages the hooks. Test the catch points before adding weight, especially if the machine is unfamiliar.
Set the bar high enough that you can stand comfortably under it with the bar on the muscular upper-back shelf, not pressing into your neck. Adjust the catches so you can lock the bar without rising onto your toes or losing your split stance. Put the safety stops just below your intended bottom position, following the machine’s design and gym instructions. They should protect you if you cannot finish a rep, not prevent a full, controlled movement.
Clear loose plates, benches and bags from the foot area. The rear foot needs room to move, and you should be able to reposition it between sides. Use a light bar for several setup trials: first find the bar’s track, then test the stance, then decide whether the movement belongs in today’s workout. A hard set is a poor place to discover that the hooks will not catch where you expected.
Unlike a free barbell, the Smith machine does not let the bar drift to accommodate a last-second adjustment. This is an advantage when the chosen position fits your body, but a disadvantage when you force your body to fit a stance that clearly does not. If the rails, catches or safeties are unfamiliar or malfunctioning, get a staff member to show you the station before loading it.
Choose a stance that works with the fixed bar track
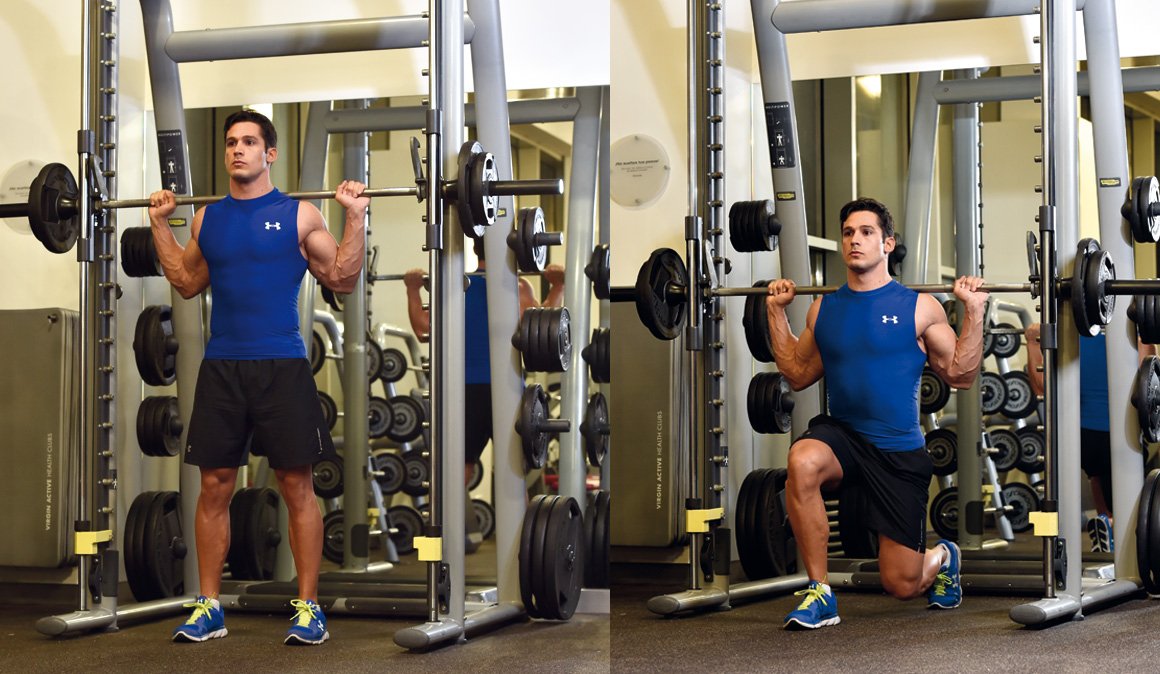
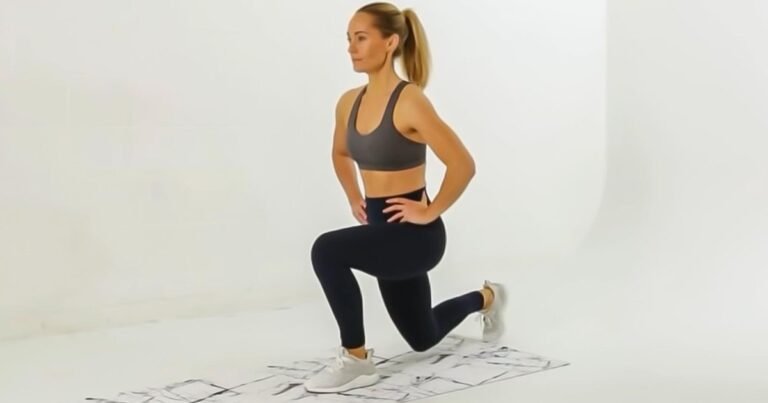
Begin with the front foot flat and the rear foot on its toes. Keep the feet roughly hip-width apart from side to side, rather than lining up both feet on a narrow tightrope. That small lateral separation makes it easier to maintain balance when fatigue rises. Stand tall enough to support the bar securely, then take a split stance that allows the back knee to travel down without being pushed uncomfortably forward.
Do not treat a longer stance as automatically better. If the feet are too close, the rear knee can crowd the front heel and the lead heel may want to lift. If they are too far apart, the rear hip flexors may feel overstretched and the front leg may lose a comfortable range of motion. Move the lead foot or rear foot by a few centimetres at a time and retest the same slow, unloaded repetition.
The bar should travel smoothly over a stable support area while you lower. Depending on the machine’s geometry and your proportions, the front foot can end up slightly ahead of or beneath the bar’s vertical projection. The goal is not to obey a universal shoe-to-bar distance; it is to avoid being pulled forward or backward by the guided path. If you must lean dramatically or lift the heel to follow the rails, adjust the position.
A slight forward torso lean is acceptable and often useful, particularly if it lets the hips move naturally while the back stays braced. A very upright torso may emphasize knee travel for some lifters; a modest forward lean may give others a comfortable glute-focused pattern. Neither is a magic muscle-isolation switch. Keep the lead knee broadly following its toes and maintain contact through the front foot from the first rep to the last.
Once a stance works, use a small floor marker or note a reference on the machine so the second side starts from a comparable position. Small asymmetries in ankle mobility or hip comfort are common, so match movement quality and effort before trying to force precisely identical foot coordinates.

Equipment Worth Exploring
Explore equipment, accessories and gear from our carefully selected range.

Multi Pull Smith Rack MPHR-780
All-in-one rack with a Smith machine, functional trainer, lat pulldown and low row.


Safety Squat Handles
Barbell squat handles that reduce shoulder positioning demands during high-bar squats.

Foldable Wall Rack
Wall-mounted folding squat rack designed to save floor space between workouts.


Competition Plates
Competition-style bumper plates for Olympic lifts and loaded strength training.
Descend smoothly and make the front leg do the work
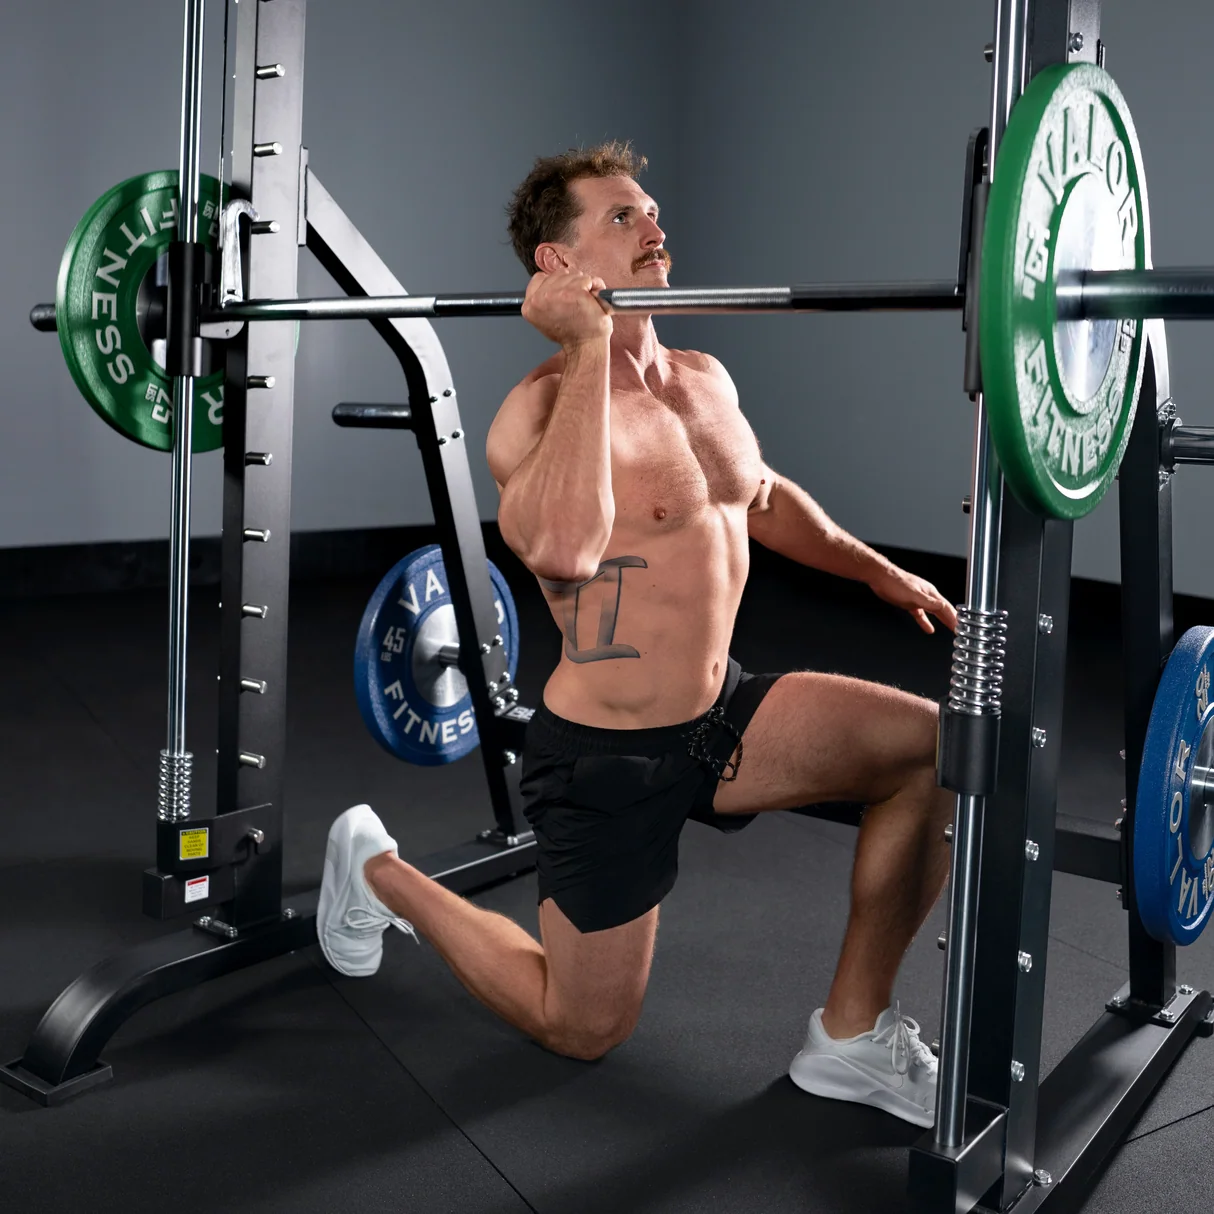
Unhook the bar only after you can feel both feet supporting you and the trunk braced. Take a quiet breath into your midsection, then bend both knees as the pelvis descends. Think of the rear knee travelling toward the floor rather than throwing the front knee sharply forward. The front knee can travel past the toes when the lifter has the range and control for it; the useful checks are heel contact, knee tracking and a depth you can reverse without losing position.
Lower for approximately two or three seconds. Stop at the deepest point where your back position, lead-foot pressure and knee path remain consistent. The rear knee may finish just above the floor, but touching the ground is not a mandatory test of effectiveness. A soft pad can be a depth reference, never a reason to crash into the bottom with a loaded bar.
Drive up through the lead foot while allowing the rear toes to assist with balance, not to launch your body upward. Keep the movement quiet: no rebound off the back knee, no sudden bounce through the hips and no sliding of the front shoe. Complete the upward phase without violently snapping the knee into lockout, then reset your breath and repeat. Your reps should look more alike as you learn the movement, not less alike as the weight rises.
The front quadriceps straighten the knee, while the glutes contribute to hip extension. The rear leg and trunk help maintain the posture needed for the lead leg to work. In a long-range split squat, each muscle’s contribution changes with the knee and hip angles; there is no meaningful way to give a fixed percentage of effort to the quads or glutes from one photograph.
For bodybuilding, a controlled eight-to-twelve-rep set per side is a sensible starting range. If you can reach the target reps with two good reps left in reserve, you are probably at a useful learning load. Do not compare the plate number with your conventional squat: one-leg loading, a guided bar and machine counterbalance can make the numbers misleading.

Leg Day Shirts & Workout Gear
Leg-day gym shirts and workout gear for lifters who never skip squats, lunges and lower-body punishment.


Quadzilla Massive Quads Sweater Leg Day Squatting T-Shirt
Keep things casual with a little “Quadzilla” attitude.

Never Skip Legday – Chicken Legs Meme , , & Leg Day T-Shirt
Heavy lifts, good laughs, and a little “Never Skip Legday” energy.

Squat Inspector Gym | Edgy Leg Day Meme Workout Decal | Sticker
A fun “Squat Inspector” touch for bottles, laptops, and lockers.


Leg Day Squats Deadlifts Meme Hooded Hoodie
Show off your leg-day humor in a laid-back “Leg Day” hoodie.

Stars Stripes & Squats Patriotic Eagle – 4th of July Wo Sticker
Put “Stars Stripes & Squats Patriotic Eagle” gym humor on your laptop, bottle, or gym gear.

My Leg Hurts Leg Day , Meme Lovers & Bros Casual T-Shirt
Bring “My Leg Hurts” humor to your next gym day.

Leg Day Is Calling You Sweater Squats & Deadlifts T-Shirt
Add a playful “Leg Day Is Calling You” touch to your casual rotation.

Negative Leg Day Review 1 Star Not Recommended Decal Sticker
Stick a little “Negative Leg Day Review” humor on your favorite gear.
Compare grounded, front-foot-elevated and Bulgarian versions
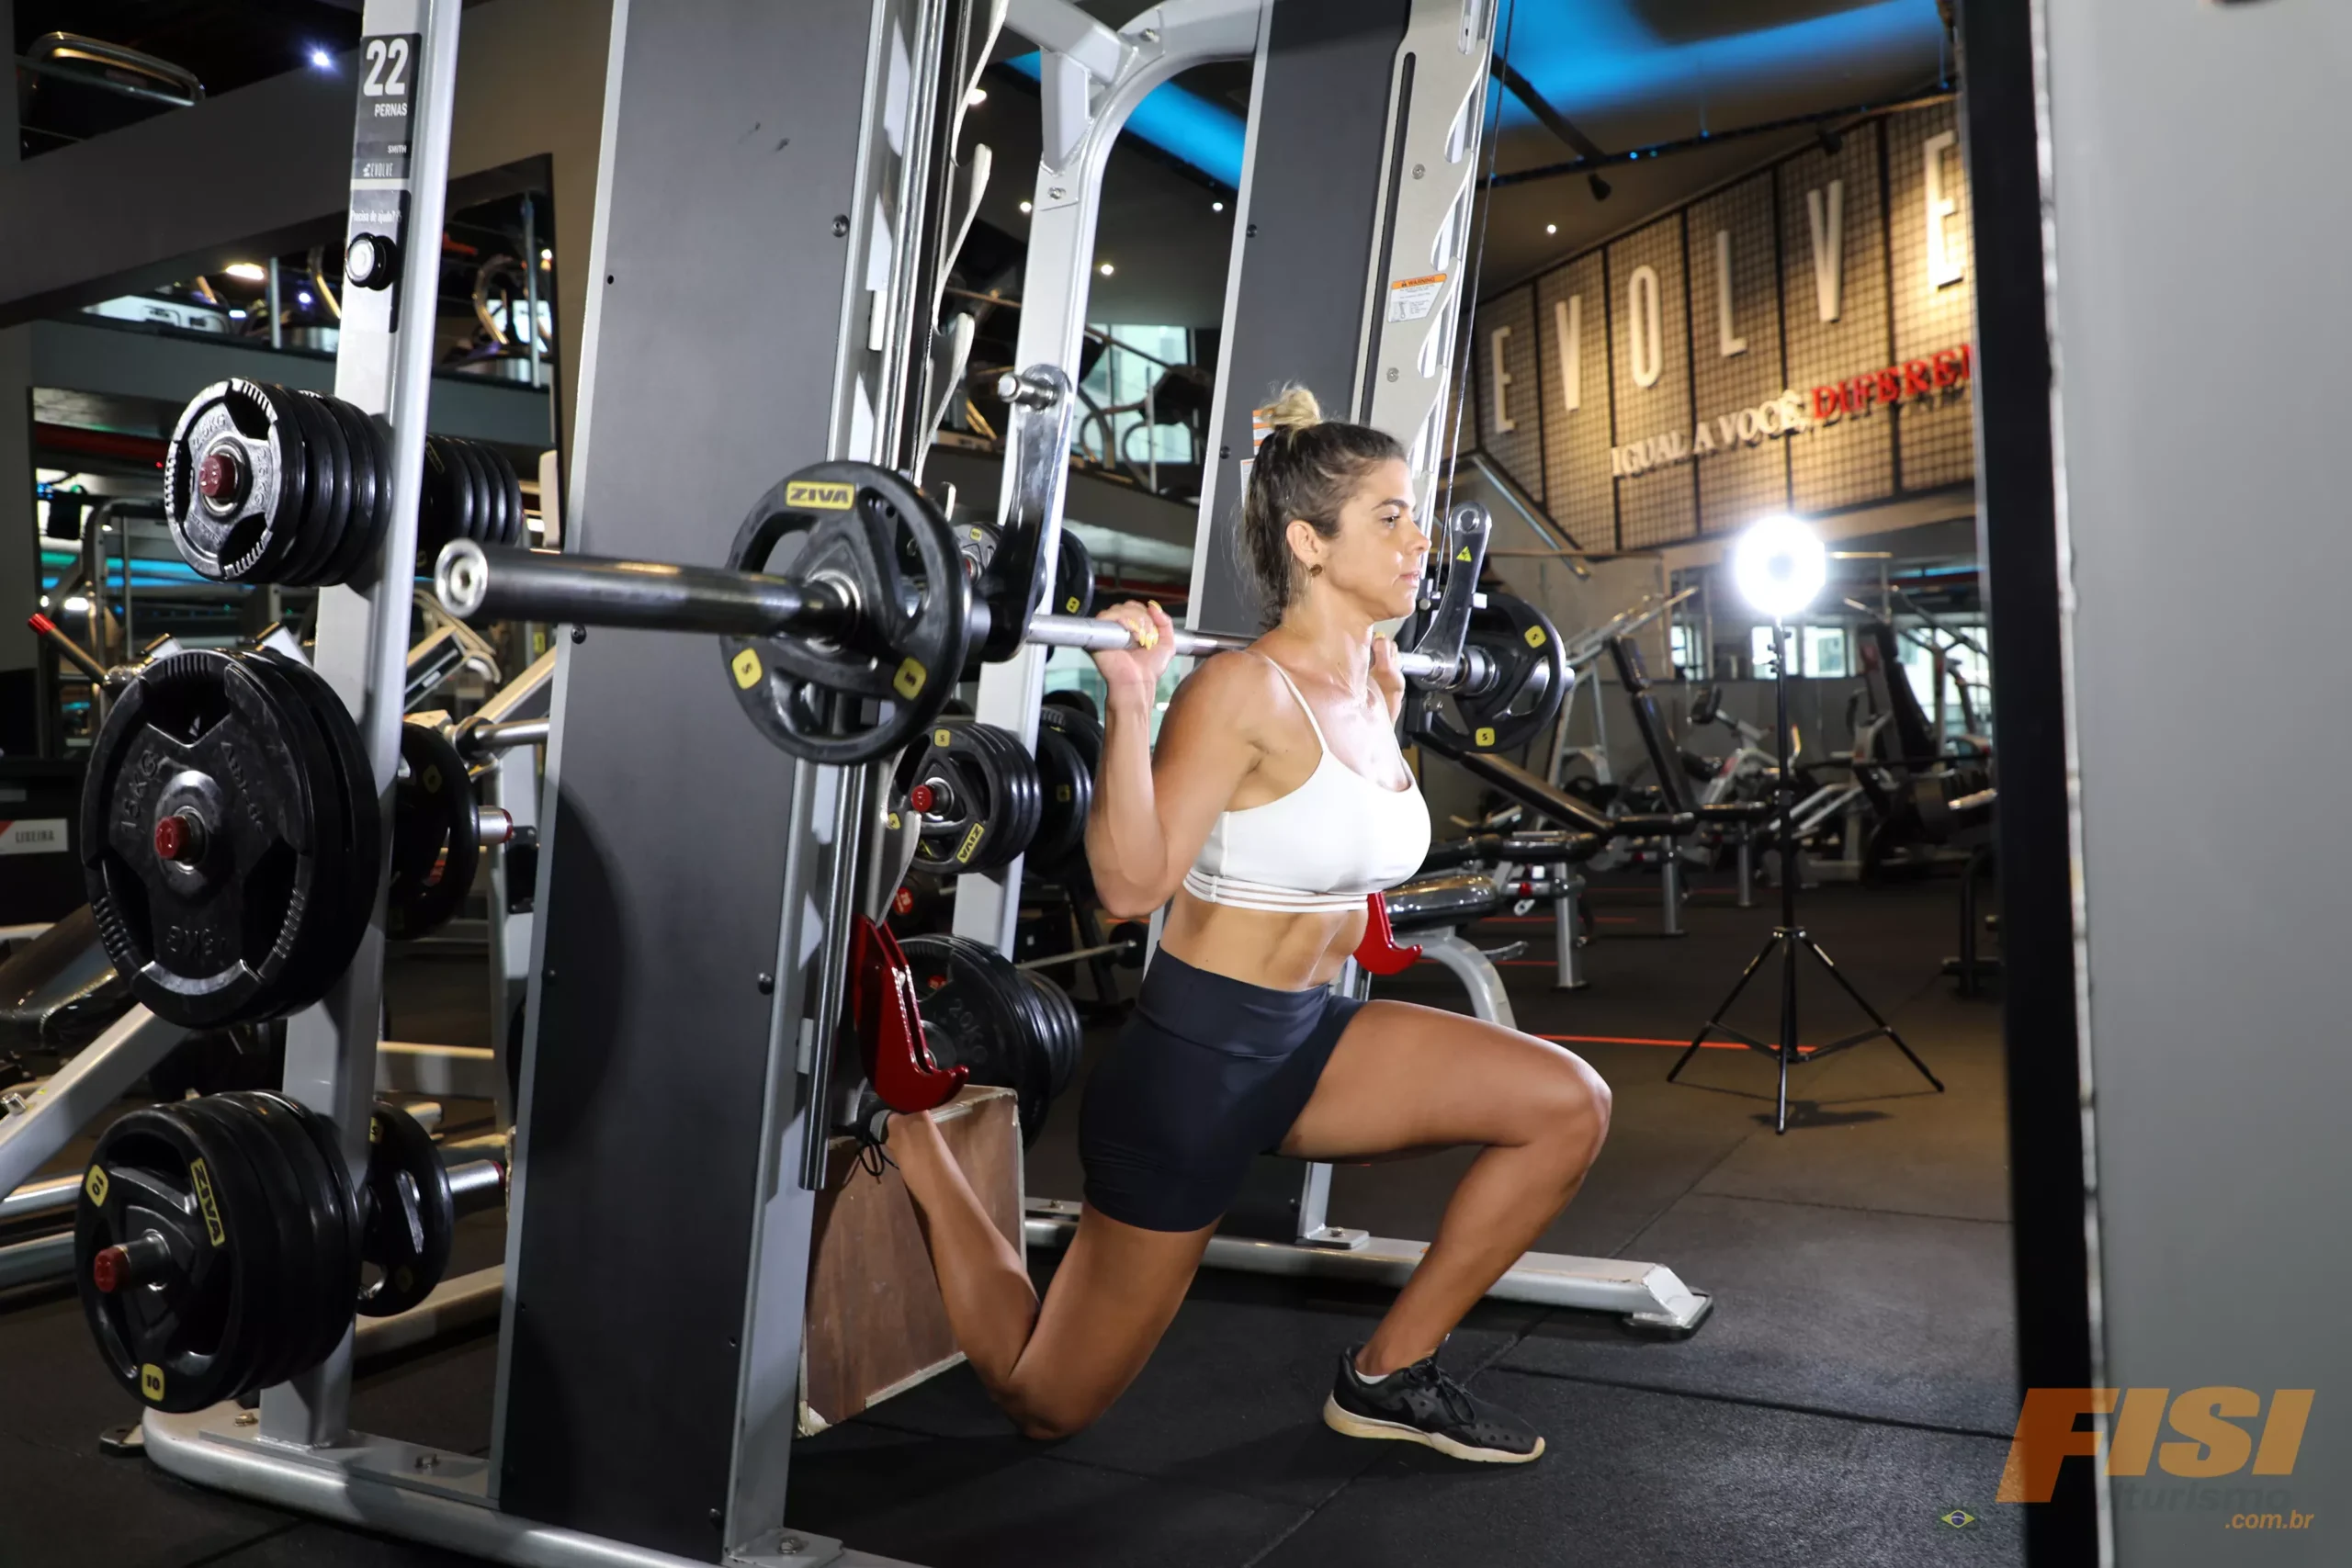
The basic grounded Smith split squat keeps the rear toes on the floor. It has a low setup burden and lets you practice bar tracking before the movement grows more complicated. If the goal is consistent quadriceps work with limited time, this variation may already give you everything you need. You can change your stance and working depth without introducing a bench or a riser.
A front-foot-elevated version places the working foot on a low, stable platform. The extra clearance can permit a deeper controlled descent, but only if the platform cannot shift and the back knee has sufficient room. Begin with a modest elevation, not a tall stack of plates. More depth is valuable only if you can control it under the actual Smith-bar line; forcing extreme ankle dorsiflexion or a painful hip position adds difficulty without a clear payoff.
A rear-foot-elevated or Bulgarian split squat puts the back foot on a bench or pad. This can increase the demand on the front leg and reduce how much the rear foot contributes, but it also makes setup and balance more sensitive. Place the bench so the back foot rests securely without the guided bar dragging your hips into a position you cannot maintain. Test bench height and distance with little or no external load first.
These are not three universally ranked levels. A lifter with limited bench access may progress farther using the grounded variant and a longer range of controlled reps. Someone with excellent mobility may prefer the front-foot-elevated version; another person may feel rear-hip irritation whenever the foot is raised. Choose the form that produces stable, repeatable tension and a working range you actually control.
Free-weight split squats and dumbbell Bulgarian split squats remain useful alternatives when no Smith station is available. They add more freedom for your center of mass, which may feel more natural, at the cost of more balance demand. Single-leg presses can let you train one leg with trunk support. No equipment swap is identical in every respect, so compare your effort, range of motion and symptoms rather than pretending the load numbers translate directly.
Equipment Worth Exploring
Explore equipment, accessories and gear from our carefully selected range.

GymPin Squat Wedges
Non-slip 15-degree squat wedges help elevate the heels for deeper quad-focused squats.

Studio V-Squat
Plate-loaded V-squat machine for supported lower-body strength training.

Leg Press/Hack Squat BPR-790
Convertible 45-degree leg press and hack squat machine with a broad footplate and band pegs.

Compact Leg Press CLP-700
Compact reverse-style leg press with a moving seat carriage and an adjustable footplate.


Rubber Hex Dumbbells
Rubber-coated hex dumbbell pairs with a stable shape for home and commercial strength training.

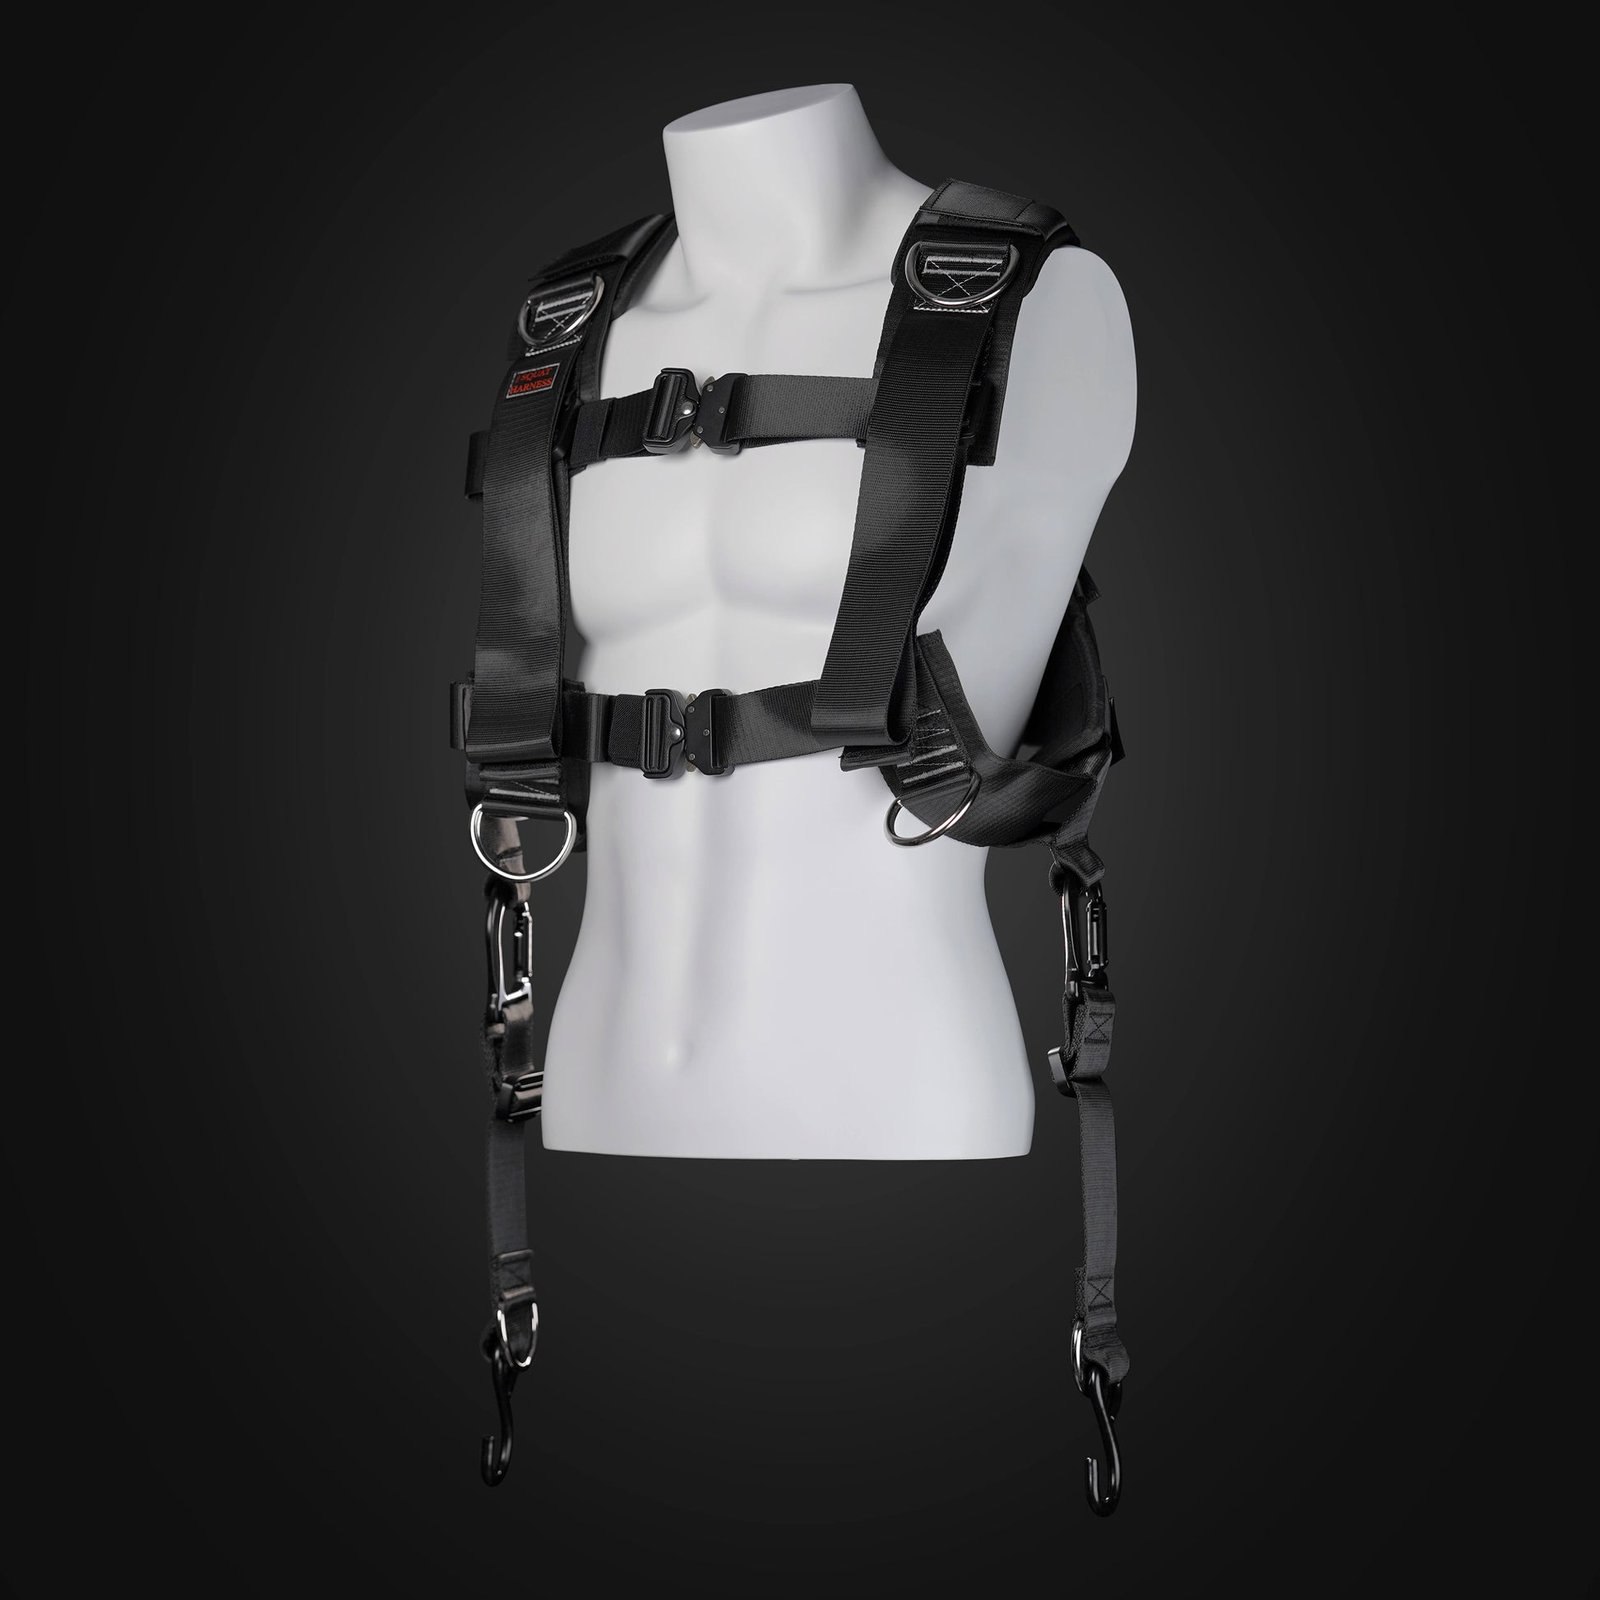
Squat Harness
Wearable harness for hands-free cable squats, sled work, and lower-body training.

Belt Squat Collar
Heavy-duty collar adapter for compatible belt-squat and landmine bar setups.
Correct the five mistakes that steal tension
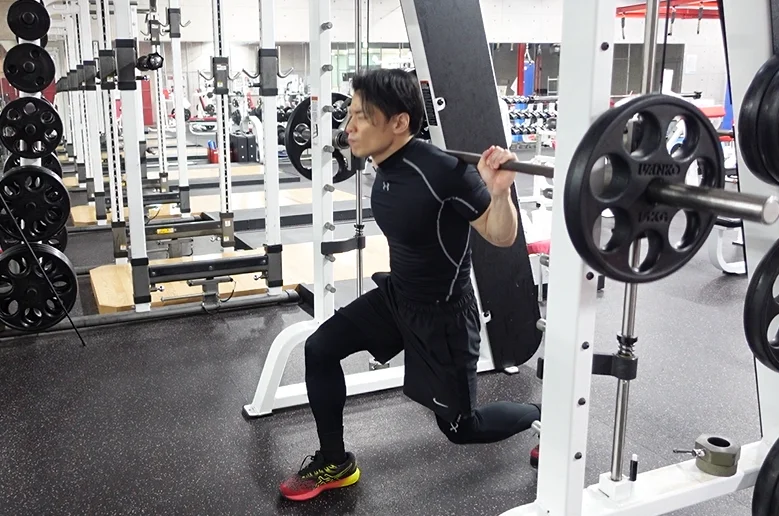
If your front heel rises or you feel pushed onto the toes, begin by reducing the weight. Check whether the stance is too short, the front foot is too far behind the bar’s line or you are trying to reach a depth your ankle cannot control. The solution is often a subtle shift in foot placement or a smaller range, not a cue to force the heel down harder.
If the lead knee falls inward toward the other leg, reduce the resistance until you can keep the knee traveling in the same broad direction as the toes. Pay attention to foot pressure and hip control rather than deliberately pushing the knee as far outward as possible. A small amount of natural movement is different from an uncontrolled collapse accompanied by discomfort.
If you bounce the rear knee or launch off the back foot, pause the loading progression. Slow the eccentric, place a soft target beneath the knee if appropriate and think of the front leg pushing the floor away. The rear foot should help you remain balanced, but the front leg should not become a passenger while the back calf does most of the work.
If the bar seems to drag the torso forward, confirm the machine’s rail direction and move your feet before blaming your core. Another common mistake is loading the bar before learning its rotation hooks; that becomes especially problematic when a tired lifter tries to rerack from a split stance. Practice a clean rehook from a stable high position on both sides with an empty bar.
Finally, watch for rep-to-rep drift. The first repetition might be controlled while the final three are shorter, faster and more dependent on the rear leg. Stop a set when you can no longer maintain the chosen depth and mechanics. Stronger muscles are developed by repeatable challenging work, not by protecting a target rep count at any cost. If a movement consistently causes sharp or unusual pain, stop and seek appropriate professional evaluation.
A four-week plan for steady, measurable progress
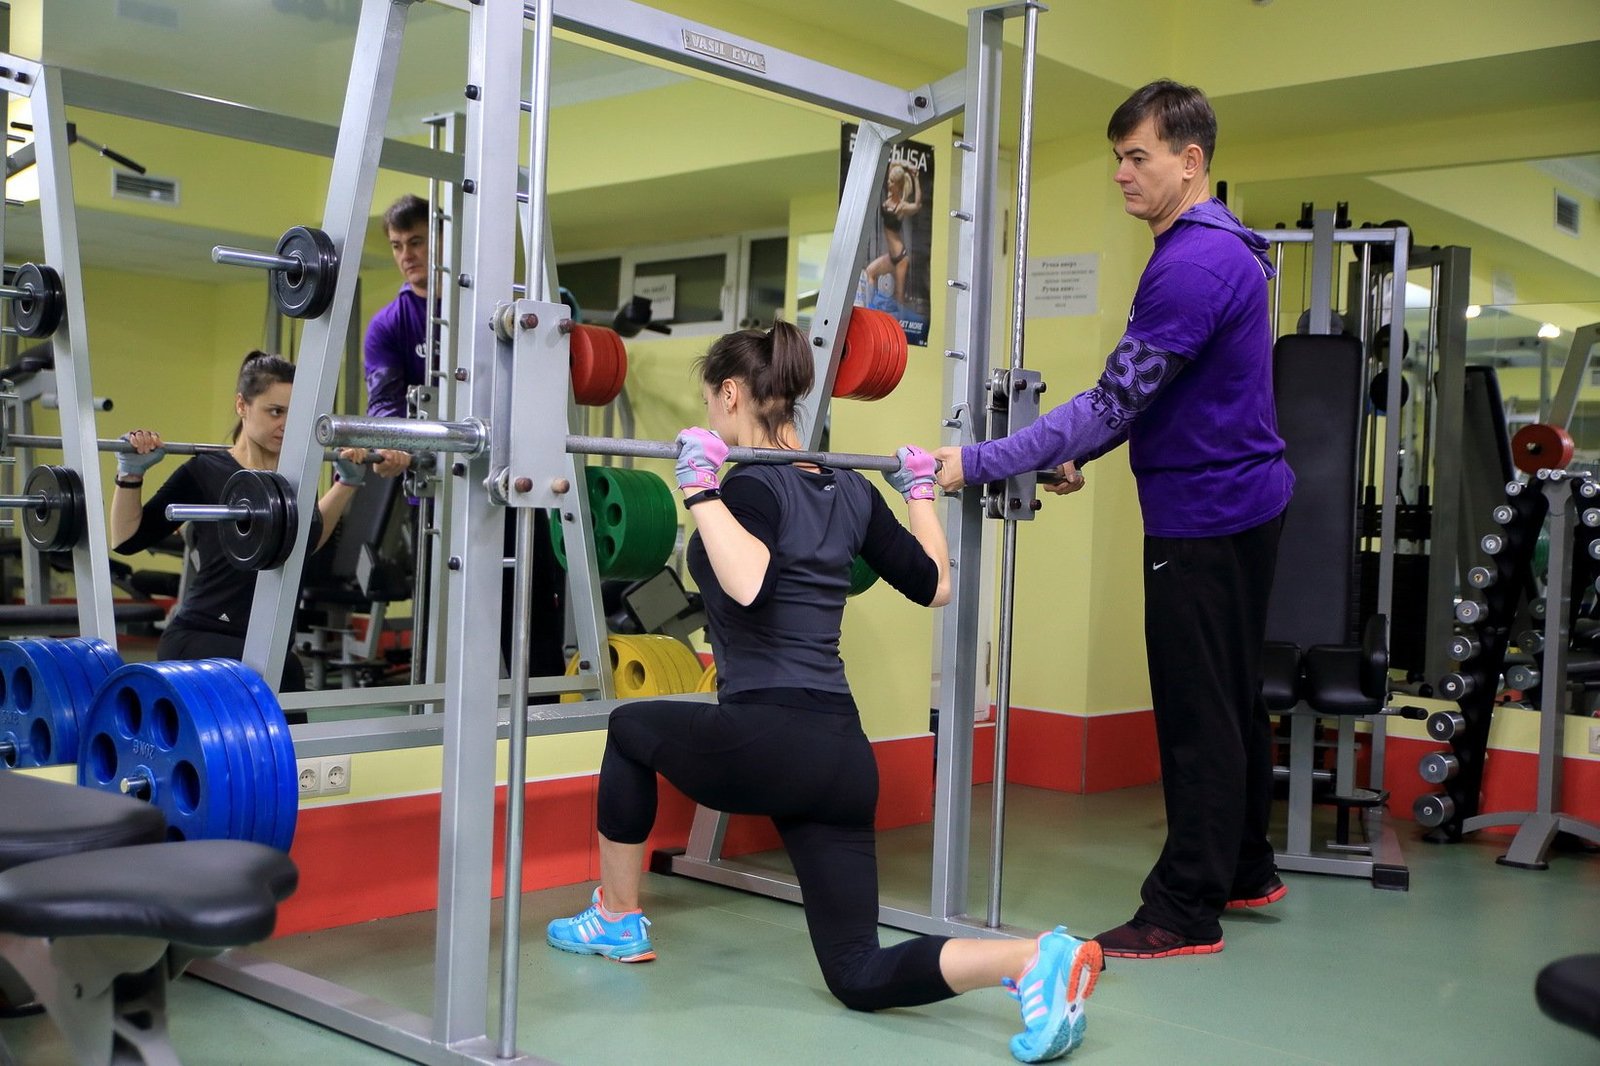
Use the Smith split squat once or twice a week in a leg-focused program. Most lifters do not need to take this movement to true failure, particularly when the limiting factor is awkward reracking under fatigue. Pair it with a bilateral squat or leg press pattern if appropriate, a hip hinge such as a Romanian deadlift, and enough calf or hamstring work to cover the rest of the session.
Week 1 — establish the stance. After your warm-up, perform two sets of eight reps per side with a light load and two or three reps in reserve. Video one set from the side if you can do so safely. Note the bar height, front-foot placement and whether the rear foot stays quiet. This is a calibration week, not a test of the heaviest plates you can stack.
Week 2 — add repeatable volume. Perform three sets of eight to ten reps per side using the same stance and range. Rest around ninety seconds to two minutes after both legs have worked, extending the interval when breathing or stability is limiting. Start with your less confident side and match the other side’s quality and reps rather than chasing a stronger-leg advantage.
Week 3 — increase reps or resistance, not both at once. If every set from Week 2 finished cleanly with one or two reps left, add one rep to each set or a small amount of weight. Keep the descent deliberate. An increase in working load that forces the rear heel to kick upward, the front knee to collapse or depth to shorten is not a successful progression.
Week 4 — consolidate. Repeat three sets of eight to twelve reps per side at the best load that preserves your form. Compare with Week 1: more controlled reps, better depth or a modestly heavier load all count as progress. If fatigue is high from deadlifts, squats or sport, use two easier sets or skip the hard Smith work rather than letting a written template override recovery.
On the next training block, you can either keep the same grounded version and progress it again or switch to a front-foot-elevated version if range of motion is now the main limitation. Change only one major variable at a time so you know what improved. Consistency in the setup is the point: when foot placement and bar path stay predictable, the quads and glutes can do the hard work.
Powerlifting Shirts & Lifting Gear
Powerlifting shirts and gym gear for squat, bench and deadlift lifters who live for heavy numbers.

If The Bar Ain't Bending You're Just Pretending – Power T-Shirt
For laid-back days and powerlifting humor: “If The Bar Ain't Bending You're Just”.

Gym The Bar Does Not Lie Medieval Knight Barbell Decal Sticker
Give your everyday gear a playful “The Bar Does Not Lie Medieval Knight” twist.

Lift O'Clock Gym | Funny Workout For Bodybuilding & Pow Hoodie
Make your off-duty look more fun with “Lift O'Clock”.

Iron Is My Therapy – Lifting Bodybuilding Powerlifting Sticker
Bring “Iron Is My Therapy” attitude to your water bottle or laptop.

Drake Certified Lifter Boy | Powerlifting Parody Hooded Hoodie
Bring “Drake Certified Lifter Boy” gym humor to lazy days and post-workout plans.

Flaming 45LB Weight Plate Fire Barbell Lifting Workout Hoodie
Keep it laid-back with a little “Flaming 45LB Weight Plate” attitude.

Deadlift Zombie Skull Gym Shirt for Powerlifters, Hallo T-Shirt
Bring “Deadlift” humor to your next gym day.

Gym Cult Member Occult Lifting Meme Graphic – Bodybuild T-Shirt
Make gym days more fun with “Gym Cult Member” style.

Die Hard Lift Harder Gym | Funny Workout for Powerlifti Hoodie
Show off your powerlifting humor in a laid-back “Die Hard Lift Harder” hoodie.

Medieval Gym – Dost Thou Even Hoist Knight & Dragon Dec Sticker
Give your everyday gear a playful “Medieval” twist.