Advertising disclosure: This page includes affiliate product links that may earn us a commission, as well as products from our own store.
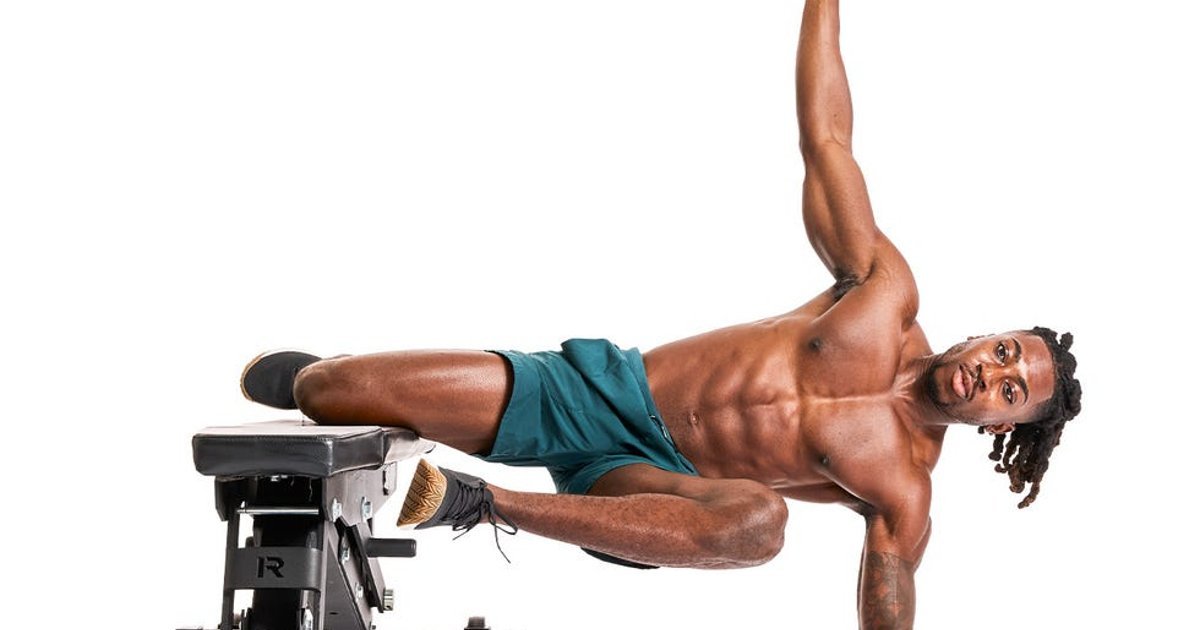
A Copenhagen plank looks like a side plank with the upper leg resting on a bench. That one change turns a familiar core exercise into a demanding hip-adductor exercise. But there is a less obvious adjustment that matters just as much: where your upper leg contacts the bench. A knee-supported hold is not simply an easier-looking ankle-supported hold. It changes leverage and the mechanical demands at the hip and knee.
In a laboratory comparison of 24 adults, moving the support outward from the knee to the ankle substantially increased measured hip-adductor joint moment. That finding offers a useful way to progress the movement without guessing at hold duration or rushing straight to the hardest version. It does not prove that ankle support builds more muscle, prevents injury or is best for every athlete. Here is how to use the difference intelligently.
1. What a 24-person comparison actually measured
Eleven men and thirteen women completed three Copenhagen adduction variations using a support positioned near the upper leg’s knee, midpoint of the lower leg or ankle. Researchers recorded forces under the supporting stand and tracked body positions to estimate three-dimensional net joint moments. The participants used brief, approximately two-to-three-second static holds for the measured positions, rather than a months-long strength-training programme.
At the knee-supported position, mean hip-adduction net joint moment was 0.93 ± 0.16 newton-metres per kilogram of body mass. At the ankle-supported position, the corresponding value was 1.54 ± 0.23 Nm/kg, with a statistically significant difference. Expressed as a comparison of these means, the ankle condition placed roughly two-thirds more measured adductor-moment demand on the system. The middle support position provided an intermediate option.
That number describes a joint-level mechanical requirement, not a measurement of how much an individual adductor muscle fired or grew. A larger joint moment can be handled by several tissues and muscles working together; it is not the same thing as a guaranteed hypertrophy advantage. The experiment also observed changes in hip extension-related and knee-related moments as support shifted outward. This is a useful reminder that Copenhagen variations are not an isolated inner-thigh machine exercise: the whole body and the supporting joints have to participate.
The practical takeaway is narrow but valuable: support position is a real loading variable. You can progress that variable deliberately and track it alongside sets, holds and symptoms.
2. Build a secure short-lever Copenhagen plank first
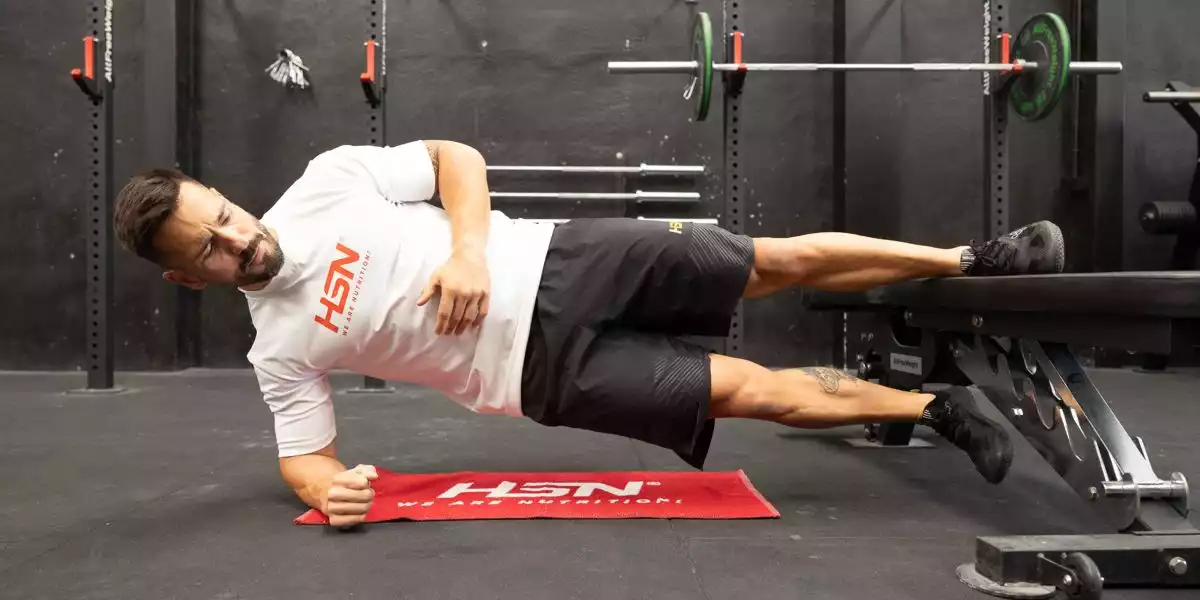
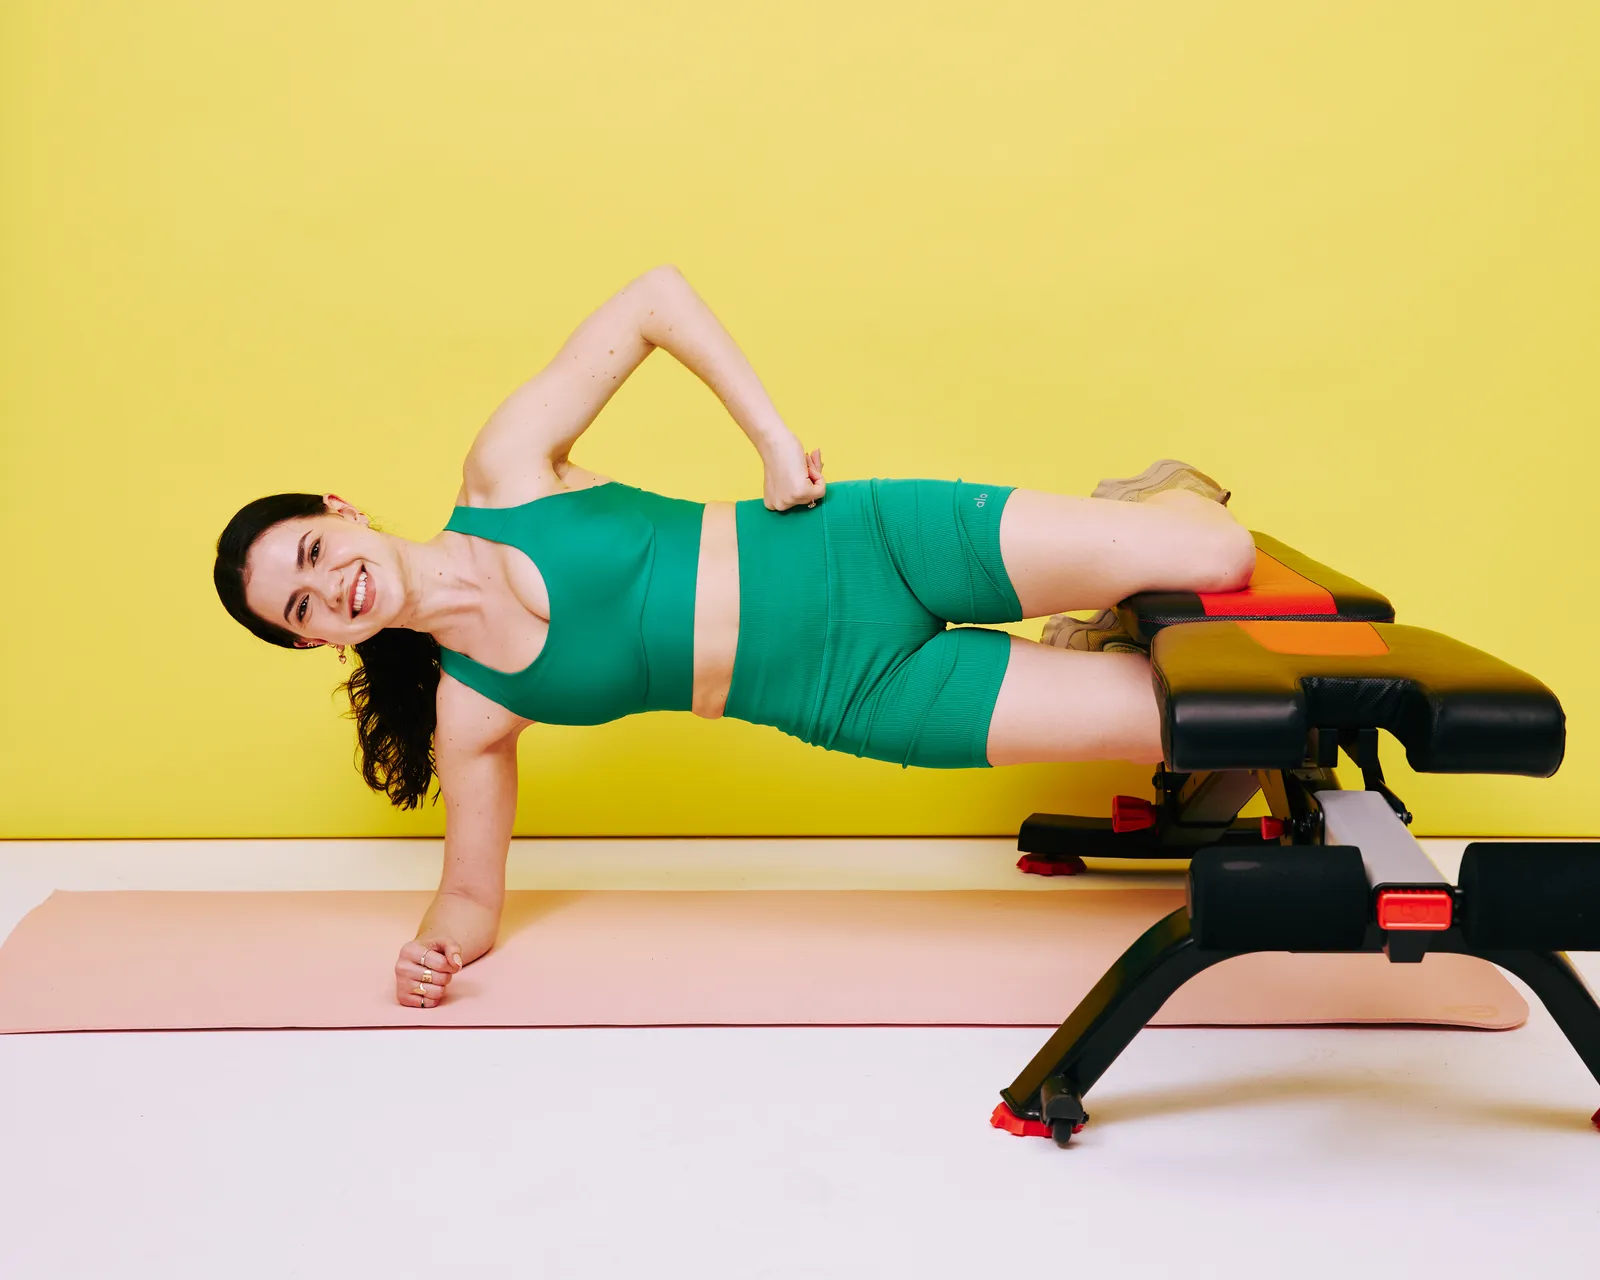
Start with a stable, flat weight bench or box that cannot roll or tip. Place a comfortable exercise mat beside it. Lie sideways on your forearm with your supporting elbow under your shoulder. Rest the inside of your upper knee or lower thigh on the bench. Bend the lower leg and, if needed, let the lower foot lightly help you find the starting position. Keep your pelvis and rib cage stacked instead of turning your chest toward the floor.
Press your upper leg downward into the bench, brace the abdomen, and lift your hips until the shoulder, hip and supported upper leg form a controlled line. Hold briefly while breathing. Return to the floor with control rather than dropping the pelvis. Do both sides, even if one feels stronger. If your shoulder is the first thing to fatigue, shorten the hold or raise your forearm support; the aim is to train your hip adductors, not turn every set into an upper-body endurance test.
Common mistakes include a bench placed too far from the body, contact on an unstable edge, a twisting pelvis, a sagging waist and bouncing out of the bottom. The first repetition should be the easiest-looking rep of the set. Once alignment starts deteriorating, the working set is effectively over. Begin with modest sets of five to ten seconds rather than copying the longest hold seen online.
The only truly essential equipment is a secure bench or low platform. For people training at home, a flat bench can serve as the fixed surface, while an adjustable bench must be locked securely. Cable devices, cuffs and weighted vests are separate tools for later adductor work or progression—not necessities for a beginner Copenhagen hold.

Equipment Worth Exploring
Explore equipment, accessories and gear from our carefully selected range.


FID Bench MAX
Adjustable bench offering flat, incline, and decline positions + adjustable headrest.

Multi Bench MBX-650 2.0
Adjustable multi-bench with roller adjustment, 15 backrest positions and accessory mounts.

VOLTRA
Compact digital cable trainer with smooth, adjustable resistance.
GymPin D Cuffs
Adjustable wrist cuffs with textured grips for supported cable-machine exercises.

Go-Tone Pro
Portable digital cable trainer with up to 66 lb (30 kg) of adjustable resistance.

3. Move the contact point from knee to shin to ankle
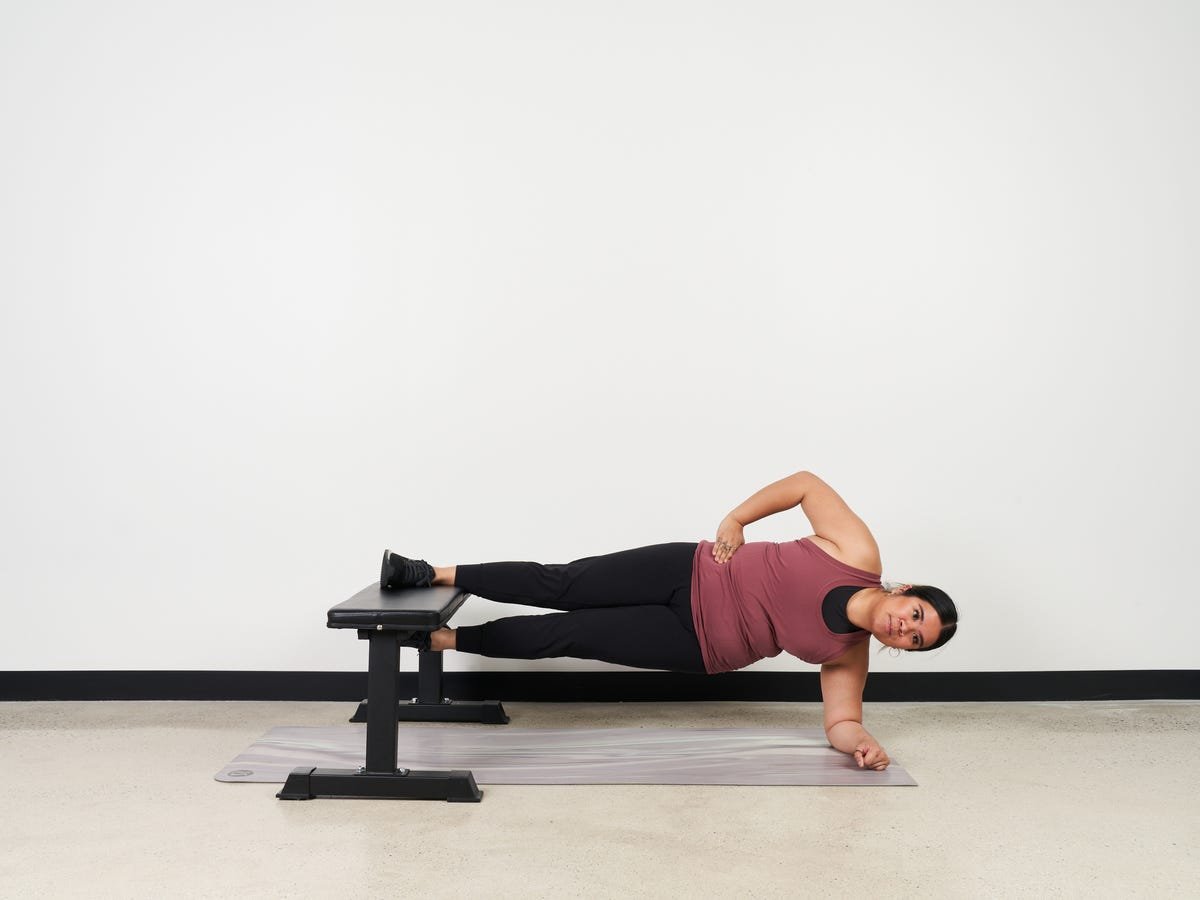
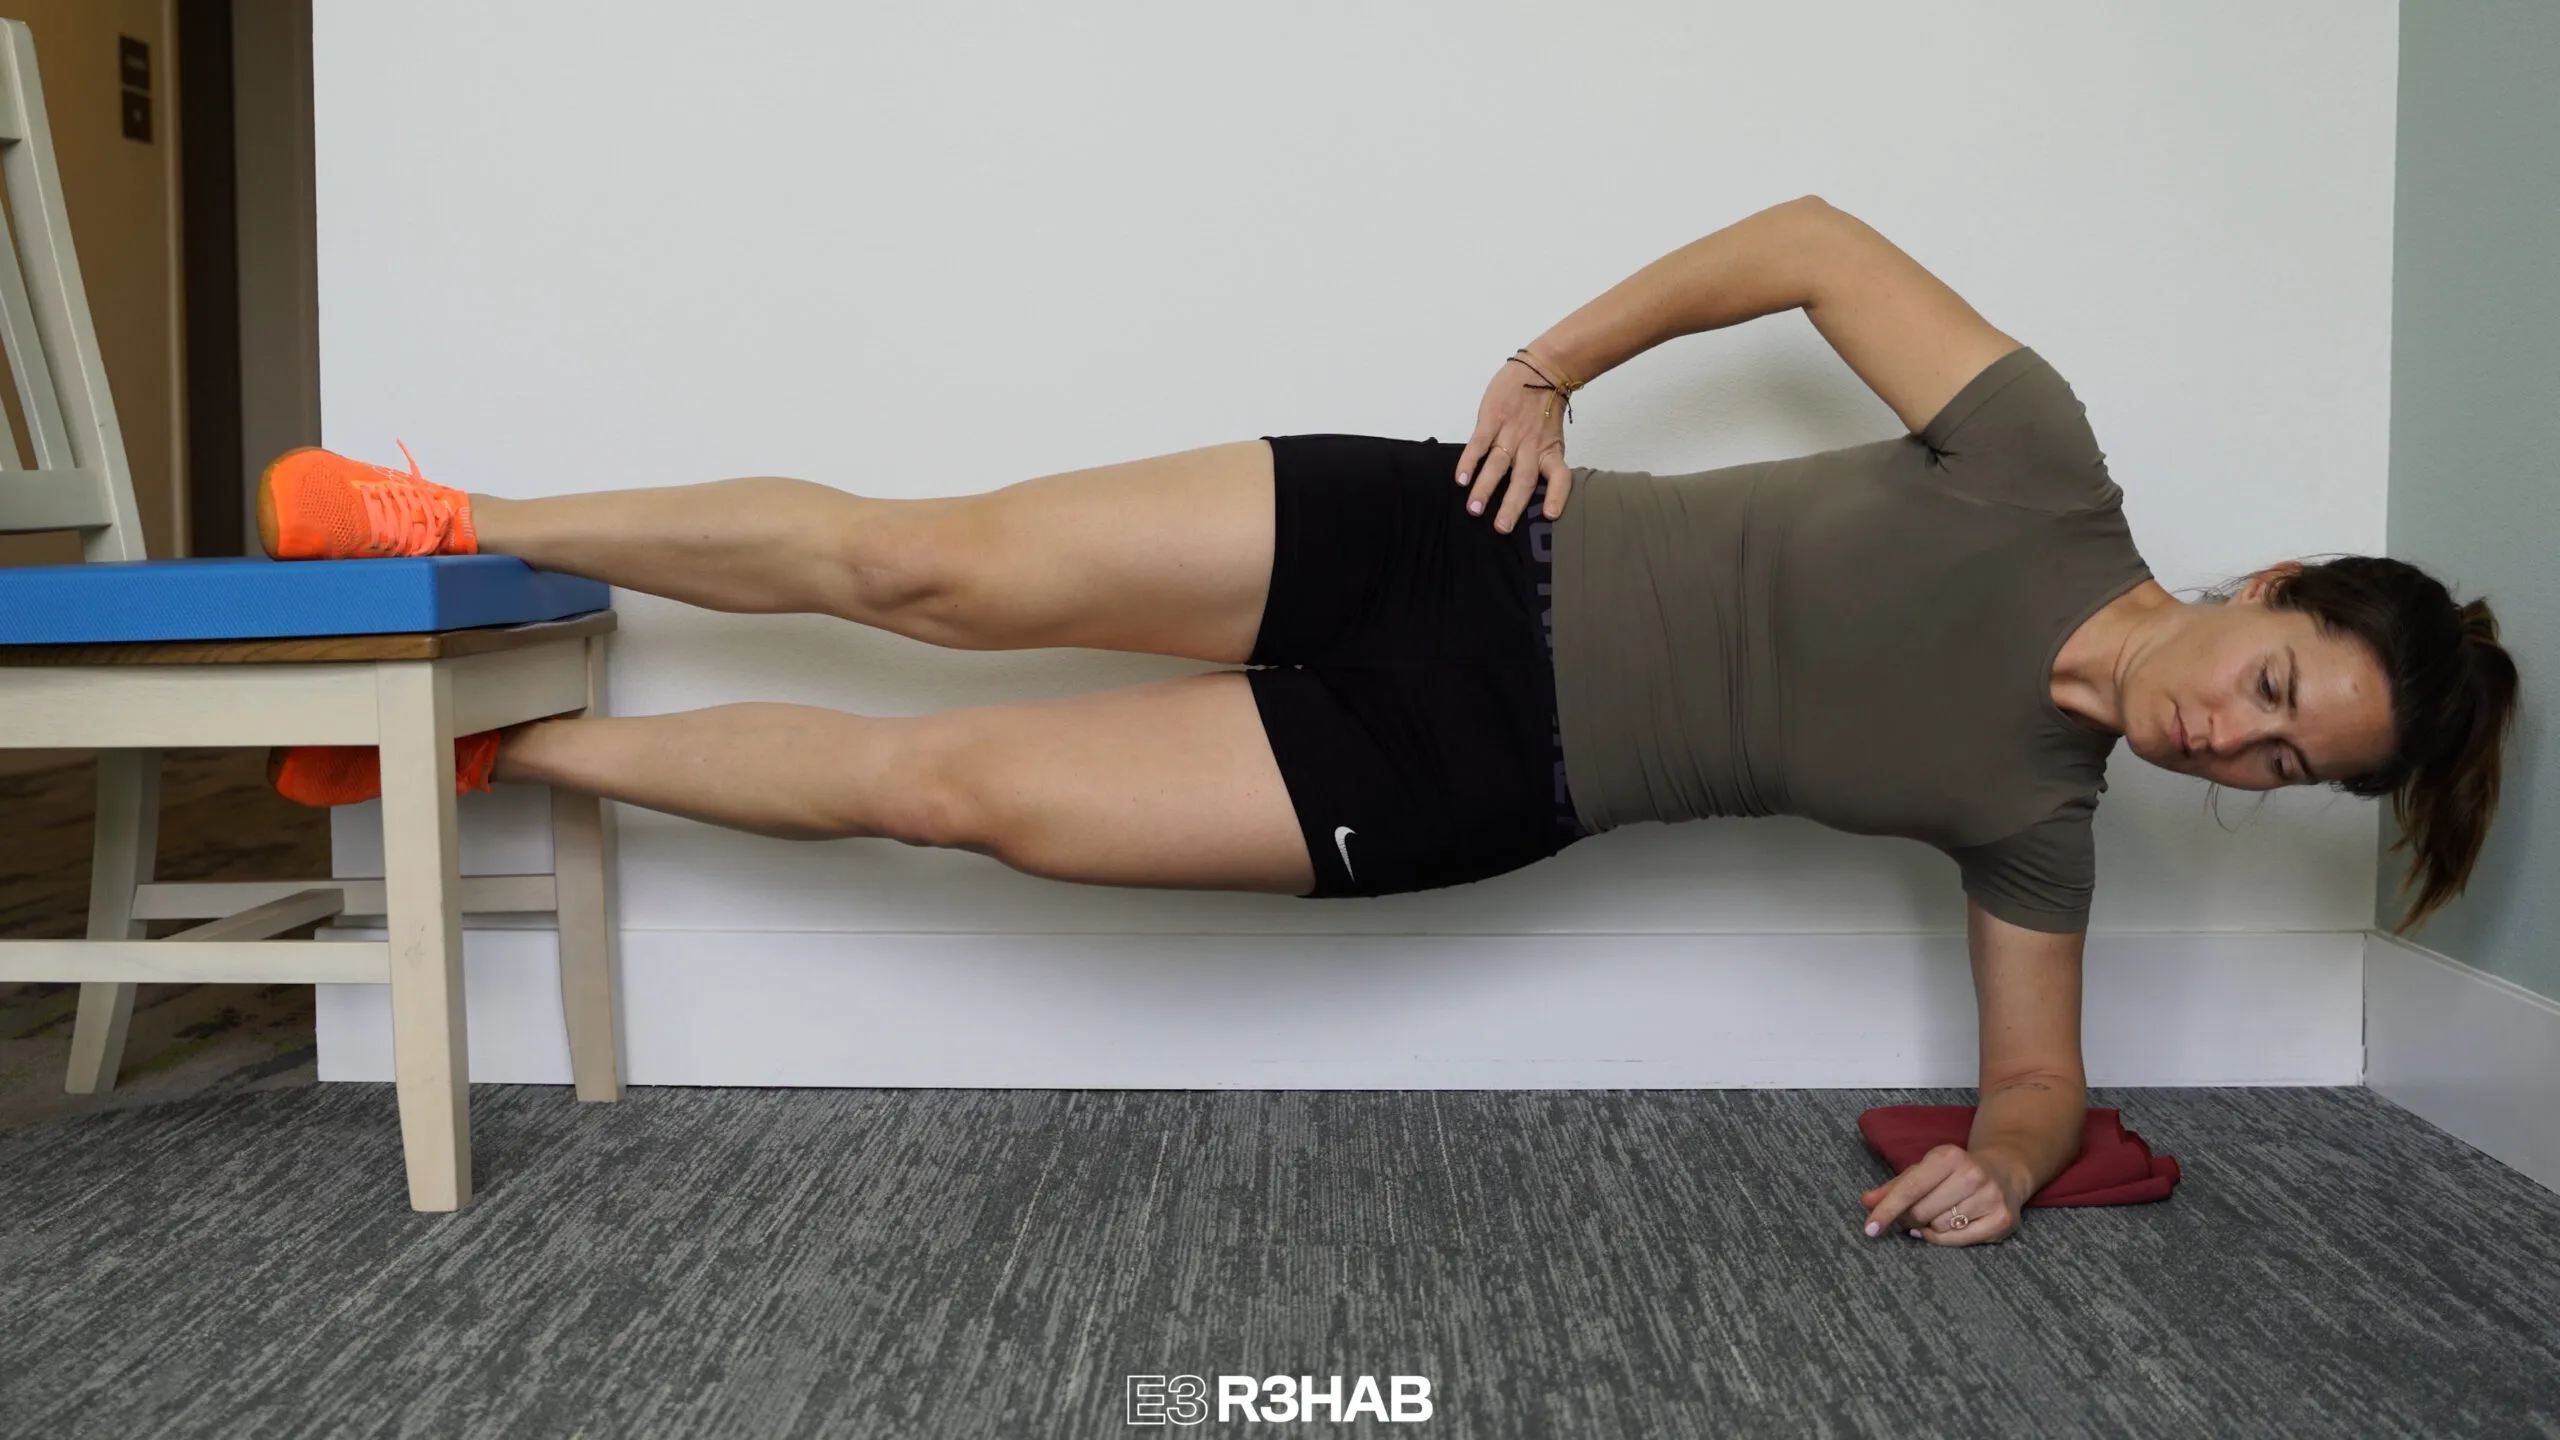
Once knee-supported holds feel stable on both sides, slide the supporting contact point a little farther down the upper leg. Supporting the middle of the lower leg produces a longer lever; supporting close to the ankle creates the longest lever of these three versions. Do not change lever length, hold duration, added weight and total sets all at once. Changing only the support location makes your training record interpretable.
On the long-lever version, keep the upper knee comfortably extended without forcing a locked, painful position. Your lower leg may remain below the top leg or hover closer to it, depending on the variation. You should feel substantial work in the inner thigh of the supported upper leg and in the trunk as you resist sideways bending. A slight muscular tremor can happen under load; sharp medial-knee, groin or pubic pain is not an appropriate training target.
The change also affects the knee. When the bench support moves beyond the knee, the lower-leg contact point can generate additional knee flexion- and adduction-related demands. If a longer lever makes the knee feel pinched or unstable, go back to a knee-supported hold and use a padded, wider contact area. If a foot or ankle support slips, end the set and correct the setup before continuing.
Progression is not a badge of honour. A clean ten-second short lever is more useful than a long-lever hold performed with a folded waist, a rotating torso and a painful knee. For larger or heavier athletes especially, leverage can make this exercise challenging much earlier than its bodyweight label suggests.
4. Static holds, moving reps and added weight are different tools
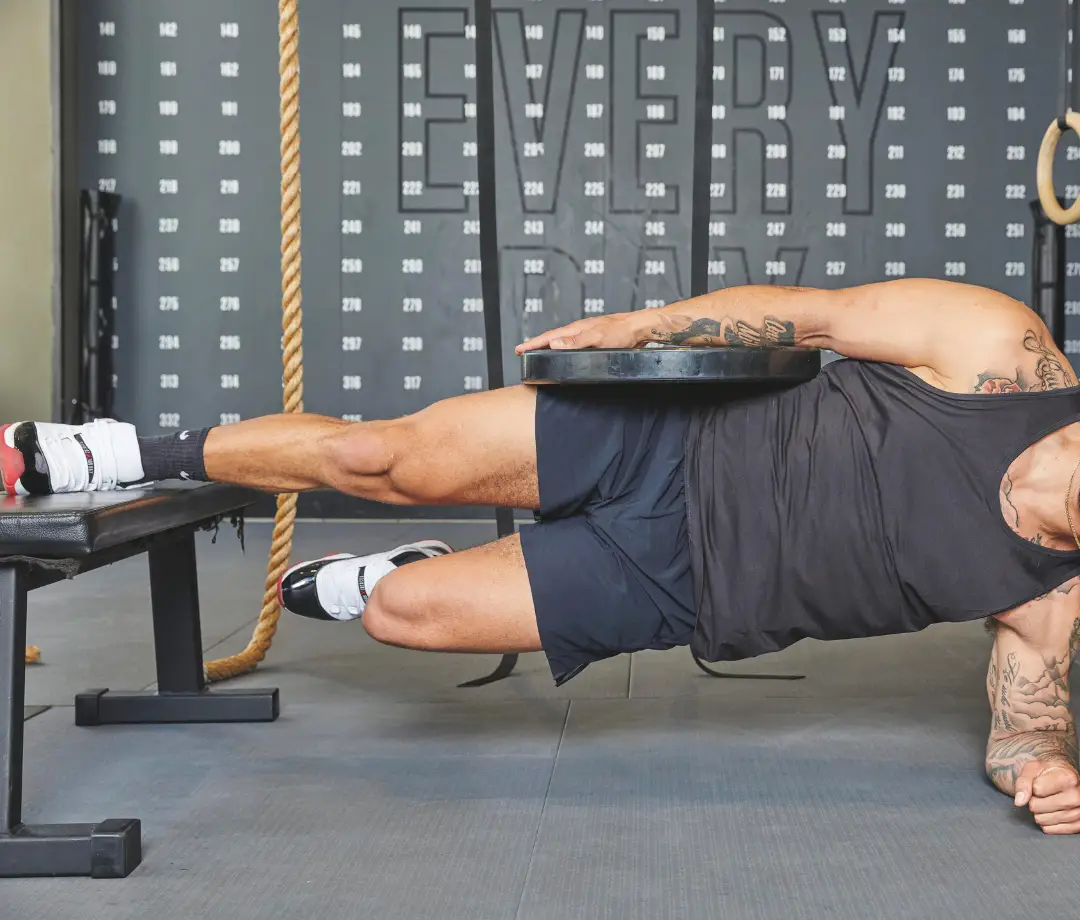
A static Copenhagen plank asks you to maintain a position for time. It makes the workload easy to monitor and can be a sensible starting point for learning balance and creating tolerable adductor tension. A dynamic Copenhagen adduction adds controlled raising and lowering of the pelvis or lower leg, depending on the chosen variation. That introduces repeated shortening and lengthening demands, and often more soreness for somebody who is not accustomed to direct groin training.
A third variation uses external resistance, such as a carefully positioned weight, after the unweighted version becomes reliable. More resistance is not automatically better. The goal is a repeatable joint position, unhurried movement and a workload you can recover from. The gym photo above illustrates a weighted version; it is not a recommendation to start with a plate resting on the body.
These modes should not be treated as interchangeable research findings. The 24-person mechanical comparison tested brief static variations. Earlier sporting programmes that observed fewer groin problems often used progressive, moving Copenhagen adduction exercises with team-based supervision. A benefit shown for an exercise programme cannot be transferred automatically to a random static hold or to every recreational lifter.
Likewise, injury prevention claims deserve restraint. A prominent pooled review of Copenhagen exercise outcomes was withdrawn in April 2026 because of fundamental analytical problems. That does not erase individual trials, but it means there is no sound basis for declaring every Copenhagen variation a guaranteed groin-injury shield. Build strength for its own value and view injury-risk reduction as context-dependent rather than promised.
5. A practical four-week progression, with a recovery check
This example is a coaching progression, not a protocol validated by the 24-person study. Use it twice per week after a short general warm-up and several pain-free easy adductor contractions. Leave at least a day between sessions at first. Your training log should include the support point, hold length or repetitions, number of sets, and how the groin and knee felt later that day and the following morning.
- Week 1: Knee-supported static holds, two sets of 5–10 seconds per side. Leave several good seconds in reserve rather than holding until the hips collapse.
- Week 2: Two or three knee-supported sets of 10–15 seconds, if symptoms and form remain settled. Reduce duration immediately if the quality changes.
- Week 3: Keep one knee-supported practice set, then try two short mid-shin-supported holds of 5–8 seconds per side. Return to the knee for subsequent work if the longer lever causes discomfort.
- Week 4: Consolidate the mid-shin hold or test a brief ankle-supported set with stable alignment. Add repetitions or longer holds only after the support point feels routine.
These are starting ranges, not minimums to force. People returning from a groin strain, recent surgery or persistent pelvic pain should use an individual plan rather than jumping into this template. Stop or regress if sharp pain develops, and seek clinical advice if pain persists or worsens. Mild exertion is expected; escalating joint or tendon symptoms are information to act on, not a toughness test.
It is perfectly reasonable to spend all four weeks at the knee and improve quality instead. The useful outcome is an exercise you can repeat while still training squats, hinges, sprints or sport practice—not an impressive single hold that disrupts the rest of the week.

Calisthenics Shirts & Street Workout Gear
Calisthenics and bodyweight-training gear for pull-ups, dips, handstands and street-workout athletes.

Calisthenics Evolution Hoodie
Bring “Calisthenics Evolution” gym humor to lazy days and post-workout plans.

Turn Off Gravity Funny Calisthenics Gym Muscle Shirt fo Tank Top
Bring “Turn Off Gravity Funny Calisthenics” humor to your next lifting session.


Calisthenics Workout Sweatshirt
Add a playful “Calisthenics” touch to your casual rotation.

Calisthenics Heartbeat Muscle Shirt Athletic Vest Human Tank Top
Bring “Calisthenics Heartbeat” humor to your next lifting session.

Stronger Than Excuses Tank
Show some personality between sets with “Be Stronger Than Your Excuses”.

Calisthenics Muscle Shirt Athletic Vest for Bodyweight Tank Top
Your gym-day look, with a playful “Calisthenics” twist.

Funny Calisthenics Gym Decal for Water Bottles Laptops Sticker
Stick a little “Calisthenics” humor on your favorite gear.

Handstand Walk Tee
Bring “: The Handstand Walk Beatles Graphic” humor to your next gym day.

6. Copenhagen plank vs side plank and adductor machines
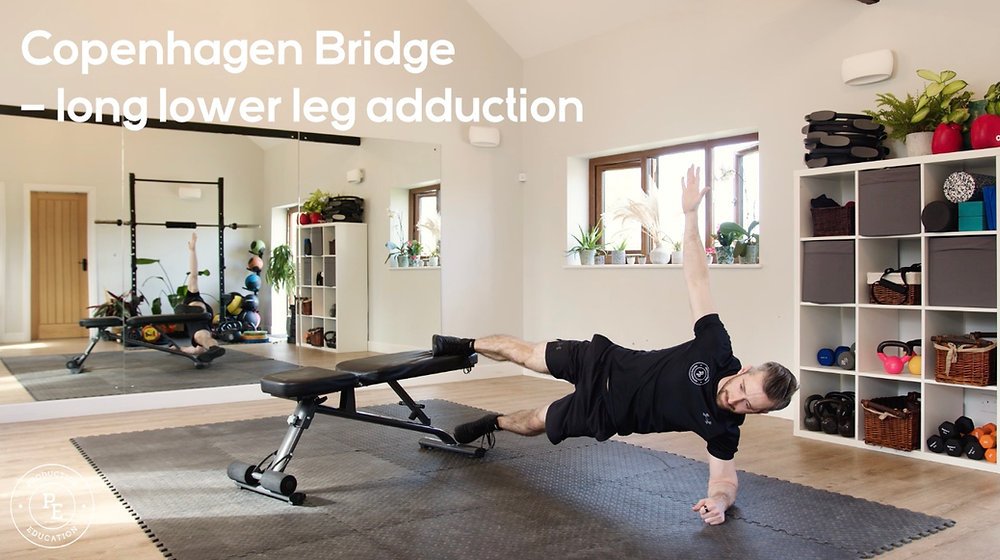
A conventional side plank primarily challenges resistance to lateral bending through the trunk and lateral hip. The Copenhagen variant adds a major demand on the upper leg’s hip adductors because they press against the raised support. Both require trunk control, but they are not equivalent substitutes if your primary objective is stronger inner thighs. A conventional side plank can be useful as a regression when the shoulder or trunk is not yet ready for a long-lever Copenhagen hold.
An adductor machine or a standing cable adduction gives you a different advantage: external resistance can be adjusted in smaller, predictable increments, and your balance usually matters less. That can be particularly useful when you want progressive direct adductor work without loading a long side-plank lever. Conversely, a Copenhagen variation combines adduction with support-shoulder and torso stabilization in one drill. There is no good reason to insist that one is categorically superior for every goal.
Use your sport, training history, equipment and symptoms to make the choice. For an athlete preparing for cutting and change-of-direction tasks, controlled Copenhagen adduction can be a useful addition to a broader programme. For a home-gym lifter with limited space, a bench and bodyweight may be all that is needed. For somebody with an irritated knee, a cable option or a carefully reduced lever may be more suitable.
Bottom line: Treat bench contact as a real form of resistance adjustment. Start near the knee, lengthen toward the shin and ankle only when stable, and progress one variable at a time. The strongest rep is the one you can reproduce without giving up control.