Advertising disclosure: This page includes affiliate product links that may earn us a commission, as well as products from our own store.
Dead Bugs for Lifters: Brace, Breathe and Progress Your Core
A dead bug looks almost comically easy compared with a loaded squat or a heavy set of rows. You lie on your back, lift your knees and move one arm and the opposite leg. Yet it becomes surprisingly demanding as soon as you insist on a stable pelvis, a deliberate reach and a normal breath rather than an exaggerated arch.
That makes it useful for lifters who want more than a few random crunches at the end of a workout. The point is learning to resist unwanted trunk movement while the limbs travel, then choosing a variation you can actually repeat. Below is a precise technique guide, common-error checklist and six-week practice plan, with clear limits on what this exercise can and cannot do.
1. What the dead bug trains — and what it does not
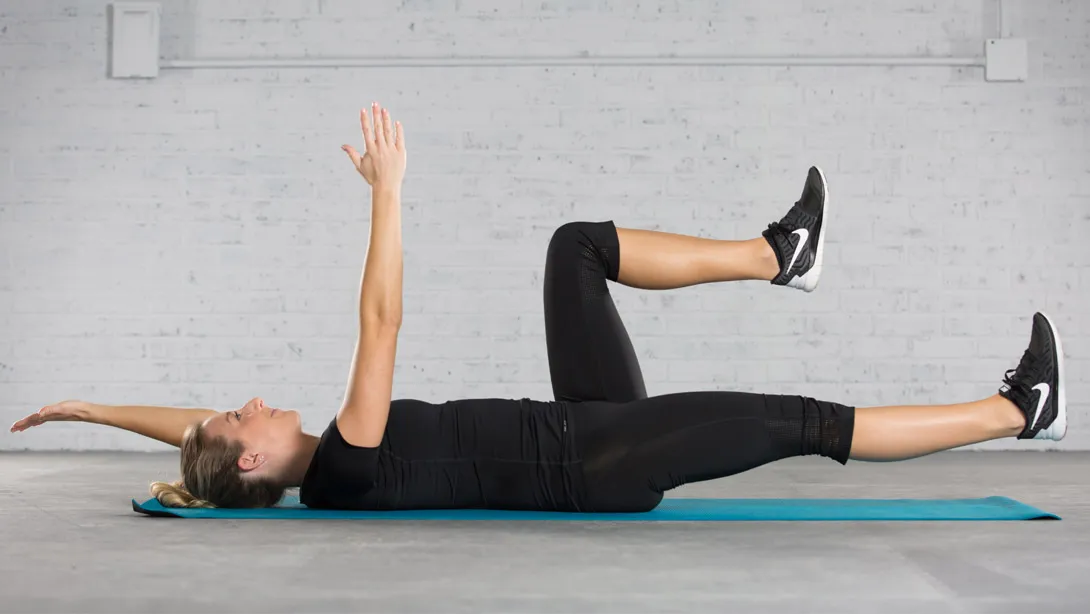
A dead bug is an anti-extension drill. Your arms and legs move away from your torso, increasing the tendency of your lower back to arch. Your abdominal wall must provide enough tension to keep the trunk from drifting into that arch. The goal is not to move the limbs as far or as quickly as possible; the goal is to make the trunk look almost boring while the limbs do the work.
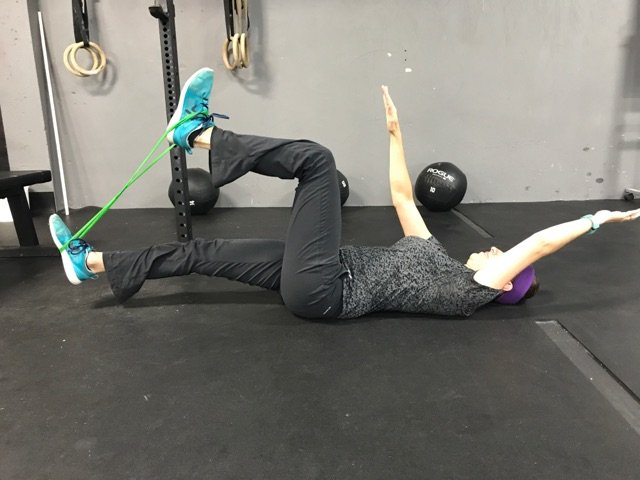
Start on your back, knees and hips bent approximately 90 degrees, with both arms pointed toward the ceiling. The rectus abdominis, obliques and deeper abdominal muscles participate in controlling the ribcage and pelvis. Hip flexors move and support the legs. This is not a machine that isolates one magical deep muscle, and there is no reliable reason to judge an entire set by whether you feel a dramatic burning sensation.
That distinction matters for lifters. Heavy squats, presses and rows involve coordinating the trunk with moving limbs and substantial external loads. A floor drill lets you rehearse part of that coordination at a low load. It does not substitute for getting stronger in the lifts themselves, and there is no demonstrated guarantee that adding dead bugs will prevent an injury or increase your one-rep maximum.
The exercise is also different from a crunch. A crunch intentionally bends the spine; a dead bug asks the spine to stay relatively steady as the legs create a longer lever. Both can have a place in a complete training program, but they address different demands. If your objective is visible abdominal development, progressively challenging abdominal exercises and overall body composition still matter. Dead bugs are best treated as a control skill and a useful accessory, not a shortcut to a six-pack.
2. Set the position and breathe before extending
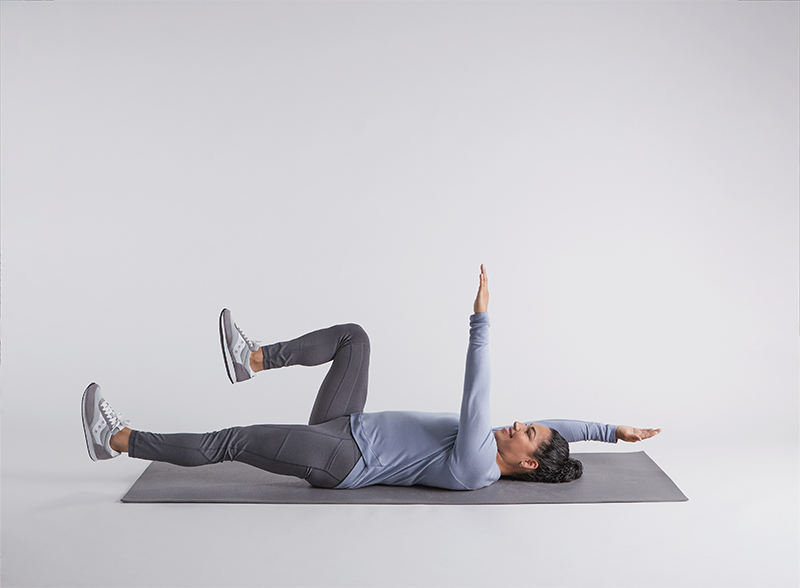
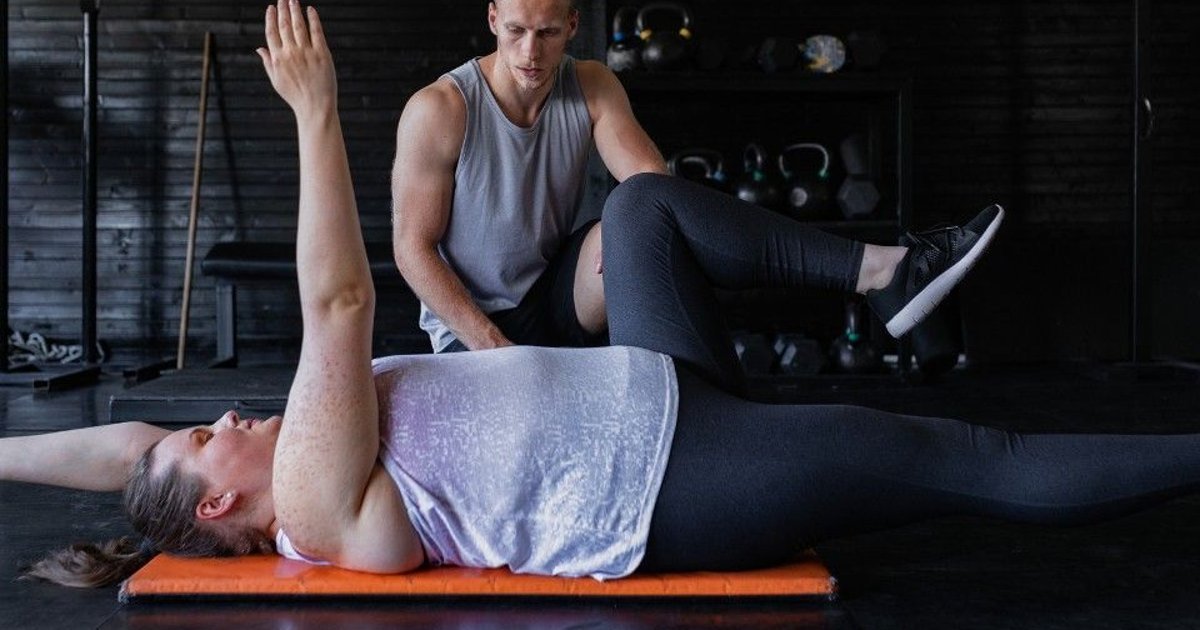
Lie on a firm mat with your head resting comfortably. Bring one thigh up, then the other, until your knees hover over your hips. Point both hands toward the ceiling with shoulders relaxed rather than shrugged. Exhale enough to bring the lower ribs into a more stacked position over the pelvis; then make a gentle, broad brace around the abdomen. Avoid turning the setup into a maximal breath-hold.
Different people will have slightly different resting lumbar curves. For this drill, the practical target is a consistent, comfortable low-back position, often with a light flattening into the mat. Do not force a painful posterior pelvic tilt just to erase every millimeter of space. Place your fingers under the low back or use the contact with the mat as feedback; the pressure should not change dramatically during the reach.
Reach your right arm back and extend the left leg slowly, taking roughly two or three seconds. Let the heel travel only as low as your position permits. Exhale during the difficult outward phase, briefly maintain tension, then return to tabletop without swinging. Switch sides. Keep the nonmoving knee above its hip instead of pulling it toward your chest to fake stability.
Count one controlled opposite-arm-and-leg extension as a rep on that side. A reasonable starting set is five or six on each side, leaving a couple of technically solid reps in reserve. If you cannot complete a slow breath while maintaining your brace, your reach is probably too ambitious. Shorten it; do not simply clench harder. A useful first-session test is whether the last two reps look and feel almost identical to the first two.
3. Fix the errors before making the exercise harder
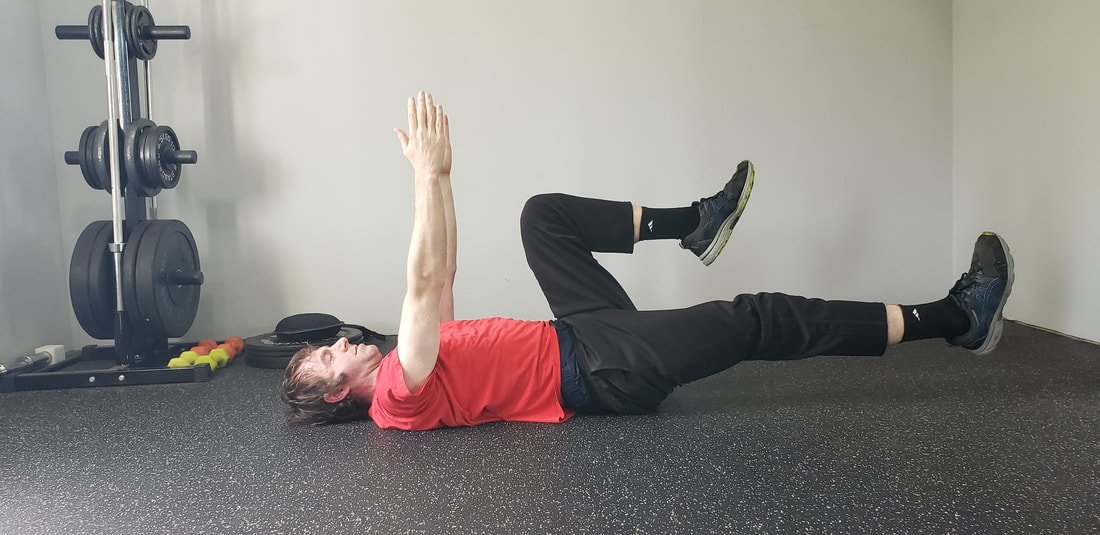
The lower back lifts at the end of the reach. This usually means the arm-and-leg lever has exceeded the trunk tension you can maintain at the moment. Bring the leg slightly higher, keep the knee bent, or move only one limb. Working in a shorter, honest range produces a better stability practice than reaching for the floor and compensating through the pelvis.
The hip flexors dominate or the neck strains. Supporting two bent legs in the air requires hip-flexor work, so feeling some effort there does not automatically mean the drill has failed. But persistent pinching at the front of the hip, a craned neck or a head lifted off the mat is a sign to simplify. Try heel slides on the floor, rest the head and relax the shoulders. Stop if you develop sharp pain or new radiating symptoms rather than trying to train through them.
You race through repetitions. Moving quickly hides the moment when your ribcage opens and your pelvis tips. Slow the outward phase, pause for a controlled exhale, and return just as deliberately. There is no prize for touching the floor if your spine changes position to get there. Use a phone video from the side if your sensation of movement does not match what is happening.
A fourth error is making bracing synonymous with holding your breath. Heavy lifting sometimes uses short, deliberate breath-holding strategies, but the dead bug works well as a place to practice maintaining moderate abdominal tension while breathing. Think of a quiet, continuous exhale rather than a huge forced breath. The correct difficulty is the one that allows you to control position, reach and respiration all at once.

Equipment Worth Exploring
Explore equipment, accessories and gear from our carefully selected range.
VOLTRA
Compact digital cable trainer with smooth, adjustable resistance.

Go-Tone Pro
Portable digital cable trainer with up to 66 lb (30 kg) of adjustable resistance.

VForce Wall Trainer
Space-saving wall-mounted functional trainer with pivoting cable arms and variable resistance ratios.


Rubber Hex Dumbbells
Rubber-coated hex dumbbell pairs with a stable shape for home and commercial strength training.


Power Tower
Freestanding pull-up and dip station with adjustable handles for bodyweight training.

4. Progress the lever, not just the rep counter
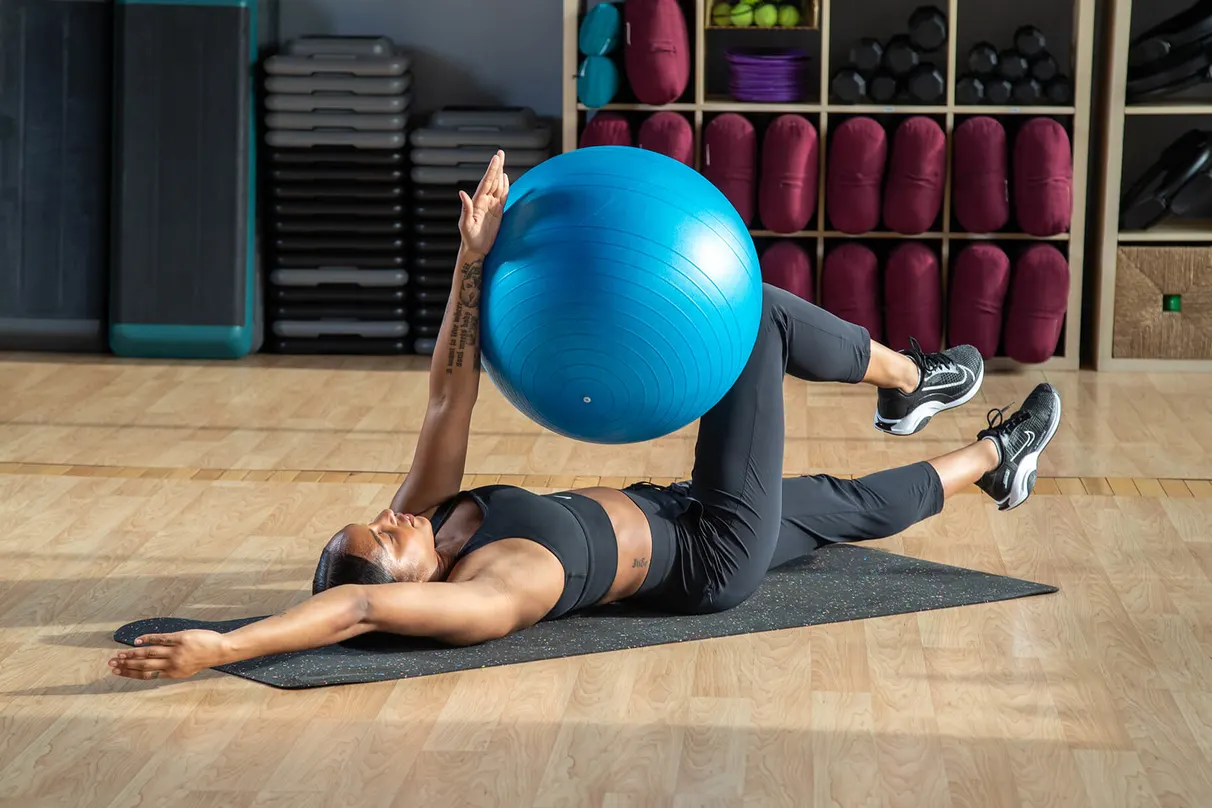
Begin with one or both feet on the floor and slide one heel away while keeping the opposite arm stationary. Next, float the legs into tabletop and lower a bent knee for a heel tap. Only then try the familiar opposite-arm-and-straight-leg reach. Each step increases the demand without requiring a heavy load or a new device. You can make the movement harder simply by extending the leg farther from the pelvis and slowing the last third of the reach.
After you own six to eight controlled reps per side, consider a brief pause at the farthest stable point. Another option is to press a small, light ball between a hand and the opposite knee while the free limbs reach. The ball is feedback and a modest resistance task, not proof that a complex variation is always better. Light bands or a small hand-held weight can add demand, but they are optional. Never load a range that already makes you lose pelvic position.
More advanced trainees can connect the same principles to exercises such as body saws, long-lever planks, hanging knee raises or ring fallouts. Those are separate exercises, with very different loads, not automatically the next mandatory rung of a single ladder. If you already have a good anti-extension movement in your routine, a dead bug can serve as an easier preparation drill rather than an extra four sets of core training.
For equipment context, the basic dead bug itself needs only a comfortable floor. Dumbbells and adjustable cable systems belong in other parts of a broader strength session or in carefully selected progressions. They are not prerequisites. Resist the temptation to turn a technically focused abdominal drill into an equipment-shopping problem.
5. A six-week practice plan for a busy lifting schedule
Use the dead bug two or three days per week, ideally before a lift or at the end of a short warm-up. Weeks 1–2: perform two sets of five to six slow reps per side with heel taps or a short opposing reach. Find a range where the ribs and pelvis stay steady and every rep includes a smooth exhale. Rest around 30–60 seconds between sets, longer if you need it to recover your control.
Weeks 3–4: extend the leg farther or straighten it while keeping the same quality. Build to two sets of six to eight reps per side. If the added lever makes the pelvis roll, return to the previous range; the progression is not earned just because the calendar moved forward. Record the version used, the quality of the last two reps and whether you could still breathe comfortably.
Weeks 5–6: keep two sets but add a one- or two-second pause near the end of each stable reach, or use a light ball squeeze if that variation suits you. You do not need to add both pauses and extra resistance at once. A clean set of eight per side with controlled breathing is more meaningful than a high-rep set done with the lower back swinging off the mat.
Keep the rest of your program honest. If you already perform loaded carries, planks and direct abdominal work, treat these two dead-bug sets as part of your existing trunk-training budget, not an automatic addition. There is no evidence that this particular six-week schedule is the uniquely effective dose; it is a practical starting template. For persistent pain, previous spinal injury or symptoms that travel down a leg, an individualized assessment takes priority over a general training article.
The final test is simple: can you reach farther, breathe more normally and keep the spine position you chose at the start? Those are useful improvements in movement control. They should be tracked independently of abdominal soreness, the appearance of your waist and the amount of weight on your next heavy squat.

Funny Gym Shirts & Workout Gear
Funny gym shirts, tanks, hoodies and workout gear for lifters who like training hard.


Vive Le Resistance Bands – Resistance Bands Warmup Reha T-Shirt
Rep “Vive Le Resistance Bands” humor in and out of the gym.


Six Pack Tacos Gym Tee
Rep “Check Out My Six Pack Tacos Gym Meme” humor in and out of the gym.

Calisthenics Evolution Crewneck
For laid-back days and lifting humor: “Calisthenics Evolution”.


Vitruvian Kettlebell Tee
Heavy lifts, good laughs, and a little “Vitruvian Man With Kettlebells” energy.

Kettlebell Skull Tee
Heavy lifts, good laughs, and a little “Kettlebell Skull Gym Meme” energy.